Friday, July 29, 2011

So Kiss Me and Smile for Me! I'll Kiss you too! Xo!


The Strudel is DONE!
I'm leaving on a jet plane early tomorrow morning and I'll be in Utah tomorrow!


 I'm so excited! There are some EPIC exciting things going on there and I couldn't resist being there for the events! You think I'm kidding? 
Well, first, I'm meeting with the outstanding people at Honeyville Grain to look at my new spice line they will be carrying in their retail stores along with my tutorial CD's! If that wasn't big, they are also talking about having me along for classes at the stores in Utah, Arizona and California.  Details to come for that for sure!! 


 Second, I'll be on KSL TV Studio 5 Monday morning. Big cool. So look for me if you live there in Utah...and I'll also see about posting the video here. I think we can work that out.


Third...Tuesday in Brigham City

Honeyville Farms Retail Store
Brigham City, Utah
1080 North Main Street Suite 101
Brigham City, Utah 84302
#435-494-4193
Tuesday, August 2nd 1PM - Food Storage Convenience Meals 101 
by “Chef Tess” – Chef Tess is a professional chef, nationally known blogger and teaches classes all over the country.  You won’t want to miss this fun and educational class!  This class is a basic food storage class that will feed a family of 4 – 6 with “just add water” ingredients!  Using her own recipes it’s a great way to either prepare for emergencies..or plan for a crazy busy night!  The 52 jar method is sweeping the nation!  Come see what it is..and what a simple concept it can be to get your One Year’s food storage in hand (with accessible meals your family will love!)


Fourth, Decorative Bread Class on Thursday...I'll be teaching Decorative Bread with my amazing friends at Orson H. Gygi Company!
 You can sign up for the class online Here! In this class, learn how to make ornate edible decorative dough to embellish loaves, edible bread painting techniques and loaf braiding with a personal and down to earth instructor who will cheer for your success! Her classes are remarkably fun and Stephanie has a unique way of making this advanced skill, completely accessible to intermediate and advanced bakers who wish to expand their experience base. Come and join us for this ONE night special engagement! 


Finally. Friday and Saturday!
Free Breakfast and Preparedness Fair!


..Honeyville Farms
Preparedness Fair in Salt Lake City Utah
August 5th and 6th
Store is located at 635 No. Billy Mitchell Road SLC, UT 84116  
I will be teaching several classes! Times and details are  here is the downloadable PDF ! 

Cooking without Power--
Alternative cooking methods for emergency situations, from solar ovens to Dutch ovens...from pitt cooking to buddy burners. Great tips and tricks for safe, effective use of what you have around the house!
Grain Surgery--
A beginners look at grain...up close and personal. We'll explore many different varieties...how to cook them, where to use them...and most important...what they taste like! You'll leave with a whole new confidence in the kitchen and a lot more grain power!
Bread Classes--
As a pastry chef and mom I am often asked how I make such supple and tasty whole grain bread that isn't dry! If you are aching to become a bold better baker...this is a great class for you! Beginners and experienced bakers are welcome! I cover the basics and some unique techniques that help you make delightful whole grain MAGNIFICENT bread fit into your life! 
Convenience Meals in a Jar 101--
This is a basic food storage class for making meals that will feed a family of 4-6 with "just add water" ingredients! They're my own recipes and they are a great way to either prepare for emergencies...or plan for a crazy busy night! The 52 jar method is sweeping the nation! Come see what it is...and what a simple concept it can be to get your year's food storage in hand (with accessible meals your family will LOVE!) 

Spice Rack Demystification and Herb Alchemy-- 
Learn the basics on herb and spice use, combining and the actual health benefits in using culinary herbs and spices! You won't want to miss what could be one of the best classes I teach on how to actually USE all those little jars in your Spice rack!

There will be giveaways like crazy! Including solar ovens, emergency clothes washers, toilets, water cubes, supplies an CASE Lot sales galore! Plus many other classed than my own. Call the store for details or to get a PDF of the event to share.

Somewhere in the middle of all of those amazing events...I'll be able to see my darling loved family including My Mega-Mom, Pansy Man, Auntie Em, Andre', Jen-Jen (and her family) and the whole ding-a-dang crew I love! This will of course, include BBQ!
Maybe some fishing...
.
I love fish...but my favorite will always be my travel fish!
 Sister slumber parties!  {Giggle} ...Chocolate! Ya know...Gluten free for Em...

In all honesty...I don't think I could be more excited IF I TRIED! Oh wow!! Okay...so...Good things, EPIC good things are going on! I hope to see all of you Soon! 

Big hugs!
Your friend, 
Chef Tess.
 
Did I mention all the other EVIL food places I need to visit? No...well I 'll just let you guess...


Smooches!! See YOU tomorrow!

Tuesday, July 26, 2011

Homemade Instant Beans and using The Heat Retention Cooking Method


Tuesday's Tutorial is one I have been working on for a long time. I think a lot of times it easy to get caught up in my mind with a "this is how we cook" mental state. In the last few years I've studied and applied the use of  
Solar cooking , including the building of several different Solar Oven cookers.  I've come a long way since My first solar oven   

In that process I learned a lot. Number one, first and foremost...I can learn something new everyday.  Second...I should learn something new about how to cook food.  I'm a chef and as food is hard wired in my brain so is the absolute desire to see that people all over the world are blessed.  I have a vision of seeing lives changed every day through my efforts...and I hope you do too. I know that together, we can make a difference.  Wow. I just got really sappy right there.  {Insert suave eyebrow raise} I know.  I don't do that often.


So today's tutorial has come to pass after being so excited about instant beans! After the last few classes on  Convenience Meals  and cooking with them, I've had a lot of requests for this tutorial.  I found some instant beans from THRIVE that can are already made, but I also wanted to see if it could be done at home.  Yup. Totally can be done.  Highlighted today are the ever amazing beans from Colorado. All hail the farm-folk up there! Dang it. There's a lady who lives in my house Granny who grew up with those bean folk...and a gal named Elsie who almost cried when she saw her beloved Bolita beans from CO come home once again. Thanks folks. Awesome beans!  I found these at our local 

 These are the Zuni Gold beans. I think they're pretty. I'd hot glue them to my favorite funky-purse and wear them as a snazzy accessory...but I think today we'll just cook them instead. Right?{ I'm secretly stuffing some in my pocket of to my right side. Now I'm mystically waving my hands in front of your face. You didn't see anything.}
 Our Heat Retention cooking class starts NOW.  For more on this amazing cooking method look HERE. It's not, in fact, a new method!   I've used my solar cooker as a sun-less cooker! Yes...it can be done! You can cook without the sun too! It's been particularly off-n-on sunny the last bit so I wasn't sure if I could pull it off...but I did. So I'm showing you. I did the post on Using Your Sun Oven as a Slow Cooker 101
 but failed to mention what to do should the sunlight be intermittent or it get cloudy shortly into your cooking. Heaven forbid! Well...there is salvation.
 Soak the beans in water overnight. Drain. Add 6 cups more water.  Bring to a simmer and cook 15 minutes (or in the solar oven, cook 20 minutes until at 350 degrees.)
 At this point, let's hypothetically say that the sun goes behind the clouds. In Arizona we've had several days like this lately. Annoying. But...I've found this out...I can sitll cook the beans.
 Cover the pot with towels, tightly fitting them around the bottom and sides of the hot pot. If you don't have a solar oven, this method will also work using a hay basket lined with blankets.  For more on this amazing cooking method look HERE. It's not, in fact, a new method!
 Close up your solar oven and allow beans to cook for 1 1/2 hours or more. Up to 8 hours.  Now. To make them into Instant beans that cook much quicker I made use of my method for Solar Dehydrating using my Bigger Bolder Sun Oven...big enough for 12 loaves . This has been an epic tool for dehydating and getting the food warm for things like beans.  At any rate. The cooked beans can go on a metal cooling rack in the solar oven and if the top of the oven is vented open by having a crack left unclosed, they will start as this...
 12-15 hours later they will be dry and shelf stable like this:
These can be cooked in as little as 20 minutes! Take one cup of instant beans and 3 cups of water. Simmer...or heat for 10 minutes over boiling water and use the Heat Retention method we talked about here. Either way will work.
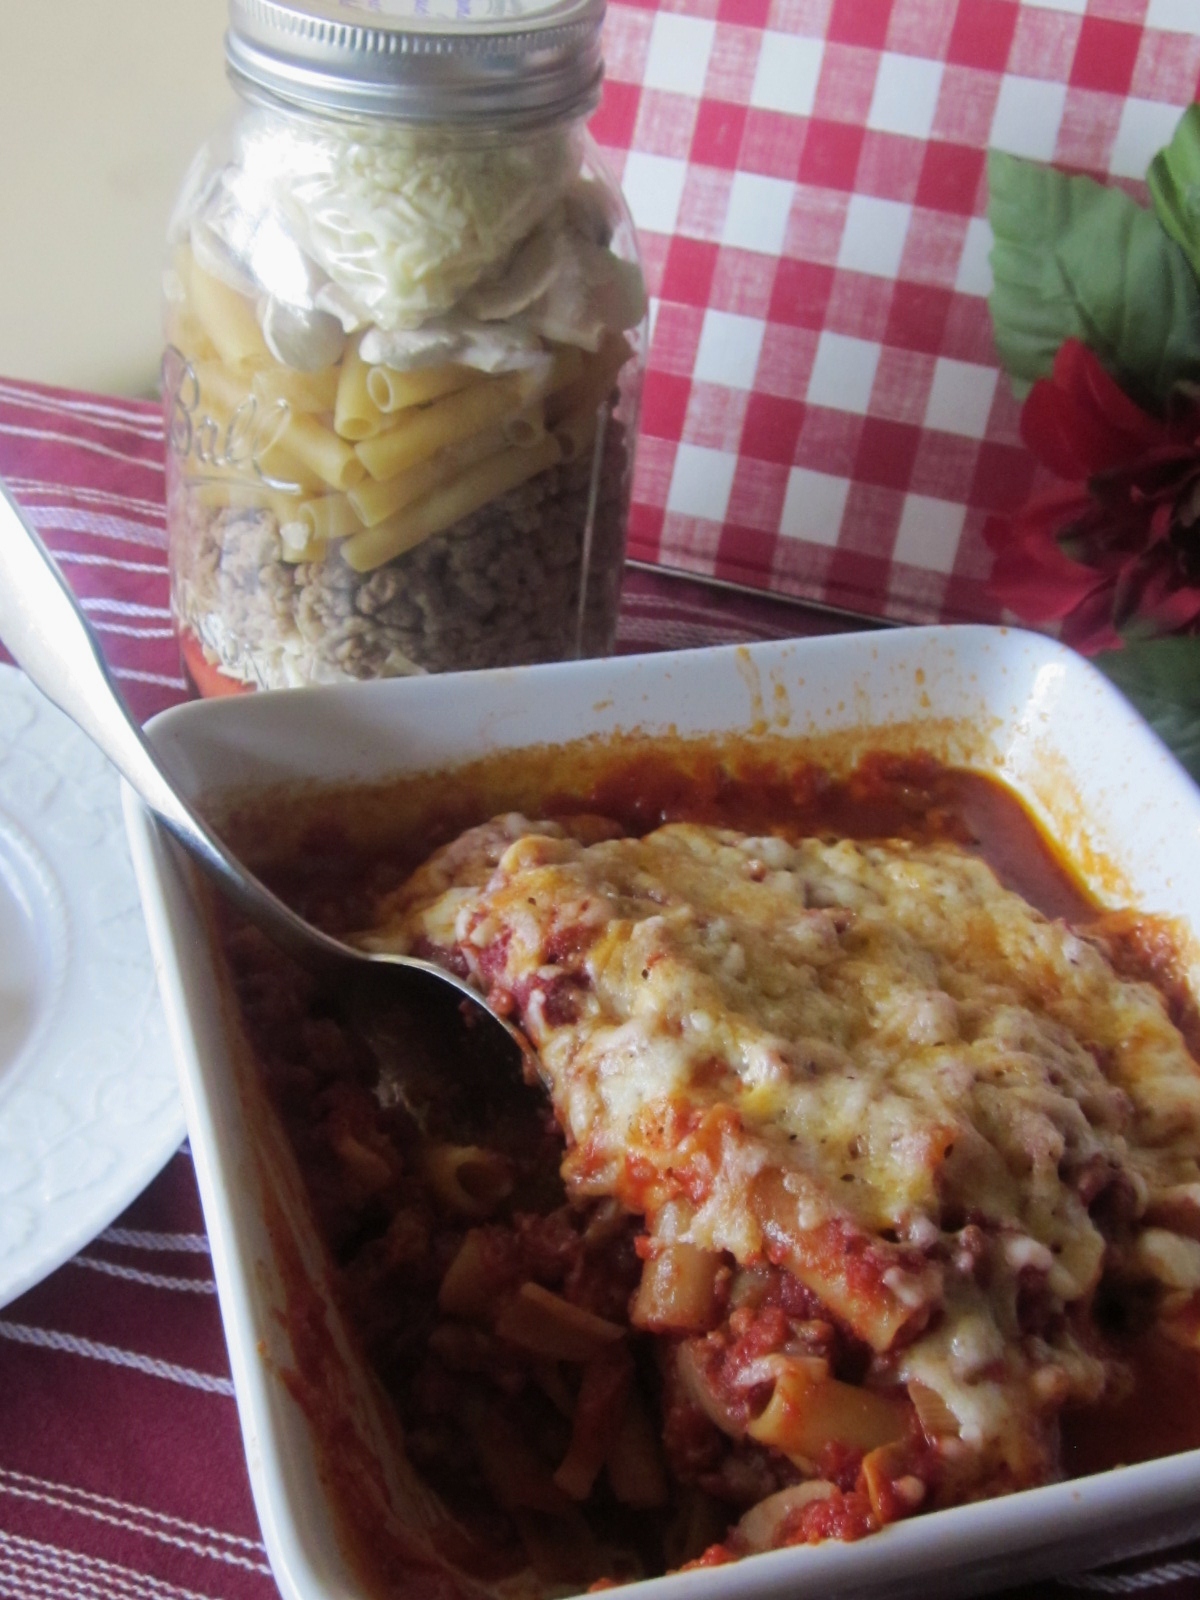
I have enjoyed using them in my Convenience Meals in a Jar.
Personal favorite...the Bean and Rice Fajita Casserole using the Heat Retention Method.
There you go! Some awesome new tips for cooking without power and making instant beans!

 Again, if you want to learn more about the heat retention method I also recommend this e- book: Retained Heat Cooking ... the Wave of the Future Again . 
It's only 55 pages and under 10$ and I learned A LOT from reading it. xoxo! Special thanks and hugs to author Leslie Romano!

Monday, July 25, 2011

Lemon Blueberry Sponge Pudding Cakes

 For starters...I'm  very excited to offer this Spice Deal to those who shop me through Identity Magazine here ! Smoking great deal on shipping! Now on to the Lemon-blueberry happy land...
 A few weeks ago I started a cooking project with these glorious blueberries in mind. Aren't they the most plum, mind boggling, berry? I could eat them until my eyes are blue. {You know what I'm talking about right?} Mmm. Blueberries...I wish I was a Smurf. I'd use this as a hat. 
 Combined with this flavor I adore...
What's not to love about a lemon-blueberry light-n-fluffy cake? Mmmm.
 I wanted it to be a dessert that was individual size...and delightfully fresh and light for the summer. I wanted to be able to seriously impress too. It was for a big party I was doing soon. So...I started with these...baking ramekins.
So, when I saw Pat Sinclair's Cookbook share a recipe for Lemon Sponge Pudding Cake I was instantly converted to the idea of using the blueberries in the bottom of the cake and use the recipe for individual cups! It was perfect!  Pat's recipes have been spot on--every time! This is my recipe adapted from her original:

You will need:
10  1 cup baking ramekins
1 cup fresh blueberries or blackberries (freeze dried work, rehydrated with orange juice)
3 large eggs
1 cup milk or almond milk
1/4 cup lemon juice (2 lemons) and zest
3/4 cup sugar ( I used cardamom infused sugar 2 cups sugar 1 tsp ground cardamom)
1/4 cup all purpose flour (Gluten free use quinoa flour or rice flour)
1/8 tsp salt
3T melted butter
1/4 tsp Chef Tess Wise Women of the East Spice and Floral Blend

1/2 tsp lemon zest

Directions:
Heat the oven to 350 degrees. {Solar oven works amazing for these!}
Generously butter the ramekins and sprinkle with some additional infused sugar.


Add a few blueberries or blackberries to cover the bottom of the dish.
Combine the sugar, flour, salt spice blend, and zest in a small bowl.
Get the cutest kid you know and have them beat the yolks in a medium bowl until well blended. Add the milk and lemon juice. This boy also has an insane love for blueberries. When I told him the blueberries were for "something special" as he started eating them with vacuum velocity...he almost cried. So...I adjusted my day and remembered HE was the reason I was home in the first place...Thanks Face. You're my light!

It's a great time to teach the kiddos how to separate eggs too! Stir the flour mixture into the egg mixture and beat until smooth.   Stir in the melted butter or alternate oil.
Line all your dishes on a metal 9 by 13 casserole with a lip.  
Beat the Egg whites with an electric mixer on high speed until soft peaks form.  


Gently fold the whites into the pudding mixture, retaining as much air as possible. Pour into the separate baking dishes.

Place in the oven. Pour 3-4 cups boiling water to a depth of about 1 inch in the casserole so it surrounds the pudding cake ramekins. Bake 20-25 minutes until puffed and light brown.  Solar oven has no need for the water in the casserole. That's a perk.  Now after baking...carefully remove from the oven. Careful...we don't want that boiling hot water from the pan all over the floor...or kids nearby.
Dust generously with powdered sugar. I used a rose petal infused powdered sugar for some added sophistication...
Served warm it will be amazing. I for one could eat them all day...


There you go. Sponge Pudding Cakes of Glory.
Remember to see my latest
Giveaway! 


Also! Very excited to offer this Spice Deal to those who shop me through Identity Magazine here ! Smoking great deal on shipping!!

Sunday, July 24, 2011

Real Painting--Bread of Life


 I came across one of my "Real Paintings" when we were moving some of our furniture from storage. I'd almost forgotten how much I loved it until I saw it again. Usually you all see the painting I do on bread. So I thought I'd share this piece here on the blog. It's not food...but ya know what? It's still my soul. Sunday is that day I share a little of my soul. Enjoy.


 At one point, painting this picture I remember thinking, "I don't want this picture to end. I want it to go on forever and ever. I wish it could trail off the canvas and into eternity." So I laced the leaves around the sides of the canvas and just sat back wishing I could do more. It was a quite afternoon in late July. The only reason I remember that is because it was a day my kids had gone for a solid 8 hour block. Mom's don't get that often when the little ones are super small. It had been a long week.

 Now, several years later I looked at this painting again in a new light.  I grew so much when I painted this. At the time I didn't have a garden so I didn't literally grow things...but I was creating something spiritually. I was giving my creative mind some solid form. I was expressing the deep yearnings of my soul to create depth and light. I wanted to see textures and shapes and I wanted it all pure on white...I wanted to take something ordinary and make it beautiful.  
 It also made me wonder why I ever put it away in storage instead of on my wall.  Isn't life like that at times?
Why do we as humans sometimes start something and then end up not keeping that thing, whatever it may be, near and dear to our hearts? Especially if the thing we started brought us great joy and personal satisfaction? I'm not sure. All I know is that today...I'm taking it out and hanging it up.  I'm not saying I will always have time to paint on canvas...but I'm remembering that at one time in my life, there was hours of silence. I'm remember that those days will come all too quickly when that isn't the "exception" but the "rule"... and that the times I have now are just as precious as the bright white. The depth, the texture, the color and the shapes...all have a place on the canvas. My life, imperfect as it is doesn't need to be more...it just needs to be taken  out and appreciated now and then for what it really is.  Real Life. I want it to run over the edges today. I want it to go on forever...but it won't. It will change. 
I'm reminded to be a Pioneer now, as my Ancestors were before me. I'm reminded to not be satisfied with one blank canvas but to touch every life I can wherever I can...for as long as I can.
“Truly the Lord encourages us to walk in faith to the edge of the light and beyond—into the unknown,” M. Russel Ballard.


There it is. Light up the darkness.