Showing posts with label Freezer Meal Ideas meat. Show all posts

Saturday, June 24, 2017

Cooking with Chef Tess Video Meatloaf Turkey Cups 3 Ways


Here you go everyone! Episode One of Season Two! Each cup is around 50 calories and 2 net carbs and loaded with veggies! We love them. A lot.

Please feel free to share this video with your friends and family. We really want to get the word out that it is now available. 


Always My Very Best,
Your Friend Chef Tess

Friday, June 23, 2017

Meatloaf Turkey Muffin Cups Three Ways--Freezer Meals from Cooking With Chef Tess


Season TWO of my show will be airing on Heartland TV  in Las Vegas on channels 34.2 and on Cox cable channel 97 every Saturday at 1:30 pm starting June 24th! YES!!!!

There are several Heartland TV Affiliate Stations Nationally and we are hoping that we'll soon be on the network across the country We also filmed several one minute tutorial videos that will be airing on cox cable across the southwest starting in July. We'll keep everyone posted as those details are made public.

As for Saturday, here's the recipe:


Time-Saving Meatloaf Turkey Cups Made 3 Ways!

 Pepperoni Pizza Meatloaf Muffin Cup 
 French Onion Meatloaf Muffin Cup
Chimichurri Meatloaf Muffin Cup


Chef Tess Meatloaf Muffins
2 pounds ground lean turkey sausage
1 medium onion, cut into chunks
1 green pepper, chopped
2 large egg
1 cup Organic Grains 7 grain rolled cereal ---here
1 Tbsp. Chef Tess All Purpose Seasoning
1 Tbsp. Worcestershire sauce


Put ground beef into a big bowl. Put onion and green pepper in blender. Pulse the blender to finely chop the vegetables into very small pieces then add them to the meat bowl. Add egg, bread crumbs and grill seasoning to the bowl. Next, mix together the smoky barbecue sauce, the salsa and the Worcestershire sauce. Pour half the sauce mixture into the bowl with the meatloaf mix. Mix the meatloaf together with your hands. Wash up.

Divide between 24 muffin tins sprayed with non-stick spray Use an ice cream scoop to help you fill meat into each tin. Bake 350° 20-25 minutes. Over 165 degrees internal temperature. When fully baked, top 8 of each of the meatloaf muffins with a spoonful of a flavor variation. 
Flavor Variations  


French onion
1 onion, chopped
1 Tbsp. olive oil
1 Tbsp. minced garlic
1 tsp lemon zest
½ cup beef broth

Saute onions in olive oil until golden brown. Add remaining ingredients and simmer until thick. 


Pepperoni Pizza
Spaghetti sauce
Pepperoni
Mozzarella
Italian Seasoning

As needed. Top each meatloaf with sauce, cheese, and pepperoni. 

 Chimichurri
If you're not familiar with it...Chimichurri is a sauce that is traditionally used as a marinade for meat in Central and South America. I almost want to call it a vinaigrette based pesto if I over simplify what it is.  I fell in love with it the first time it's flavors were unleashed on my pallet! It really lends a powerful punch of flavor and there are hundreds of variations on the internet.  This one is special because it is what I use for meat, but also for vegetarian dishes like this cheesy grain casserole.  I simply stir 1 cup of the prepared sauce into the base recipe and top it with roasted garlic.  Suddenly, everyone can't stop eating the meatloaf!

Chef Tess' Chimichurri Sauce
1/3 cup red wine vinegar
2T fresh lime juice
1/2 tsp kosher salt
4-5 cloves garlic
1 shallot
1/2 jalapeno, seeded
1 cup minced fresh cilantro
1/2 cup minced fresh parsley
1 cup extra virgin olive oil
1 tsp dry oregano
1/4 tsp ground cumin
Combine all ingredients in a covered food processor and pulse until smooth.


Freezing Instructions:
Cool completely, about 15 minutes. Transfer to a parchment lined baking sheet or plate and freeze until solid. Transfer to a gallon sized freezer bag. Label well. with cooking instructions.

Heating and Serving:
Reheat in microwave from frozen, about 2 minutes each muffin. Or, bake in oven 350 degrees for 15-20 minutes. Today we are going to serve  them over mashed potatoes with plenty of fresh micro-greens. 

My Fitness Pal Recipe Nutritional information Yield 24 servings, 57 calories each, 2 carbs, 2 gram of fat, 10 grams protein, 


Special thanks to our friends at Organic Grains.com for ingredients and financial support to help make this show possible. We are so very thankful for all you've done for our family here at Chef Tess Bakeresse.

Always My Very Best,
Your Friend Chef Tess


Wednesday, May 3, 2017

2 Chicken Dinners and Easy Homemade Stuffing (Full Video)


Cooking like a Chef-Boss has never been so easy! This is 2 chicken dinners, homemade stove-cook stuffing and the secrets to freezer-friendly potatoes all in one episode. That’s right! Today I'm back with incredibly delicious homemade convenience meals that will save you time, money and energy. Strap on your oven mitts and let’s get rockin’!


I am frequently asked how I make so many freezer meals so quickly. Here is the big secret. Sit down, it may be too much AWESOMENESS at once... It's called Dove tailing. You see it a lot in restaurants. One kind of meat 12 different sauces. This is basically how a lot of them do it. I think it's quite remarkable. I'm only using 2 sauces here today, but you will get the main idea. Don't worry, I will add a lot of sauce recipes along the way. This is the start.

First...I season and bake 5 lb of Chicken. Salt, Pepper, Garlic...you can use any "all purpose seasoning" out there. 5 lbs of legs and thighs is about $4 at my local Wal-mart. Gotta love that. It will make us 4 dinners. My kids eat a leg each, I eat a thigh, and my husband has all the side dishes because he thinks any cooked meat is just nasty. Ace is out of town this week. I am cooking FISH and CHICKEN and all kinds of animal stuff. Hint: side dishes .

Chicken Legs and Thighs
4-5 lbs leg and thigh meat (about 12 thighs)
2 T all purpose seasoning blend
Place legs and thighs on a large cookie sheet and season generously with seasoning blend. Bake at 350 degrees for 30-40 minutes (until juices run clear when pricked with a fork or temperature reads 170 degrees when inserted with a meat thermometer). Divide meat between three plates, 4 thighs each and season with three different sauces...today I did two.

Mustard Glaze: 
2T whole grain mustard
2T molasses. Mix and wipe all over the chicken....

Put in a freezer bag clearly labeled. Put in the fridge immediately. Once cooled transfer to the freezer. (I do this cool, then freeze thing so that I don't have a lot of medium temperature meat sitting in my freezer making germs grow...the quicker the meat gets cold, the less chance my family has of getting a food born illness...which is good.)


Pesto sauce: 
3T prepared Pesto sauce. I also added 2T chopped Italian flat leaf parsley
and 1T fresh rosemary leaves....


Put Pesto Chicken in a freezer bag and label clearly. Transfer to the fridge immediately and then once cool, to the freezer.

Now I have 2 of each of these dinners in my freezer. I will be doing a lot more of these so don't feel like you are being left out of any secrets.
Oh. To reheat the chicken, DEFROST and then heat in the microwave 5-7 minutes on a microwave safe dish, or heat in the oven (covered casserole) 350 degrees 20-25 minutes until internal temperature is over 150. Simple stuff.

There you go darlings!


Always My Very Best,
Your Friend Chef Tess


Monday, April 10, 2017

Foil Dinners for Camping And Freezer Meal (full Video)


Episode 3 of Cooking with Chef Tess aired on Saturday in Las Vegas on channel 34.2 and Cox cable channel 97. The Heartland TV Network! Here's the recipe...


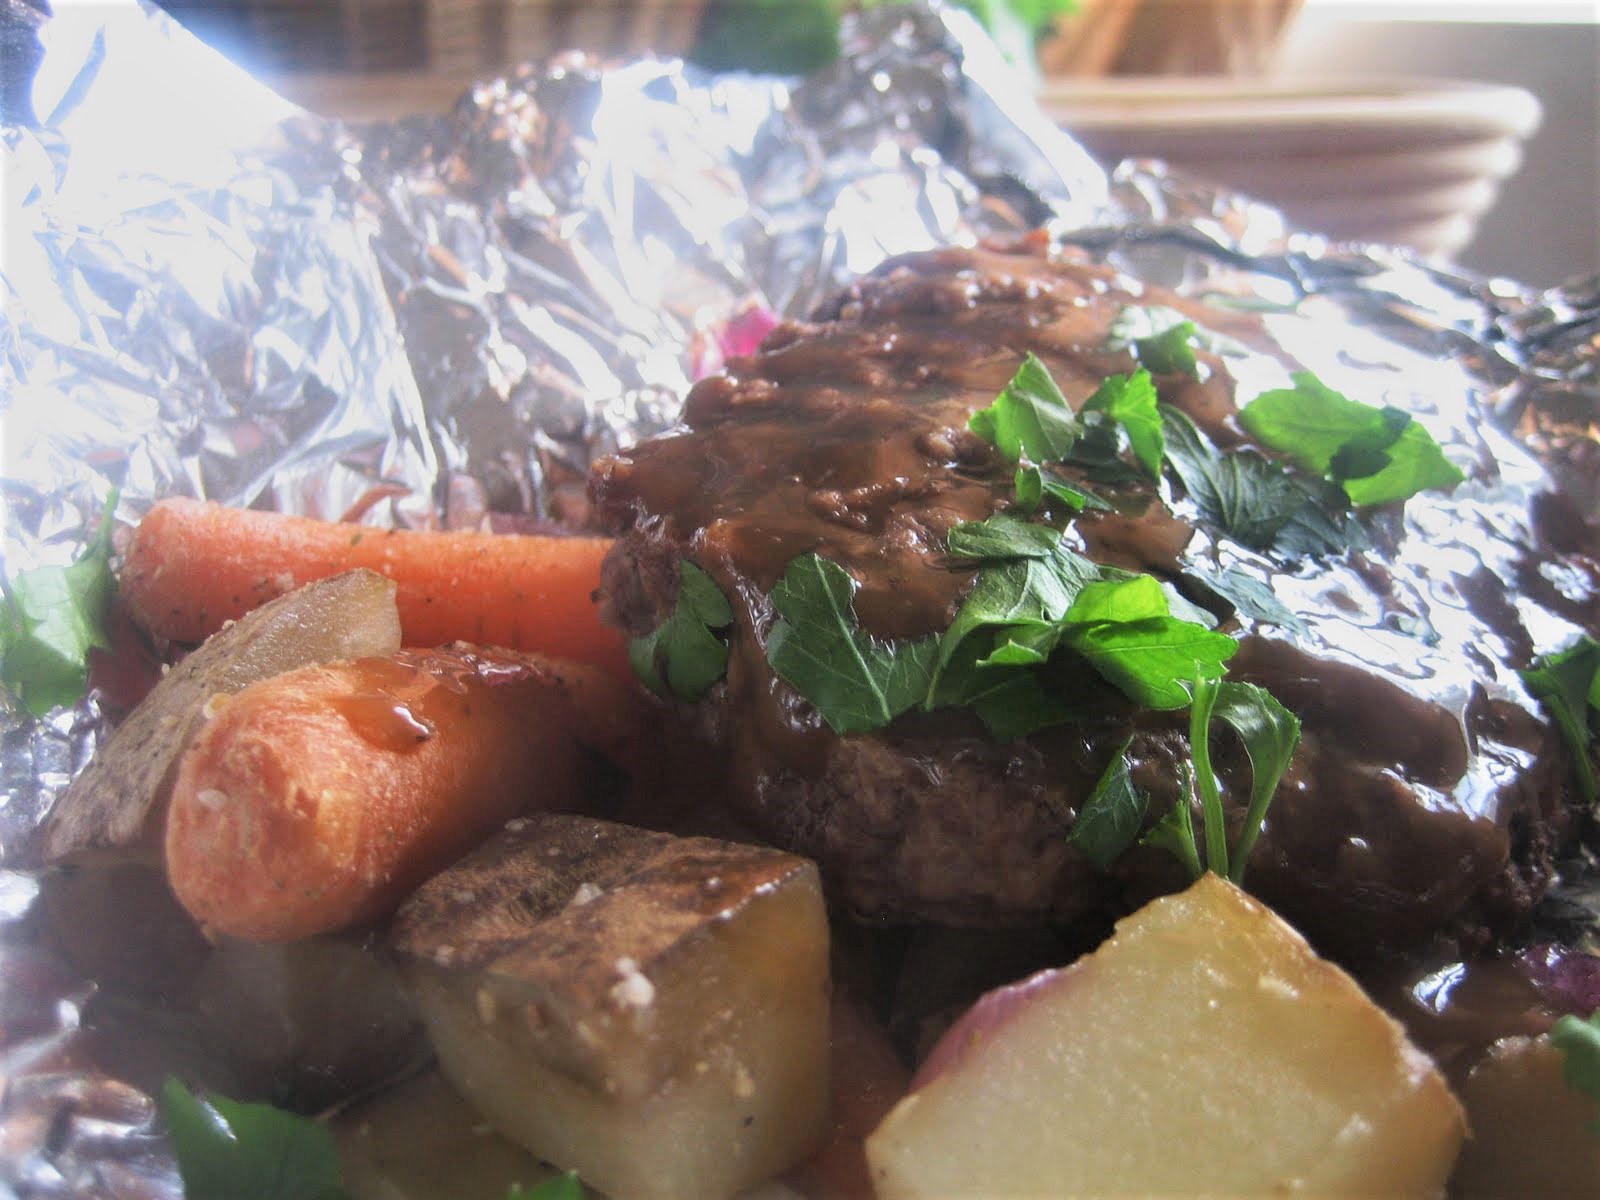
We've got summer vacation coming up soon...and that mean camping trips. What mom, dad or granny wouldn't love to be prepared way ahead of time for that big camping trip...or dinner tomorrow? I think this freezer meal will shock and amaze even the pickiest eaters in your house. We call it a Hobo Dinner (or Foil dinner), but it's one of those classic comfort foods that we always had as a kid when we went camping. It's basically a hamburger pot roast cooked over hot coals in the woodland setting. Or, at home it can be baked in the oven (or solar oven) They can be made fresh for dinner, or frozen for later use. However you do it, be prepared to sing a rousing ensemble with your favorite hillbilly harmonica songs. It's campfire good. Down home good. If you precook the veggies and meat, it's even fast and good. So...here we go:

Foil Freezer Dinner's A La Chef Tess

5-6 large russet potatoes, cleaned well and cut into cubes, cooked in microwave or stove top until fork tender OR 4 lb frozen cubed hash browns
1 lb baby carrots, steamed 5 minutes (or frozen)
2 medium red onions, chopped, steamed with the carrots
2-3 T Chef Tess All Purpose Seasoning
3 lb cooked hamburger patties, about 12
1/2 cup chopped fresh parsley (optional)
2 Cups dark brown mushroom gravy of your choice (I use homemade Gravy Mix made easy)

12 sheets of heavy-duty foil (use the heavy stuff if you don't want a mess) about one foot long each.

Directions: 
In a large bowl, combine the carrots, onions, potatoes, and seasoning.
Place one cup of vegetable mixture onto a lightly oiled sheet of foil. 
Place the cooked hamburger on  top of the vegetable mixture and wrap tightly.
 I roll the ends and sides very well. Repeat until you have used all your hamburger and vegetable mixture. You can use veggie burgers if you choose instead of meat. Top the meat with a few tablespoons of the prepared gravy. Place 4 meals in a gallon size freezer bag and remove as much air as possible.

 Label with baking directions:
Remove from plastic bag and place in a 400-degree oven for 35-40 minutes until heated through, or place in a solar oven Pot, cover the foil with a dark sheet pan, and close oven. Cook 45 minutes to an hour. In the woods...place on hot coals and cook 25 minutes.

Pour contents onto a plate and sprinkle with parsley if desired.
There you go. Quick and easy on the go for camping, oven baking, or solar cooking.

Always My Very Best,
Your Friend Chef Tess


Monday, April 3, 2017

Full Video: 3 Freezer Meals from One Beef Base


For those of you who don't live in Las Vegas, here's the full video of last Saturday's show. It was so much fun! If you want the Recipes click here.


Always My Very Best,
Your Friend Chef Tess


Saturday, April 1, 2017

Today's Episode:3 Quick and Easy Freezer Meals from One Beef Base


This Week's Episode of Cooking with Chef Tess on 
Heartland TV  in Las Vegas on
 channels 34.2 and on Cox cable channel 97 at 1:30...

The original post was:

Here's the information from today's show! 


Make-A-Head Ground Beef Base 

Ingredients:
3 medium onions, peeled and chopped or minced fine
3 lbs. 90% lean ground beef or 93% lean ground turkey (or chicken breast pieces)
3 garlic cloves, pressed
2 carrots, peeled and shredded finely
2 stalks of celery, chopped finely

Cooking Directions: Place all ingredients into skillet (12-in or larger). Cook over medium-high heat, breaking into crumbles, 15-18 minutes or until beef is no longer pink. Divide beef mixture into three equal portions (according to your recipe choices below). Label clearly with cooking directions. Chill promptly!


Home-Style Chili

In a gallon-sized freezer bag or container, add the following:
⅓ of the meat base
1 (15 oz.) can roasted tomatoes
2 (15 oz.) cans kidney beans
2 Tbsp. chili powder or Chef Tess Fajita Seasoning
1 small can diced green chile or jalapeno


Directions: Chill in the fridge up to 4 days or freeze up to 3 months. Defrost and heat for 15 minutes over medium heat. Serve with shredded cheese and cornbread if desired.


Taco Rice Casserole

In an oven-safe non-aluminum 9x13 pan, layer in order:
3 cups cooked rice
⅓ of the meat base
1 cup tomatillo salsa or red salsa
1 packet taco seasoning of your choice (or homemade),
1 cup shredded cheese

Directions: Cover and store up to 5 days in the fridge or freeze up to 3 months. Defrost and heat for 20-25 minutes uncovered at 350 or 10-12 minutes in the microwave on high.


Sloppy Joe Filling

In a quart-sized freezer bag or container:
⅓ of the meat base
¼ cup brown sugar
1 can (15 oz.) tomato sauce
2 small red bell pepper, minced
2 Tbsp. balsamic vinegar
2 Tbsp. Worcestershire sauce

Directions: Chill in the fridge up to 4 days or freeze up to 3 months. Defrost and heat 5-6 minutes in microwave. To serve, divide between 4 toasted burger buns. Serve with coleslaw or side of your choice.

How to Freeze Food Safely and Effectively 101

·         Buy Quality Fresh Ingredients: Freezing will not cover up inferior cooking or ingredients. Check the flavors and seasoning before freezing to be sure it tastes good.

·         Chill First: Make sure food is cold before you freeze it! This allows it to freeze faster and reduces the amount of drip loss (leakage of moisture that occurs during defrosting) the ice crystal will be smaller in chilled food, reducing the amount of water lost. The result is better texture and flavor. It will also reduce the amount of condensation (moisture that collects on the surface of food when frozen) when defrosted, the excess water will make the food soggy and tasteless.

·         Chill Cooked Food Uncovered: If you can’t bag and chill in labeled bags, it is essential that the food is chilled uncovered so the heat isn’t kept in the container (even plastic wrap!) If it’s a large pot of chili or meat, I freeze bottles of water and put them inside the pot to further hasten the drop of internal temperature.

·         Freeze Small: The smaller the item, the quicker it will freeze. Whenever possible, freeze in pint or quart-sized name brand freezer bags. Gallon size is perfect for pizza crusts and larger family sizes. I use quart-sized for my family of four. When you freeze it, do so with the bag laid out flat-- the increased surface area will not only freeze faster, but also be easier to store in stacks. I have a “freezer file” that I use. It’s an ice bin that I put the flat bags in just like files I can flip through!

·         “Open” Freeze Smaller Items: Smaller items like berries and cooked potato wedges can be placed on a parchment lined sheet pan (metal is best because of its temperature conducting qualities). Using this method will keep these smaller items from freezing in a block. I use it for twice baked potatoes and blanched vegetables.

·         Wrap Well: Squeeze out as much air as possible and label food clearly with permanent marker. Include defrosting and cooking instructions so anyone can cook it later (my husband needs it clearly marked to remove the ingredients from the bag before microwaving!) Preventing freezer burn is the key! There is nothing wrong with using two bags. I always use the name brand bags. If the store brand is used it needs to be double bagged anyway, so it is worth the cost of the quality bags. If able to use the specially made vacuum sealers and the freezer bags with them, it is a good investment.

·         Watch Freezer Temperature: On big freezing days, it is essential to check the temperature, as well as checking periodically to be sure the freezer stays cold on other days. Keep a freezer thermometer in the freezer. It should be between 0-30° Fahrenheit. If you are placing a large quantity of food in the freezer at once, turn the thermostat to the coldest setting until food is frozen.

·         Follow Defrosting Recommendations: It is best to defrost in the fridge or microwave. Do not defrost at room temperature because microorganisms like yeast, mold, and bacteria multiply quickly at temperatures above 40 degrees. It may still feel cool to you, but is a breeding ground for food-borne illness--don’t take chances! Cook defrosted food soon and chill leftovers as soon as possible.

Know Your Beef. 
      As a final note,  I love learning a little bit about different cuts of beef and where the parts come from.  So, I asked Jack from BroBBQ if I could share his The Ultimate Guide to Beef Cuts diagram. If you hover over his picture of each part of the cow, you see the information for each cut. Below the diagram is a great reference for beef cuts and how to use them in cooking. He really makes the complex topic of how to use the cow, much easier to digest. 
This Infographic is designed by Jack Thompson from BroBBQ


There you go!


Always My Very Best,
Your Friend Chef Tess


Friday, August 1, 2014

Sweet and Hot Slow Cooked Spanish Pork


We've made it to another Freezer Friday! Hooray! It's not just any Friday, mind you, but Labor Day weekend Friday! It's going to be a really nice four days to get together with family and friends. I may just relax and snooze. Tonight is "girl's night out"...and I'm going to leave dinner with the kids and a sitter. So, I thought I'd share one of my favorite freezer meals that also doubles as an amazing meal to serve to guests, neighbors, friends...or the babysitter. Good news, it's also gluten free and dairy free (if you don't top it with sour cream).

Sweet and hot is a weird combination. It's like a gorgeous drop-dead-to-look-at mom who can also bake brownies. Hmm. I'm not going to point fingers at anyone in particular. My mom says I totally fit that description. To the rest of you, you know who you are. I'm just saying, it's a hard balance to keep. Apply the sweet and hot combination to a dinner that can also double as a freezer meal for just about any Mexican filled entree...and you will be ready to cry tears of joy. Then and only then will you understand what it feels like to truly achieve dinner zen. Ohhhmmm. You love me already...Ohhmmmm. You can't wait to try this.
I've been goofing around with this recipe for quite a while. I hope when you have it, you will experience all the combined wisdom several different recipes. Call me crazy. What I wanted was a recipe that had fairly few ingredients, without using a jar or packaged item of to "count" as an ingredient. I also wanted the meal to be satisfying. I wanted them to love it! So much love...that I would hear a lot of general moans of adoration for my skills as a chef. I'm selfish that way. I like praise. Doesn't everyone?


Tess' Sweet and Hot Slow Cooked Spanish Pork


3 lb boneless pork carnitias (or a boneless pork loin, cut into cubes)
2 tsp dry ancho chile,
2 tsp dry Mexican oregano
1 tsp whole cumin,
1/2 cup honey
1/2 cup lime juice plus zest of one lime
1/2 cup Homemade sundried tomatoes or store purchased sun dried tomato julienne
1/2 bunch cilantro, chopped
3 green onions, chopped
salsa and sour cream (optional)


Directions: In a spice mill, combine the ancho chile,
oregano,
and cumin seed.


Grind until a fine powder is achieved.


Spread the spice mixture over the carnitas (pork). Drizzle with honey.
Add the lime and sun dried tomato.

I cooked mine in my solar oven (350 degrees) for 4 hours, but you can put it in the crock pot on low 5-8 hours or high 3-4 hours.

Meat will be very tender. Thanks to the tomato and lime juice for the acid that breaks down the meat to make it so divine. You can leave it in chunks or shred it, depending on your preference. It's so tender it easily shreds with a fork.


Serve as a taco filling. I like to add fresh chopped cilantro and green onion and top it with some avocado yogurt cream and some of my Home canned Salsa.


Yields 6 3/4 cup servings. Recipe is okay to double or triple as needed for freezer meal purposes. To freeze, place 3 cups of the meat and juice mixture in a quart size bag along with fresh chopped cilantro and green onion. Label clearly with date and reheat instructions:


"To serve, defrost overnight in the fridge or remove bag and defrost in the freezer. Shred the pork. Heat 5-7 minutes in the microwave or 8-10 minutes on the stove top. Be sure to keep the juice with the meat. Salt and pepper as needed. Serve hot as a taco filling, taco salad base, enchilada or burrito filling."


Lay bag flat in fridge. When cool, transfer to the freezer. Freeze solid and place in your freezer file.

Last note.
My sweet friend Andee Andee Farnsworth Bergeron sent me this wonderful recipe that would also work wonderfully!
Costa Vida Sweet PorkPork Roast (4-5 lbs), thawed if frozen
3 c. Dr. Pepper
1 can tomato sauce
1/2 c. sugar
1/2 c. (packed) brown sugar
1 Tbsp. cayenne pepper
1/2 tsp. powdered garlic
2 cloves garlic, minced
3 large carrots, peeled and grated
1 (smallish) Serrano pepper, seeded and diced
1 medium yellow onion, chopped
Cut away any obvious fat portions from the roast. Place all ingredients in a crock pot and cook on high for 6-7 hours.
Remove pork to cutting board.
Add an additional 1/2 c. granulated sugar and 1 cup Coke to the liquid in the crock pot. Stir.
Shred the pork, removing excess fat and bones, and add back to the crock pot. Stir.
Reduce to low and cook an additional 3 hours.
There you go!

Always My Very Best,
Your Friend Chef Tess

Friday, November 4, 2011

Country Style Cheeseburger Veggie Pot Pie {Freezer Friendly}

This has been a highly eventful week! Pie In The Sky Week! I flew to LA...made some new and exciting big plans for an epic food storage cookbook with Honeyville...Awesome details to follow. 


 I've posted a lot of new food storage pie baking ideas and I know that by Friday of an amazing week...we need a freezer meal!  So... this one is for Auntie Em...who once asked me if I ever cook real people food. I'm real people...sometimes.  Here it is hun. At the end of a 12 hour pie making day on Monday, I decided to use some of the extra pie dough and make a country style cheeseburger veggie pot pie with ingredients I had on hand. It was devoured by my "vegetarian" husband (who in all honesty slips into the flexitarian category. ) He'll eat meat now and then...and this was a "then" moment.  He loved the pot pie! Loved it.  The kids drizzled it with ketchup...no comment.  As I can honestly say, I did call it a cheeseburger pot pie. There is no need for a pie pan in this case so the meat mixture is just nestled between two very crispy, flaky savory pie crust layers.  This dough actually uses seasoning in the dough. It's crazy good!
 Chef Stephanie Petersen's Standard Recipe for  Savory Pastry dough (using shortening)
Basic Pastry crust: 2 9 inch single shells or 1 9 inch two crust pie
2 1/4 cup pastry flour (for whole wheat pastry flour increase water to about 1/3 cup)
1/2 tsp salt, 
1 tsp Chef Tess All Purpose Seasoning
1 cup shortening (crisco works but if you want non trans-fat try "Spectrum" brand)
3T cold water
3T vinegar
Directions:
 1. Mix flour, salt and seasoning, cut in shortening with a pastry blender. 
2. Combine lightly until the mix resembles course meal or tiny peas: its texture will not be uniform, but will        contain small crumbs and small bits and pieces. 


3.Sprinkle water and vinegar over mixture one Tablespoon at a time and mix lightly with a fork, using only enough water so that the pastry will hold together when pressed gently into a ball. This will vary on the moisture content of the flour. Divide the dough into two balls. Roll each ball out into a circle ( see Pie Crust Tutorial for details on my technique)


Filling ingredients
 1 lb lean hamburger (2 cups freeze dried, hydrated with 2 cups hot water 10 minutes and drained well)
1/4 cup chopped onions
1/4 cup flour OR 2T Ultra gel
2 cups beef stock
1 clove pressed garlic
1 tsp Chef Tess All Purpose Seasoning
1 cup mixed vegetables (1/2 cup freeze dried mix rehydrated OR 1 cup frozen mixed veggies of your choice)
1 cup shredded sharp cheddar cheese


To make filling:
In a deep skillet, cook the lean hamburger and  and onion until burger is cooked through. Add 1/4 cup flour stir well and cook 2 minutes. Add the stock all at once with the garlic and seasoning to the simmering beef. Stir until thick, about 5 minutes. Add Veggies and cook 2 more minutes.  

  1. Take one piece of pie dough, rolled out in a 12 inch circle and place it on a sheet pan lined with non-stick foil.
  2.  Pile the beef mixture into the center of the dough. Top the filling with the shredded cheese. 
  3.  Top with second 12 inch circle of pie dough. 
  4. Tightly roll the outside 1 inch of the pie crusts together and pinch well, sealing the meat mixture between the dough (Freeze: see directions below or Bake right away for dinner tonight).
  5.  Preheat oven to 400 degrees.
  6.  Prick a few holes in the top of the pie and bake 25-30 minutes.


 I sprinkled mine with some flaked salt and chives before baking.
 If freezing:

  • Transfer the uncooked open air pie to the freezer and allow to freeze 2 hours.
  •  Remove from the freezer and wrap tightly with plastic wrap or a Gallon size freezer bag.  
  • To bake, Place unwrapped pie on a sheet pan and bake 45 minutes from frozen at 400 degrees. Serve hot.
There you go my dears! Make some pot pie at the end of pie week! I hope you've had as much fun with pie as I've had! Xoxo!


Get the printable version of this recipe Here

Always My Very Best,
Your Friend Chef Tess