Showing posts with label freezer meals. Show all posts

Thursday, August 3, 2017

The Best Gourmet Frozen Lasagna!


Happy Freezer Friday!  We love Freezer meals and this is the ultimate freeze lasagna of all time in the history of forever. Well. If I had a dollar for every blog post that ever claimed it was the "best ever"------ whatever it is...I'd have a bazillion dollars. However, in the case of this lasagna, it's a recipe that I've used in catering large weddings as well as bottomless pit feeding-frenzied teenage boys.  Okay, I say boys, but Little Man just turned 18 and is just about finished with his college degree...so he's man--ish. As for the Lasagna recipes, this one is pretty legit. It's loaded with vegetables and flavor.  

If you notice, there's not a Cooking with Chef Tess video with this one, I've taken a step back from the network TV show for a while. My producer said that I'm welcome back anytime, so don't think this is forever y'all.  It's a long/short story mainly having to do with choosing between something "earthly important" and something "family eternal"...and I picked the eternal. I'd hope everyone would respect my privacy on this one and just know that I love you all dearly and will still be posting frequently here as well as keeping my family on track, together, and focused on keeping the main goal the main goal.  So, dinner together with this righteous lasagna is probably a fantastic idea! 


Homemade Gourmet Freezer Lasagna

This recipe makes 16 very large servings, so feel free to make 2-4 casseroles, depending on the size of your family. Today, we’re making 4

This recipe I have tweaked quite a few times to find just what I liked, nice tender pasta that is still a little firm with just a great amount of sauce and meat (or veggies) to hold the layers apart and keep its shape. I hope you enjoy it.

Sauce:
  • 2 Tbsp olive oil
  • 2 medium onion, chopped
  • 2 stocks celery, sliced thin
  • 2 cup shredded carrot
  • 1/4 cup minced garlic
  • 2 lb lean turkey Italian Sausage
  • ½ cup teff seed (optional)
  • 4 quarts (16 cups) tomato puree 
  • 3 Tbsp. Chef Tess Italian
  • 1 Tbsp. Red Pepper Flakes


Directions: put the oil in a large dutch oven on the stove. Saute the vegetables and the meat until the meat is cooked and the vegetables are tender.  Add tomato puree. I used 4 quarts of my home canned tomatoes, but you can totally use the store cans. It take 4-28 0z cans of tomato puree, or if you like a chunky sauce, use two 28 oz can of tomato puree and 2-28 oz cans of diced tomatoes.
Simmer on low for 10-15 minutes.

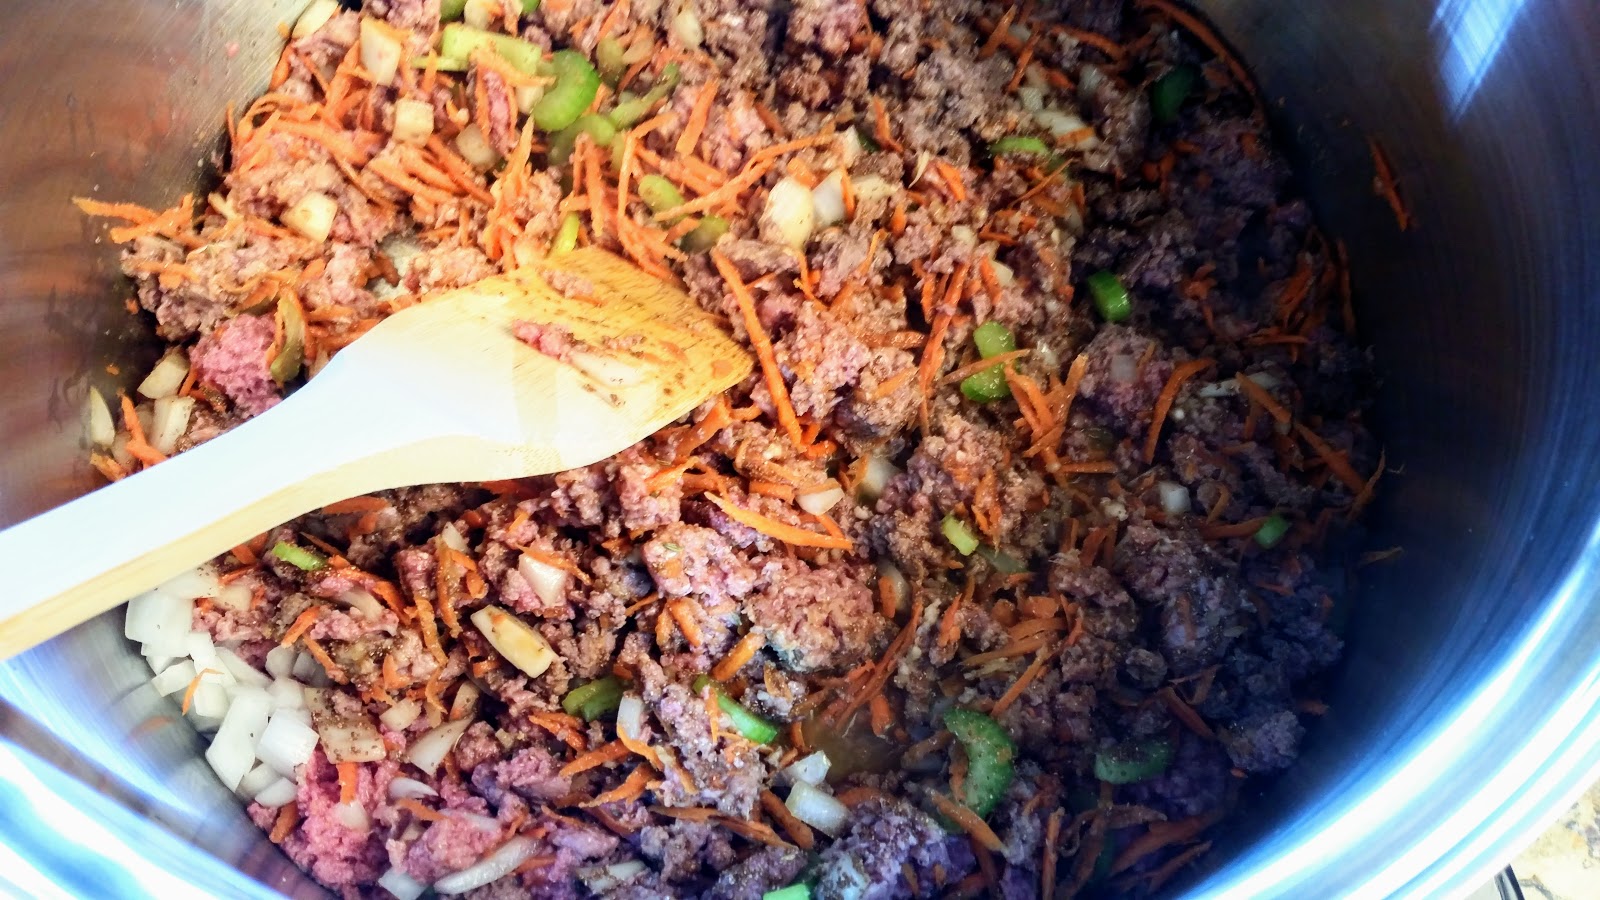


 Okay. Let’s talk about that sauce. If the sauce seems a little thin, keep in mind that I don't cook my noodles first, so there needs to be a little extra liquid for the noodles to cook properly. So, let’s get the cheese filling put together and build this awesome lasagna.


Cheese filling:
  • 2 lbs ricotta cheese 
  • 2 cups Parmesan cheese
  • 1/4 cup fresh chopped basil, or 2 Tbsp dry basil
  • 2 Tbsp. Chef Tess Romantic Italian Seasoning 
  • 2 eggs
  • salt and pepper (about 1 teaspoon each)


Combine well in a large bowl. 


Noodles:

24 oven ready lasagna noodles (dry)
2 lbs mozzarella cheese, part skim is okay
1 cup Parmesan cheese


Decide the size casserole you will make:
  • 8 inch by 8 inch yields 4 casseroles
  • 9 by 13 inch yields 2 casseroles
  • 16 by 11 inch yields 1 casserole

Be sure to use NON aluminum pans, as they will have a reaction to the tomato products. Just as a general rule, tomato products should not be stored in aluminum.

To assemble:
8 inch use: 1/2 cup tomato sauce, 3 dry noodles, 1/3 cup cheese filling per noodle.
9 by 13 use: 1 cup sauce, 4 dry noodles and 1/2 cup cheese filling per noodle.
16 by 11 use: 2 cups sauce, 8 dry noodles, and 3/4 cup cheese filling per noodle.

Spread the tomato sauce on the bottom of your pan, avoiding large chunks of meat, lay noodles down across the bottom of the pan on top of the tomato sauce.
Spread the cheese filling over the noodle.
Top the cheese layer with some tomato sauce
8-inch pan: 3/4 cup tomato sauce

For the third layer, top with noodles and then the remaining sauce. Top with mozzarella and Parmesan cheese. You know, I say three layers, but it just depends on how big the pan is. I always end up with more layers on the smaller pans than the large ones. Especially if I use a loaf pan instead of an 8 by 8-inch casserole. So... you know. 5 layers or so for the small pans. 


·       
      Freezer Precautions: Okay, we’ve made our casseroles, so now we’re ready to freeze them. Cover with plastic wrap and then foil, as we don't want any tomato to meet foil.

    Label clearly with cooking directions:  Defrost in fridge 24 hours, or microwave defrost. This is the best way to cook frozen lasagna. By far. I've tried straight from the freezer to the oven and I don't like how uneven it cooks, even with the store purchased lasagna. I'm weird that way. I'm okay with that. 

      Slow Cooker Lasagna?  One more thing. If you measure the inside of your crock pot and can find a plastic container that fits it and goes about 4 inches up the sides, you can put all these layers of cheese, sauce and noodles in the container and freeze it. When you want lasagna, you simply invert the container under hot running water until the lasagna cube comes out. Place it in your crock pot on low 6-8 hours OR on high 4-5 hours.
·


To Serve: Adjust oven rack to middle of the oven. Remove foil, remove plastic. Spray side of foil that meets cheese with a non-stick coating of your choice. Replace foil tightly sealing edges. Place on oven rack (Usually put it on a sheet pan on the oven rack).

Bake times 400 degrees:
8 inch: 25-30 minutes, remove foil and bake an additional 15-20 minutes, until hot throughout and the cheese is browned in spots. Let cool for 10 minutes before serving.
9 inch by 11: 30-40 minutes, remove foil and bake additional 25-30 minutes until hot throughout and the cheese is browned in spots. Let cool 10 minutes before serving.
11 by 16 inch: 40-45 minutes, remove foil and bake additional 30-35 minutes until hot throughout and cheese is browned in spots. Let cool 10 minutes before serving.

There you go. Make frozen lasagna.


Always My Very Best,
Your Friend Chef Tess
Yum


Friday, June 23, 2017

Meatloaf Turkey Muffin Cups Three Ways--Freezer Meals from Cooking With Chef Tess


Season TWO of my show will be airing on Heartland TV  in Las Vegas on channels 34.2 and on Cox cable channel 97 every Saturday at 1:30 pm starting June 24th! YES!!!!

There are several Heartland TV Affiliate Stations Nationally and we are hoping that we'll soon be on the network across the country We also filmed several one minute tutorial videos that will be airing on cox cable across the southwest starting in July. We'll keep everyone posted as those details are made public.

As for Saturday, here's the recipe:


Time-Saving Meatloaf Turkey Cups Made 3 Ways!

 Pepperoni Pizza Meatloaf Muffin Cup 
 French Onion Meatloaf Muffin Cup
Chimichurri Meatloaf Muffin Cup


Chef Tess Meatloaf Muffins
2 pounds ground lean turkey sausage
1 medium onion, cut into chunks
1 green pepper, chopped
2 large egg
1 cup Organic Grains 7 grain rolled cereal ---here
1 Tbsp. Chef Tess All Purpose Seasoning
1 Tbsp. Worcestershire sauce


Put ground beef into a big bowl. Put onion and green pepper in blender. Pulse the blender to finely chop the vegetables into very small pieces then add them to the meat bowl. Add egg, bread crumbs and grill seasoning to the bowl. Next, mix together the smoky barbecue sauce, the salsa and the Worcestershire sauce. Pour half the sauce mixture into the bowl with the meatloaf mix. Mix the meatloaf together with your hands. Wash up.

Divide between 24 muffin tins sprayed with non-stick spray Use an ice cream scoop to help you fill meat into each tin. Bake 350° 20-25 minutes. Over 165 degrees internal temperature. When fully baked, top 8 of each of the meatloaf muffins with a spoonful of a flavor variation. 
Flavor Variations  


French onion
1 onion, chopped
1 Tbsp. olive oil
1 Tbsp. minced garlic
1 tsp lemon zest
½ cup beef broth

Saute onions in olive oil until golden brown. Add remaining ingredients and simmer until thick. 


Pepperoni Pizza
Spaghetti sauce
Pepperoni
Mozzarella
Italian Seasoning

As needed. Top each meatloaf with sauce, cheese, and pepperoni. 

 Chimichurri
If you're not familiar with it...Chimichurri is a sauce that is traditionally used as a marinade for meat in Central and South America. I almost want to call it a vinaigrette based pesto if I over simplify what it is.  I fell in love with it the first time it's flavors were unleashed on my pallet! It really lends a powerful punch of flavor and there are hundreds of variations on the internet.  This one is special because it is what I use for meat, but also for vegetarian dishes like this cheesy grain casserole.  I simply stir 1 cup of the prepared sauce into the base recipe and top it with roasted garlic.  Suddenly, everyone can't stop eating the meatloaf!

Chef Tess' Chimichurri Sauce
1/3 cup red wine vinegar
2T fresh lime juice
1/2 tsp kosher salt
4-5 cloves garlic
1 shallot
1/2 jalapeno, seeded
1 cup minced fresh cilantro
1/2 cup minced fresh parsley
1 cup extra virgin olive oil
1 tsp dry oregano
1/4 tsp ground cumin
Combine all ingredients in a covered food processor and pulse until smooth.


Freezing Instructions:
Cool completely, about 15 minutes. Transfer to a parchment lined baking sheet or plate and freeze until solid. Transfer to a gallon sized freezer bag. Label well. with cooking instructions.

Heating and Serving:
Reheat in microwave from frozen, about 2 minutes each muffin. Or, bake in oven 350 degrees for 15-20 minutes. Today we are going to serve  them over mashed potatoes with plenty of fresh micro-greens. 

My Fitness Pal Recipe Nutritional information Yield 24 servings, 57 calories each, 2 carbs, 2 gram of fat, 10 grams protein, 


Special thanks to our friends at Organic Grains.com for ingredients and financial support to help make this show possible. We are so very thankful for all you've done for our family here at Chef Tess Bakeresse.

Always My Very Best,
Your Friend Chef Tess


Tuesday, August 23, 2016

Chimichurri and Roasted Garlic Mac-n-Cheese


I shared Twisted Mac and Cheese of the Day Base Recipe earlier.  If you are looking for a perfect macaroni casserole style recipe, here's my family favorite. It freezes beautifully. It works perfectly. Every. Single. Time. Just remember the secrets for success ( here ).  

Over the next few weeks I'll be sharing some of my favorite twists on this base that will make your life simple!  

Enters...the Chimichurri!  This is just a twist that will rock your world! I adapted this recipe from  a Bon Appetit Chimichurri Recipe that I loved for beef. 


 If you're not familiar with it...Chimichurri is a sauce that is traditionally used as a marinade for meat in Central and South America. I almost want to call it a vinaigrette based pesto if I over simplify what it is.  I fell in love with it the first time it's flavors were unleashed on my pallet! It really lends a powerful punch of flavor and there are hundreds of variations on the internet.  This one is special because it is what I use for meat, but also for vegetarian dishes like this twisted macaroni.  I simply stir 1 cup of the prepared sauce into the base recipe and top it with roasted garlic.  Suddenly, everyone can't stop eating the pasta!

Here's my recipe for the sauce...


Chef Tess' Chimichurri Sauce


1/3 cup red wine vinegar

2T fresh lime juice
1/2 tsp kosher salt
4-5 cloves garlic
1 shallot 
1/2 jalapeno, seeded
1 cup minced fresh cilantro
1/2 cup minced fresh parsley
1 cup extra virgin olive oil
1 tsp dry oregano
1/4 tsp ground cumin


Combine all ingredients in a covered food processor and pulse until smooth.

For the mac-n-cheese, scoop one cup of chimichurri in the base mixture and bake according to the original directions.  Top with roasted garlic, lime, and spices to taste.  We serve it with Sweet and Hot Slow Cooked Pork...


There you go darlings! Fast and easy delicious additions to your freezer meal collection!

Always My Very Best,
Your Friend Chef Tess


Sunday, December 14, 2014

Twisted Bistro Make-Ahead Mac-n-Cheese


One of my favorite dishes to create daily at  Bistro 'A la Mode is the Twisted Mac-n-Cheese.  It is all from scratch and the flavor of the day changes depending on what I want to do, so it has been a good comfort food creative outlet.   I make a base recipe that is the best make-ahead macaroni and cheese recipe I have ever created for a baked casserole-style Mac. Once the macaroni canvas is made, then I twist it...

This week we did: 


Obviously I won't be sharing the exact recipes I use in the Bistro here on the blog, but if you are looking for a perfect macaroni casserole style recipe, here's my family favorite. 

My Tips for success:

  •  Slightly undercook the pasta.  I generally only cook it about 7 minutes. It will be a little crunchy, but the sauce is a little loose and the noodles will absorb the extra as they bake. This ensures you have a great texture on the pasta, even though it is baked later. 
  • Use subtle spices in the sauce to add depth.  My secret is the mustard, cayanne and a hint of nutmeg. Don't use too much nutmeg or it will taste like pudding. You want it to be subtle, yet enough of a nuance that people beg you for your secret ingredient. I use fresh grated, about 1/16 of a tsp. Just a hint. 
  • Watch the heat when you add the cheese to your sauce. I take my white sauce off the stove, let it cool about 5 minutes, and then add the real cheese. Real cheese in creamy sauces will tend to get a "grainy" texture if it is heated too high, so this step keeps it creamy-luscious.


Chef Tess Make-Ahead Mac-n-cheese
yield: 8 1 cup servings

1 lb elbow macaroni, cooked about 7 minutes (slightly undercooked)
1/2 cup butter
1 clove garlic, minced
1/2 cup all purpose flour
8 cups milk
1T dry mustard
1/4 tsp cayanne pepper
pinch of nutmeg
1 lb sharp cheddar cheese, shredded
1/2 lb Monterrey jack cheese, shredded

Directions: 

  • In a gallon sized saucepan, melt the butter over medium high heat. Add the minced garlic and saute about 3 minutes until tender, but not burned. Add the flour and stir well with a whisk, about 4 minutes.  Add the milk and remaining ingredients gradually, while whisking and bring to a boil over medium heat, then simmer about 10 minutes.  Be sure to stir every 2-3 minutes so the milk doesn't burn on the bottom of the pan.  
  • Remove the pan from the heat. Allow it to cool about 5 minutes then stir in the shredded cheese. Smooth perfect cheese sauce can't be done if you cook the cheese on the stove, it will get a grainy texture if the cheese gets too hot...and you want it to be creamy smooth right?
  • In a large 9inch by 13 inch deep casserole pan, lightly grease the pan. Pour the cooked, drained pasta into the pan and season well with salt and pepper.  Pour the cheese sauce over the noodles and stir to combine.  
  • Top with breadcrumbs or twisted variation of your choice (see twisted ideas above). Usually just a drizzle of savory sauce and a different crumble of bacon or cheese on top will kick it to the next level of awesome!  I have so many more flavor variations to make it is sometimes scary how my brain works!

To Bake Immediately:
Bake the casserole at 400 degrees until sauce is bubbling and the topping of choice is crisp, about 20-25 minutes. 

To save for later: Cover casserole with foil and place in the fridge. May be kept up to 5 days. Ready to heat and eat. Bake, covered with foil, 400 degrees 25-30 minutes. Remove foil and allow to bake 10 minutes more, until topping is crisp. 

To make into a freezer meal:  Cover with foil, label and date and transfer to the freezer. 
To prepare: Thaw the casserole in the fridge for 24 hours and follow the directions for the refrigerator version. OR bake from frozen, covered with foil 1 hour 20 minutes. I recommend thawing first. It just gives your sauce a really great texture.  

There you go darlings!

Come and see me at the Bistro. I'd love to give you a big hug!


Our Menu PDF


Follow our daily Twisted Mac updated on our page:
 Palm Street Culinary on Facebook


Always My Very Best,
Your Friend Chef Tess


Tuesday, July 23, 2013

6 Quick and Easy Freezer Dinners from 1 Ground Beef Dinner Base


What if you could really consolidate the last few days of summer cooking into one quick and easy event, making 3 meals at a time using one simple make-ahead ground beef and veggie base and the meals were ones that everyone would agree on eating? Here are my fun and easy way to really make it happen along with 6 recipes you can make today using stuff you probably have in your cupboard! Come on...you can't lose here!

The first time I introduced this method of making freezer meals we made 6 casseroles out of one chicken divan recipe in This Post. It was one of the many Freezer Friday posts where we have had many a tutorial for freezer casserole, enjoyed giving friends a Freezer Meal Baby Shower, provided Auntie Em's best  freezer meal 5 week menu and shopping list, and shared my best tips for dove-tailing and making Freezer Meal Meat Main Courses. I love making smaller meal bases that are freezer meal pasta toppers. We've done many group classes and tutorials on Oven-Rise Homemade Freezer Pizza and given several ideas for: freezer meal potatoes,freezer Quichefreezer rice toppers, and freezer meal stews.  There are also some gluten free freezer meal menus.  


With that, here's the beef base and 6 new dinners you can make using this base:
Make-A-Head Ground Beef Base

Ingredients:
3 medium onions, peeled and chopped or minced fine
3 lbs. 90% lean ground beef or 93% lean ground turkey (or chicken breast pieces)
3 garlic cloves, pressed
2 carrots, peeled and shredded finely
2 stalks of celery, chopped finely

Cooking Directions: Place all ingredients into skillet (12-in or larger). Cook over medium-high heat, breaking into crumbles, 15-18 minutes or until beef is no longer pink. Divide beef mixture into three equal portions (according to your recipe choices below). Label clearly with cooking directions. Chill promptly!


Home-Style Chili

In a gallon-sized freezer bag or container, add the following:
⅓ of the meat base
1 (15 oz.) can roasted tomatoes
2 (15 oz.) cans kidney beans
2 Tbsp. chili powder or Chef Tess Fajita Seasoning
1 small can diced green chile or jalapeno


Directions: Chill in the fridge up to 4 days or freeze up to 3 months. Defrost and heat for 15 minutes over medium heat. Serve with shredded cheese and cornbread if desired.


Taco Rice Casserole

In an oven-safe non-aluminum 9x13 pan, layer in order:
3 cups cooked rice
⅓ of the meat base
1 cup tomatillo salsa or red salsa
1 packet taco seasoning of your choice (or homemade),
1 cup shredded cheese

Directions: Cover and store up to 5 days in the fridge or freeze up to 3 months. Defrost and heat for 20-25 minutes uncovered at 350 or 10-12 minutes in the microwave on high.


Sloppy Joe Filling

In a quart-sized freezer bag or container:
⅓ of the meat base
¼ cup brown sugar
1 can (15 oz.) tomato sauce
2 small red bell pepper, minced
2 Tbsp. balsamic vinegar
2 Tbsp. Worcestershire sauce

Directions: Chill in the fridge up to 4 days or freeze up to 3 months. Defrost and heat 5-6 minutes in microwave. To serve, divide between 4 toasted burger buns. Serve with coleslaw or side of your choice.


Italian Hoagies

In a quart-sized freezer bag or container:
⅓ of the meat base (pictured with chicken version of meat base)
2 Tbsp. Chef Tess Italian Seasoning
1 bottle roasted red bell peppers, drained well
¼ cup diced pepperoni

Directions: Chill in the fridge for up to 4 days or freeze up to 3 months. Defrost and heat in a microwave safe container on high for 5-6 minutes. To serve, divide between 4 Italian hoagies, top with provolone or cheese of your choice.


Cheeseburger Salad

In a quart-sized freezer bag or container:
⅓ of the meat base
⅓ cup mustard
⅓ cup ketchup
4-5 chopped dill pickles or ½ cup sweet pickle relish

Directions: Chill in the fridge up to 4 days or freeze up to 3 months. Defrost and heat out of bag in a microwave-safe dish for 5-6 minutes. Serve over 1 lbs. of shredded lettuce with 1 cup shredded cheddar cheese, a drizzle of ranch dressing, and some fresh tomato wedges.


Home-Style Baked Ziti Casserole

In an oven-safe non-aluminum 9x13 pan, layer in order:
1 lb. of cooked ziti pasta
⅓ of the meat base
3 cups marinara sauce
2 cups shredded mozzarella
1-2 Tbsp. of Italian Seasoning

Directions: Cover and store up to 5 days in the fridge or freeze, up to 3 months. Defrost and heat 20-25 minutes uncovered at 350° or 10-12 minutes in the microwave on high.


As a bonus, please read the details below on freezer meal safety and some things to know about freezer meals in general. 
How to Freeze Food Safely and Effectively 101
By Chef Stephanie Petersen

      · Buy Quality Fresh Ingredients: Freezing will not cover up inferior cooking or ingredients. Check the flavors and seasoning before freezing to be sure it tastes good.

· Chill First: Make sure food is cold before you freeze it! This allows it to freeze faster and reduces the amount of drip loss (leakage of moisture that occurs during defrosting) the ice crystal will be smaller in chilled food, reducing the amount of water lost. The result is better texture and flavor. It will also reduce the amount of condensation (moisture that collects on the surface of food when frozen) when defrosted, the excess water will make the food soggy and tasteless.

· Chill Cooked Food Uncovered: If you can’t bag and chill in labeled bags, it is essential that the food is chilled uncovered so the heat isn’t kept in the container (even plastic wrap!) If it’s a large pot of chili or meat, I freeze bottles of water and put them inside the pot to further hasten the drop of internal temperature.

· Freeze Small: The smaller the item, the quicker it will freeze. Whenever possible, freeze in pint or quart-sized name brand freezer bags. Gallon size is perfect for pizza crusts and larger family sizes. I use quart-sized for my family of four. When you freeze it, do so with the bag laid out flat-- the increased surface area will not only freeze faster, but also be easier to store in stacks. I have a “freezer file” that I use. It’s an ice bin that I put the flat bags in just like files I can flip through!

· “Open” Freeze Smaller Items: Smaller items like berries and cooked potato wedges can be placed on a parchment lined sheet pan (metal is best because of its temperature conducting qualities). Using this method will keep these smaller items from freezing in a block. I use it for twice baked potatoes and blanched vegetables.

· Wrap Well: Squeeze out as much air as possible and label food clearly with a permanent marker. Include defrosting and cooking instructions so anyone can cook it later (my husband needs it clearly marked to remove the ingredients from the bag before microwaving!) Preventing freezer burn is the key! There is nothing wrong with using two bags. I always use the name brand bags. If the store brand is used it needs to be double bagged anyway, so it is worth the cost of the quality bags. If able to use the specially made vacuum sealers and the freezer bags with them, it is a good investment.

· Watch Freezer Temperature: On big freezing days, it is essential to check the temperature, as well as checking periodically to be sure the freezer stays cold on other days. Keep a freezer thermometer in the freezer. It should be between 0-30° Fahrenheit. If you are placing a large quantity of food in the freezer at once, turn the thermostat to the coldest setting until food is frozen.

·  Follow Defrosting Recommendations: It is best to defrost in the fridge or microwave. Do not defrost at room temperature because microorganisms like yeast, mold, and bacteria multiply quickly at temperatures above 40 degrees. It may still feel cool to you, but is a breeding ground for food-borne illness--don’t take chances!Cook defrosted food soon and chill leftovers as soon as possible.


Know Your Beef. 


      As a final note,  I love learning a little bit about different cuts of beef and where the parts come from.  So, I asked Jack from BroBBQ if I could share his The Ultimate Guide to Beef Cuts diagram. If you hover over his picture of each part of the cow, you see the information for each cut. Below the diagram is a great reference for beef cuts and how to use them in cooking. He really makes the complex topic of how to use the cow, much easier to digest.  


This Infographic is designed by Jack Thompson from BroBBQ


There you go! Make some great dinners and save some time in the kitchen! 

Always My Very Best,
Your Friend Chef Tess