Showing posts with label kitchen crafts. Show all posts

Tuesday, May 13, 2014

Fabulous Centerpieces on a dime! Popcorn Ball Topiary Segment!


Good Morning Arizona! Was amazing yesterday! If you missed it or are out of state, this is a fabulous way to get ready for weddings, bridal showers, baby showers, Summer and Spring parties. Kids love them for birthdays! Sky is the limit!

Always My Very Best,
Your Friend Chef Tess


Saturday, May 10, 2014

Popcorn Ball Topiary for Mom's Day


Tomorrow morning I get to spend some time at ABC 15 Phoenix showing a fast and easy last minute craft for kids to do for Mom's Day. If Dad waited until last minute and wants to still do something fun and easy, this is a great idea!  Enjoy darlings!

Honey-Fruity-Cutie-Gelatin Popcorn Balls

1 microwave bag popcorn, popped
1/2 cup granulated sugar
1 cup honey or corn syrup
1 box Jello (3 oz box, any flavor)

Equipment:
Large bowl (gallon sized or larger)
saucepan
Oil for coating hands/popping


Directions:
1. Gather all ingredients and supplies together.
2. Pop the popcorn. Pour into the large bowl.
3. Combine granulated sugar, honey (or corn syrup) and gelatin in a heavy saucepan. Stir slightly and bring to a full rolling boil over medium high heat.
4. Remove gelatin mixture from stove top and pour over popped corn. Blend well, until all of the popcorn is coated. Allow to cool a few minutes before shaping into popcorn balls. {Note: you can add up to 1 cup of nuts, candy corns, jelly beans, Boston Baked Bean candies, red hots...etc. at this point.}

5. Shape popcorn into balls using lightly oiled hands, or leave as fruity popcorn as is. You will need to press them together rather firmly.   To make a topiary, I wrap each popcorn ball with plastic wrap first, then pierce with a bamboo skewer and tie a ribbon at the base of the ball. You may insert them into other popcorn balls or brownie-cupcakes for a stand alone topiary or just enjoy a popcorn ball on a stick!


You may also like:

There you go darlings! Happy Mother's Day!

Always My Very Best,
Your Friend Chef Tess

Tuesday, March 26, 2013

Easter Treats, Centerpieces and Bread Ideas... Segment on Fox 10 AZ AM


 Tomorrow morning on our local Fox 10 Arizona Morning I'll be sharing some great ideas for Easter breads, treats and centerpieces to help celebrate the holiday season! I'm excited!

We'll be talking about Bunny bark (white chocolate mango and toasted walnut bark)..
 Hazelnut mousse pots...

 Turning those into a stunning centerpiece for the dessert table...
 Along with some fun cupcake ideas...

 Plus some great new decorative edible breads!
If I don't cover it all in the 4 minutes I have to talk...why of course we'll share all the details here!

In the meantime, I'm working away on the post for tomorrow! I can't wait to share the goodness with you!

Always My Very Best,
Your Friend Chef Tess

Wednesday, December 26, 2012

CTB Delicious Homemade Buttermilk Eggnog Mix


Cheers from CTB (Chef Tess Bakeresse)! It is getting close to New Year's Eve and for us that means eggnog. Nog! My darling little freaks of nature   the "boys-ohs" will beg for it every single time I stop at a grocery store or convenience store.  They love the thick sweet spiced milky drink.  Everyone has their own version of this luscious creamy delight. Before we get into the nog though...I have to give you some Christmas updates.

 We moved into our new house. That was an adventure. When I say new house, I mean new-to-us. In all reality, we moved into the Brady Bunch house from 1973. Seriously. I'm so exited about the stove...among other things.

There wasn't a zombie Apocalypse 
(hooray for that, I was out of ammo and fresh brains)... Ace barely survived Christmas morning.

 I got the traditional mother's gift. In pink...and fuzzy. I'm a sucker for foot-garb.

The Test Kitchen is back. 
I got a lot of much needed sleep (I'm also a sucker for sleep-garb) while Ace organized the test kitchen and affixed many shelves and stuff to the office. Bless his ever-screw-affixin'-heart. I'm very happy to report that I'm now back in business and yes, it will take me a while to catch up on the e-mail! That being said, thank you all for the well wishes and love. It has been such a wonderful adventure!
 Tara is Gone and Chicklet is Visiting.
Evil Tara has been my go-to girl when it comes to updating the facebook pages and I'm so thankful for her help the last few weeks as I've been offline!  In case you missed the news, Evil Tara (AKA  my darling friend and awesome marketing director here at CTB) is traveling to Paris this week (no doubt eating amazing chocolates,cheeses, and croissants)...and I made sure she had some good meals to go with her in her luggage (as if she really needs more food in Paris). I swear, it was the only way I could make it to France this year!  In case you missed it this is the link: How to make mylar packed just add water meals for camping and travel.
Evil Tara's dog Chicklet is here taking over the kingdom. 
 All hail!  She's been getting way too much attention from my son Face, who insists that the little princess doesn't need to get her feet cold on the patio. He'll sit there until his own little rump is numb. Bless his heart. 
Oh hey, we also got a really cool vintage Coke machine for Christmas. What do you think? Why are you reading this tiny print anyway?

 Evil Queen Chicklet, with her delicate little paws, has also not had to even walk around the yard.  She is getting very spoiled here at the Petersen Dog Resort. " Faster my cute little-boy-minion! " Now, I realize she can walk around just fine. I'm having a hard time convincing my son otherwise.  Our yard is now a full half-acre. What shall we do with that much space?!I will be hard-pressed to separate the two pals when Evil Queen Chicklet does have to leave.


Now on to the Nog.  My main idea for this mix came when a gal asked me if I had a good recipe for eggnog she could make for her son who was overseas with the military. It broke my heart to tell her, "no I don't." I've been feverishly perfecting this recipe since that time. I don't think it will make it to her son in time for Christmas, since it is already passed, but hopefully it will bless a few lives in the future.
As a random side note, So far, we haven't given Chicklet any eggnog. I'm told that little doggies get the doggie toots when they drink milk? Is there any truth to that? I don't know. I don't want to find out. I'm happy not knowing if the dog will get violent silent...never-mind.  In the meantime, we've been making a lot of eggnog for the humans.  This is a basic shelf-stable mix that is just add water and one that is wonderful hot or cold. I'm personally partial to a hot cup of  spiced eggnog with a piece of 6 grain cranberry oatmeal bread.  Yes, this instead of hot cocoa (Did I just say that out loud? I swear if you dare tell my love Chocolate that I've been kissing a mug of nog, I'll deny it...)

I use whole egg and creamy buttermilk powders because they are pasteurized and shelf stable. I love the use of the sour cream powder as well for added richness.  The ultra-gel works as a thickener in the mixture to add some body (and is what is used in instant pudding mixes).  This mix is good up to 3 years when stored in an oxygen free environment. 


CTB Delicious Homemade Buttermilk Eggnog Mix

2 cups  instant non-fat dry milk
1/2 cup buttermilk powder
2 cups sugar or sugar free alternative like granular erythritol
1/2 cup  powdered whole egg
1 cup ultra gel (optional)
1/2 cup powdered sour cream
1T  vanilla powder

1 T LorAnn Rum Bakery Emulsion
1/2 tsp salt
1T Chef Tess Wise Woman of the East Spice blend chef-tess-spices
1 tsp Orange Brandy (grand-marnier-type) flavored oil
1 tsp fresh nutmeg, fine ground

To make the mix: 
Combine all dry ingredients. Slowly drizzle the baker's emulsion and brandy oil into the dry mix and whisk well until well combined.
I'm partial to fresh ground nutmeg. My kiddos sometimes can be found carrying them in their pant pockets...because they're as weird as their mother. Officially. 
To make the eggnog:
Combine 1/2 cup of the eggnog mix with 1 cup warm water (or more, depending on how thick/thin you like your eggnog). Chill for 2 hours for cold egg nog or serve hot for those who like to kiss mugs of hot nog. 

There you go. Make some delicious homemade buttermilk eggnog mix! 

Always My Very Best,
Your Friend Chef Tess


Friday, December 21, 2012

12 Days of Christmas!

 
Are your kids like mine? They can't wait to get to the final days of the advent calendar to welcome Christmas! Oh they unwrap each new day like it is the best thing in the universe to see what we'll be making or reading together. It's my favorite 12 days of the year!

What do you do to spread a little Christmas Cheer? Do you bake something evil  righteous?
Make Gingerbread?

Do you sing? What gifts do you bring?

Well, on the Chef Tess Facebook page we're celebrating the 12 days of Christmas! Come join us for the last few days and maybe get some delightful ideas for sharing some Spirit this year!

Always My Very Best,
Your Friend Chef Tess


Sunday, December 2, 2012

The Kitchen Craftin' Gingerbread House Under Glass Tutorial


 Last week we made some gingerbread houses for centerpieces to use during some swanky upcoming Christmas events. Ya know. It is the pretty little house that any inch-high fairy would find passed the land of swirly whirly gum-drops and the proverbial "wintery Fairy-Land". Try not to scream, "Saaaanta! I know him!!"  Now, in order to keep swipers from swiping...we put our gingerbread fantasy-lands under glass!


How did we take this gorgeous beast and put it in the glass display?
 Ya know...without destroying all the delicate features of the house?


Well. The secret is making them by first measuring. Simple silly.  The second secret is making them lightweight and cheating a little. Yes. I cheated. These beauties are made with cardboard. They're a cross between a kitchen craft and a real gingerbread. This makes them light enough and strong enough to put in a container without falling apart.

We even used a hot glue gun to really give the strength we needed for the base.
My advanced pastry school instructors are probably not very happy with this. However, I'm a mom first right now...and I just didn't have a full day to devote to baking gingerbread, cutting, sugar melting, and waiting for royal icing to dry. Plus...it wouldn't have been light enough to slip into the cookie jar. Really. 
Just make sure the base of the structure fits inside the container, then remove from the glass, decorate and return to the "under glass" area.  This one was done in a trifle bowl.
This also works for mini snow-globe-type gingerbread houses. Invert a regular mouth mason jar lid and ring that have been sealed together with hot-glue. This base gives the house enough lift to be seen as a snow globe inside of the jar.  Put your gingerbread or cardboard house inside the inner circle of the ring. Place the regular mouth mason jar lid on a wide-mouth lid. 
Make sure it will fit inside the wide mouth quart jar. This is one of the Ball old-fashioned wide mouth pint jars. They are a little fatter and shorter than the regular wide-mouth jars. 

Remove. Decorate. Return to the jar.

Other cheater ideas.
Yup. I have them too.
1. Use recycled stuff. The top roof is a recycled hamburger clam-shell. The base is a cardboard box and the structure for the fireplace is some strategically folded paper-towel cardboard.  

2. Use unexpected decorations and embellishments.
The "wood siding" for the house is actually some perfectly measured and snapped pieces of tomato-basil dry linguine...hot glued in place. This was dry enough to keep the structure from going soggy. I could have used gum pieces or something. This was just what I had around the house. If you see some light green on the side of the wrap-around porch and the balcony...that was spinach linguine.

The pillars on the wrap-around porch and the fence-posts are all made from candy sticks. My son called them candy cigarettes. I'm not sure I'd let my kids play with them for anything but making gingerbread. I used royal frosting for the final decorations but in general, the hot glue gun stayed in-use most of the project. I think this house will be here in 5 years if I keep it dry. Not that I'm going to do that...but it is really cool!
My son said, "We need to make these every single week!" So, you can bet that we will be doing more. 
Please note. The pile of candy and bags of goodies...well...that was for the project. However, for under 20$ and a full 6 hours of just being creative with my son...it was a priceless investment.

We bonded over pretzel-logs, licorice siding, smarties shingles, and frosting ice-cycles. What could be more perfect?

There you go. Do some kitchen crafts with your kiddos!

Always My Very Best,
Your Friend Chef Tess


Monday, November 26, 2012

Elegant Budget Friendly Holiday Buffet Table Ideas Segment


 Today at 5:45 AM I was on NBC 12 Phoenix with one of my all time favorite people, Syleste Rodrigez talking about some amazing and outstanding holiday buffet table ideas.  First we'll be talking about some amazing tamales!
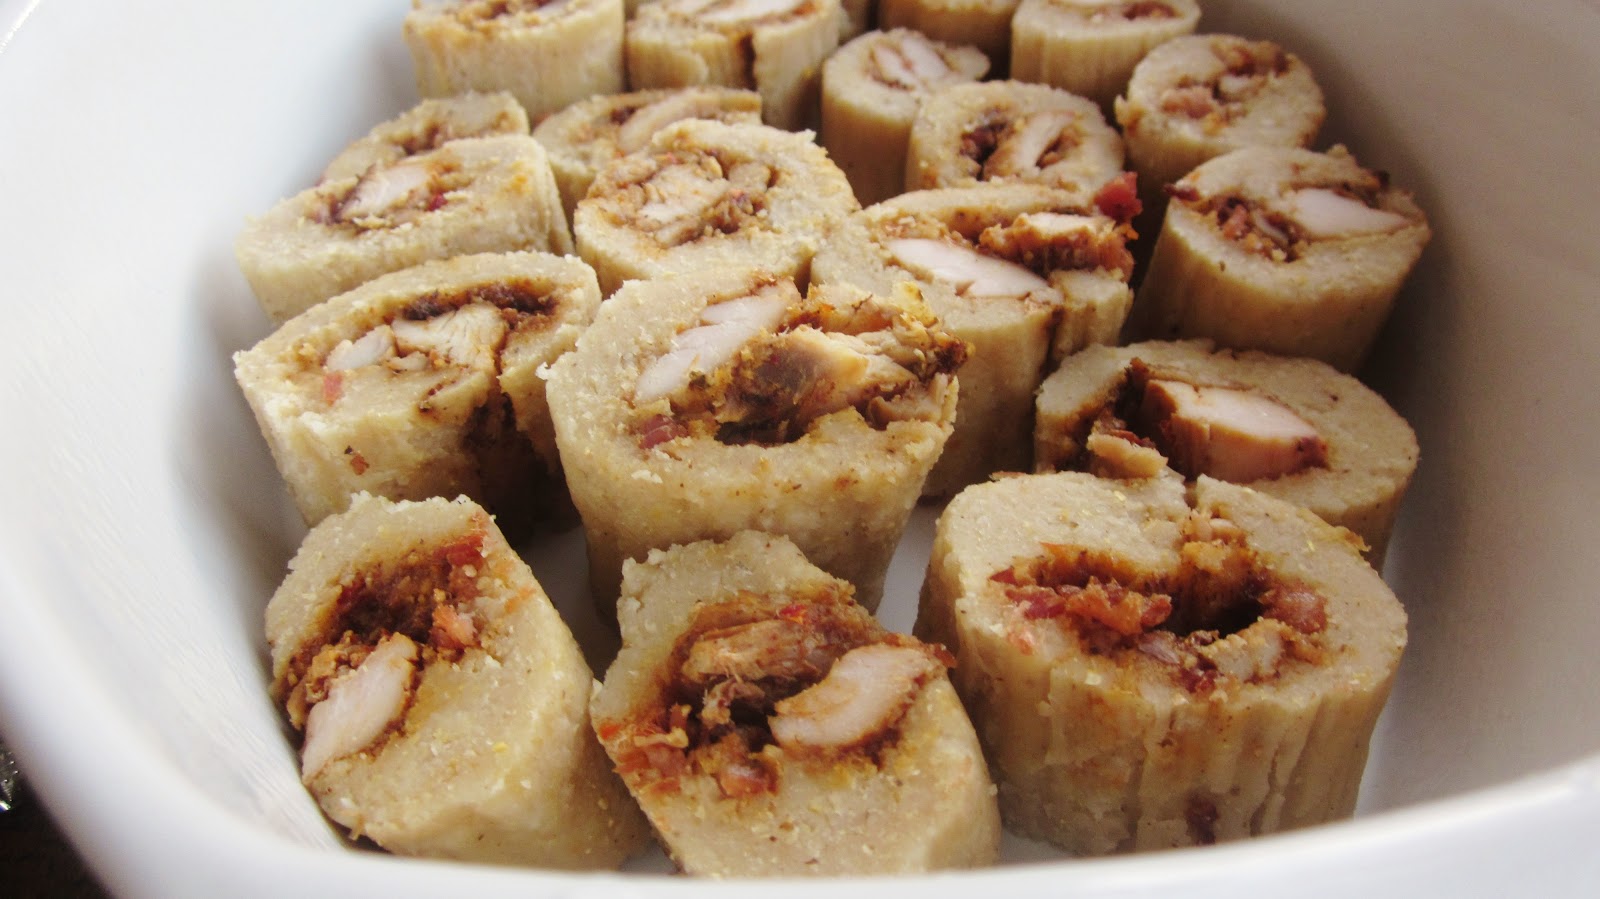
 I have a full tutorial on how to make Homemade Tamales here on the blog.   I'll be making some cheddar bacon tamales enchilada style with green sauce and jalapeno cilantro sour cream. 
We'll also be making some hot dips.  Today it will be  Jalapeño Popper Dip. The only change being that I will top it with bacon! Also...the ridiculously beautiful centerpiece ideas that will blow your mind including gingerbread mansions...
How do I build them in glass cookie jars though?
I'll post the full tutorial for the gingerbread house centerpieces soon.
There you go!
Always My Very Best,
Your Friend Chef Tess