Showing posts with label sandwiches. Show all posts

Monday, November 20, 2017

Good Morning Arizona! 3 Brilliant Ways to Use Thanksgiving Leftovers for Breakfast, Lunch and Dinner


Tomorrow morning I will be on Good Morning Arizona sharing 3 Brilliant ways to use Thanksgiving Leftovers for breakfast, lunch, and dinner! I'll be incorporating a lot of whole grain goodness from Organicgrains.com in this one because I not only have the honor of using their grains often in my baking as part of my regular job but also because I love them!
Breakfast: 

Puff Pastry (or Biscuit) Turkey Quiche Cups

1 package froze puff pastry*
8-10 oz cooked turkey, well seasoned
8 slices of bacon, sliced in 3 pieces (total 24 small pieces)
3 eggs, beat well
1/4 bell pepper, chopped fine
12 1 inch squares of Havarti or Swiss Cheese
Pepper to taste

Allow the puff pastry to come to room temperature and cut into 12 squares. Line the bottom of a muffin cup with the pastry up the edges.  Put pieces of bacon and bell pepper in each cup and top with a few chunks of turkey.  Fill cup with 1 Tablespoon scrambled egg. Put a nice little cheese top on the whole deal-eee-oh (no I really don't have a real technical jargon for the muffin thing-a-ma-gig...sorry.) Bake 425 degrees 13-15 minutes. Serve warm. Any leftovers need to go in the fridge. 
*Variations:
Low carb: Omit the puff pastry and spray the muffin tins well with a non-stick coating (or line with a cupcake liner).  Proceed with the recipe filling the cups as described. 
Biscuit: Use biscuit dough in place of the puff pastry dough.
Flavors: Change the seasoning using your favorite variety of fajita seasoning for a Southwest quiche, French herbs de Provance for a more classic flavor, Spinach to replace the bell pepper if desired. Play with these! 

Lunch:


Start with the Sweet Potato Bread...

The Sweet Potato Bread is my original recipe made in full in the Fall Sweet Potato Bread Tutorial with the embellishments and leaves.  Here, I'm just giving you the recipe for the plain loaves. 

Chef Tess' Sweet Potato 5 Day Bread Dough
yield: 4 loaves 
2T active dry yeast (over 3000 feet use 1 T only)
4 cups milk, cold is best 
3/4 cup honey Or Organic Maple SYRUP
1T salt
4 eggs (or 1 cup egg replacement)
3/4 cup oil
1 1/2 cup mashed sweet potatoes. cooled to body temp again. The consistency of thick oatmeal.
1T baking powder

 2T cinnamon, 
2tsp ground ginger and 
1T vanilla
2 cups Organic Grains Freshly Milled hard white wheat flour
12-14 cups  organic grains bread flour  (I have used fine ground white wheat and been fine doing all whole grain, use only 12-14 cups total if whole wheat is used )

Directions: Dissolve yeast in milk. Stir in honey. Allow yeast to get all foamy and look like it is having a hay day. Add egg, oil, mashed sweet potato, baking powder, 2 cups whole wheat flour, 2 cups all-purpose flour spices, vanilla, and salt, in that order. Do not let yeast come in contact with salt on its own or it will kill the yeast. Beat until smooth. Allow dough to rest 10-15 minutes
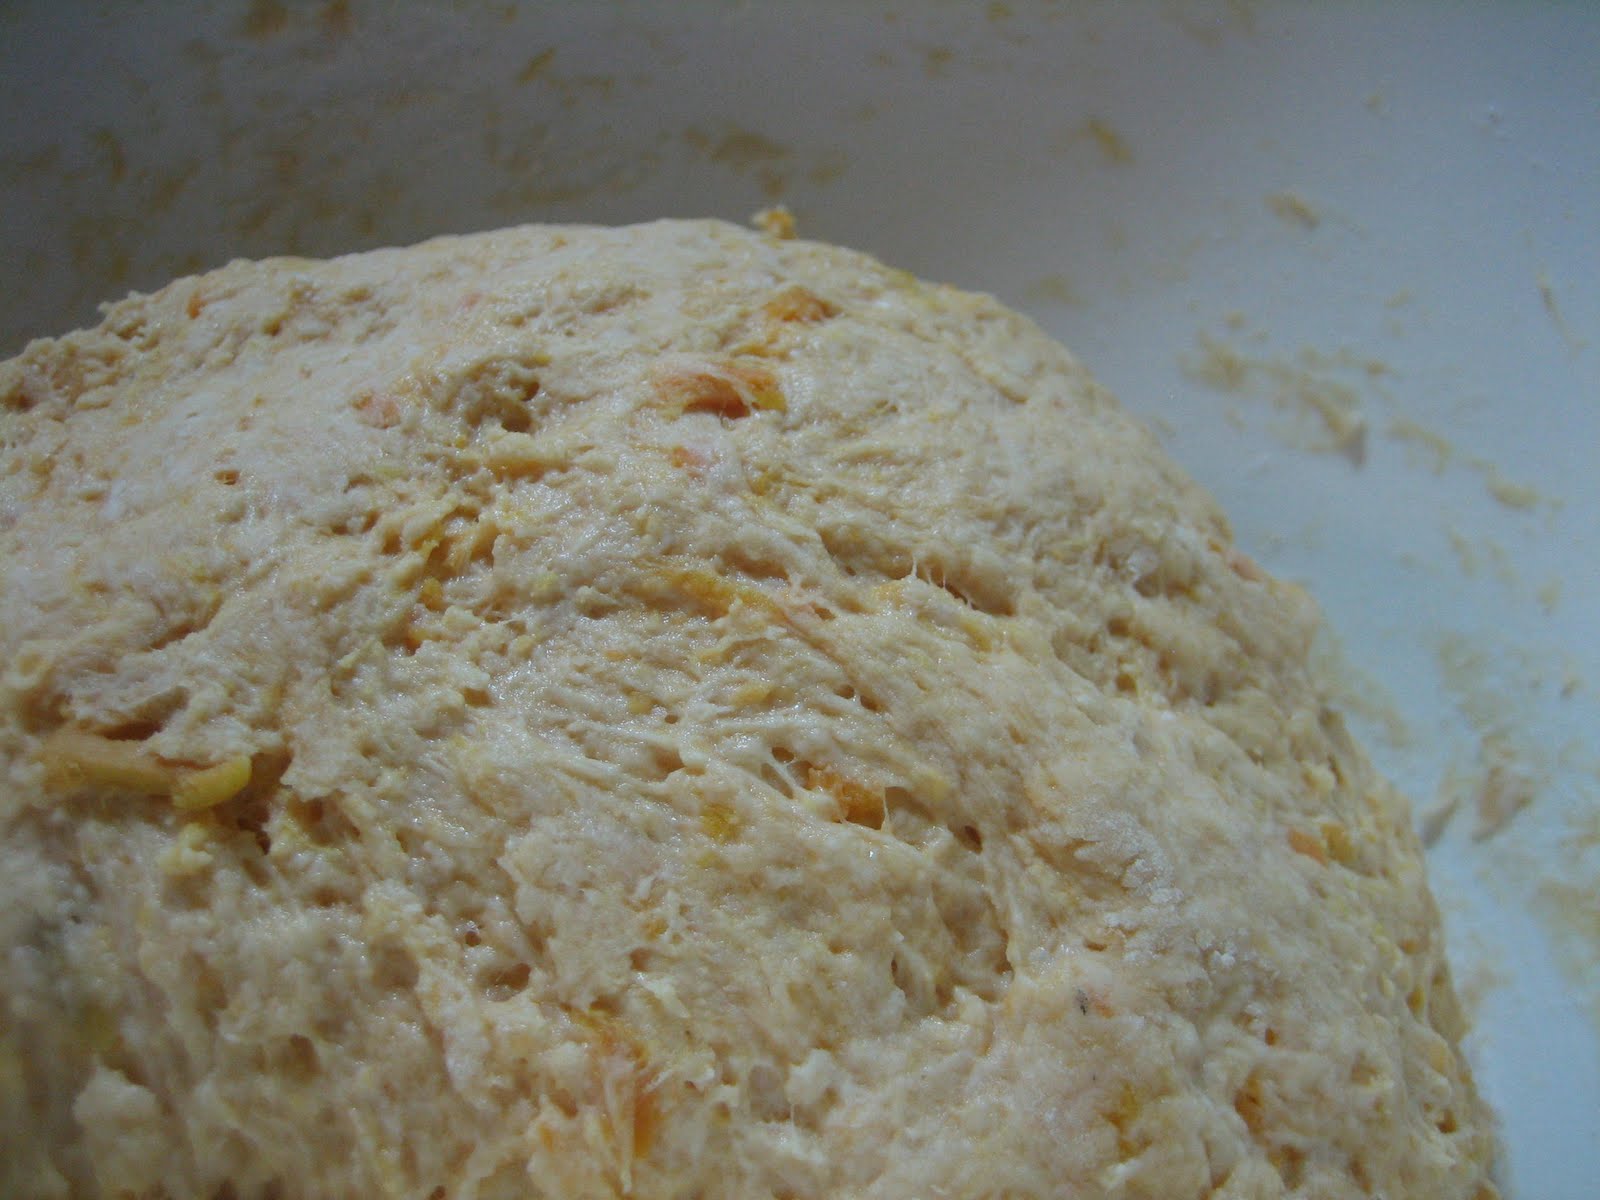
Add enough of the flour remaining to make a soft dough that is easy to handle but not dry. Turn dough onto a lightly floured surface and knead 10 full minutes. about 600 turns. Yea. 600 by hand. 5-6 minutes by machine on medium speed. Form into a ball and place in an ungreased 2 gallon bowl, covered tightly. If you don't have a large enough bowl...use two smaller bowls. Or...just half the recipe if you are worried. Put in the fridge. Punch down after 2 hours (this may be faster if you use warm ingredients or flour. If the dough is over 85 degrees when you put it in the fridge, be sure to punch down sooner. Also...if you have kids who open the fridge a lot, be sure to lower the temperature a bit so that your fridge is really as cold as it should be) Form into a ball again. Cover tightly and chill at least 8 hours.
Be sure to punch down daily (this not only expels gas, but also ensures even temperature in the dough). This dough can be made up to 5 days before Thanksgiving! So, it's nice to have around. It's also amazing to make into rolls instead of bread, should you choose to do something else. This makes four loaves. Four. I will only make one here, but you'll get the idea. Take one-quarter of the dough and roll it into a tight ball. I like to expel as much air as possible so it raises rather uniformly. Gather the dough at the bottom and make a tight ball out of the dough.
Place on a parchment lined baking stone or baking sheet, at least 12 inches by 10 inches. Allow to rise until doubled, uncovered, lightly misted with water. When almost raised, turn on the oven to 425 degrees.  Bake 425 degrees 15 minutes and lower the temperature to 350 for the final 15-20 minutes of baking.  Allow cooling. Slice and wrap tightly. 

To make into the Turkey Grilled Cheese simply place a slice of the well-seasoned turkey and 2-3 slices of sharp cheddar on a thick slice of the sweet potato bread. Grill on the stove in a medium skillet over medium heat with melted butter until golden and toasted.  Add a Tablespoon or two of cranberry relish and a drizzle of good balsamic. Garnish with minced fresh rosemary if desired.


Dinner: 
Marinara Turkey Sliders with Roasted Garlic 


Get your rolls.
In this recipe, I used the 4 Ingredient Make-Ahead-Rolls from Organicgrains.com. Or the Make-Ahead No Knead Cracked Wheat Dinner Rolls (pictured below).  If you're still looking for great roll recipes, these will save your brain power. 


You will need:
1 dozen baked rolls 
1 lb cooked turkey
1 cup roasted garlic
1 1/2 cups marinara sauce
12 slices mozzarella
1/2 cup Garlic infused Ahuacatlan Avocado Oil
1 cup parmesan cheese
Parsley, chopped (for garnish if desired)

Direction:
Cut a 1 1/2 inch circle out of the top crust of each roll and set aside. With each roll, remove a little of the soft interior or push it down with your thumb. 


In each roll, add 1 1/2 oz turkey, 2-3 pieces of roasted garlic, 2 Tbsp Marinara, and1 slice of mozzarella. Top with the circle of crust that was removed previously. Brush with garlic infused olive oil and sprinkle with parmesan cheese. Bake at 350° for 15-20 minutes. Serve hot. Garnish with chopped parsley if desired.


There you go! Make some awesome meals with all those Turkey leftovers!

Always My Very Best,
Your Friend Chef Tess


Saturday, September 24, 2016

Lemon and herb Roasted Turkey with Cheddar and Citrus Cranberry Sauce Grilled Cheese


Our next grilled cheese of glory for grown-up people who don't just want cheese and bread is this freakishly delicious concoction. It is basically a Thanksgiving feast between two slices of sweet potato bread from the Fall Sweet Potato Bread Tutorial. It really is a bread to keep on hand for the next several months.


Let's start with the relish. I think it is probably one of my all-time favorite recipes for Thanksgiving and we love it!
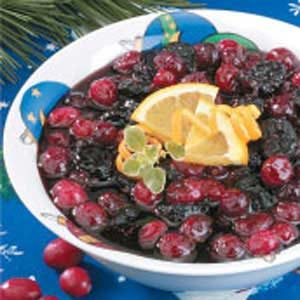
Teapot Cranberry Relish Photo from Taste of Home

The citrus cranberry relish is one that I adapted from a Taste of Home recipe found Here. I use orange juice concentrate, balsamic vinegar glaze and zest from orange and lemon to give it added flavor contrasts. I also love the addition of a hint of fennel seed. It gives the sauce a remarkable depth. If you make it for Thanksgiving, it is good in the fridge up to a month! Use it on Turkey sammiches yes, but it is also amazing in oatmeal (really?!), as an addition to muffins and cookies or as a relish for pot roasts and chicken.


Tess' Citrus Balsamic Cranberry Sauce
Ingredients:
  • 1 package (16 oz) fresh or  frozen cranberries
  • 2 cups brown sugar
  • 1/2 cup orange juice concentrate
  • 1/2 cup balsamic vinegar glaze  here
  • 2 cups dried cherries or apricots
  • 1 tsp grated orange zest
  • 1 tsp grated lemon zest
  • 1 tsp fennel seed, optional
Directions:   In a large saucepan, cook the cranberries, sugar, juice and balsamic glaze over medium heat until the berries pop, about 15-20 minutes. Add the remaining ingredients and simmer uncovered for 10 minutes. Cool slightly and transfer to quart jar and cover with a lid.  Good in the fridge up to 1 month.  

Let's talk Turkey. Seriously. This has to be right.
Ina Gartner's Herb Roasted Turkey photo from Food Network.com
I don't mess with perfection on the turkey and my go-to the last few years has been the tutorial posted by Ina Gartner in 2008. Always perfect. Always flavorful. Would we expect anything less from Ina? She's one of my all-time favorite chefs.  Get her Printable Recipe  and you can also watch the full tutorial here
For the Grown-up grilled cheese...
Place 1-2 slices of warm turkey breast (above) on a slice of sweet potato bread. Top with 2 slices of sharp cheddar cheese. Add 1-2 Tablespoons of the citrus cranberry sauce.  Grill in a skillet  with a few tablespoons of olive oil or butter over medium heat until cheese is melted and bread is golden brown.  Server warm.
There you go darlings! A wicked delicious sandwich for fall! Use both the recipes for the components for your Thanksgiving dinner too! 
Always My Very Best,
Your Friend Chef Tess

Wednesday, August 31, 2016

Yankee Rosemary Pot Roast and Swiss Grilled cheese on Sweet Potato bread


This is by and far one of the most delicious celebrations of opposites you will ever put in your mouth! The sweet and the savory intermingled into an explosion of flavors that can only be described as "The Ultimate Fall Sammich". Yup. September is upon us and I am finally giving in to the impulse to actually bake again at home! All hail the Sweet Potato Bread! Fall Sweet Potato Bread is one that has been a classic here on the blog for many years!  I served this sandwich variation at the Bistro regularly and it always had people begging for more! The slightly sweet soft spiced bread wraps around a tender herbaceous hunk of pot roast that is drenched in a rosemary gravy of glory!!

 This post will be two posts in one...the Yankee Rosemary Pot Roast Recipe, and the Sweet Potato bread. That way you can decide if you want to just make the roast, or just the bread...but either way, be prepared for bliss! 

This is a variation of the original post of Jan D'Atri's Cola Braised Pot Roast. My variation is designed to bode well for this sandwich. It has more garlic, rosemary, onion and beefy goodness! Here's where to start...


Chef Tess' Rosemary Yankee Pot Roast
 Ingredients:
4-5 pound boneless chuck roast or rump roast
2 tablespoons vegetable oil
2 large sweet yellow onion, diced and sautéed
3 Tablespoons FRESH garlic, minced
1 Tablespoon beef bullion (non-msg)
1 Tablespoon  black pepper
1 Tablespoon fresh rosemary, minced
2 cups beef broth
1 (12 oz) can cola (I used Blue Sky All Natural Soda)
2 tablespoons organic tomato paste
2 tablespoons flour

Directions:
Season the roast on all sides by sprinkling with bullion powder and  pepper over the entire roast. Sautee diced onion in a little oil until golden brown and set aside. Heat a Dutch oven on high heat and add oil. When oil is hot,  place roast in pot and cook until browned on all sides.  Add beef broth, cola, garlic, sautéed onion,  and remaining teaspoon of salt. Bring to boil, stirring to release browned bits.  Add tomato paste and stir.  For crock-pot cooking method, transfer meat and juices to crock-pot and cook on high for about 4-5 hours (or until fork tender) or cook overnight in crock-pot on low heat. For oven method, cover Dutch oven and cook at 325 degrees in the oven for 3 1/2 hours. Liquid should be at least 1/3 of the way up the roast. Add more beef broth if necessary. At the end of cooking, sprinkle with fresh rosemary.
To make gravy: Remove roast from pot and keep warm. Pour beef liquid through a strainer to catch onion bits, mash through and then discard remaining onions. In a bowl, add 1/2-cup hot beef liquid to  2 tablespoons of flour. Whisk to combine eliminating lumps.  Slowly whisk mixture into the remaining liquid on the pot. Whisk frequently until mixture comes to a boil. Cook for another 5 minutes or until sauce thickens. Serve roast with hot gravy.

The Sweet Potato Bread is my original recipe made in full in the Fall Sweet Potato Bread Tutorial with the embellishments and leaves.  Here, I'm just giving you the recipe for the plain loaves. 

Chef Tess' Sweet Potato 5 Day Bread Dough
yield: 4 loaves 
2T active dry yeast (over 3000 feet use 1 T only)
4 cups milk, cold is best (cold soy milk is wonderful!)
3/4 cup honey Or Organic Maple SYRUP
1T salt
4 eggs (or 1 cup egg replacement)
3/4 cup oil
1 1/2 cup mashed sweet potatoes. cooled to body temp again. The consistency of thick oatmeal.
1T baking powder

 2T cinnamon, 
2tsp ground ginger and 
1T vanilla
2 cups whole wheat flour
12-14 cups all purpose flour (I have used fine ground white wheat and been fine doing all whole grain, use only 12-14 cups total if whole wheat is used )

Directions: Dissolve yeast in milk. Stir in honey. Allow yeast to get all foamy and look like it is having a hay day. Add egg, oil, mashed sweet potato, baking powder, 2 cups whole wheat flour, 2 cups all purpose flour  spices, vanilla and salt, in that order. Do not let yeast come in contact with salt on it's own or it will kill the yeast. Beat until smooth. Allow dough to rest 10-15 minutes
Add enough of the flour remaining to make a soft dough that is easy to handle but not dry. Turn dough onto a lightly floured surface and knead 10 full minutes. about 600 turns. Yea. 600 by hand. 5-6 minutes by machine on medium speed. Form into a ball and place in an ungreased 2 gallon bowl, covered tightly. If you don't have a large enough bowl...use two smaller bowls. Or...just half the recipe if you are worried. Put in the fridge. Punch down after 2 hours (this may be faster if you use warm ingredients or flour. If the dough is over 85 degrees when you put it in the fridge, be sure to punch down sooner. Also...if you have kids who open the fridge a lot, be sure to lower the temperature a bit so that your fridge is really as cold as it should be) Form into a ball again. Cover tightly and chill at least 8 hours.
Be sure to punch down daily (this not only expels gas, but also ensures even temperature in the dough). This dough can be made up to 5 days before Thanksgiving! So, it's nice to have around. It's also amazing to make into rolls instead of bread, should you choose to do something else. This makes four loaves. Four.
I will only make one here, but you'll get the idea.

Take one quarter of the dough and roll it into a tight ball.
I like to expel as much air as possible so it raises rather uniformly.
Gather the dough at the bottom and make a tight ball out of the dough.
Place on a parchment lined baking stone or baking sheet, at least 12 inches by 10 inches. Allow to raise until doubled, uncovered, lightly misted with water. When almost raised, turn on the oven to 425 degrees.  Bake 425 degrees 15 minutes and lower the temperature to 350 for the final 15-20 minutes of baking.  Allow to cool. Slice and wrap tightly. 

To make into the Yankee Rosemary Pot Roast and Swiss Grilled Cheese simply place a slice of the warm pot roast and 2-3 slices of Swiss cheese on a thick slice of the sweet potato bread. Grill on the stove in a medium skillet over medium heat with melted butter until golden and toasted . Garnish with minced fresh rosemary if desired.

There you go darlings! 
A wicked sandwich for Fall!


Always My Very Best,

Your Friend Chef Tess


Monday, August 15, 2016

Caramelized Onion Bacon Jam for Grilled Cheese Bliss


  In 2011 I posted this insane "delush" recipe here on the blog for Caramelized Onion Shallot Jam with Black Pepper and Shallots and it was an instant classic here at my house and with my catering/personal chef customers! Everyone loved it and I used it for a lot of things!  Adding Bacon and adjusting the seasoning for a savory sweet and smoky combination has been almost too amazing for human understanding. Yet here we are.One of my all time favorite sandwiches is  Ham and Swiss with Bacon Jam grilled to perfection. The sweet and smoky jam is a delightfully tart and savory flavor explosion. It is a fantastic balance combined with the nutty Swiss cheese and the salty-smoky ham.

So...what is the secret to awesome onion jam? It starts with good onions and shallots. I look for shallots to go on sale at the dollar store near my house and sometimes I get lucky.  Add this jam to your list of things that "freeze beautifully". The addition of bacon makes it so it cannot be home canned because of the high fat content, but that has never stopped me from putting it in half-pint jars with 1 inch headspace and popping the jars in the freezer!  The recipe calls for lemon infused olive oil. If you can't find it at your local grocery store, you can add 1T fresh fine minced lemon zest to your jam. This adds a brightness to the flavor profile that will really delight! I've found the addition of the fennel and the black pepper to be what really sets this jam apart from other recipes...in an addictive can't-live-without-it kind of way.

Unlike the first onion jam recipe I did here on the blog, this recipe does not employ the use of sure-jell. The bacon actually helps to absorb the excess moisture and gives you a really thick jam if done correctly.

Tess' Bacon and Onion Balsamic Jam
Yield 6 pints (12 cups)
Ingredients:
3 lbs of red onions, minced
3 lbs white or yellow onions, minced
1/2 lb peeled shallots, minced
1 lb bacon crumbles (pre-cooked works great)
1/4 cup lemon infused olive oil
1 1/4 cup balsamic vinegar
6 cups sugar
1 cup honey
2T sea salt
1T fennel seed
2T cracked fresh pepper
4 bay leaves


Procedure:
Mince onions and shallots.

In a two gallon pot, caramelize bacon in the olive oil until dark brown. Add the onions and shallots and stir.


Put all the ding-a-dang happy seasonings of joy in the pot with the onions and bacon. Give it a stir and then...talk about bacon and boys. It takes a good 20 minutes of sweating the onions before you add the vinegar.


Sweat. Sweat. Sweat.

Now. once the onions are translucent looking...add the vinegar, sugar, honey and bay leaves. Simmer...


 Simmer 20-30 minutes over low heat.
Transfer to fridge, covered and cooled. It will thicken as it cools.  Transfer to half-pint jars. This will yield 12 jars.

For grilled cheese, spread a generous amount on bread, top with 2-3 slices of cheese and top with bread. Grill in a lightly oiled pan over medium heat until bread is golden brown and cheese is melted.
Serve warm.


There you go darlings! Make something wicked!

Always My Very Best,
Your Friend Chef Tess


Friday, August 12, 2016

Bistro Style Chilled Steak Salad Sandwiches with Creamy Horseradish


As many of you know, I am no longer working as the Executive Chef at the Bistro. I was there for 18 months and I loved it, but it was time to move onward. My kids needed me home more and I had some pressing personal issues that needed to be addressed. 

The new chef has changed the menu quite a bit to fit his own style, as he should. Greg is actually a rather brilliant chef and I truly loved working along side him when he was my Sous Chef.  When I left they really didn't announce the change. I was sad to go. I cried buckets of tears. I didn't really say much here about the change either. I have since moved on, but will look back on the bistro days with fondness. It was a remarkable experience. I love them all. Seriously.

The early classics that I had there are no longer available for ordering.  I get emails and messages on facebook almost daily, even though I haven't been at the bistro for over six months asking when I will be back and if not, can I at least share the recipes on my blog.  Though I don't think I can share the exact recipes that I used in the bistro, I will share ones that are close.

One favorite was the Roasted Sirloin Beef Salad Sandwich on a house-made tomato basil baguette.  The bread was my recipe that I've shared here on the blog. It is a simple no-knead artisan dough that pretty much anyone can make with very little effort. 

 6 ingredient Tomato and Herb No Knead Bread Anyone Can Make

The chilled steak salad was a great way for us to utilize filet mignon that we had overage of from the catering events and sell in the bistro.  This was beef that had not been served to guests, but rather was held in reserve at the banquet events. Sometimes there would be more beef on-hand than we needed and it was still good. We'd chill it immediately to keep it safe for consumption later, and then we'd mix it to make the chilled Steak salad. It is a delightfully refreshing salad. I was at first, a little nervous about how my guests would react to a cold steak salad, but it was well received.  

There's a nice infusion of fresh herb, garlic and a touch of creamy horseradish to add just the right amount of kick.  We served it with fresh arugula micro-greens and edible orchids drizzled with a tart-sweet balsamic glaze ( Here).


Tess Steak Salad Sandwich Spread
2 pound filet mignon or sirloin, roasted or grilled to medium-rare, cooled and diced
1/4 cup minced  fresh parsley
2Tbsp minced fresh thyme
1 Tbsp minced fresh rosemary
2Tbsp minced garlic
1tsp Chef Tess All Purpose Seasoning (online here)
1 ½ cups Mayonnaise
3/4 cup red onion, minced
1T horseradish
Salt And Pepper, to taste

Procedure:
Combine ingredients, adjusting quantities to taste. Be sure to add enough salt and pepper.
Keep refrigerated until you need it. Spread on toasted wheat bread or serve as a salad on a piece of Romaine lettuce.

There you go! An awesome chilled salad for the hot summer days still ahead of us!

Onward and Upward my darlings!

Always My Very Best,
Your Friend Chef Tess


Wednesday, August 11, 2010

More Back to School and Work Brown Bag Lunch Ideas

Well, my lovelies. I promised some zany fun new ideas to stuff in your lame boring lunch boxes to add pizazz to the hum-drum life. Decidedly...we have some winner ideas already. I have a lot of vegetarians and meat eaters who read my blog. I'm torn sometimes. I love to please everyone. However, I've found, that it is possible to try to please everyone and end up pleasing nobody. So...I will write to please myself as a mom who has a vegetarian husband and two very meaty sons who crave a beast sometimes. I'm not against using meat sparingly and with thanksgiving for the blessing, it is to us. As promised...here are a few things we do around here to keep it real, lower fat, whole homemade and delicious. I hope you use what you can and that it saves you some real cash at the grocery store.

Brown Bag Lunch Ideas
I'm a freaking' huge fan of just using leftover pizza and freezing it by the slice. If the crust is whole grain and the topping are insanely loaded with flavor and dynamics...pizza is sure to please. I don't consider this a "groundbreaking" new concept. However, it is one worth mentioning. My favorite for vegetarians is the Cool Ranch Veggie Pizza.


Pizza Muffin Bites work in all flavors and styles. If you missed them...you really should spend more time with me. I know...it's sick how much I want you here isn't it?


Remember the Stuffed breadsticks ?! Today we have a gorgeous pineapple upside down and outside in breakfast version. Thanks to Lisa for a smackdown in the Evil Think Tank AKA the ETT

Lisa's Pineapple Outside-in breadsticks
2 cups crushed pineapple, drained.
1/2 cup brown sugar
Boil for 10 minutes in a medium saucepan until thick.
Add:
2T raisins
1 cup coconut
1/2 cup slivered almonds
1 tsp vanilla bean paste
1/2 tsp ground ginger
Stuff bread sticks, raise and bake as you would with Chocolate Peanut Butter Stuffed Breadsticks .


Or stuff with cooked maple flavored breakfast sausage, a few pieces of dry apple and a little chopped green onion.


Marinated Mushroom and olives Hot Pockets 

I use this amazing marinated mixture:

1/2 cup chopped Italian olives of your choice
1/2 cup shredded Romano cheese
1 cup chopped baby portabello mushrooms
1/4 cup high-quality balsamic vinegar
1/4 cup olive oil
1/4 cup chopped fresh basil
1 pressed fresh garlic clove
1 tsp crushed fennel seeds

Raise and bake as you would the hot pockets. This last time we did the mushroom mixture but also added a few cooked Italian Meatballs.


Grilled Zucchini-Roni Sandwiches 
A lot of times we will use zucchini slices in place of the mushrooms and grill the slices on a grill pan before slapping them on a heaven delicious grilled zucchini-roni sandwich.


Hoagie Sandwiches

I will also prepare a lot of hoagie sandwiches ahead of time and freeze the mini subs in sandwich bags (inside gallon size freezer bags). These clearly labeled make excellent lunches not only for my kids, but for my in-laws who don't cook a lot and need some extra meals.


Hot Dogs and Veggie Dogs
I do the same thing with hot dogs...well homemade veggie dogs where I prepare them ahead.One dog in a bun and wrapped in a cool hot dog wrapper in a freezer bag. The wrappers I get at a restaurant supply store, but I've seen them at Target.  This is my favorite way to stock the lunch box with something other kids don't get...the carnival wrapper! Rock on mom!  Kids like them cold with ketchup, however, mine have access to a microwave at school so 1 minute heats it and it's ready to go.


Chicken Pizza Subs 


The chicken pizza boat sub is a "must have" at my house. I make them 6-footlongs (cut into thirds) and bag them one at a time in sandwich bags. 18 lunches...super fast!
Combine:
2 lb cooked chicken breast, chopped
1/2 cup sundried Tomato Pesto from the solar oven
1/2 cup Homemade Ranch Dressing
4-8 oz pepperoni or veggie sausage recipe from the homemade Veggie Dogs (Seitan)
2 slices of cheese (your choice) per sub sandwich.

Once defrosted, it takes on 30 seconds in the microwave to have meaty good lunch.

There you go. Hopefully, that gives you some more awesome ideas for quick lunches!

Always My Very Best,
Your Friend Chef Tess