Showing posts with label okra. Show all posts

Thursday, October 4, 2012

More Meals in a Jar Variations. Oh...and Regional Foods of America Cooking Class Notes and Recipes!

Today I'm guest posting on Honeyville Farm's Blog with two new meal in a jar variations on the Vegetarian Meals in a Jar Base Recipe that we posted on Tuesday. It is sweeeet! 
I'm sharing these:

Classic Pasta Primavera
and a Chinese Noodle Wok 

Brace yourselves for this though...

 Yesterday I took a trip back to 4th grade and visited my son's class for some very cool lessons on regional foods of America. In handing my son the camera, I got to see some pretty cool perspectives. One that caught my attention in particular was how great he did at capturing the unique look of okra! Well done my darling boy! You're a natural!  He also caught a few of my apron with my head cut off...but I adored that too! I don't get to see life through the eyes of a 4th grader on a short plastic chair very often and it made me giggle like a geek. Yes. I was a geek in school back-in-the-day. No. I don't want to show you pictures of that awkward stage. 


I borrowed a Regional Foods of America Lesson Plan that was pretty good! 

We made some Gumbo with the fresh okra that I adapted into a just add water meal using my favorite Paula Deen Gumbo Recipe. Yes. That will be our next meal in a jar (minus the okra...I can't find it freeze dried and that's probably good because I'd eat it like popcorn!). 

We talked about grain and how the early settlers used a lot of sourdough to make their breads with simple Homemade Sourdough Starter. 
We ate some Maple Sourdough Ginger Cake with Maple Glaze
We also got the kids learning about "staple foods" like corn!
Have you ever seen a 4th grader try to make some Jimmy-Cracked-Corn? 

Oh...and we had fun with some Johnny Cakes. 

Just to make sure you have it all in one place, I'm giving you my class recipes. Plus, I just have to say that my son's teacher is adorable! I love being able to teach the kids! Thank you Chandra!  Chandra's mom was there too...and I can't tell you how nerveous I was teaching food history with a real history teacher in the classroom! Yikes.


Regional Foods of America Recipes for Face's 4th Grade Class

New England Boiled Dinner
Recipe Courtesy of James Beard 1965

5 pounds corned brisket of beef
6 peppercorns
Cold water to cover
1/2 pound salt pork
3 parsnips, cubed
6 carrots, scraped and cubed
2 cups cubed rutabaga, or 6 small white turnips, peeled
8 small white onions, peeled
6 medium potatoes, quartered
4-6 wedges green cabbage
Chopped parsley
Melted butter
Place the corned beef in a kettle, add the peppercorns and cold water, cover, bring to a boil and simmer 4-5 hours or until the meat is tender, skimming occasionally. Remove meat and keep in warm place. Add the salt pork (in one piece), parsnips, carrots, rutabaga or turnips, onions and potatoes. Cook 30 minutes. Add cabbage wedges during the last 10 or 15 minutes and cook just until tender. Place the meat on platter and surround with the vegetables. Blend parsley with melted butter and spoon over vegetables. Discard salt pork, but save stock for a pot-au-feu or other stew.
Tess' Johnny Cakes Mix
4 cups cornmeal
4 cups whole wheat flour (I use fresh milled soft wheat)
1/2 cup sugar or granulated fructose
1/3 cup baking powder
1T salt
1 cup nonfat milk powder
Directions: Combine all dry ingredients.
To cook:Combine 2 cups mix with 1 cup water for waffles. Pancakes: 2 cups mix and 1 1/4 cup water (more or less for thicker or thinner pancakes.

Gumbo recipe courtesy Paula Deen

3 large boneless skinless chicken breast halves
Salt and pepper
1/4 cup vegetable oil
1 pound smoked sausage, cut into 1/4-inch slices
1/2 cup all-purpose flour
5 tablespoons margarine
1 large onion, chopped
8 cloves garlic minced
1 green bell pepper, seeded and chopped
3 stalks celery chopped
1/4 cup Worcestershire sauce
1/4 bunch flat leaf parsley, stems and leaves, coarsely chopped, plus chopped leaves for garnish
4 cups hot water
5 beef bouillon cubes
1 (14-ounce can) stewed tomatoes with juice
2 cups frozen sliced okra
4 green onions, sliced, white and green parts
1/2 pound small shrimp, peeled, deveined and cooked

Directions: Season the chicken with salt and pepper. Heat the oil in a heavy bottomed Dutch oven over medium-high heat. Cook the chicken until browned on both sides and remove. Add the sausage and cook until browned, then remove. Sprinkle the flour over the oil, add 2 tablespoons of margarine and cook over medium heat, stirring constantly, until brown, about 10 minutes. Let the roux cool.
Return the Dutch oven to low heat and melt the remaining 3 tablespoons margarine. Add the onion, garlic, green pepper and celery and cook for 10 minutes. Add Worcestershire sauce, salt and pepper, to taste and the 1/4 bunch parsley. Cook, while stirring frequently, for 10 minutes. Add 4 cups hot water and bouillon cubes, whisking constantly. Add the chicken and sausage. Bring to a boil, then reduce the heat, cover, and simmer for 45 minutes. Add tomatoes and okra. Cover and simmer for 1 hour. Just before serving add the green onions, shrimp and chopped parsley.

Alaskan Sourdough Maple Ginger Cake
Dry ingredient mix:
1/2 cup dehydrated honey or brown sugar
2T dehydrated egg powder
1 1/2 cups whole wheat cake flour
1 tsp baking soda
1/2 tsp salt
1T Chef Tess Wise Woman of the East Spice Blend (OR 1 tsp cinnamon, 1 tsp ground ginger, 1/4 tsp ground clove, 1/4 tsp ground nutmeg)
To bake combine:
1/2 cup vegetable oil
1/2 cup pure maple syrup
1 cup Chef Tess Homemade Sourdough Starter
Preheat oven to 375 degrees. Grease and flour a nine inch by nine inch cake pan. Combine the dry ingredient mix. Combine the wet ingredient mixture. Mix the wet and the dry ingredients together, beating about 100 strokes by hand. Pour into prepared pan and bake 30-35 minutes or until a toothpick inserted into the cake comes out clean. While cake is warm, top with the maple glaze.
Maple Glaze:
2 cups organic powdered sugar
1/3 cup maple syrup
1T melted butter
1tsp Wise Woman of the East Spice Blend
Heat maple syrup and butter together until just boiling. Stir in powdered sugar and spice blend.
Remove from heat and use immediately on the cake.

©2009 http://cheftessbakeresse.blogspot.com Chef Stephanie Petersen. stephanie@cheftessbakeresse.com ChefTess on Facebook and Twitter.


There you go. 
Have some fun with regional foods! I know I did!

Always My Very Best,
Your Friend Chef Tess


Tuesday, June 14, 2011

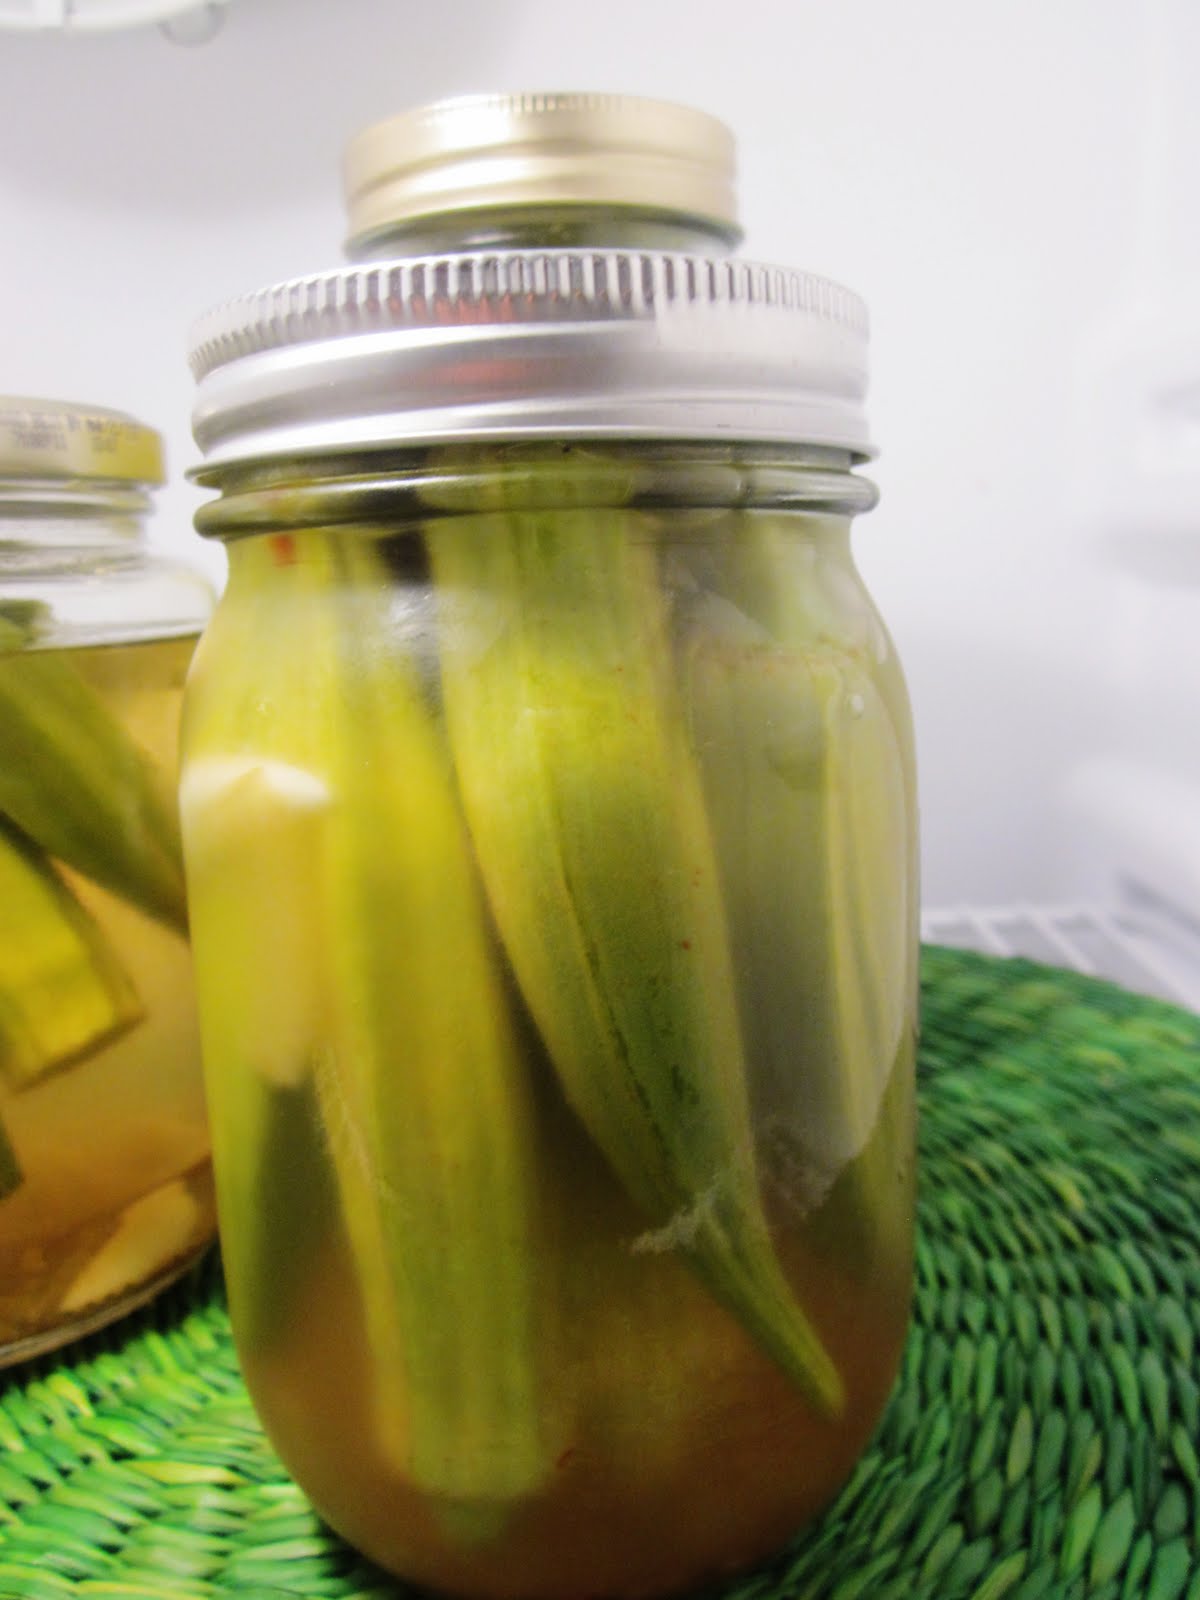
Pickled Okra-Ooo-la-la


 I mentioned that we've been having some new organic farming adventures! I'm always the one who says, "Try something new"...but I have to confess...okra was not high on my list.  I never ate it growing up in my family. We never raised it in any of our many giant and fruitful gardens.  Dad didn't seem to think we needed it and mom didn't like it.  So...there it is.  So, when we were handed some in a beautiful shining paper bag...I decided I needed to say, " I dare say I need to post what we did with the okra that we gathered from Love Grows Farms!" Because...I've been eating it like crazy! Krista, the greenhouse manager and farming sweetheart gathered these for me.  This is what she showed me.   First, when harvesting okra, you want to gather it when it is still very young and tender.  The seeds should not get big like this one (below). In fact, she said this one will be fed to the goats.


Then she gave us some okra to play with. My boys ate it raw right from the bag! They thought it was awesome! Of course,  my husband Ace said, "they have also been out in the sun for a long time."  Ace, who is normally a veggie guy... not impressed by okra. He may never be impressed. Just like me and parsnips who may never find a common ground. Or  Tara and raisins (she calls them "the Devil")...ya know. Everyone has an opinion. I'm okay with that.  


 However...I think I have found my new favorite okra-song!

PicKleD OkRa! 
Krista at the farm said, "okay, it's pretty good pickled if you want to try it. "
 Who am I to *not* be at least  willing  to try it! Just once. So...I did.


I followed the recipe below, but instead of processing them in the heat (which seems to draw out the slime texture), I simply made the brine, added the okra, tightened the lids and then put in the fridge.  7-10 days later, we had the most delightful little garlic "niblets" of okra I've ever had! However, should you need to actually keep them on the shelf at room temperature, you'll need to follow the directions for processing the jars. 


Gourmet  | November 2003; originally published November 1982
ingredients

  • 1 pound okra (3 1/2 to 4 inches long)

  • 6 garlic cloves, peeled


  • 3 cups cider vinegar (24 fluid ounces)

  • 1 cup water

  • 1/2 teaspoon dried hot red pepper flakes

  • 1 1/2 tablespoons dill seeds

  • 1 tablespoon mustard seeds

  • 1 1/2 tablespoons kosher salt

  • 1 tablespoon sugar


  • Special equipment: 6 (1/2-pt) canning jars with screw bands and lids; an instant-read or candy thermometer.


    preparation

    Sterilize jars and lids:
    Wash jars, screw bands, and lids in hot, soapy water, then rinse well. Dry screw bands.
    Put jars on a rack in a boiling-water canner or a deep 8- to 10-quart pot and add enough hot water to cover by 2 inches. Bring to a boil, covered with lid, and boil 10 minutes. Heat lids in water to cover in a small saucepan until thermometer registers 180°F (do not let boil). Keep jars and lids submerged in hot water, covered, until ready to use.
    Make pickled okra:
    Drain jars upside down on a clean kitchen towel 1 minute. Tightly pack jars with okra, stem ends up, then put 1 garlic clove in each jar.
    Bring remaining ingredients to a boil in a 2-quart nonreactive saucepan, stirring until sugar and salt are dissolved. Divide pickling liquid evenly among jars, leaving 1/4-inch space at top, then run a thin knife between okra and jar.
    Seal and process jars:
    Wipe off rims of filled jars with a clean damp kitchen towel, then firmly screw on lids with screw bands.
    Put sealed jars on rack in canner or pot and add enough hot water to cover by 2 inches. Bring to a boil, covered. Boil pickles, covered, 10 minutes, then transfer jars with tongs to a towel-lined surface to cool. Jars will seal (if you hear a ping, that signals that the vacuum formed at the top has made the lid concave).
    After jars have cooled 12 to 24 hours, press center of each lid to check that it's concave, then remove screw band and try to lift lid with your fingertips. If you can't, the lid has a good seal.
    Let pickled okra stand in jars at least 1 day for flavors to develop.

    There you go! Pickled Okra!