Showing posts with label tutorial Tuesday. Show all posts

Monday, October 6, 2014

Easy 4 Ingredient Homemade Cake Fondant


Recently I taught a class on how to make rolled fondant for cakes and I wanted to share the recipes here on the blog for those who were unable to attend the class. It is really not very difficult to make and tastes a ton better than the stuff in a box, plus it costs a heck-of-a-lot less! We made two varieties, one traditional and one using marshmallows. Both were delicious! My favorite for ease and flavor was by and far the one based on marshmallows. I think a lot of people will be surprised to see how inexpensive it is to make. For around $1 a lb to make compared to up to $10 a pound pre-made and packaged. That adds up quickly when you're frosting a large cake!


My  4 Ingredient Easy Homemade Rolled Fondant
Adapted from the Cake Boss (here)
  • 16 oz marshmallows, mini
  • 2lb powdered sugar
  • 1Tbsp corn syrup
  • 2 tsp natural flavored oil or flavor extract (here)
Directions: Grease a large wooden spoon or silicon spatula with oil.  Transfer to a plastic bag and cover tightly until ready to use, allowing to rest at least 5 hours.


Melt marshmallow in microwave for about 2 minutes in a large glass bowl. Yes.  I used a microwave. It is just fast and easy. If you want to melt it on the stove, you can do that as well, but it will take about 5 minutes and you'll need to stir it constantly. 
 Add the corn syrup and flavor along with a gradual addition of the sugar, stirring until the sugar is assimilated.
 When dough becomes too stiff to knead by spoon, transfer to a well oiled counter top and knead 5 minutes until smooth. I had to add a little more oil to the surface about half way through kneading.  Some folks have been saying that this can be done by machine, but I've not found a machine strong enough to handle it for home use. The larger commercial bakery mixer will work if you have access to them. 


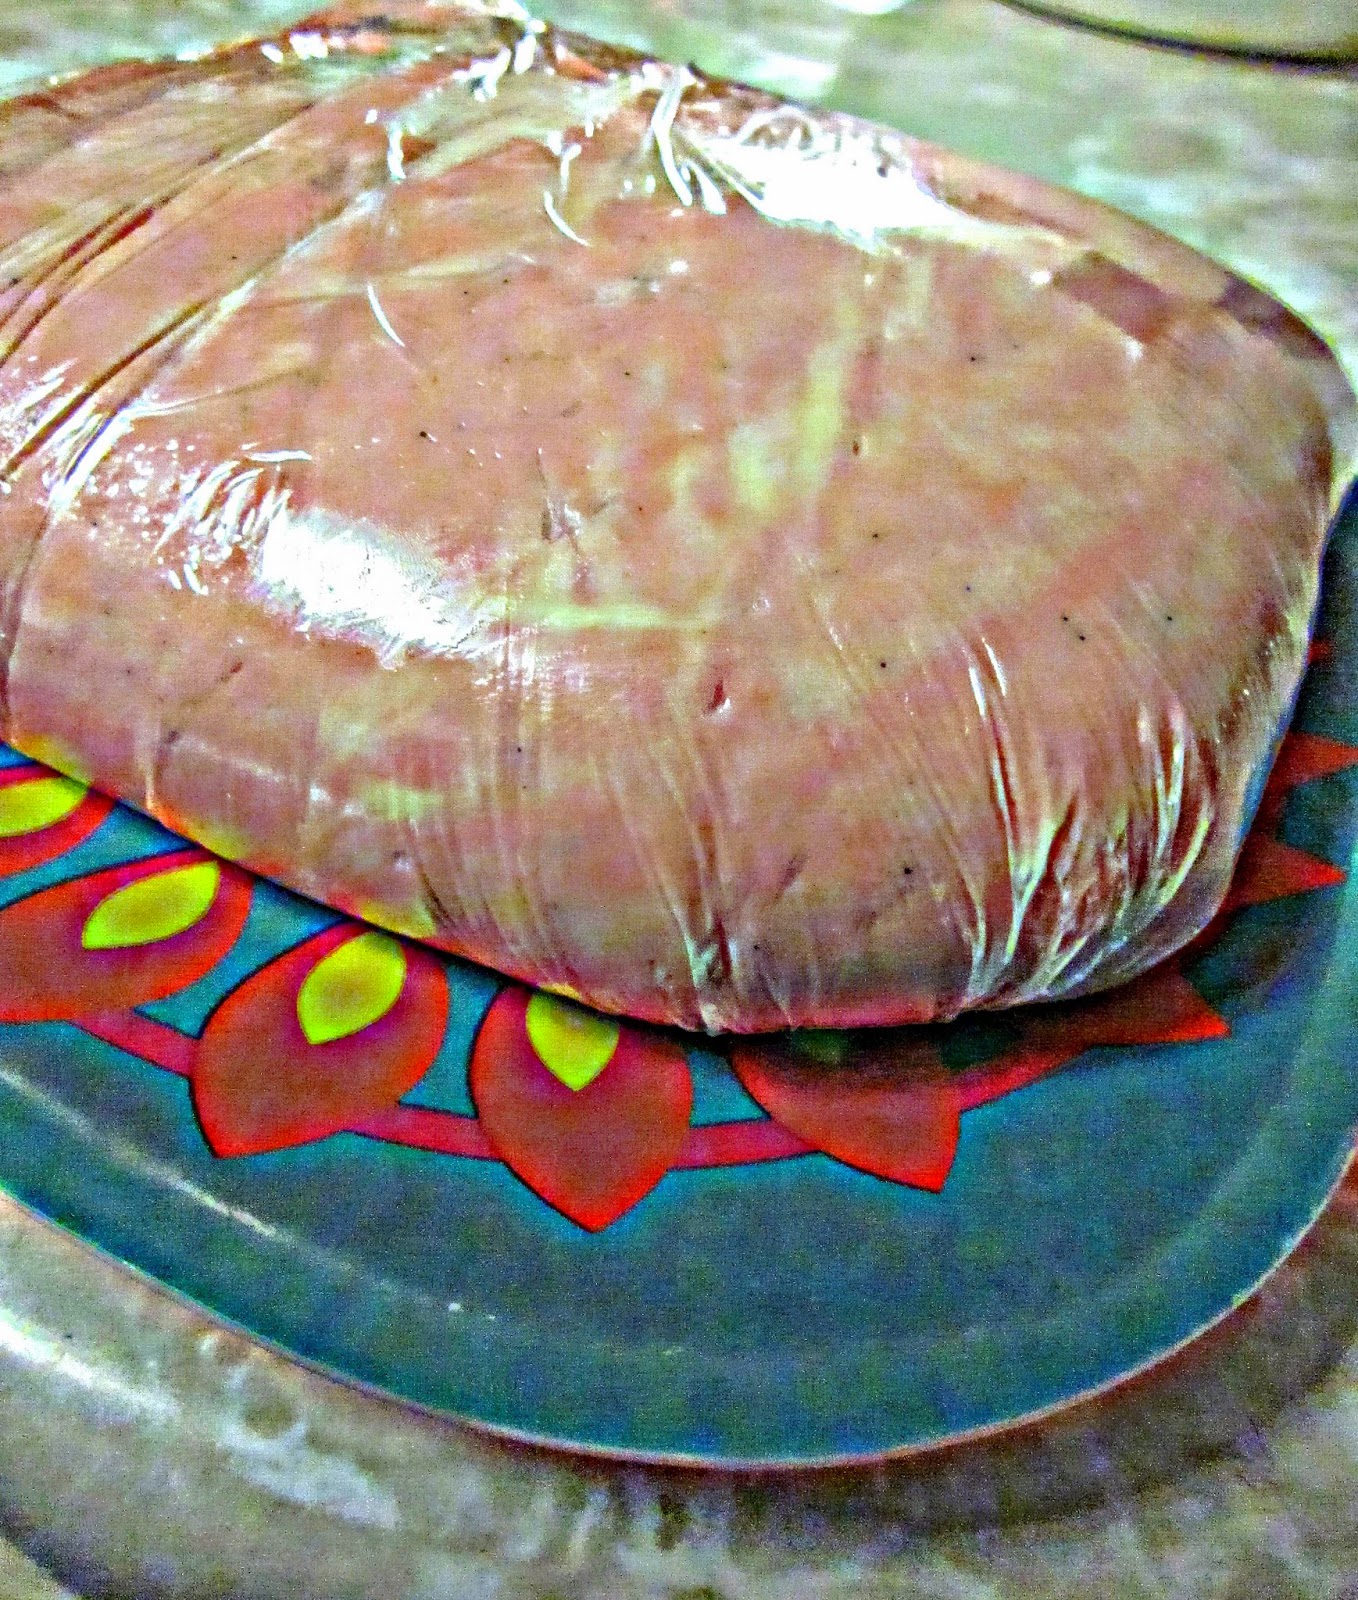
 Lightly oil the outside surface of the fondant so it doesn't stick.  Transfer to a plastic bag and cover tightly until ready to use, allowing to rest at least 5 hours.
 To cover a cake with fondant: Dust a clean pastry cloth, or a smooth, clean surface, with cornstarch and roll the fondant with a rolling pin until it is approximately 1/4 inch thick. Make sure that the fondant is large enough to fit over the top and sides of the cake. Slide both hands under the fondant and carefully center it on top of a cake that has been freshly iced with butter-cream. (The icing makes the fondant adhere to the cake.) Dust your hands with cornstarch and smooth the fondant, starting at the top and working down the sides until the entire surface is even and flat. Cut off the excess icing around the bottom of the cake with a pizza cutter or sharp knife. Decorate the cake with butter-cream or royal icing. This fondant keeps a cake fresh for two days at room temperature. Do not refrigerate a cake with fondant icing. 


Want to see how to make these fabulous roses? 


The next recipe is the more traditional fondant. It has some specialty ingredients like the vegetable glycerin that I had to find at a cake decorating store. You may be able to find it online also. 

Traditional Homemade Rolled Fondant
Adapted from Colette Peters, Cooking Live here
Yield:icing for 2 9-inch cake, 4 inch tall
Level:Easy

Ingredients
  • 4 pounds confectioner's sugar, sifted
  • ½ cup cold water
  • 2 tablespoon unflavored gelatin
  • 1 cup glucose (found in cake decorating stores) or white corn syrup
  • 3 Tbsptablespoons glycerin (found in cake decorating stores)
  • 1 teaspoon oil based desired flavoring 
  • food coloring (if desired)
  • Cornstarch
Directions: In a large bowl (do not use metal), sift the sugar and make a well in the center. In a small saucepan, add the water and sprinkle the gelatin on top to soften for about 5 minutes. Begin to heat the gelatin and stir until the gelatin is dissolved and clear. Do not boil. Turn off the heat and add the glucose and glycerine, stirring until well blended. Add the flavoring. Pour into the well of sugar, and mix until all of the sugar is blended. Use hands to knead icing until it becomes stiff. Add small amounts of confectioner's sugar if the mixture is sticky. Form the mixture into a ball and wrap tightly in plastic wrap. Place in an airtight container. This icing works best if allowed to rest at room temperature for about eight hours before using, particularly if the weather is humid. Do not refrigerate. 


There you go! Homemade awesome fondant! cake decorating

Always My Very Best,
Your Friend Chef Tess

Tuesday, March 11, 2014

My Mom's 5 Day Bread Dough...Updated Bosch Tutorial!


Homemade matters to us.  For my entire life, this recipe has been the standard of excellence in bread making. This is a bread dough recipe that my mother, Geneve, developed for her college Food Science final. I grew up with this bread and the smell of wheat grinding fresh in our family home.  I remember mom always testing the fresh milled flour to be sure the wheat had not gone rancid in storage.  Today...we milled wheat that I had put away when my first born son was born. Yup. 14 years ago.  I turned into my mom today. I got really giddy to find it was still perfect wheat, ready for bread.

  There was also only one bread mixer that she would ever openly praise.  It was our family Bosch mixer from the Bosch Kitchen Store.  It really was the only machine strong enough to handle this dough, because she made 5-6 loaves at a time. Repeat that several times a week. The machine lasted without a hick-up or need for a tune-up for most of my life. The last time I visited my mother, she was still using the same machine. She got the machine when I was about 2 years old...and I turn...(gulp) forty this year.  Yup. Bosch mixer are that good.

Gathering around Mom’s mixer and watching the dough form into supple perfection was the highlight of my week and the very testing-ground for what became a baking passion for me. We had to watch as it "spun gold out of wheat" and I was able to see first-hand what proper protein development should look like in the bread making process. Baking bread with mom made me what I am today. Some of life’s richest lessons were taught around that bread-board. 

 She'd always dissect the fresh loaves and make sure they were up to her standard.  I still do the same when I make mine. 

  • Is the crust thin, crisp, and uniformly colored? 
  • Is the crust tight to the loaf or did it separate?
  • Is the loaf rounded, uniform in width size, and well domed? 
  • Is the taste mild and sweet with the flavor of the wheat?
  • Are there any strong flavors?
  •  Is it overly yeasty, sour or salty?   
  • Is the texture silky and tender?
  •  Is the crumb fine? 
  • Are there any flour lumps or knots in the dough?
  • Are the air holes uniform?
  • Can you cut reasonable slices without the bread falling apart?


Life has taken me far from my mother’s home. If I think about it too much, I get misty-eyed.  Now as a pastry chef and mother myself, her recipe for this remarkable bread remains a classic.  I was reminded of this once again this week as we gathered around our mixer. Mine is the newest model, thanks to my friends at Bosch. The recipe...is still mom's. 

It is called 5-day bread, but the dough can be made up to 7 days ahead of time. I still use it every single week! The dough is stored in a large bucket or covered bowl in the fridge.  Sometimes I divide it between 4 gallon sized zipper bags.  I love this dough made into rolls, pretzels, pizzas and yes, decorative ornate braided bread loaves.  You’ll find this to be excellent dough to keep on hand for all your bread making needs. Don’t be dismayed by the number of ingredients in this bread, each one works with the other to make it perfect.
Chef Tess' Mom's 5-Day Bread
2 T active-dry yeast OR 1T SAF Instant premium yeast
4 c milk, scalded and cooled OR water (no hotter than 115 degrees)
3/4 c honey
1T salt
4 large eggs
3/4 c oil (olive or melted coconut oil)
1 1/2 c mashed potatoes, cooled to body temperature
1T baking powder
14-15 cups fresh milled whole wheat bread flour ( tutorial on making-whole-grain-flour-at-home )

Directions: Dissolve yeast in milk (or water) in a Bosch Universal Mixer.  Yeast does matter. I use this one because I know it works.
Stir in honey. Allow yeast to get foamy. Add egg, oil, mashed potato, baking powder, salt and 14 cups of fresh milled flour. Turn to speed 1 and combine about 30 seconds.
 Increase speed to 3 and mix 4 ½ minutes until dough is soft and well developed but not dry.
 It will look almost like spun golden yarn. That's what good protein development should look like in your bowl. 
Allow dough to rest 10 minutes in the bowl (this gives the wheat time to absorb moisture). Don't skip this 10 minute resting step. You'll end up using way more flour than you need to in your bread and your bread will be dry.  After 10 minutes, you should be able to pull a piece out and have it string 6-7 inches above the bowl without the dough breaking. 
Add enough of the flour remaining to make soft dough that is easy to handle but not dry. More often than not, I don't have to add any more flour at all. Turn dough onto a  very lightly floured surface.  Form into a ball. It should hold it's shape without melting into a blob on your counter-top. 
 Place dough  in an ungreased 2-gallon bowl or food-grade bucket, covered tightly. If you don't have a large enough bowl...use two smaller bowls. Or...just half the recipe if you are worried about the dough growing all over your fridge outside of the container.
Put in the fridge, tightly covered.
 Punch down after 2 hours (this may be faster if you use warm ingredients or flour). If the dough is over 85 degrees when you put it in the fridge, be sure to punch down sooner. 
Form into a ball again. Cover tightly and chill at least 8 hours.  This chilling step is what will give you the best taste in your bread.  Long, slow, low fermentations of dough  are unparalleled for flavor development and gluten elasticity. This fermentation process cannot be produced by adding artificial flavors or mixing longer mechanically.  Some people try to mimic this process by adding extra chemical dough conditioners or added gluten powders.  They are not necessary if you do this step correctly.  They happen naturally by slowly raising in your fridge. This is the single most important step in making this bread remarkable and clean from added chemicals. 

Be sure to punch down daily if keeping it more than a day or two (this not only expels gas, but also ensures even temperature in the dough). This will yield 4 standard sized loaves of bread. Yes. You can also use it for anything remarkable at this point. I have such a hard time not making it into at least a dozen cinnamon rolls...or apple pie rolls...
To bake a standard sized loaf: Divide dough in 4 equal portions, about 2 lbs of dough for standard loaves. Form each loaf using the loaf molding technique ( Loaf Molding Tutorial).  Lightly coat the top of the loaf with melted butter and then lightly tent the loaves with plastic or plastic bags OR place in a moist place to rise. Allow to rise (1 -1 ½ hrs) until dough is about 1-2 inches above the edge of the pan. Lightly slit the top with a very sharp knife. 
Bake in preheated 425° oven for 20 minutes then drop the temperature to 350 for the final 15-20 minutes of cooking.
Remove from pans and allow cooling completely before cutting.
I cut this loaf right from the oven. 
Awww. See how it looks fuzzy instead of a clean texture?
Wait 30 minutes...and it slices a lot cleaner and nicer. 
So now I have my dough, ready for the week. It is just part of what I do to make things run smoothly here and save money.  Homemade matters to us. I know what is going into our sandwiches and lunch boxes.  We're using fresh milled grain that keeps the nutrition right in my kitchen instead of a factory somewhere. Plus, saving money and eating whole food is just how we roll.  

Yes. Mom was right. The best things in life cannot come from a store. They come from the heart. As I watched my kiddos rip into this gorgeous bread (while praising my name) I thought to myself, "This is it. This is why I do what I do."   Make a memory. Share some love.  Get the goodness into them!  And by all means, move onward and upward!

Always My Very Best,
Your Friend Chef Tess


Tuesday, April 2, 2013

3 New Rolls for Spring (from one base dough) Tutorials of Love


It is Tutorial Tuesday! Spring is in the air. Baking with darling friends is in the air. Carbs are in the air. Guess what?! I got to bake some delightful rolls with my sweet friend Sassy Cassie! She's heading off to start her culinary training soon and I certainly needed some Cass' face-time before that happened...and all the way through school. I told her she needs to tag me on facebook everyday so I feel like I'm not missing her adventures! You know how it is right? You meet someone who is such a kindred spirit that it is almost scary. She's one of those.  

So, here's a peek at what we did. I know you can do them too because they are just some cool shapes to do and make with dough. For each of the variations you can use any of the Basic Bread Recipes. I personally prefer my mom's 5 Day Bread Dough. The dough is good in the fridge up to 7 days and I was raised with this bread. It is my mother's recipe.  It can be used for a variety of recipes...basically any recipe that needs some kind of delightful dough base. 


First variation today, 
  Herb fans
I'm the biggest herb fan. Ever...so this is basically a hot-bun version of me.
 How's that for scary?
A fan roll is a fabulous way to have an herb or spiced pull-apart layer-by-layer love bomb. 
Roll out a pound of dough as you would a cinnamon roll, on a lightly floured work surface about 1/2 inch thick. Then cover with a light layer of butter and sprinkle with your favorite herb combination.  Today I used my Chef Tess Big Dill Seasoning. It is a delightful combination of garlic, onion, bell pepper, citrus and dill. Perfect for a Spring salad or in this case, a spring dinner roll.  There really is a little bit of me inside...but in a very non-cannibal way.  At any rate, cut the dough into 1 1/2 inch strips the entire length of the dough and stack the dough strips. 
Cut the stack into 2 inch stacks and place sideways into a greased muffin pan. 
Raise until doubled in size. Preheat oven to 350 degrees. Bake 25-30 minutes until golden brown. Yields about a dozen rolls. 

Next up...
Savory French Herb and Smoked Paprika Pinwheel:
I know you know what a cinnamon roll is...if you've lived on this planet for more than a week in America. Well...here's my favorite variation (today). 
Roll out 1 lb of dough in a 12 inch by 8 inch rectangle.  Spread with a thin layer of butter to the edges and sprinkle with French Provencal Essential blend. It is a bold, rustic blend of herbs, citrus, and garlic, and sea salt. I love it with chicken, but I especially love it in buns. Roll up the dough and cut into 2 inch pin-wheels. 

Place in a greased muffin tin and sprinkle lightly with a really good smoked paprika.  This gives the buns a beautiful spring color and a bold spring flavor...plus they just look like flowers in your dinner roll basket!

Last but certainly not least...
Bear Claws-o-Glory
This is a classic breakfast bun and it can be filled with a wide variety of flavorful blends. Today I chose a sweet variation  using hazelnut paste, a kiss of ginger and touch of lemon. You can do any number of flavors but I've done them with raspberry jam and a little jalapeno. They're excellent as a blue cheese and black pepper roll. Amazing as an orange-cardamom roll...with a hint of lavender or nutmeg. You name it. You're only limited by your giant brain!


Roll out your pound of dough into a rectangle, twelve inches by 8 inches. Spread with the filling of your choice. I used 1/2 cup of hazelnut butter and a sprinkle of sugar...along with the zest of half a lemon and 1 tsp of ginger. It works best to cream the spice and zest into the hazelnut butter. 
Roll tightly and pinch at the seams. Cut into 4 3 inch rolls and flatten the rolls with the heal of your hand.
Cut with 3 notches along the length of the bun, being careful not to cut through the roll. 
Place on a greased  baking sheet. 
Lightly mist with water and allow to raise until doubled. Bake in a pre-heated oven at 350 degrees 30-35 minutes. 
They're the perfect grab-n-go!

Speaking of that. Grab your favorite baker and GO! Start creating today my darlings! I'm excited to see what you're up to! Seriously. It always makes me smile to read about your success!


Always My Very Best,
Your Friend Chef Tess

Tuesday, February 26, 2013

Pavlova 101, The Meringue Based Cake Tutorial

What the heck is a Pavlova? If you've never had one, you're in for a happy delight! Especially if you're gluten-free and trying to go a little more low-fat!Pavlova got it's name in honor of Anna Pavlova, a Russian ballerina who toured Australia and New Zealand in 1926. I'm assuming she was light on her feet and completely delicate.  I'm sharing two version of this recipe today. One is a traditional version from the Joy of Baking, and the other is my higher protein, less sugar version. Both are excellent!

Pavlova is basically a wheat-free, flour-free meringue based cake that has a delicate and crispy crust. The inside is almost a marshmallow center.  My dad, the Pansy Man, has no affection for marshmallow, so we really  never made these when I was growing up. Now however, I have a great love for these bad-boys. Seriously. The crust alone is enough to make me smile. It is just a tender, divine piece of happiness on a plate...if that's possible. 

Usually this remarkable dessert is served with lusciously whipped, lightly-sweet whip cream and fresh fruit.  My personal preference is to make the cream with a kiss of fresh orange zest and a pinch of fresh grated nutmeg, just enough to give a subtle nuance to the cream.  Another secret is I often will dip the fruit in a fresh fruit marinade made from Avocado Oil, lime or lemon juice, and a drizzle of honey.    

The basic tutorial video from Joyofbaking.com (though 8 minutes ) is pretty helpful in seeing how this dessert is made.


 Pavlova on The Joy of Baking.com :

4 large (120 grams) egg whites
1 cup (200 grams) superfine (castor) sugar
1/2 teaspoon pure vanilla extract
1 teaspoon white vinegar
1/2 tablespoon cornstarch (corn flour)
Topping:
1 cup (240 ml) heavy whipping cream
1 1/2 tablespoons (20 grams) granulated white sugar (or to taste)
1/2 teaspoon pure vanilla extract
Fresh fruit - kiwi, strawberries, raspberries, blackberries, passion fruit, peaches, pineapple, or other fruit of your choice

Serves 6 to 8.


Pavlova: Preheat oven to 250 degrees F (130 degrees C) and place rack in center of oven. Line a baking sheet with parchment paper and draw a 7 inch (18 cm) circle on the paper. Turn the parchment paper over so the circle is on the reverse side.

In the bowl of your electric mixer, with the whisk attachment, beat the egg whites on medium speed until they hold soft peaks. Start adding the sugar, a tablespoon at a time, and continue to beat, on high speed, until the meringue holds very stiff and shiny peaks. (Test to see if the sugar is fully dissolved by rubbing a little of the meringue between your thumb and index finger. The meringue should feel smooth, not gritty. If it feels gritty the sugar has not fully dissolved so keep beating until it feels smooth between your fingers). Beat in the vanilla extract. Sprinkle the vinegar and cornstarch over the top of the meringue and, with a rubber spatula, gently fold in. Spread the meringue inside the circle drawn on the parchment paper, smoothing the edges, making sure the edges of the meringue are slightly higher than the center. (You want a slight well in the center of the meringue to place the whipped cream and fruit.)


Bake for 60 to 75 minutes or until the outside is dry and is a very pale cream color. Turn the oven off, leave the door slightly ajar, and let the meringue cool completely in the oven. (The outside of the meringue will feel firm to the touch, if gently pressed, but as it cools you will get a little cracking and you will see that the inside is soft and marshmallowy.) 


The cooled meringue can be made and stored in a cool dry place, in an airtight container, for a few days. 


Just before serving gently place the meringue onto a serving plate. Whip the cream in your electric mixer, with the whisk attachment, until soft peaks form. Sweeten with the sugar and vanilla and then mound the softly whipped cream into the center of the meringue. Arrange the fruit randomly, or in a decorative pattern, on top of the cream. Serve immediately as this dessert does not hold for more than a few hours.


My Chef Tess Version uses less sugar and powdered egg white, increasing the protein content quite a bit!

Chef Tess-no-mess-never-fail Meringue from Food Storage

1 1/2  cup warm (not boiling) water
3/4 cup sugar
2T Ultra gel  (modified corn starch)
1T lime or lemon juice
1 tsp vanilla
Directions: 
In a very clean (must be free from any oily film whatsoever!)metal bowl combine the egg white powder and water with a whisk until smooth. Fit a stand mixer with a metal bowl with the wire whisk (again, VERY clean). Pour egg whites into the bowl.
 Turn mixer on medium high setting. In a small bowl, combine the sugar and ultra gel. 
When eggs start to get stiff and glossy, add the sugar mixture in a steady stream to the mixer. 
Continue to whisk about 4 minutes until firm peaks form. Add vanilla  and lemon or lime juice and mix to combine.


 I made personal-sized Pavlova by dividing the meringue into 6   5 inch circles on a parchment lined baking sheet. The parchment will help it not to stick like crazy.  Bake the full 60 minutes at 250 degrees. Turn off the oven and allow the Pavlova to sit an additional hour or more in the oven. I personally leave them in the oven overnight. This just assures they will be dried enough.

For service, top with whip cream and fresh sliced fruit. 

There you go my darlings! You're really going to love this one!

Always My Very Best, 
Your Friend Chef Tess