Showing posts with label vegetarian. Show all posts

Wednesday, August 5, 2020

Stove-top Ratatouille


We moved to a small town in Northern Arizona
 about 18 months ago. 
I needed a change of pace and a better housing situation. I'm still close enough to the city that I can take a short day-trip if I need to be in Phoenix for work meetings or TV shoots, but far enough away from the crazy heat and hustle of the city to enjoy a more country life.  I've always been a very simple gal, and I don't really need anything fancy. It's been a perfect fit and we're thriving here. It's a whole new world.  We bought an acre and are really enjoying the cooler weather and totally different growing zone for our garden as well.

Many of you are aware of my avid love of gardening and this new part of the state has been just what this gal needs. We've had a couple of very successful gardening seasons compared to Phoenix where the heat is just relentless and well...evil. This year, around March, my youngest son (now 17 years old and in college) helped build a greenhouse to extend our growing season a lot and also to get experience with a greenhouse ecosystem. He's seriously considering a career in Botany and Horticultural Science...and I couldn't be more thrilled about that! So really the greenhouse is for school right? I mean I learn something everyday and this has been a learning experience for sure. 

So here's the journey. We started with a 16 foot by 20 foot greenhouse kit. Some good soil, 100 cinder blocks and lots of anchors (about 6K pounds worth of cord and screw-in-the-ground things) to keep it from flying away in our very, very windy mountain town. 

Face worked really hard to make this happen. 
Then we installed soak hoses and planted all the seedlings that we had been nurturing inside under the grow-lamps. We planted 3 carrot varieties, beets.  Peas that will climb. There are 25 varieties of heirloom tomatoes.  There are herbs like mad for my shenanigans in the kitchen including basil, cilantro, tarragon, dill, oregano, thyme, lemon balm, chives and 3 varieties of sage. I also wanted to try my hand this year with leeks. 
Things started to grow really well! 
We even put in solar powered lamps so I could just weed in the middle of the night if I wanted to do so. Don't judge me. I really love being in this place. Sometimes I say I'm weeding, but I'm just sitting out here reading a good book or listening to some good Gospel tunes. It's really good for my soul. 
Now everything is pretty huge! We had to take out the zucchini and we're putting in our second crops for Fall. Other things like the broccoli have bolted like mad, but I'm saving the seeds so I'm just using the extra leaves for coleslaw and low-carb enchilada or lasagna bakes. Our cilantro went to seed so I harvested the large branches with seed pods to dry for spices and also to replant seeds in the spring (or indoors during the winter). 
As our adventures in gardening continue I decided that I really needed to be a chef and actually make a version of Ratatouille that didn't require using and oven. I wanted one that also used a lot less oil than most traditional recipes, since they tended to be heavy. So with our Japanese eggplant, zucchini and honkin' huge load of heirloom tomatoes coming into full ripeness...this was a must! 
Pick the eggplants young and tender to avoid lots of thick seeds and to minimize the sponge effect it has on oil in cooking. If you aren't growing your own tomatoes, be sure to pick firm and ripe varieties. I used both large chopped tomatoes as well as the smaller cherry varieties. 

We have a few things outside the greenhouse too...
Face built a few grow-boxes in the yard. There is space for all his side projects. Yes. He built all of these from scratch. I'm so proud. 
Now. For the recipe...

My Stove-top Ratatouille 

1 medium globe eggplant, peeled, coarsely chopped

1 large zucchini, sliced into ¼-inch-thick rounds

2 teaspoons kosher salt, plus more

¼ cup olive oil

1 Tbsp fresh thyme

1 large onion, halved, sliced ½ inch thick

1 red bell pepper, ribs and seeds removed, coarsely chopped

2 garlic cloves, thinly sliced

1 pints cherry tomatoes

2 large tomatoes, chopped 

Freshly ground black pepper, to taste

1 cup fresh torn basil leaves 

Directions:

Toss eggplant, zucchini, and 2 tsp. salt in a colander. Let sit 30 minutes, then pat dry with paper towels. 

Heat oil in a large heavy Dutch oven or other heavy ovenproof pot over medium-high. Add eggplant and zucchini and cook, stirring constantly, until vegetables begin to take on color, about 10 minutes. Add the onion, bell pepper and garlic. Cook another 5 minutes until clear. Add thyme and tomatoes and cook, stirring occasionally, until just beginning to soften, about 5 minutes; season with salt and pepper. Cover and slow cook on very low heat for 10-15 minutes more. 

Transfer to a serving platter and top with basil.

Always My Very Best,
Your Friend Chef Tess

Monday, June 12, 2017

Low-carb "Hot Wing" Cauliflower and the 8 Benefits of Eating Cauliflower


I went way outside of my comfort zone last week and starting seeing a personal trainer named Chris Schenck at Tribrid Personal Training in Mesa. I started mainly because I need someone who will kick my butt and hold me accountable to my goals.  So...believe me when I say that it was really emotional and weird for me (at first) even though it shouldn't have been.  I made it big in my head to have to seek help, even though, if it had been some other medical issue I wouldn't have hesitated to see a professional about it. This is the first time in all my years on earth that I've actually gone to see a personal trainer, so this is all new to me. Going to a gym? That's never happened. I've stuck to doing workouts at home...away from people. 


 I've had health coaches online in the past, but for some reason, this seems more "real".  True story, with the brain tumor several years ago, the medication made me gain about 80 lbs in just a few months, and then my whole system was messed up and I haven't, for the life of me, been able to take it off. When my doctor told me he'd like to see me lose (gulp of shame) 100 lbs...I was shocked that it had gotten that bad.  Despite my best efforts, it just hasn't been happening to take the weight off and keep it off. Given my profession as a TV host, that's been pretty discouraging. People judge us by how we look. I hear some pretty nasty comments now and then from total jerks online who have no idea what I have struggled with or where I have been in the past. 


 For the record,  I have lost about 30 lbs since this time last year walking first a few blocks a day and now a few miles a day.  It hasn't been glamorous. I gave up Diet Coke and switched to sparkling water with Sweet Leaf stevia drops.  I haven't had a sugar dessert since January. Anyone who knows me knows that change for health has been a miracle of miracles. I have been working on it. So the battle continues. 
So far, this last week, Chris has made me puke twice...and somehow I leave his gym feeling like that was totally cool, though he did offer me gum. wink. wink. "You smell like puke chick."  I say he "made me puke" but I pushed myself and he made sure I had a toilet.   After two days of weighted core squats, I was walking around my house like Yoda. Sore I was. Stretched more I did. It has officially been a week. I didn't puke today. So...there's that.  We'll keep moving onward and upward here and I'm still going to be sharing a few healthy recipes a week (as usual) and keeping myself accountable to you guys too. My fitness journey continues. The struggle is real, but it has been awesome this last year as I've felt more fit to see the changes. Now, we're stepping up to the next level.  

Here's the Cauliflower of glory!

 Chop a head of cauliflower.  Heat a larger frying pan to almost smoking and add 1-2 Tbsp avocado oil or coconut oil (I prefer avocado oil for high heat applications because it has a high smoke point and that means less free radicals in my gorgeous body). Saute the Cauliflower in the pan until caramelized, but not soft. That's important if you want the crunchy texture similar to hot wings. 
 At this point, season generously with Chef Tess All Purpose Seasoning  and drizzle with the true and righteous hot wing sauce.  I'm addicted to this stuff.  Frank's Red Hot...
 There are no calories or carbs...though it is a little higher in salt


 Try not to eat the whole thing. Oh wait. Maybe do try to eat the whole thing! Why? 

According to This Article From Mercola here are the 8 Top Health Benefits of Cauliflower!


8 Top Health Benefits of Cauliflower

Because of its beneficial effects on numerous aspects of health, cauliflower can easily be described as a superfood. 8 of its most impressive benefits follow:
1. Fight Cancer
Cauliflower contains sulforaphane, a sulfur compound that has also been shown to kill cancer stem cells, thereby slowing tumor growth. Some researchers believe eliminating cancer stem cells may be key to controlling cancer.
For instance, research has shown that combining cauliflower with curcumin (the active compound in the spice turmeric) may help prevent and treat prostate cancer.1
A study published in Carcinogenesis also found sulforaphane may reduce the incidence and rate of chemically induced mammary tumors in animals.2 It also inhibits the growth of cultured human breast cancer cells, leading to cell death.
Other compounds in cauliflower also show anti-cancer effects. According to the National Cancer Institute:3
"Indoles and isothiocyanates have been found to inhibit the development of cancer in several organs in rats and mice, including the bladder, breast, colon, liver, lung, and stomach."
2. Boost Heart Health
Sulforaphane in cauliflower and other cruciferous vegetables has been found to significantly improve blood pressure and kidney function.4 Scientists believe sulforaphane's benefits are related to improved DNA methylation, which is crucial for normal cellular function and proper gene expression, especially in the easily damaged inner lining of the arteries known as the endothelium.
3. It's Anti-Inflammatory
You need some level of inflammation in your body to stay healthy. However, it's also possible, and increasingly common, for the inflammatory response to get out of hand. 

If your immune system mistakenly triggers an inflammatory response when no threat is present, it can lead to significant inflammation-related damage to the body, a condition linked to cancer and other diseases, depending on which organs the inflammation is impacting.
Cauliflower contains a wealth of anti-inflammatory nutrients to help keep inflammation in check, including indole-3-carbinol or I3C, an anti-inflammatory compound that may operate at the genetic level to help prevent the inflammatory responses at its foundational level.5
4. It's Rich in Vitamins and Minerals
Most Americans are seriously lacking in nutrients their body needs to function. Eating cauliflower regularly is a simple way to get these much-needed nutrients into your body. For instance, one serving of cauliflower contains 77 percent of the recommended daily value of vitamin C. It's also a good source of vitamin K, protein, thiamin, riboflavin, niacin, magnesium, phosphorus, fiber, vitamin B6, folate, pantothenic acid, potassium, and manganese.
5. Boost Your Brain Health
Cauliflower is a good source of choline, a B vitamin known for its role in brain development. Choline intake during pregnancy "super-charged" the brain activity of animals in utero, indicating that it may boost cognitive function, and improve learning and memory. It may even diminish age-related memory decline and your brain's vulnerability to toxins during childhood, as well as conferring protection later in life.6
6. Detoxification Support
Cauliflower helps your body's ability to detoxify in multiple ways. It contains antioxidants that support Phase 1 detoxification along with sulfur-containing nutrients important for Phase 2 detox activities. The glucosinolates in cauliflower also activate detoxification enzymes.7
7. Digestive Benefits
Cauliflower is an important source of dietary fiber for digestive health. But that's not all. According to the World's Healthiest Foods:8
"Researchers have determined that the sulforaphane made from a glucosinolate in cauliflower (glucoraphanin) can help protect the lining of your stomach. Sulforaphane provides you with this health benefit by preventing bacterial overgrowth of Helicobacter pylori in your stomach or too much clinging by this bacterium to your stomach wall."
8. Antioxidants and Phytonutrients Galore
Eating cauliflower is like winning the antioxidant and phytonutrient lottery. It's packed with vitamin C, beta-carotene, kaempferol, quercetin, rutin, cinnamic acid, and much more. Antioxidants are nature's way of providing your cells with adequate defense against attack by reactive oxygen species (ROS). 

As long as you have these important micronutrients, your body will be able to resist aging caused by your everyday exposure to pollutants, chronic stress, and more. If you don't have an adequate supply of antioxidants to help squelch free radicals, then you can be at risk of oxidative stress, which leads to accelerated tissue and organ damage.
 So, eat your Cauliflower!

 Always My Very Best,
Your Friend Chef Tess


Tuesday, May 23, 2017

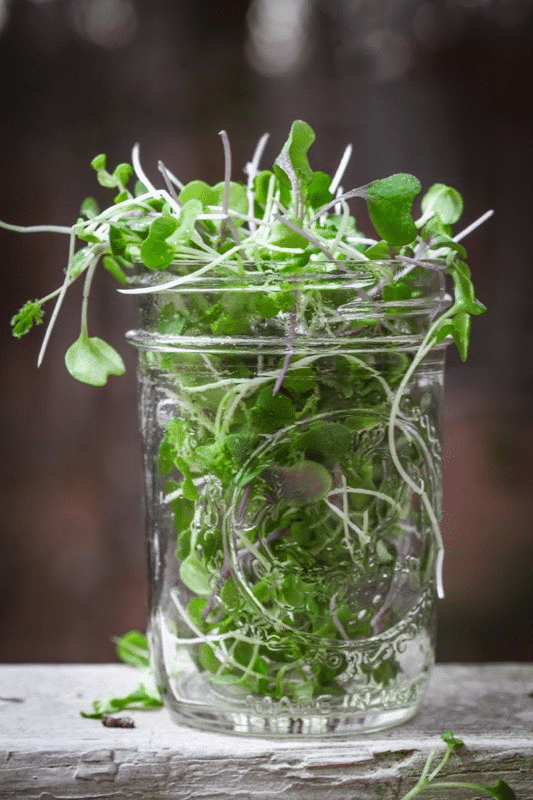
The Power of Indoor Micro-Green Farming

Photo Courtesy of IOGP website

One of the perks of doing what I do, is that sometimes I get to interview some remarkable individuals. This week I had one of those experiences.  I had a very unique opportunity to spend about an hour interviewing one of the pioneers in the indoor organic micro-greens farming industry  from Indoor Organic Gardens of Poughkeepsie named Brud Hodgkins. After over 20 years as a chef who is passionate about childhood education, empowerment and nutrition, it is still awesome to connect with someone who shares that same vision.  As the daughter of a greenhouse manager and Master Gardener, I relish the opportunity to bend the ear of an urban farmer. 

 In full disclosure, Brud's company reached out to me to see if I would be interested in sampling their products for this blog. As a chef who has used micro-greens extensively as an Executive chef in a French bistro as well as catering venue, I already was a huge fan of what they could do for any dish. Add to that, the desire to continue to incorporate micro-greens in my at-home cooking, this seemed like an ideal marriage of product use. They are not paying me to endorse their products. They're just giving me some greens.  So, I will be sharing their stuff here on my blog. Don't let that freak you out. I'm always trying to share good nutrition with y'all. I think this is pretty daggum interesting to hear about.

This is what I found out about this amazing food source and this indoor farm.


Photo Courtesy of IOGP website

Bringing Farming to the Inner City
First of all...Brud explained  that his crop is farmed exclusively indoors using a commercial property that was sitting vacant after the downfall of one of the neighborhood retail marketplaces. In a seventeen thousand square foot facility that originally started out as a K-Mart-type store, they're using this space to produce a powerful nutrition source in the middle of the city. At the first mention of this, my mind actually starting racing, thinking of all the vacant buildings in my own town that could easily be converted to such a use. It was a brilliant use of space, not to mention providing clean food and employment opportunities to the "at risk" segment of society usually found in the parts of the city he is focusing on in Poughkeepsie. In fact, just before our meeting, Brud had been meeting with some local high-functioning autistic teenagers who would be coming to work at his farm. This of course, got us talking about the need for education of children in the school system.

Photo courtesy of IOGP website

Kids Love Them!
Micro-greens are sweet and nutrient dense. They are easy-to-absorb nutrition...and one of the simplest things to get kids to eat. For example, cabbage Micro-greens have 260% more vitamin A than fully grown cabbage, and they don't taste like cabbage. They taste sweet.  That's just one of many examples of the powerful punch of nutrition in micro-greens.  They grow to mature micro-status in just a few days! Why wouldn't we teach kids how to grow these? They want to eat them because there's ownership.  Well...Brud is doing that. They're launching local school STEM programs teaching kids first hand how to grow this crop...and they're giving them the power to be able to grow a crop that is financially sustainable. 

So here's the skinny on Micro-greens. 

*What are microgreens?
 Microgreens are older than sprouts, but younger than baby vegetables. Almost any edible vegetable or herb can be enjoyed as a microgreen, such as lettuce, radish, basil, beets, celery, cabbage and kale. Many microgreens are four-to-six times higher in vitamins and antioxidants than their adult forms and can provide a nutrient boost in just a few calories.


Eating them
Many people enjoy the tiny leaves of microgreens for their fresh taste, crisp crunch and bright colors, including:
  • Raw, as an addition to a salad. Drizzle with a little lemon juice or low-fat dressing or eat them on their own.
  •  As a garnish to meals. Add them to your breakfast plate. Top fish, chicken or baked potatoes with microgreens.
  • Added to a sandwich or wrap.
  •  Sprinkled into soups, stir fries and pasta dishes.
  • Blended into a fruit drink or cocktail.
Growing them
  •  If you grow your own microgreens or purchase them in soil, snip the healthy stems and leaves above the soil when they are seven-to-14 days old. 
  • Eat them fresh, or store them in the refrigerator.
Finding them
  • Microgreens are available at local health food stores or whole foods markets. Look near the lettuce for packages of greens that are a few inches in length and have tiny stems and leaves. Check the local farmers market as well. Microgreen growing kits can be ordered online or found in some kitchen stores. (May I suggest just getting them from here. )
  • Selections may change from time to time so keep an eye out for your favorites.
  • Once cut, they can last in the refrigerator for five-to-seven days, sometimes longer depending on the type.
*Source: here


As for me and Brud Hodgkins, we are clearly on the same page regarding organic plant based nutrition, clean food, providing opportunities for the "at risk" segment of society, environmental Awareness, etc, etc.  They at IOGP are working toward the Financial Sustainability end by spreading the word so folk's know there is a Source of Nutrition Dense Vegetables within 24 hours of Harvest to fill their Personal and/or Commercial needs.  
 The website for info and ordering:  indoororganicgardensofpoughkeepsie.com


Photo courtesy of IOGP facebook page


There you go. Awesome Micro-greens. Great Brand. I'm a fan. 

Always My Very Best,
Your Friend Chef Tess

Saturday, May 6, 2017

Summer Apple Beet Salad with Peach Balsamic Dressing

 This week I've had an influx of red and golden beets from local farmer friends of mine Eric and Christina Amadio at Amadio Ranch in Laveen, Arizona. These beauties are flipping perfect, and organically grown. Plus, they come from some good hard-working people that I just love! If you've never tried golden beets, they are a bit milder in flavor than red beets and they are gorgeous! I love them.  

This is a light and refreshing salad that really is brilliant in color and is extremely simple to make. The addition of apples gives the salad a sweet-tart crunch balanced with the peach balsamic dressing. I'm picky. I'm specific about the brand on of balsamic that I use because the flavor is deep and complex with natural sweetness. 


Summer Apple Beet Salad with Peach Balsamic Dressing

Ingredients:
4 large beets, about 1 lb. Peel and dice.  
1 crisp tart Fuji or Pink Lady Apple, diced
1 white sweet onion, sliced thin

Dressing:
1/4 cup agave nectar
1/2 cup high quality Extra Virgin Olive Oil
1 tsp dry dill
salt and pepper to taste

Directions: 
Cook the beets by placing them in a 1 quart pot on the stove. Cover and steam 15-20 minutes over medium heat until tender. Cool.

In a large bowl combine the beets and chopped fresh apple with the dressing ingredients.  The apples won't get brown because they take on the color of the beets. 
I love how colorful it is!

* If you do not have peach infused white balsamic vinegar, you can use 1/4 cup white balsamic+1/4 cup peach puree.

There you go. It's vegan, clean, and divine!
A very simple salad for all the Spring and Summer adventures ahead.

Also...if you're in Phoenix, check out these awesome local farmers Christina and Eric Amadio and their mobile farmer's market peach truck...

Amadio Ranch Peach Truck and  Amadio Ranch Farm Store. You will not be disappointed. 


Oh...and their pie...is to die for. To. Die. For! We've purchased them twice on separate occasions. The strawberry rhubarb and the blueberry. I'm in love. Clean flavors, with just a hint of spice so that the natural organic fruit flavor comes through. They're killing it over there in Laveen. Killing it!


Always My Very Best,
Your Friend Chef Tess

Thursday, May 15, 2014

220 Calorie Awesome Alfredo with Veggies


In case you missed it on facebook, we're having another weight loss challenge group. Today is day 4 of a free 14 day challenge and then we'll go from there...but this is one of the recipes that I made today and it is just awesome! The stats are great too! 

This will make 4 servings {about 1 1/2 cups each}
220 calories, 8 g fat, 31g chol, 210g sodium, 26.8 carbs, 6 g fiber, 10 g protein.

 Ace ate the whole pan...minus my serving, and I didn't even argue. It is a much healthier choice than most of the alfredo recipes I've seen.  The secret is adding the vegetables to replace part of the pasta, using low fat cream cheese as part of the sauce, and dancing while you cook. Boom-vaaaa-vaaa-booom! I use a lot of garlic, but that will really boost the flavor factor! 

Chef Tess' 220 Calorie Alfredo with Veggies

Ingredients
1 tablespoon butter {herb infused is awesome!}
6 clove garlic, minced fine
2 teaspoons all-purpose flour
1 cup low-fat (2%) milk
2 tablespoons Neufchtel or low-fat cream cheese
1/4 cup grated parmesan cheese, plus more for topping

4 oz (dry weight) fettuccini noodles or your favorite egg noodles (weight on this matters for calorie count)
8 oz green beans, fresh or frozen
1 cup carrots, julienne cut
Freshly ground pepper

Directions:
Make the sauce: Melt the butter in a skillet over medium heat. Add the garlic and lemon zest and cook until the garlic is slightly soft, about 1 minute. Add in the flour and cook, stirring with a wooden spoon,1 minute. Whisk in the milk
and cook, whisking constantly, until just thickened, about 3 minutes. Add the Neufchatel and parmesan cheese; whisk until melted, about 1 minute. Stir in the chopped parsley.

Meanwhile, bring a large pot of salted water to a boil. Add the fettuccine, carrots and green beans cook until al dente, 8-10 to. Reserve 1 cup cooking water, then drain the pasta and return to the pot.

Add the sauce and 1/2 cup of the reserved cooking water to the pasta and gently toss to combine, adding more cooking water as needed to loosen. Season with salt. Divide among bowls and top with parmesan and pepper.

Yields 4 servings:
220 calories, 8 g fat, 31g chol, 210g sodium, 26.8 carbs, 6 g fiber, 10 g protein

Always My Very Best, 
Your Friend Chef Tess


Friday, July 5, 2013

Gluten-free Vegan Almond Flour Graham Crackers


I love graham crackers. I've made homemade graham crackers for many years instead of buying the boxed versions and I can honestly say that it has saved us a lot of money! However, as of late I've been trying to eat carbohydrates that are much lower on the glycemic index.  I have been using Blanched Almond Flour a lot more and have noticed some outstanding results.  Graham crackers were a challenge because of the light color of the flour, but the addition of balsamic vinegar and Coconut Sugar to the recipe have solved that! Plus, there is a naturally occurring caramel flavor that comes with coconut sugar that I adore!
 Palm Coconut Sugar  is supposed to be great for helping regulate blood sugar.  It is low on the glycemic index and this really affects how quickly you extract the energy from the food. It is measured and used the same as sugar in baking, but I seriously use about half. Honestly, in most baking, you can almost count on the fact that you can reduce the sugar by almost half and it will still bake pretty similarly. 

Palm Coconut Sugar was explained by Dr. Oz. He showed the benefits of using it in This Video. There are still a few people who say it isn't as healthy a choice but I'm in the group that says hey, " It still has more vitamins and minerals than regular sugar and yes, it contains natural fructose. It isn't calorie free, but it is all natural." That being said, it is also very easy to harvest and is sustainable. 

Here's my recipe for these amazing graham crackers!

Gluten-Free Vegan Almond Flour Graham Crackers

1 3/4 cup Almond flour
1/4 tsp salt
1/4 tsp baking soda
1 tsp Xanthan gum
1/2 cup Coconut Sugar
1 tsp vanilla
2T balsamic vinegar ( I love Wild Groves blueberry balsamic vinegar)
1/4 cup water

Directions: Preheat oven to 350 degrees.  Grease a full sized cookie sheet or pizza baking stone.  A baking stone will help pull moisture from your crackers and give you a crispier finished product.

 In a quart-sized bowl, combine almond flour, salt, baking soda and xanthan gum.
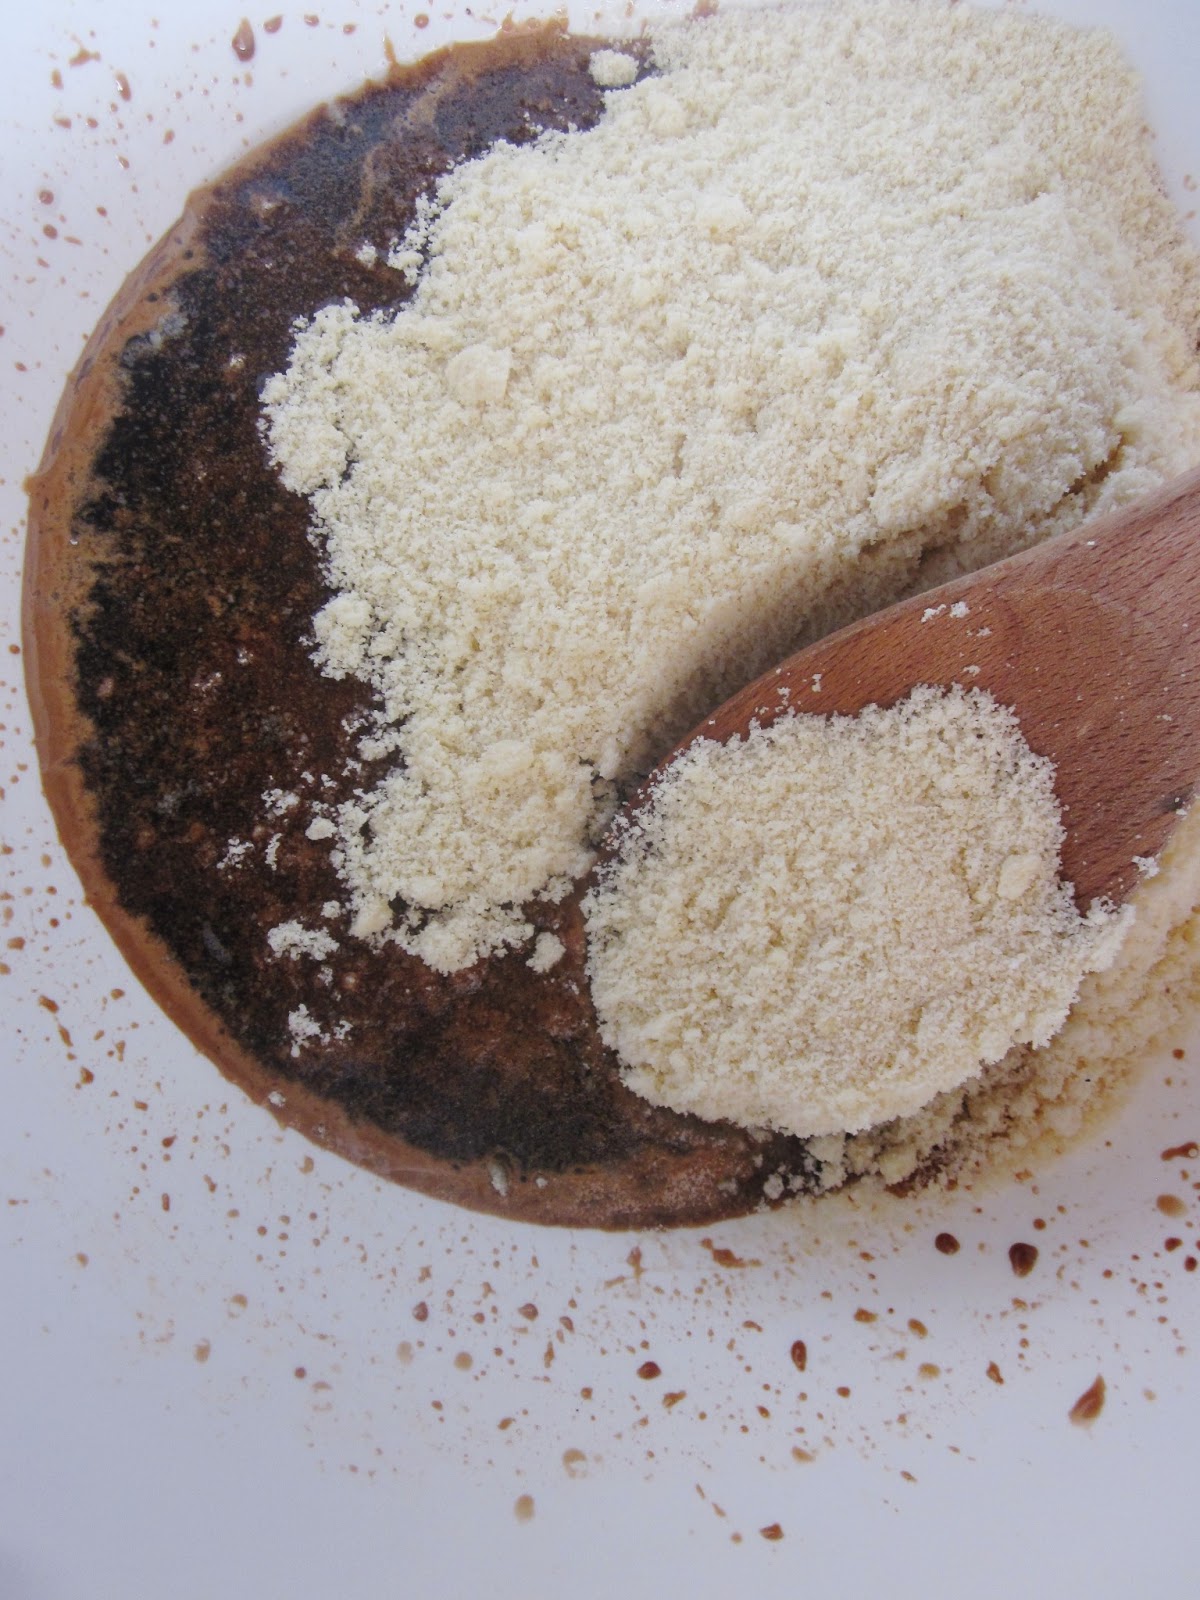
  In a separate bowl, combine coconut sugar, vanilla,blueberry balsamic vinegar and water.


 Stir the wet ingredients until the the coconut sugar dissolves completely.  It shouldn't have any crystals still in the bottom of the bowl.
 Pour the wet ingredients into the dry ingredients and stir well until a nice thick dough is made.

Generally I will flatten the dough out a little by hand on a lightly greased pizza stone and then cover the dough with unbleached parchment paper. This keeps the crackers from sticking and you won't need to add any flour to roll them out. 
 Roll it to 1/8th inch thickness.
 Gingerly remove the parchment paper on top, being careful not to pull it away to quickly. 
  Lightly score the dough with a knife into 2 inch squares.
 Bake 15-20 minutes until golden brown and crisp.  If there are thinner spots in your dough they will need to watched closely.  Remove the baking stone from oven and allow to cool on the stone.   I serve mine with a low fat version of the Chocolate Chip Cheesecake Cheeseball...


There you go! Some freakishly awesome crackers that taste amazing! 

Always My Very Best,
Your Friend Chef Tess