Showing posts with label Cheesecakes. Show all posts

Friday, April 18, 2025

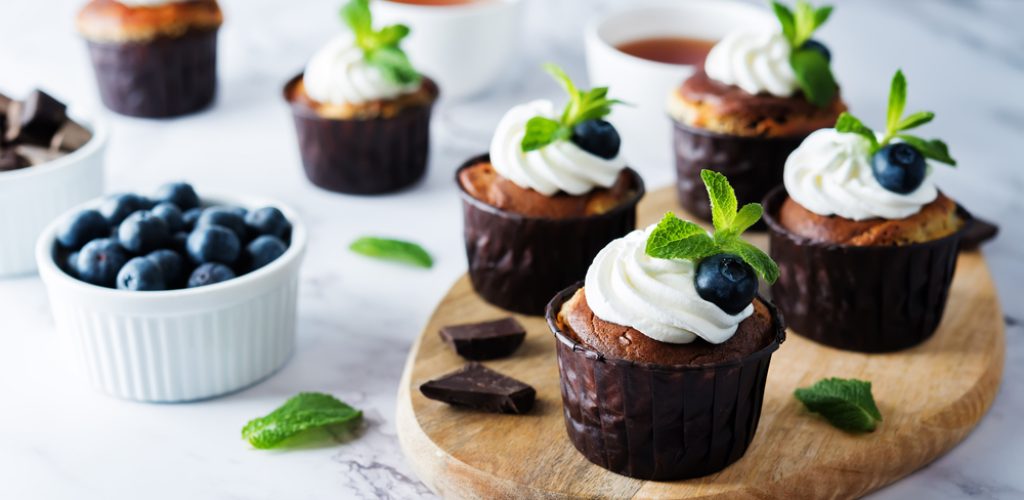
Best Ever Black Bottom Cream Cheese Chocolate Chip Cupcakes


Chocolate,Cream,Cheese,Cupcakes,With,Whipped,Cream,,Mint,Leaves,And

These luscious chocolate cupcakes are filled with a rich cream cheese chocolate chip filling.

What is a Black Bottom Cupcake? Heaven. I have fond memories of these cupcakes from my childhood.

These delicious velvety chocolate cupcakes have a cream cheese chocolate chip filling baked right into the batter. They come together in just a few minutes and can be served as a warm addition to brunch or a dessert. I like topping them with fresh fruit and whipped cream for a contrast in texture. Fresh berries can also be added to the cream cheese filling before baking.

The recipe is easy to assemble in just a few minutes. Enjoy!

Black Bottom Cupcakes

Filling:

1 package (8 ounces) cream cheese, softened

1/3 cup (67g) sugar

1 large egg (57g)

1 tsp. (5g) vanilla extract

1 cup semisweet chocolate chips

Cupcakes:

1 cup (200g) sugar

1 cup (255g) water

1/3 cup (75g) vegetable oil

1 large egg (57g)

1 Tbsp. (14g) white vinegar

1 tsp. (5g) vanilla extract

1-1/2 cups (180g) All-purpose Flour

1/4 cup (23g) baking cocoa

1 tsp. (6g) baking soda

1/2 tsp. (6g) salt

Directions

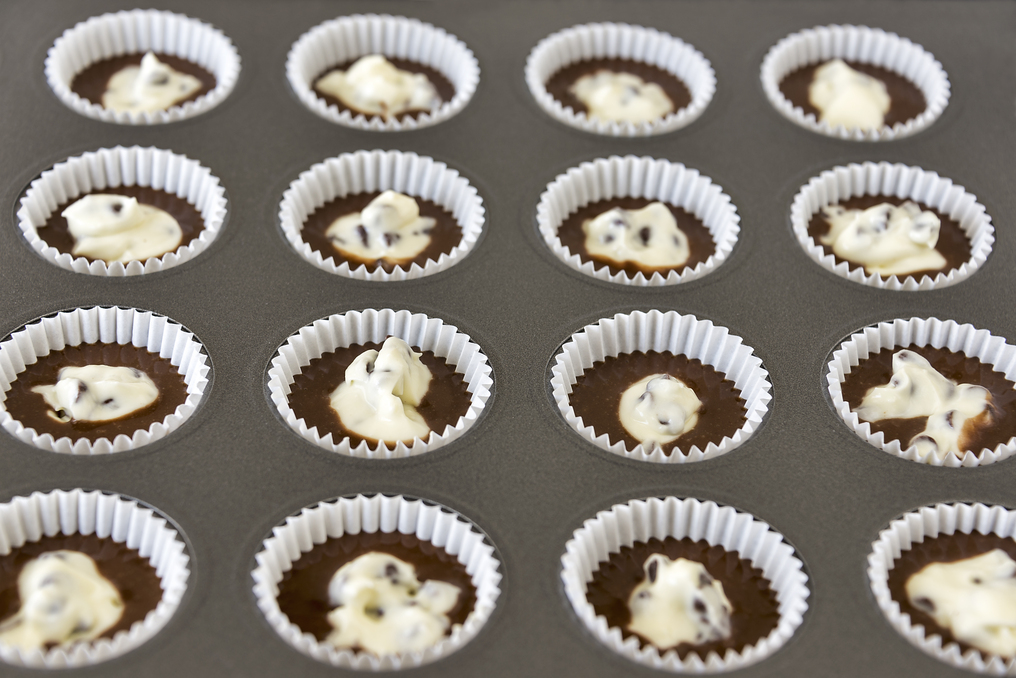
  • In a small bowl, beat the cream cheese, sugar, egg, and salt until smooth. Stir in chips; set aside.
  • For cupcakes, beat the sugar, water, oil, egg, vinegar, and vanilla until well blended in a large bowl. Combine the flour, cocoa, baking soda, and salt; gradually beat into the egg mixture until blended.
  • Fill 24 paper-lined muffin cups half full of chocolate batter. Drop a heaping tablespoonful of cheese mixture in the center of each cupcake. Sprinkle with sugar and chopped almonds, if desired.
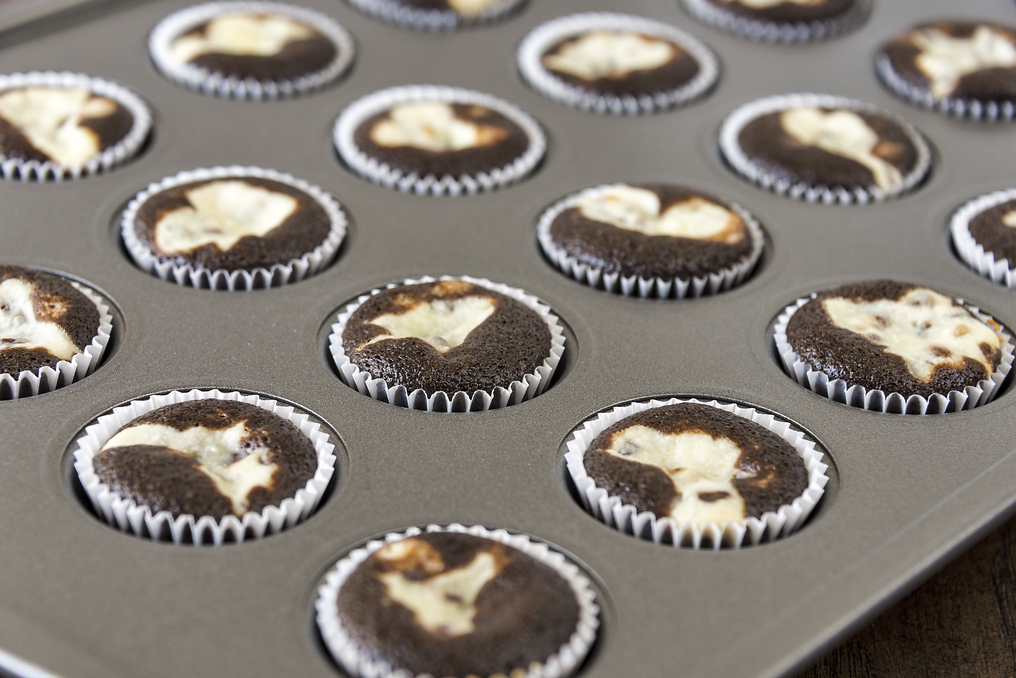
  • Bake at 350°F for 18-20 minutes or until a toothpick inserted in the cake portion comes out clean. Cool in pans for 10 minutes before removing to racks to cool completely. Refrigerate leftovers.

Always My Very Best,

Your Friend Chef Tess


Thursday, October 24, 2013

Guest Post: Pressure Cooker New York Style Cheesecake in 20 Minutes

 Today I shared a really cool way to bake a cheesecake as a guest post on the Here. It cooks in 20 minutes in the pressure cooker, and the texture is remarkable!
I also shared a chocolate raspberry cheesecake variation using the same recipe!
 
 
Go check it out darlings! They also did a PrintPrint Friendly version.
 
Always My Very Best,
Your Friend Chef Tess


Monday, July 1, 2013

No-bake Raspberry Peach Trifle Dessert Jars


 We celebrate the 4th of July this week and I thought I'd share a few of my favorite things for picnics! Remember the Americana Picnic Craft Day post we did on getting ready for the cutsie-cutsie crafts and junk? Once you're ready with your decorating, make sure you're ready for the food!


My Favorite Picnic Dessert

My darlings down at Lucky Leaf  sent me this fabulous package of pie filling...
They always send the best Lucky Leaf Recipes!

Lucky Leaf Pie Filling has been a favorite of mine for many years now. They fill the cans with mostly fruit instead of "fluff" and they always delicious!

I went with this amazing recipe...

Ingredients

  • 18-ounce carton mascarpone cheese
  • 5teaspoons sugar
  • 2cups heavy whipping cream, divided
  • 27.05-ounce packages amaretti cookies, coarsely crushed
  • 121-ounce can LUCKY LEAF® Premium Red Raspberry Pie Filling
  • 121-ounce can LUCKY LEAF® Premium Peach Pie Filling
  • 1cup sliced almonds, toasted

Instructions

In a small bowl, beat cheese and sugar until smooth. Add 1 cup cream; beat on high speed until thickened. 
Spread 1/2 cup of the cream mixture into a 3 quart trifle bowl or glass serving bowl; sprinkle with 1-2/3 cups crushed cookies. Layer with LUCKY LEAF Premium Red Raspberry Pie Filling, 1 cup cream mixture and 1-2/3 cups cookies. Spread LUCKY LEAF Premium Peach Pie filling gently over cookies; layer with remaining cream mixture and cookies. 
In a small bowl, beat remaining cream until soft peaks form. Spread over top; sprinkle with almonds. Chill until serving. 
Chef Tess Version:
Since we're doing the 90 Day Weight Loss Challenge here at my house, I did a healthier version using low-fat Greek yogurt and fat free Reddi-whip. Listen, I have to splurge now and then on that 8 calorie whip or I might go crazy.  I also added a little of the non-GMO Ultra-gel modified food starch to help it set up a bit. It tastes more like a no-bake cheesecake than I can express...in a good way! We also went with some home-baked butterscotch cookies for the crumble. I don't think I'm missing anything except the calories!
Cream layer:
8 oz fat free Fat Free Reddi-Wip, thawed
1/2 tsp almond flavor
Cookie layer:
Fruit:
  • 121-ounce can LUCKY LEAF® Premium Red Raspberry Pie Filling
  • 121-ounce can LUCKY LEAF® Premium Peach Pie Filling
Directions: Mix the yogurt, starch, whip and almond flavor until smooth.

Get the cookies.

Place 1/4 cup of cream mixture in the bottom of 4 pint sized mason jars.  Layer with 2 T raspberry pie filling and 1 cookie crumbled. 
The tighter your cream mixture is to the edge of the jar, the better your layers will look through the glass. 
Add a layer of peach filling, a layer of another cookie crumble, raspberry filling, and cream again. Or just layer as your desire until the jars are filled. You don't have to do it exactly as I did it. 

Chill the jars in the fridge for a few hours, up to 4 days.  

Here's a fun idea for when you're ready to go to the picnic!
4 Pint-sized mason jars fit perfectly in a "grab-n-go" drink carrier and this will help the jars not to rattle or break on the way.
I American-dolled my lids up with some patriotic poppies just stuck to the top with a dot of clear packaging tape. Cutsie-cutsie complete!

They're ready to rock!

Thank you so much to my darlings at Lucky Leaf !
 Now I'm ready for the 4th of July! How about you? 

Need another idea? 

More recipes to follow this week for great celebrations with family and friends! Onward and upward!

Always My Very Best,
Your Friend Chef Tess


Tuesday, April 30, 2013

Pin and Win with Lucky Leaf Springtime 500$ Contest!


 My darlings down at Lucky Leaf  always send me the best goodies in the mail! Seriously. What is the best thing you could send a baker, besides flours? {Tee hee}...

Pie filling! This time it was three free cans of their premium Pie Filling along with some cuter-than-heck recipe cards and a really adorable kitchen timer.  

 I seriously can't get over how simple these recipes were to make! Ya know what though? Their recipes are always easy to make! That's why I love them. Love. Love. Love.
Here are some of my favorites...

This ridiculously delicious


Another absolute favorite was the Amaretto Peach Cobbler in the Awesome 

that included the Sweet and Hot Slow Cooker Pork and Chocotinis! It was a very fun menu and really easy to make ahead of time for the party!

Perhaps my favorite post ever from Lucky Leaf has been the 


 These New Recipes for spring are so light and luscious, we might be having them all summer long!  The first recipe I made was the Lemony Blueberry Layered Pie. Ladies...if you want your husband to fall over with happiness...go ahead. Use this recipe. When I pulled this creation out of the fridge the words that escaped his mouth were, "You blessed woman!"  So ya know...he then sat down with the entire pan and ate it with a spoon.  I guess he thought it was just for him. I did manage to get a small little nibble...and it was ridiculously divine! The second batch I made, I changed the recipe a bit for my family's preferences. I've made the adjustments below.

Lemony Blueberry Cheesecake

 with Pistachio-Graham Crust

Adapted from Lemony Blueberry Layered Pie  from Lucky Leaf

Ingredients

1 10-inch graham cracker crust in a springform pan  (see recipe below for my homemade with pistachio)
3 8-ounce package cream cheese, softened to room temperature
8-ounces sour cream
¼ cup powdered sugar
2   3.4-ounce box instant lemon pudding mix
2 teaspoons fresh lemon zest
¼ cup lemon juice, freshly squeezed
1 21-ounce can LUCKY LEAF® Premium Blueberry Pie Filling

Instructions

Make your crust by combining:
2 1/2 cup graham cracker crumbs, 1/2 cup fine ground pistachios, 1/2 cup melted butter and 1-2 T of water.  Press into a 10 inch springform pan.
 It helps to lightly mist your fingers with a little water so they don't stick.
 Bake at 350 degrees for 101-12 minutes.
Allow to cool while making the filling...


Filling directions: Combine cream cheese, sour cream and powdered sugar in a large bowl. Using an electric mixer, mix at medium speed for 1-2 minutes, until smooth. Add pudding mix, lemon zest and lemon juice; mix until well blended.
 I have boys. I will not tell you how much they laugh whenever they see this picture of me squeezing the lemon. If you don't understand...I'm not going to explain it to you either.

 Spoon lemon-filling mixture on top and spread evenly. Cover and chill for at least 1 hour.

Spoon  Lucky Leaf Premium Blueberry Pie Filling on top just before serving. Garnish with fresh lemon zest if desired.

The second recipe I did was the Cherry Coconut Squares. Um Wow! There are only 6 ingredients in these bars and so far, my boys have asked me to make them four times in the last four days. I have a teenage boy and one nipping at his heals. Tell me that they'll stop eating soon. It is starting to get scary. Speaking of scary. These coconut squares are the most delightful coconut shortbread imaginable topped with the super-fruit cherry filling from Lucky Leaf. I'm telling you...you can't lose!
That being said, these whip up in minutes, are delicious to make, and have made their way to the top of the list of "Best Things to Trade" at the lunch table.
  My son says he can get premium trade-items from other kids whenever he brings them in his lunch box...and he still won't trade them with his friends! 
There. That is the ultimate test right there! Punk my lunchbox. That's right. I'm super-bad!

 Cherry Coconut Squares from Lucky Leaf

Ingredients


  • cup sugar
  • ¼cup butter
  • 1 ½cups all-purpose flour, sifted
  • ¼teaspoon salt
  • 18-ounce can flaked coconut
  • 121-ounce can LUCKY LEAF® Regular or Premium Cherry Pie Filling

Instructions


Preheat oven to 375°F.
Cream sugar and butter. Sift flour and salt together and then add to creamed mixture. Mix in coconut.

 Pack 1/2 of this mixture into a greased 9-inch square pan. Spread LUCKY LEAF Cherry Pie Filling on top. Put remaining crumb mixture on top of pie filling. Pat down firmly


Bake for 25 to 30 minutes. When cool, cut into 16-squares.


Guess what?!!! The fun hasn't stopped!  Lucky Leaf is opening up a great Contest to you my darlings!!
  •  The Grand Prize is 500$, and two additional winners will receive 200$!  
  •  To enter the contest, go to the Contest Entry Pin and pin away (Contest starts May 1st)! There isn't anything posted on the page-link until then so you might have to be patient...
There you go my darlings! Join me for this amazing contest and share these outstanding recipes!

Always My Very Best,
Your Friend Chef Tess


Wednesday, December 16, 2009

Pansy Man's Cherry Cordial Cheesecake


My dad is the Pansy Man. He was labeled that about 16 years ago when a local newspaper came to see the greenhouses he ran for our worldwide-church and the reporter saw the inordinate number of pansies the sweetest man on earth was able to produce. In a very deep Russian accent the reporter said, "Pansy Man" and that was in fact the title of the article... Some men would have taken offense to that nickname, but my father, who is one of the most tender kind beings to ever walk the earth...it fit. He's strong. Not to be confused with the term applied to wimpy men. His Super-Pansy strength has allowed him to raise me...who, let's face it...would take the strength and emotional stability of Job. He's a nurturer and the embodiment of creativity. Yes, to raise me would take that most amazing of souls. He did it...with flying colors. He did in fact raise 4 children with that same spirit of love. Today on his 60th birthday as children and family gathered around to celebrate his life...this is the cake he wanted. Cherry Cordial Cheesecake. A real man's cake. He is a man who will answer to God that he did, in every way, love and support his family. That my friends, is worth celebrating.
Cherry Cordial Cheesecake
seriously altered and Adapted from the Pillsbury Christmas Cook book 2007

Crust:
2 cups chocolate cookie crumbs
3 T melted butter

Filling:
2 lbs cream cheese, softened
3 eggs
3/4 cup sugar
1/2 tsp almond extract
1/2 tsp pure vanilla
1/2 tsp orange oil (King Arthur)
1/4 cup whipping cream
1 cup prepared cherry filling (canned or fresh homemade)
1/4 cup chocolate chips
Ganache Glaze:
1 cup cream
1 lb chopped high quality chocolate (we used Guitard)
1/4 tsp hazelnut oil
1/4 tsp cinnamon
1/8 tsp ancho chile powder
Crust:
Heat oven to 325 degrees. In a medium bowl combine crust ingredients. Mix well. Press into the bottom and 1 inch up the sides of ungreased spring form pan.
Filling:Make sure cream cheese is at room temperature. Add sugar, almond extract,vanilla and orange oil. Cream this mixture until smooth, scraping down the sides of your bowl several times to ensure it is all combined.
It should look very smooth. Add the cream and combine again.
Beat in the eggs one at a time. I mean it. One at a time. This will give you a very even nice batter.
Pour 1/2 of the batter in the prepared crust in a spring form 10 inch cheesecake pan.
Do everything in your power to avoid licking the rim of that mixing bowl...or at least tie your hair back so it doesn't get in the batter. Sick-o.
Cherry filling. One cup. Canned or homemade? Yeah...whatever you want. Just make sure it tastes like cherry filling and not tin can. That's all I have to say about that.
Spoon the one cup of cherry filling over the middle of the cheesecake filling, leaving an inch around the outside edge and a 3 inch circle in the middle.
Gently cover the filling with 1/4 cup dark chocolate chips and then lightly spoon the remaining cheesecake batter over the top of the filling. It should cover the filling completely.
Bake 325 degrees 1 hour and 5 minutes. I personally prefer baking 2 hours at 300 degrees.
Now, hunk off 1 lb of high quality chocolate. The Professor was in town for this event, and he mathematically calculated how much I would need.
Boil one cup of cream in a sauce pan and pour over the chocolate. I added 1/4 tsp hazelnut oil, 1/4 tsp cinnamon, 1/8th tsp ancho chile powder...and blended until smooth. Want to see something evil?
Don't hurt yourself. Once cheesecake has been removed from the oven, chill 4-6 hours. Remover spring form ring and spread the chocolate ganache glaze over the top of the cheesecake (use a spatula...I know you'll want to use your tongue...but don't do it). Once glaze has been done, shaved chocolate or decorations may be added as desired.
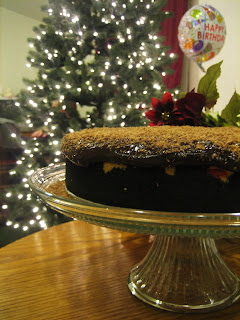
All I know...is the Pansy Man said it was perfect. You just don't get better approval than that.
There you go dad. Thank you for being a Pansy Man. I love you forever!

Always My Very Best,
Your Friend Chef Tess