Showing posts with label Homemade dairy. Show all posts

Monday, April 2, 2012

Homemade Yogurt Tutorial and Yogurt Parfaits...Fox 10!


This is not the first time I've made homemade yogurt on my blog. It is, however, the first time I've combined the yogurt making and the parfait making into one post. If it looks a lot like the original yogurt post...it is. Haa. 

Tomorrow morning I'm visiting Fox 10 Arizona Morning show at 9:45 for some basics on homemade yogurt and I thought I'd share the printable pdf along with the details of the show...all in one spot. I'm nice that way. Feel free to buy me a polk-a-dot apron or something with all the money you save on yogurt. Better yet...get one for yourself!  Xoxo. Seriously. I need an apron intervention...or convention. I can't decide which would be better for me at this point. I'm leaning toward the convention though. There's too many frilly aprons in the world for them to not be all in one spot at one time for me to just shop until I pop...right?

Homemade Yogurt and Yogurt Cheese Tutorial
How many years can a mother say, "Eat this. I promise you'll like it"? Little man took a picture of me saying it over a tray of broiled sub sandwiches slathered heavily with herbed yogurt cheese. My favorite is still fresh blackberries with Homemade fruit and nut granola and mesquite honey. I've spoiled myself. Ruined forever. I will never look at yogurt the same. After I'm through gasping and dramatically wiping my sophisticated brow we can get on to business.
Okay. I'm ready now.
I've talked a little about the ever amazing work of Dr David B. Fankhauser, Ph.D. Professor of Biology and Chemistry. His blog has been a great source of information on homemade dairy. I dare say, one of the best I've seen as far as easing any concerns anyone may have about the safety and use of yogurt made at home. His Introduction to Yogurt is superb. I highly suggest reading it, as well as his detailed (highly detailed...to the point of perfection!) directions on how to go through the proper Procedure (Illustrated). I'll talk here briefly on it. I do however make no claim about being an expert on this subject. I've been practicing all his techniques and am now totally bird-dogging. I bow in respect. (I also now do the ceremonial head cock and "thumbs up" gesture with a cheesy Chef Tess grin.) Well done. Anyone else picture Drew Barrymore in "Never Been Kissed" just then? Totally what I look like when I do the thumbs-up. Right before I trip on my shoes and fall to the ground in a pool of cute-ness.
Speaking of pools of cuteness. Let's begin.
You will need Supplies and Equipment.
1 gallon fresh milk (either store bought, or your own home grown milk)
starter: 1 cup Dannon Plain yogurt, very fresh The good Dr. prefers Dannon Plain, made purely with milk and culture. (Get the freshest: check the expiration date.)Dannon Plain WORKS for me. See label
Equipment:
Heavy bottomed stainless steal pot that can cook 1+ gallon
four quart jars with lids, sterilized in boiling water
one 8 oz jar with lid, sterilized in boiling water.
candy or meat thermometer, reading range = -10 to 110oC (0 to 225 oF)
2 cup liquid measuring cup
1 medium sized "cooler" (such as a "Playmate" or Styrofoam with close fitting lid) (A gas oven with pilot may work if monitored closely).

These are the Directions according to Dr. David B. Fankhauser. 
Sanitation is key here folks. Please don't skip any of these details.

1: Sterilize jars and lids which will be used to make the yogurt. Place in a 5 gallon pot with an inch of water in the bottom.

2: Cover and bring to boil. Boil for ten minutes. Turn off heat, do not remove lid.

3: Use a pot with a thick bottom to scald the milk. Note the thick pad on the bottom of this pot.
 Alternatively, a double boiler may be used. It is not necessary to boil the milk. This gives the milk a "cooked" flavor, and increases the probability that it will burn on the bottom or boil over.

4: Scald until the temperature of the milk is 85-90 C (185-195 F). It is not necessary to boil, and do not let boil over...what a mess! (Many claim success leaving out this step. But... results may work, but intermittently...)

5: Cool milk to 122-130 degrees. Rocket science as it sounds, it's important to watch the temperature so you don't kill the good stuff in the culture that would be bad. It won't make yogurt without that stuff.Place one cup of the scalded and cooled milk in a two cup measure. Add enough fresh, uncontaminated yogurt to bring the level up to two cups. Uncontaminated meaning yogurt from a new clean container that has never been dipped into. (Especially by your kiddos. I know what grows under those fingernails. Bleck!) Stir to blend the yogurt starter into the scalded and cooled milk until homogeneous

6..INOCULATE: Add the yogurt-milk slurry slowly to the 50 C scalded and cooled milk with stirring. (No hotter--you will kill the bacteria in the starter.) Stir very well to thoroughly distribute the yogurt starter. Once thoroughly mixed, distribute the inoculated milk to the sterilized jars, filling to the neck. Cover immediately with sterile tops. Tighten well.
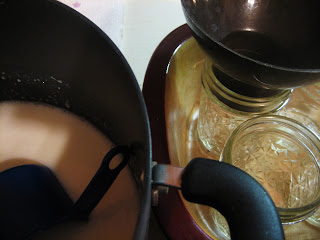
7.INCUBATE:Warm a gallon of fresh clean water to 55 C, pour into a clean cooler. Place in a warm location. I use my oven, turned off or in the summer, my Arizona front porch is perfect. Sad isn't it? At any rate, carefully set the jars of inoculated milk in the water so the bottom of the lids are above the water.
let sit undisturbed for three hours. If the starter was active and the temperature correct, the yogurt will have gelled. I let mine sit for about 8 hours and it is perfect. Either for a nice delicate snack or to take at this point and make into yogurt cheese. See: how to make labneh for more detailed instruction.
Homemade Yogurt Cheese Tutorial 
Place salted yogurt in a sterile colander lined with a sterile handkerchief.
Bunch with a clip or tie. Suspend over the bowl. It usually takes about 24 hours.
This is what it looks like.
I mix it with herbs and garlic. 1 tsp Italian herbs and 1 tsp fresh pressed garlic to 1 cup of cheese. Look how awesome it is!
Sometimes I fold a little into cooked hot pasta and it makes a quick wonderful dinner. Fat free and so creamy!
By and far, my favorite use for it on Solar oven roasted potatoes with herbs and carrots. Swooning yet?
Now on to the Parfaits!

 Recently I've been addicted to these little love nugget-layer-delights. They are basically my  Homemade yogurt,  Home-Spun Breakfast Cereal or my favorite...

Homemade fruit and nut granola and of course, some of the evil-delight...

a fruit layer Using Freeze Dried Fruit for Freezer Jam.  
The thing I love most is that we don't use any added sugar in this "jam" filling...so these parfaits are relatively healthy.


I've discovered that the use of the half pint (1 cup) mason jars for the parfaits work perfectly. It helps me to have something covered like that in the fridge. My 87 year old father in law (AKA Mr. Putt Putt) likes having them around too.  My kids beg for them.  


So, that being said, I think everyone can now safely make some delightful snack or breakfast grab-n-go items.
There you go. Make some yogurt and some yogurt parfaits! 
Always My Very Best,
Your Friend Chef Tess

Tuesday, September 14, 2010

How to Make American Mozzarella Cheese


I'm excited and pleased to announce that I have finally been able to produce Mozzarella cheese. Mind you, it's fresh cheese made at home. I can control the dairy and the ingredients. Daggumit...I can make it. Isn't that cool? Now why would I make it if I can just buy it at the store? Hypothetically...I could. Just like the rest of the world, but there is something fantastic about being able to take a raw ingredient and make something out of it. I adore the freedom that it gives me to know that no matter what the circumstance, if I have milk...we can have cheese, cottage cheese, cream cheese and yogurt. If you missed any of those posts on Homemade dairy, they are a good read. They are also wonderfully instructive picture tutorials on some of that homemade dairy basic stuff. I started making homemade dairy when we had some friends drop off several cases of dry milk powder. They had no idea what to make with the dry milk...and I was a full time stay at home mom on a very tight income. I saw all kinds of possibilities, and I learned quickly. Needless to say, as things have become less tight, I've relaxed on my cheese making. However, the nagging question at the back of my mind has always been lingering on other cheeses. Could I make pizza for my kids or lasagna if all I had was milk powder* and some flour? Could you?! This has been my quest, not only for myself, but for anyone who may be anxious to learn a new skill. I'm passionate about learning and trying new things. Cheese is the next step...in many steps.


Tutorial Tuesday today is American mozzarella. This is the cheese commonly used on American pizza. It is made using citric acid for acidification instead of bacterial fermentation as in other cheeses. It is very elastic, melts well and strings when hot. It makes great American Pizza.


This recipe was created for Junket by Dr. David B Fankhauser, PhD Professor of Biology and Chemistry University of Cincinnati Clermont College. Dr. David is very smart. I bow to his mighty large brain.

You will need:

Ingredients:

1/2 Junket Rennet Tablet

1-1/4 teaspoon citric acid powder

1 teaspoon salt

1 gallon milk whole milk for a richer flavor or skimmed milk for low calorie cheese*
( Note: I have been very successful using dry milk powder* dissolved in water for all my dairy making, but Dr. David Fankhauser does not recommend it usually.)

Equipment: Large 2 gallon pot, one gallon bowl, 8 inch strainer and cheese cloth. 1 quart more of water and 1/3 cup of salt.

Directions:
Warm milk over gentle heat 88ºF (31ºC). Temperature is important so use a thermometer and watch it carefully!

If you have never seen a rennet tablet, let me introduce you to my friendly neighbor hood Junket.


It takes half a tablet to make a batch of mozzarella.


This next ingredient is granulated citric acid. If you don't know where to find it, look in the home canning section of your local Wal-Mart or contact my friend Troy down at Preparing Wisely. He said there would be some in the store (hopefully today). A little goes a long way and I assure you...it is well worth keeping around if you plan on making cheese on a regular basis.

Dissolve 1-1/4 tsp. citric acid powder in 1/2 cup cool water.
Dissolve 1/2 Junket Rennet Tablet into 1/4 cup cool water. Stir thoroughly into warmed milk
mixture. When it set about 30 minutes it looked like this:
Let set undisturbed for 1-2 hours, until a clean break is achieved. It will come clean when you cut into it. Cut curd into 1/2 inch cubes.

Put the curds and whey in a large 2 gallon pot. I usually heat just two minutes and remove from the heat. Warm the curds and whey over low heat, stirring gently to warm evenly and keep the curds separated until temperature reaches 42º C (108ºF). When the pot is off the heat, it is easier to Hold at 42ºC for 35 minutes, stirring every five minutes to keep curds separated and off the bottom. This temperature is a "no brainer" in Arizona during the summer. In fact, I can put the pot outside on my patio and it stays perfect for the duration of this step. At any rate, while it is held at that temperature, get your remaining equipment ready. While it heats, get your strainer and a one gallon bowl...

Cloth to line the strainer is pivotal for good cheese. I use a fine cotton instead of the store purchased "cheesecloth". I find it not only costs me nothing...but it is much better for cheese making at retaining all the curd. This cotton I drape over the strainer.

Pour the curd into the cloth and twist the top of the cloth closed.
This is an 8 inch sieve over a 1 gallon container, let drain for 15 minutes. The whey will separate from the curd.


After 15 minutes it will look like this:


Now you need a 2 cup glass measuring cup. Set it aside. Get your one tsp of salt. Put the curd in a bowl.

With very clean hands, break up curd. Then mix in 1 teaspoon salt thoroughly.


Place 1 cup of salted curd into 2 cup glass measure. Microwave on high for 45 seconds. You will also need to put 1/3 cup salt into 4 cups of water to make the brine for the cheese. This salt needs to be dissolved.
Remove cheese curd from the microwave. Separate hot curd from container with the back of a fork, knead with hands to distribute heat evenly. Use caution, as it can become very hot.
Heat again for 20 more seconds. Stretch and fold to make smooth and elastic shape into a soft ball.
Drop into cold, salted water (1/3 cup salt per quart), let sit in refrigerator for a day, store in an air tight container. Use within a week.

Again, I can't take credit for this amazing process. This recipe was created for Junket by Dr. David B Fankhauser, PhD Professor of Biology and Chemistry University of Cincinnati Clermont College http://biology.clc.uc.edu/fankhauser/Cheese/CHEESE.HTML . I, Chef Tess, am but a faithful follower of Dr David. Thank you for all you do!

To see more delicious recipes and products visit the Junket web site http://www.junketdesserts.com/ and if you do remember this little tidbit...

Redco Foods AKA Junket wrote me an email. Here's what they said, "Currently we have a promotion running that with your first order you will receive 50% off (before shipping) using offer code JKT5006. We would be delighted if you posted this recipe on your blog. Have a great day!"

So, there you go folks. Make some cheese! I want to hear about your experiences.

Monday, August 31, 2009

Alternate Cooking Method Homemade Cottage Cheese

This is the official follow up on the original posting for Homemade cottage cheese . Brace yourselves people. I, Stephanie Petersen, am now letting everyone know that there may be an easier way to make cottage cheese from powdered milk. I'm almost embarrassed to admit this. It's just hurting my cute little ego. Sigh...alas, I think it's very healthy to admit when something this cool happens to me. It was quite by accident that I came across this method. There. It's out there. I'm not as sharp as I pretend to be. Is anyone? Really? Except for Ace. He is as cool as he pretends to be (think on that one...). On this occasion, I literally just forgot to add all the water to my powdered milk. I was using powdered because we where out of fresh milk. The irony? I was shocked at how quickly it set and how much easier it was. I think I actually find more success. Scary isn't it? First, I followed the instructions for Homemade cottage cheese except I used:

COTTAGE CHEESE
Ingredients:
1/4 Junket Rennet Tablet (http://www.junketdesserts.com/)
1/2 cup water
1 quart water, 70 degrees
4 cups powdered milk
1/4 cup buttermilk
1 teaspoon salt
1/3 cup cream

Dissolve Rennet Tablet in 1/2 cup water by crushing. Set aside. In a large (8 cup capacity) sterile microwave safe dish with a fitting lid, heat water to 70º F. Add the milk powder and dissolve. 70 degrees is important. It will not feel warm to the touch. (Use a thermometer folks!) Stir in buttermilk and Rennet Tablet solution, mixing well. Cover with towel and let stand at room temperature 12 to 18 hours until firm curd forms. To test for firm curd, remove a milk sample at a point near the edge of the pan or bowl with a spoon. The curd is ready when the coagulated milk sample holds its shape and the edges are sharply defined.
Now here's the difference in cooking method. I took the curd and placed it in the microwave for 1 minute on high heat, then stirred it. Allowing it to sit for 5 minutes.
If you are against the microwave cooking, by all means, do the double boiler spoken of in the original post.
Make sure you are Checking that the curd doesn't get above 115 degrees. 110 degrees is optimal. Mine did get slightly warmer and I stirred it. Even a few degrees hotter and it will turn to more of a soft fresh mozzarella. This batch actually ended up okay because I caught it in time. I have found this method to be easier at allowing it to stay at this temperature for about 20 minutes.
Stir ever few minutes and heat 20-30 seconds if it gets below 100 degrees. After 20 minutes, drain the whey. It takes a lot less space to do this one and yields about one pound of cottage cheese with excellent flavor. Not a hint of dry milk taste. Transfer to a clean bowl and mix in the salt and cream. Enjoy as you would cottage cheese.

See, and now you can sleep at night knowing that even I can admit when I find a better way. I'm not opposed to seeking out bold better and brighter futures. I think we can all agree on that.
There you go...
Hey, does anyone else wonder why I end all my posts "There you go"?
It's my way of saying, "Now you go do it." I want to hear all your joys and despairs on this journey. I'm here learning everyday right along with you.
So...There you go.

Homemade Soymilk

If I drink regular milk plain, I wake up in the morning looking all puffy like I stuffed my eyelids with marshmallows. Oh, that's attractive. It doesn't happen with yogurt or any of my homemade cheeses, just on plain milk. If I was more of a rocket scientist, I would have a logical reason for it. As it is, I just steer clear of chuggin' milk from the jug.Unlike my 10 year old. I have to remind him on a regular basis to "get a cup". Really. I feel like the lab assistant at my Dr.'s office...but she's asking for a cup for a totally different reason. There it is. Now you know. I, like Superman, have a weakness. (No...not the cup at the doctor's office. I'm not a total freak. Total.) Milk. My weakness tastes better than kryptonite...and it's really hard to avoid. I try to make my soy milk as much as possible. It tastes just as good as the store kind, except for the fact that it does separate a little and I have to stir it up before I pour it on my cereal. My hats go off to the people at Hodgson Mill. They make this awesome soy flour that I like a lot. Now, I do know you can make the soy milk from the actual soy beans. I just use the flour because it is much faster. Yea, I know. I do have corners to cut sometimes. Bet you thought I just made everything from scratch that took 12 hours at a time right?
You will need:
6 cups water
1 cup soy flour
Combine in a cool pot whisking well and then bring to a boil. Simmer 20 minutes stirring every few minutes so it doesn't burn.
It's that simple. You may strain it if you think yours has lumps. Add a little honey or sugar and a little vanilla or chocolate sauce for flavored soy milk. That's the full rocket science of the project. Remember to keep it in the fridge and stir if needed. Keeps good up to a week.
Enjoy saving money on soy milk.
There you go.

Thursday, August 20, 2009

Homemade Yogurt...and Yogurt Cheese (Labneh)

How many years can a mother say, "Eat this. I promise you'll like it"? Little man took a picture of me saying it over a tray of broiled sub sandwiches slathered heavily with herbed yogurt cheese. My favorite is still fresh blackberries with Homemade fruit and nut granola and mesquite honey. I've spoiled myself. Ruined forever. I will never look at yogurt the same. After I'm through gasping and dramatically wiping my sophisticated brow we can get on to business.
Okay. I'm ready now.
Yesterday we talked a little about the ever amazing work of Dr David B. Fankhauser, Ph.D. Professor of Biology and Chemistry. His blog has been a great source of information. I dare say, one of the best I've seen as far as easing any concerns anyone may have about the safety and use of yogurt made at home. His Introduction to Yogurt is superb. I highly suggest reading it, as well as his detailed (highly detailed...to the point of perfection!) directions on how to go through the proper Procedure (Illustrated). I'll talk here briefly on it. I do however make no claim about being an expert on this subject. I've been practicing all his techniques and am now totally bird-dogging. I bow in respect. (I also now do the ceremonial head cock and "thumbs up" gesture with a cheesy Chef Tess grin.) Well done. Anyone else picture Drew Barrymore in "Never Been Kissed" just then? Totally what I look like when I do the thumbs-up. Right before I trip on my shoes and fall to the ground in a pool of cute-ness.
Speaking of pools of cuteness. Let's begin.
1 gallon fresh milk (either store bought, or your own home grown milk)
(whole milk makes richer flavored yogurt, skim milk makes it non-fat)
starter: 1 cup Dannon Plain yogurt, very fresh
The good Dr. prefers Dannon Plain, made purely with milk and culture. (Get the freshest: check the expiration date.)Dannon Plain WORKS for me. See label
Equipment:
Heavy bottomed stainless steal pot that can cook 1+ gallon
four quart jars with lids, sterilized in boiling water
one 8 oz jar with lid, sterilized in boiling water.
candy or meat thermometer, reading range = -10 to 110oC (0 to 225 oF)
2 cup liquid measuring cup
1 medium sized "cooler" (such as a "Playmate" or Styrofoam with close fitting lid) (A gas oven with pilot may work if monitored closely).
Directions according to Dr. David B. Fankhauser. Sanitation is key here folks. Please don't skip any of these details.
1: Sterilize jars and lids which will be used to make the yogurt. Place in a 5 gallon pot with an inch of water in the bottom.
2: Cover and bring to boil. Boil for ten minutes. Turn off heat, do not remove lid.
3: Use a pot with a thick bottom to scald the milk. Note the thick pad on the bottom of this pot. Alternatively, a double boiler may be used. It is not necessary to boil the milk. This gives the milk a "cooked" flavor, and increases the probability that it will burn on the bottom or boil over.
4: Scald until the temperature of the milk is 85-90 C (185-195 F). It is not necessary to boil, and do not let boil over...what a mess! (Many claim success leaving out this step. But... results may work, but intermittently...)
5: Cool milk to 122-130 degrees. Rocket science as it sounds, it's important to watch the temperature so you don't kill the good stuff in the culture that would be bad. It won't make yogurt without that stuff.Place one cup of the scalded and cooled milk in a two cup measure. Add enough fresh, uncontaminated yogurt to bring the level up to two cups. Uncontaminated meaning yogurt from a new clean container that has never been dipped into. (Especially by your kiddos. I know what grows under those fingernails. Bleck!) Stir to blend the yogurt starter into the scalded and cooled milk until homogeneous.INOCULATE: Add the yogurt-milk slurry slowly to the 50 C scalded and cooled milk with stirring. (No hotter--you will kill the bacteria in the starter.) Stir very well to thoroughly distribute the yogurt starter. Once thoroughly mixed, distribute the inoculated milk to the sterilized jars, filling to the neck. Cover immediately with sterile tops. Tighten well.

INCUBATE:Warm a gallon of fresh clean water to 55 C, pour into a clean cooler. Place in a warm location. I use my oven, turned off or in the summer, my Arizona front porch is perfect. Sad isn't it? At any rate, carefully set the jars of inoculated milk in the water so the bottom of the lids are above the water.
let sit undisturbed for three hours. If the starter was active and the temperature correct, the yogurt will have gelled. I let mine sit for about 8 hours and it is perfect. Either for a nice delicate snack or to take at this point and make into yogurt cheese. See: how to make labneh for more detailed instruction.
Place salted yogurt in a sterile colander lined with a sterile handkerchief.

Bunch with a clip or tie.
Suspend over the bowl. It usually takes about 24 hours.

This is what it looks like.

I mix it with herbs and garlic. 1 tsp Italian herbs and 1 tsp fresh pressed garlic to 1 cup of cheese. Look how awesome it is!
Sometimes I fold a little into cooked hot pasta and it makes a quick wonderful dinner. Fat free and so creamy!

By and far, my favorite use for it on Solar oven roasted potatoes with herbs and carrots. Swooning yet?
There you go.