Showing posts with label breakfast. Show all posts

Monday, November 20, 2017

Good Morning Arizona! 3 Brilliant Ways to Use Thanksgiving Leftovers for Breakfast, Lunch and Dinner


Tomorrow morning I will be on Good Morning Arizona sharing 3 Brilliant ways to use Thanksgiving Leftovers for breakfast, lunch, and dinner! I'll be incorporating a lot of whole grain goodness from Organicgrains.com in this one because I not only have the honor of using their grains often in my baking as part of my regular job but also because I love them!
Breakfast: 

Puff Pastry (or Biscuit) Turkey Quiche Cups

1 package froze puff pastry*
8-10 oz cooked turkey, well seasoned
8 slices of bacon, sliced in 3 pieces (total 24 small pieces)
3 eggs, beat well
1/4 bell pepper, chopped fine
12 1 inch squares of Havarti or Swiss Cheese
Pepper to taste

Allow the puff pastry to come to room temperature and cut into 12 squares. Line the bottom of a muffin cup with the pastry up the edges.  Put pieces of bacon and bell pepper in each cup and top with a few chunks of turkey.  Fill cup with 1 Tablespoon scrambled egg. Put a nice little cheese top on the whole deal-eee-oh (no I really don't have a real technical jargon for the muffin thing-a-ma-gig...sorry.) Bake 425 degrees 13-15 minutes. Serve warm. Any leftovers need to go in the fridge. 
*Variations:
Low carb: Omit the puff pastry and spray the muffin tins well with a non-stick coating (or line with a cupcake liner).  Proceed with the recipe filling the cups as described. 
Biscuit: Use biscuit dough in place of the puff pastry dough.
Flavors: Change the seasoning using your favorite variety of fajita seasoning for a Southwest quiche, French herbs de Provance for a more classic flavor, Spinach to replace the bell pepper if desired. Play with these! 

Lunch:


Start with the Sweet Potato Bread...

The Sweet Potato Bread is my original recipe made in full in the Fall Sweet Potato Bread Tutorial with the embellishments and leaves.  Here, I'm just giving you the recipe for the plain loaves. 

Chef Tess' Sweet Potato 5 Day Bread Dough
yield: 4 loaves 
2T active dry yeast (over 3000 feet use 1 T only)
4 cups milk, cold is best 
3/4 cup honey Or Organic Maple SYRUP
1T salt
4 eggs (or 1 cup egg replacement)
3/4 cup oil
1 1/2 cup mashed sweet potatoes. cooled to body temp again. The consistency of thick oatmeal.
1T baking powder

 2T cinnamon, 
2tsp ground ginger and 
1T vanilla
2 cups Organic Grains Freshly Milled hard white wheat flour
12-14 cups  organic grains bread flour  (I have used fine ground white wheat and been fine doing all whole grain, use only 12-14 cups total if whole wheat is used )

Directions: Dissolve yeast in milk. Stir in honey. Allow yeast to get all foamy and look like it is having a hay day. Add egg, oil, mashed sweet potato, baking powder, 2 cups whole wheat flour, 2 cups all-purpose flour spices, vanilla, and salt, in that order. Do not let yeast come in contact with salt on its own or it will kill the yeast. Beat until smooth. Allow dough to rest 10-15 minutes
Add enough of the flour remaining to make a soft dough that is easy to handle but not dry. Turn dough onto a lightly floured surface and knead 10 full minutes. about 600 turns. Yea. 600 by hand. 5-6 minutes by machine on medium speed. Form into a ball and place in an ungreased 2 gallon bowl, covered tightly. If you don't have a large enough bowl...use two smaller bowls. Or...just half the recipe if you are worried. Put in the fridge. Punch down after 2 hours (this may be faster if you use warm ingredients or flour. If the dough is over 85 degrees when you put it in the fridge, be sure to punch down sooner. Also...if you have kids who open the fridge a lot, be sure to lower the temperature a bit so that your fridge is really as cold as it should be) Form into a ball again. Cover tightly and chill at least 8 hours.
Be sure to punch down daily (this not only expels gas, but also ensures even temperature in the dough). This dough can be made up to 5 days before Thanksgiving! So, it's nice to have around. It's also amazing to make into rolls instead of bread, should you choose to do something else. This makes four loaves. Four. I will only make one here, but you'll get the idea. Take one-quarter of the dough and roll it into a tight ball. I like to expel as much air as possible so it raises rather uniformly. Gather the dough at the bottom and make a tight ball out of the dough.
Place on a parchment lined baking stone or baking sheet, at least 12 inches by 10 inches. Allow to rise until doubled, uncovered, lightly misted with water. When almost raised, turn on the oven to 425 degrees.  Bake 425 degrees 15 minutes and lower the temperature to 350 for the final 15-20 minutes of baking.  Allow cooling. Slice and wrap tightly. 

To make into the Turkey Grilled Cheese simply place a slice of the well-seasoned turkey and 2-3 slices of sharp cheddar on a thick slice of the sweet potato bread. Grill on the stove in a medium skillet over medium heat with melted butter until golden and toasted.  Add a Tablespoon or two of cranberry relish and a drizzle of good balsamic. Garnish with minced fresh rosemary if desired.


Dinner: 
Marinara Turkey Sliders with Roasted Garlic 


Get your rolls.
In this recipe, I used the 4 Ingredient Make-Ahead-Rolls from Organicgrains.com. Or the Make-Ahead No Knead Cracked Wheat Dinner Rolls (pictured below).  If you're still looking for great roll recipes, these will save your brain power. 


You will need:
1 dozen baked rolls 
1 lb cooked turkey
1 cup roasted garlic
1 1/2 cups marinara sauce
12 slices mozzarella
1/2 cup Garlic infused Ahuacatlan Avocado Oil
1 cup parmesan cheese
Parsley, chopped (for garnish if desired)

Direction:
Cut a 1 1/2 inch circle out of the top crust of each roll and set aside. With each roll, remove a little of the soft interior or push it down with your thumb. 


In each roll, add 1 1/2 oz turkey, 2-3 pieces of roasted garlic, 2 Tbsp Marinara, and1 slice of mozzarella. Top with the circle of crust that was removed previously. Brush with garlic infused olive oil and sprinkle with parmesan cheese. Bake at 350° for 15-20 minutes. Serve hot. Garnish with chopped parsley if desired.


There you go! Make some awesome meals with all those Turkey leftovers!

Always My Very Best,
Your Friend Chef Tess


Wednesday, November 15, 2017

Meal in a Jar: Breakfast Ham and Zucchini Quiche Casserole (Low Carb & Gluten Free)


One of the classes I adored teaching was how to make shelf-stable meals in a jar that are good 5-7 years. This is, in fact, something I have done for my family for years. It's just a super practical way to have a "grab-n-go" meal for any occasion. Unlike other jar meals I've seen, the ones I plan are "just add water" and include the meat, veggies, sauce and all...ONE jar. One place. Grab-n-go!   These quart size jars make a meal for our family of 6 (4 adults, 2 children) and average about 9 cups of prepared food coming from the small amount of space in a quart jar. They can be made in mylar bags, but I personally prefer the jars. They're airtight, rodent proof and clear, so I can tell if the food is still gorgeous. Yes, I do slip into my Hollywood fashion designer alter-ego and say, "Fabulous Darling! Fabulous!"  Yes. I realize I'm odd. Shhh. I'm happy in my delusion. It keeps me young. What was I talking about? Oh yeah...

 I'm sharing an adaptation of an old family recipe that I think is a keeper! I made it for my kids and the 12-year-old had 3 plates of it. Next time I'm making half gallon jars. I'm getting into teen years with these little whipper-snappers. Yikes. Needless to say, the meals will feed a normal family of 5...or one teenage boy. I also plan a loaf of bread a day per person (for rolls, breadsticks, or sides like that) in my food storage. I have a whole series of jars based on those too...but that will be a later post.   This is an adaptation of my mom's Zucchini Casserole. I grew up with this fresh from the garden and I wanted to capture the flavors in a jar meal for storage.  Thankfully I have found the most beautiful freeze-dried zucchini slices!  I have to stop myself from eating them like potato chips right from the can. You know what else I love? I love the there's no junk added to my favorite brand of freeze-dried veggies.  It's just the veggie. Just the fruit. Nothing added but happiness. 

When the Breakfast Ham and Zucchini Quiche Casserole is in a jar, it looks like this...

Cooked, it looks like a quiche and tastes like a quiche...without the crust. 

My Mom's Ham and Zucchini Quiche Casserole
Ingredients:
1 cup Freeze Dried Ham
1/2 cup Freeze Dried Bell Peppers
1/2 cup Freeze Dried Zucchini
1 T Powdered Butter
1/4 cup Ova Easy Egg Crystals or Scrambled Egg Mix
1/2 cup Powdered Sour Cream
 2T  Ultra Gel
1/2 tsp  Italian Seasoning
1  1/2 cup Freeze Dried Cheddar Cheese

Directions: 
 *Real freeze dried meat must be in a glass jar or mylar bag with an oxygen absorber. Open all your cans of happiness. Line up your jars. Get all your measuring tools and stuff together. Make sure you have all your ingredients. 

Put the green onion, freeze-dried ham, zucchini, and bell pepper in the jar. Add the powdered ingredients and shake them down into the veggie mixture. This is how I get a lot of product into a small space. I shake things a lot in my jars. 


 Add the cheese and top with a fresh 300 cc oxygen absorber. You can also use the jar attachment on a food saver, but you'll need to either cut a coffee filter to fit the top of the jar or use a cupcake/muffin liner at the top of the jar just inside the rim to keep the dry particles from clogging the hose. I prefer the speed of the oxygen absorbers. Frankly, that's how I can do so many in a short amount of time. If you want to use the slower method with the lid attachment, you totally can.  
In about 25-30 minutes, the jar lid will "pop", indicating you have a vacuum seal. 

I made eight of these meals in about 15 minutes (one was prepared and in the oven when I took this picture). Eat your heart out, Rachael Ray. One dinner in 20 minutes is so last week.

To prepare:  Preheat oven to 325 degrees.  Pour the jar ingredients into a 2-quart bowl and add 2 1/2 cups cool water. Allow to hydrate 10 minutes.


 Lightly grease a 9 inch by 9-inch casserole (or solar oven 9 inch round pan works too).


Cover with foil.  Bake until set, 325 degrees 35-40 minutes. Do not over bake. May be stored in the refrigerator after baking and heated for service. 

I had enough ham to make about 10 of these meals, so initially, the cost is about $8 a meal. Some meals or less if you use the TVP. The sausage TVP is amazing. I'm a big fan.

There you go! Welcome to my meals in a jar!  

Estimated Nutritional Information:
Yield 5 Servings, 336 calories, 25 g fat, 5 g carbohydrates, 1 g fiber, 21 g protein.

Again, the sales of freeze-dried products from my website is a huge blessing to my family and will be to yours.  I give out the recipes here as a service. If you do share them, please give full credit to this site.  Thank you so much!  Onward an upward!


Always My Very Best,
Your Friend Chef Tess


Tuesday, September 19, 2017

Shakshuka : The Versatile Middle Eastern Low Carb Egg Dish


Those of you who have been with me long enough remember the early days of the blog when I first introduced many of my loyal friends to some of my fast, delicious, and super simple comfort foods. My children were young. I ached to express my culinary creativity with my sweet family and dear cooking students. At that time, as it has often been through the years, every penny counted. I wasn't the chef buying truffle oil and expensive wine. I just wanted to feed my babies healthy good stuff.

 I still want all the whole food I can give them.

So, back when we embarked on the "whole foods on a budget campaign", I never in a bazillion years would have known that it would have led us to book deals, radio show hosting and my own TV show airing weekly in Las Vegas. If anything, I thought maybe I wouldn't absolutely lose my mind under a pile of dirty dishes and endless laundry while listening to "The Wheels on the Bus" on a loop.

As for the food, nothing has changed here at home except for the fact that my boys are now teenagers and eat like they have hollow legs. The job title has been added upon, I'm no longer just a full time stay at home mom, but also a full time Caregiver to my aged Mother in Law. When life turned I was given the challenge of being the full-time bread winner working in restaurants and bake shops as an executive chef, it was a struggle to find a balance.

God blessed us with a miracles this year and I am finally now able to be home again as a food writer, chef and recipe developer for a large grain company (and thankfully only having to travel a few times a month away from the home). It's funny how life changes. Both boys are now home-schooled. Little Man is almost done with college!  Granny is still here. Ace is still plugging away. Things are crazy every single day, but we love it!

However, we still want whole food. We still want to stay on budget. We still want it to be super delicious! Super. Freakin'. Drop-dead-happy-delicious. If anything, after all these years, I expect extra awesome flavor in as short a time as possible! 

So...that brings us to today's adventure.  One of the early day recipes we lovingly referred to as  2 Ingredient Ravioli Eggs...
We ate it often. My kids still love it and ask for it.

Fast forward eight years since I introduced it here on the blog.   I've seen a trend here in the Phoenix valley. Bistros and upscale neighborhood foodie establishments are starting to have a similar egg dish on their menu to the one I grew up adoring. We've seen them called "Eggs in Purgatory" but the original dish actually is North African in origin and is well known in the Middle East and Isreal. Earlier this week I saw it on one of my favorite food sites, Serious Eats and I knew I had to share my version of this more complex recipe.   It's a classic comfort dish, simple to make and quick.  Though this more "exotic" version has several more ingredients than my childhood favorite, it has found it's way into my heart with it's spice and additional vegetables. Change up the sauce with southwest seasonings and you've got an awesome fajita version of this dish. Add Bacon, caramelized onion, tarragon, and fennel instead of the cumin and you've got a delicious French version. Keep it simple with just tomato and egg...and you've got what my dad, The Pansy Man, would make for us at the end of a long work day or as a satisfying Saturday morning breakfast with thick wedges of homemade bread from fresh ground wheat.

The sky is the limit on how you can customize this one. However you change it up, it will always be one of my go-to classics. 

Shakshuka (Middle Eastern Poached Eggs)
YIELD:Serves  6-8
Ingredients

  • 2 tablespoons garlic infused Avocado oil
  • 1  ½ medium onion, thinly sliced
  • 2 large red pepper (bell pepper for milder heat, or a hotter variety, such as red horned pepper, depending on your heat preference), stems, seeds, and ribs removed, thinly sliced
  • 2 fresh small hot chili (such as jalapeno), stems, seeds, and ribs removed, thinly sliced
  • 4 cloves garlic, thinly sliced
  • 1 Tbsp.  sweet Hungarian or smoked Spanish paprika
  • 1 ½  teaspoons whole or ground cumin seed
  • 2 (15-ounce) cans fire roasted diced tomatoes
  • ½ cup minced cilantro and parsley, blended
  • 10 eggs
  • Sliced Kalamata or black olives, feta cheese, or artichoke hearts, for serving (all optional)
Directions
Heat oil in a large, deep 12-inch skillet with lid. When shimmering, add onion, pepper, and chili and spread into an even layer. Cook as you would fajita vegetables, without moving until deeply brown and beginning to almost char, about 6 minutes. Stir and repeat. Continue until softened, about another 4 minutes. Add garlic and cook until soft and fragrant, about a minute. Add Spices and toast about 30 seconds more. Add tomatoes, stirring carefully. Lower temperate to low simmer. 

With a spoon, make a whole near the edge of the pan and carefully break an egg into the whole. Repeat until you’ve partially submerged all 10 eggs in the pan. 

Cover and simmer for 5-6 minutes for runny centers and 8-10 for a more well done firm center, until egg is poached to your preference.

Sprinkle with the herb mixture and additional toppings if desired.  Serve hot with fresh toasted bread. 


We like the eggs a little harder in the center.
My Fitness Pal Nutritional Information : Serving size 2 eggs, 281 calories, 17 gr. Carb, 5 grams fiber (12 net grams carbohydrate), 15 g protein, Fat 17 g.

There you go. A simple and delicious way to have a quick satisfying dinner.

Always My Very Best,
Your Friend Chef Tess


Wednesday, May 17, 2017

Cherry Orange Biscuits


This is just a quick post to keep everyone updated on what I've been doing around here.  As many of you know, as soon as the boys hit their teen years, they really didn't want me posting much here on the blog about them.  However, it's been way too long since I updated my friends on the prides and joys of my life!  So...here's the scoop. The boys are almost finished with the school year. That's always a bitter-sweet time. Little Man graduated at age 16 after spending the last two years of school as a home-school genius. He definitely didn't get his giant brains from me, but I've been cheering him onward.  He got a full scholarship to our local community college last year and has just a few months left before he has his associates degree. He'll be 18 years old next week. That freaks me out. I'm not old enough to have a kid that old. Period. He's preparing to serve as a missionary for our church at the end of the year. That's freaking me out too.


As for Face, he starts high school in the fall. He just won first place in the science fair for building 16 steam engines from coke cans in various shapes, sizes and functions. I'm pretty sure he's going to solve the world energy crisis. I'm really, really, really looking forward to having him home for the summer!


Okay. Now you're updated on the home-front.  Now...for the biscuits. With Spring is upon us I always love a good sweet biscuit for breakfast during this time of year. It's grab-n-go for the drives to school, and I want it easy.  These are some of my favorite biscuits. They're full of sundried cherries coupled with orange zest with a hint of cardamom in a fluffy buttery biscuit. I serve them often with chicken peach salad as a quick lunch as well. I think they're pretty delicious...and simple. Enjoy. 

Chef Tess Cherry Orange Biscuits
yield 8 large or 16 small

Dry ingredients:
1 1/2 cups all purpose flour
1/2 cup whole wheat flour
1/2 cup butter or organic vegetable shortening
1/2 tsp salt
5 Tbsp sugar 
5 teaspoons baking powder
1/2 tsp ground cardamom
1 Tbsp orange zest
1/2 cup dried cherries, chopped

Wet ingredients:
1 cup milk or buttermilk

Directions:

  • Preheat your oven to 425 degrees. 
  • In a half-gallon sized bowl, combine the shortening or butter with the dry ingredients. Mix until the shortening has been cut into tiny pieces, the size of a pea.
  • Add milk or buttermilk them to the flour/shortening mixture.  Mix very gingerly until a light dough is formed. 
  • Knead the dough 4-5 times, then roll out on an floured counter top 1 inch thick.
  • Cut into biscuits.
  • Place on ungreased baking sheet and bake 15-20 minutes.
There you go darlings. Finish up the school year with glory!

Always My Very Best,
Your Friend Chef Tess


Thursday, May 4, 2017

2 Ingredient Dinner?! Easy Ravioli Eggs


When I was growing up, Ravioli Eggs were a staple. I now call them Rav-i-oh-leeee-oh-lee eggs. Not sure why that nickname has stuck but I like it. I think the words "quick and easy" had a lot to do with their popularity around my house as a child. Not only did they taste pretty freaky awesome, but they where also a comfort food. We used plain tomato sauce (don't ask me why...). Now as an adult, I use marinara or spaghetti sauce depending on what I want. The good thing is they are low fat, low carbohydrate, loaded with flavor, and easy. Did I mention easy?! They sport a whopping 2 ingredient. I now need to go get more eggs. My kids want more of these bad boys and I only made 6. Little Man says these are now and forever his favorite breakfast food. FOREVER. He totally gulped it down. Three gulp to be exact. Grin. I couldn't be more pleased if I tried.

Ravioli Eggs
2 cups spaghetti sauce
6-8 eggs
Italian seasoning (optional)
1/4 cup Parmesan cheese (optional)

In a heavy 10 inch skillet with a lid, pour tomato sauce.
Turn on heat to medium and slowly crack the eggs into the sauce as you would for poached eggs.
Sprinkle the top with Italian seasoning and Parmesan cheese. Cover and reduce heat to low for 10-12 minutes until cooked through... yolks cooked silly.
Serve warm with crusty Italian bread for breakfast, lunch or dinner.

There you go!

Always My Very Best,
Your Friend Chef Tess


Thursday, January 28, 2016

Bacon Jalapeno Baked Brie Strata for Breakfast and Beyond


Either you love bacon, or you're wrong. How's that. Okay. Maybe I just offended about half of the world's global population using that introduction, but I just won over the rest of them. I'm a red-blooded American girl who eats a few pork items now and then. I don't eat it every day, but let's face it, this isn't your everyday recipe.  This is something for the book of savory-ridiculousness.  A savory peppery brie enshrouded in a creamy fluffy bread-type pudding that is topped with a crispy, salty,smoky layer of bacon studded with slices of jalapeno. It's a freak-show. A good freak show.

 First let's talk about Stratas. 

What's a Strata anyway?   

When I first met my soon-to-be Mother in law, the subject of "family favorite meals" came up in conversation.  That wasn't new to me at the time as a young chef chick.  "Meal time" is always a safe subject when one finds out that a soon-to-be-daughter-in-law can cook. To her credit she didn't delve into hard-core political rants (that was for later) but we did talk about the neutral ground of what she had made Ace for dinner for years.  That was fun. I learned a lot about his childhood from that first conversation with her. She mentioned a few times this magical "cheese souffle" that she made often for the adorable tyke. I cringed. Oh stink. He was raised on souffle?!! Seriously?!!!
She whipped out the family photo album.  Several hours later and several tattered photo albums later, I learned that her cheese souffle was really a cheese strata. Phew. That was good news.  If ace was accustomed to real souffle for dinner, my life would be a lot more complicated! 

Cheese Souffle requires whipping egg whites (ugh) and making a thick cheese sauce (doable but not something I enjoy on most days) and folding things together with diplomatic poise and baking them to perfection in a lovely ceramic dish that is just the right size. Daggumit Martha Stewart.  I could see fresh pressed linen and crocheted doilies in my future.  All this meal preparation is then executed with precise timing within minutes of Ace's arrival home from work to assure it could come out of the oven fluffy and elegantly structured. That's a lot of freaking pressure for a young bride. 

Cheese Strata on the other hand, is a totally delicious, simple, make-ahead heaven of a dish that any gal could do in minutes and could not mess up!   It's bread cubes combined with an egg and milk batter topped with cheese or having the cheese folded into the bread mixture. It's then good for keeping in the fridge and baking at dinner time, or baking ahead and reheating individual servings in the microwave or oven. 

Enters today's variation on a cheese strata. Baked Brie. Bacon. Jalapeno. This is a go-to.  This is a nod to the simple cheese strata that Ace grew up with, made into a more gourmet creation by a chef-wife who still has to cook meals for a family, on a budget, every day of the week. 


You will need:

  • 5-6 cups bread cubes
  • 6 oz brie, sliced (or any cheese of your choice)
  • 3 eggs
  • 2 cups milk or cream
  • 1/4 lb bacon, diced
  • 3 jalapeno peppers, seeded and diced
  • Salt and fresh cracked pepper to taste
  • butter for coating the baking dish

Directions:
Butter the inside of an 8X8X4 inch baking dish and fill with bread cubes topping with brie slices. Crack fresh black pepper over the mixture and fold them together. 

 Combine the milk and eggs. Add salt and pepper to them.
Whisk well.

Pour  the egg mixture over the bread and brie mixture. Allow to sit a while. 
 Now for the bacon and jalapeno...
 Heat a large skillet over medium-high heat 3-4 minutes. Add the bacon. Cook until almost crispy then add the jalapenos.  Cook 2-3 minutes more.
Distribute the bacon mixture over the bread-brie mixture, leaving most of the bacon on top...meaning seriously don't mix them up. You know why? Because when you bake it the bacon will stay crispy. 

At this point you can either put the unbaked strata in the fridge and chill for up to 1 week, or bake for dinner/breakfast right now.  We usually opt for baking it right away. 350 degrees 20-25 minutes until bubbly and delicious.

You'll have this thick rich layer of a cheese strata topped with a crispy bacon jalapeno layer that will seriously rock the universe. Most of the time we drizzle it with  maple syrup or a simple apricot jam for a savory-sweet yin-yang magical experience. 
There you go darlings. 
Simple. Delicious. Fast. Budget-friendly. 
Serve with a simple salad and vinaigrette and dinner is served. 
Serve with a fresh fruit salad and breakfast is served. 
 Serve it with both kinds of salad and nobody will know what time it is. 


Always My Very Best,
Your Friend Chef Tess


Monday, January 18, 2016

Simple Baked Oatmeal of Glory!


I love oatmeal.  I've often taught How to cook oatmeal 101, along with some of my Top 10 Ways to Cook Oatmeal in several cooking and baking applications.  However, I have been working on this recipe for baked oatmeal for a while. 

Let's talk baked oatmeal.  I've been long on a search for the best baked oatmeal recipe.  I've tried a few that were...doozies...in a bad way. They were glorified glue in a pan.  Disgusting! I wanted chewy, hearty, baked oatmeal that was fast and easy. I wanted something we could eat a few times a week and never get bored.  
I stopped looking for a few years.  

 Then  two years ago, a dear friend shared her recipe with me for baked oatmeal.  It was the most perfect baked oatmeal I'd ever had.  For the last couple of years, I've made her recipe again and again. Still perfect every single time.  So, now it gets a place of glory here on the blog. I've added my own touches and made it my own, but I think you'll be pleasantly in love with it from the first batch.  It's really quite perfect. Change out the berries for whatever you have on hand. Add crushed pineapple or shredded carrots in place of the fruit for a carrot cake baked oatmeal. It's incredibly versatile. 

This is it.

 Simple Baked Oatmeal 


  • 2 eggs (or 1/4 cup powdered egg plus 1/2 cup water)
  • 1/2 cup brown sugar or coconut sugar
  • 1/2 cup melted coconut oil or butter
  • 1 cup milk
  • 2 tsp vanilla
  • 1 tsp almond extract
  • 3 cups rolled oats or 6 grain rolled cereal
  • 2 tsp baking powder
  • 1 tsp salt
  • 1 1/2 tsp Chef Tess Wise Woman of the East Spice blend
  • 1 cup fresh chopped cranberries, cherries or blueberries
  • 1/2 cup flaked coconut (optional)
  • Brown sugar for topping


Directions: In a large bowl,beat eggs and brown sugar until they are thoroughly mixed.  Add coconut oil, milk and vanilla.  


 Add the remaining ingredients (except the additional brown sugar for topping). 

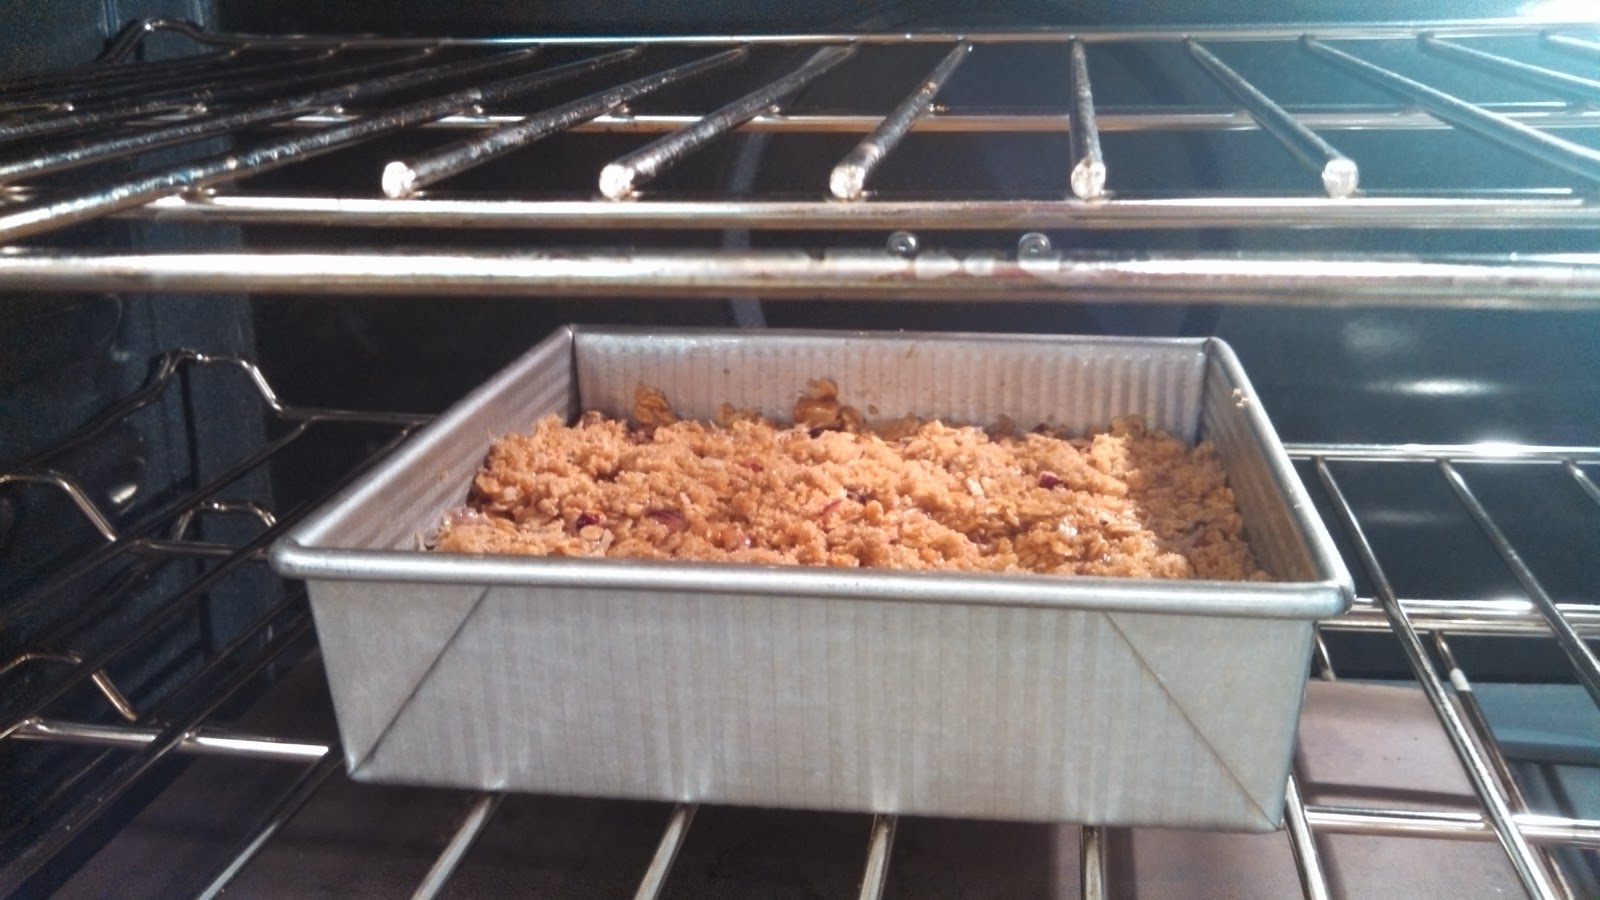
 Pour the oatmeal mixture into a greased 9 by 13 inch casserole pan.
 Sprinkle with brown sugar on top.
   Bake at 350 degrees for 20-25 minutes uncovered.
Do not over-bake.


There you go my darlings. Delicious, hearty and wholesome baked breakfast. 

Always My Very Best,
Your Friend Chef Tess