Showing posts with label Kathy Peterson. Show all posts

Thursday, February 3, 2011

The Flip-Pal™Scan your heart out blog hop week#5 Vintage Garden additions


Have you ever seen one of these mobile scanners? I had not ever heard of one until I got a special message from Kathy Peterson asking me to participate in this blog hop. The last four weeks I have been honored to participate in a small hand picked group of designers for
The Flip-Pal™ mobile scanner Design team.

This is the last week we'll be having the hop. Special thanks to the The Flip-Pal™ mobile scanner Design team leader, Kathy Peterson. Kathy Peterson is a Design Expert, Best Selling Author, TV corespondent on LIFETIME TV, Product Developer/Licensor and Master Gardener. It's an honor to be part of her team! For the blog hop, Kathy picked 6 designers across the country to help create some unusual craft projects of their choice using the Flip-Pal Mobile Scanner. So far, I have been not only excited to see what the other creative minds have devised...but also excited to have new friends. Can I just say how zany fun it has been to get to know these gals on Face Book these last few weeks?
Please don't forget to enter the drawing for a free scanner of your own Here. Yes! They're giving one scanner away a week!

This week I thought I'd end on a great gardening note.
I love to garden. As the daughter of a master gardener, is it any wonder? I spent many a bare foot hours in my childhood next to my dad. He's a Christian in every sense of the word. He loves the Lord and his family. In fact he's been a gardener for my church since I was just a tiny kid. One of the few pictures I have of my dad at work was taken over 25 years ago in Arizona. He is a soft spoken, very gentle and loving person. I've never met anyone like him. I've been blessed to have him as a father and a friend since the day I was born. I'm sure it is his love that has seen me through some of the most difficult challenges I've ever faced...and his love that continues. So, as the daughter of a master gardener, it only seems right that we keep a little bit of my daddy in our family garden with us. After all, it was that amazing and tender man who let the toddler Stephanie hang onto his legs while he weeded the garden. He is the one who instilled in my heart a love for nature and seeing things come to my life with work and honest effort. He taught me to love the smell of dirt and the sweet taste of corn right out of the field. I loved sitting in the tomato patch and eating tomatoes right off the vine until the juice ran down my elbows. Those are memories money can't buy.

It was that same man who lovingly sent my son Face his first set of garden tools (that are still loved and used often). Imagine my joy when my dear friend Lisa shared some of her vintage garden pictures with me and I was able to use my Flip-Pal™ Mobile scanner to upload them to my computer! Dad was superimposed onto this vintage seed pack of cabbage seeds!
Using a bit of this sealant, I sealed the photo into a plastic photo frame.
Y'all have seen these frames right? They are in most stores, and usually have a magnet on the back to go on the fridge.
I used the sealant to attach the photo frame to a large pop sickle stick and attached one silk pansy to the front. Okay...the pansy is an inside joke. You have to read the Cherry Cordial Cheesecake to really understand...or the great post on what we made for his 60th birthday: The Real Man's Dinner
Now doesn't it just feel right having my daddy in the garden looking over my cabbage patch? Well, it does for me. Plus...look at my red cabbage! We've got a great crop this year!
My son Face, who loves gardening almost as much as my father, suggested we also needed to have grandpa in a stepping stone. So we used one of the smaller picture frames and sealed dad's picture in it. Then used some of my son's treasured rocks from his own rock collection to add some details. This is my son's project. If you look really closely, you can see one of the love bubble rocks with Face's face right next to my dad. We made this from a "stepping stone kit". Craft stores are cool for that kind of thing. While the cement was still wet, we pressed pansies into the surface and removed them. This left some really nice imprints on the cement. Cool eh?
So, now my dad, his pansies, and my son are side by side in my garden...
They're right under the Swiss chard and dill. Somehow that feel really right.
There you go. Our last week with the blog hop! I'm so dang sad it's over. In fact, I think I'll continue with the kitchen crafts every week! What do you think of that?! Thursdays will now be "Evil Think Tank Thursday". I'll propose the project theme for the week and be sharing a lot of ideas from myself and other bloggers here (so more to come on that for sure!). It's about time we had a special day for the ETT !

Now hop over to the other gals in the design team and see what else crafty-cool is being made today on the The Flip-Pal™ mobile scanner. Don't forget to enter the drawing for a free scanner of your own Here. Yes! They're giving one scanner away a week!

Kathy Peterson is a Design Expert, Best Selling Author, TV corespondent on LIFETIME TV, Product Developer/Licensor and Master Gardener.
Linda Peterson is a wonderful multi-talented designer of jewelry and mixed media projects!
Chef Stephanie Petersen baker, food display artist, and cooking instructor.
Christy Tomlinsonis a fabulous paper and mixed media artist and more!
Amy Andersonis a delightfully talented decoupage queen, knitter and loves to sew!
Melissa Langer is a fun and energetic pug artist. Her art is all about crocheting and painting pugs!
Pat Sloan is a very talented designer and quilting expert!

Thursday, January 27, 2011

Flip Pal Scan Your Heart Out Blog Hop Week #4--Hammered Copper Hand Sculpture and Recipe Card Holder

How in the world do you make a copper sculpture anyway?!


Have you ever seen one of these mobile scanners? I had not ever heard of one until I got a special message from Kathy Peterson asking me to participate in this blog hop. The last three weeks I have been honored to participate in a small hand picked group of designers for
The Flip-Pal™ mobile scanner Design team.


Special thanks to the The Flip-Pal™ mobile scanner Design team leader, Kathy Peterson. Kathy Peterson is a Design Expert, Best Selling Author, TV corespondent on LIFETIME TV, Product Developer/Licensor and Master Gardener. It's an honor to be part of her team! For the blog hop, Kathy picked 6 designers across the country to help create some unusual craft projects of their choice using the Flip-Pal Mobile Scanner. So far, I have been not only excited to see what the other creative minds have devised...but also excited to have new friends. Can I just say how zany fun it has been to get to know these gals on Face Book these last few weeks?
Please don't forget to enter the drawing for a free scanner of your own Here. Yes! They're giving one scanner away a week!


So this week...I wanted to do a kitchen craft dedicated to my sweet mother. She will be so surprised!


I remember going into a lot of cooking and kitchen stores with my mom as a kiddo. We did a lot of window shopping. I learned that art early on. Mom was particularly fond of the copper pans and pieces, but we never really had the money for them. Dad is a master gardener for our church. He has been my whole life...and mom worked full time just to help keep food on the table. I got my first copper trivet as an adult from a flea market and felt like I finally had a piece of my mom's dreams in my kitchen. It was loved. Used...and adored. Eventually it was joined by a few other copper trivets. Now I have a very small collection that I keep in my home to remind me of my mom. I decided this would be a perfect piece to scan with my Flip Pal Mobile Scanner and turn it into a piece of kitchen art that would represent my mother.
My mom is also a belly dancer...and baker. She has a bachelor's in Home Economics education, a Master's in Business. She's also a paralegal for one of the largest law firms in Utah. So, now you know how I got to be so cool--and smart.

I'm going to give some credit here to an amazing friend of mine. As it turns out, I have a lot of creative friends. I was visiting with my friend Erica Miles...a kindred artist spirit like myself (http://www.edmiles.blogspot.com) and she showed me her hand. No, not the finger...goof. It was a paper mache replica of her amazing self.
Well...I started to think that I needed to do a recipe card holder in a similar fashion, but I wanted it to be a little more durable than regular paper mache and hold up in the kitchen. I also wanted it made at least in part out of copper! So...I started with masking tape and plastic wrap around my hand so the tape wouldn't stick.
Decided to go with aluminum foil instead...as the plastic was lame. It was not holding onto my coolness at all. Dorky plastic wrap.
After applying a thick layer of tape, I carefully cut through the layers with scissors and removed my hand.
Black spray paint was applied...but I didn't like it. It didn't have enough texture or something.
Contact! I found black leather contact paper that worked like a charm magnet.

Enter my personal high. I mean...I didn't inhale...but I did use it to excess. Yes folks...there's not a single bit of copper on this piece. I am a cheater. It's a LIE. A LIE. I'm confessing to you now.
I still don't have a "random-play-with-copper budget". We're working on that dream. Instead I used this...
But still...doesn't it look freakin' wicked decent?! I mean...for a fake? Okay...and added the scanned pictures of the trivet to the bangle jewelry-retread that I gathered from a thrift store because it reminded me so much of my mom's belly dancing garb. Okay...seriously...how many people can say their mother has ever put on belly dancing garb?--Actually, my brother saw mom dance at a competition show...and said he needed serious therapy after that. But, ya know...he's a professor. (Smooches bro'...you know I love you...)

The ultimate test of it's coolness of course, was if it could make my recipes look good. The recipes that my sweet sister Em painstakingly downloaded from my blog for over 2 years and transferred with love...to recipe cards for me to use in my kitchen. Can you just feeeel the love in my family right now? Yes...I'm seriously blessed.
So there it is.
Now hop over to the other gals in the design team and see what else crafty-cool is being made today on the The Flip-Pal™ mobile scanner. Don't forget to enter the drawing for a free scanner of your own Here. Yes! They're giving one scanner away a week!

Kathy Peterson is a Design Expert, Best Selling Author, TV corespondent on LIFETIME TV, Product Developer/Licensor and Master Gardener.
Linda Peterson is a wonderful multi-talented designer of jewelry and mixed media projects!
Chef Stephanie Petersen baker, food display artist, and cooking instructor.
Christy Tomlinsonis a fabulous paper and mixed media artist and more!
Amy Andersonis a delightfully talented decoupage queen, knitter and loves to sew!
Melissa Langer is a fun and energetic pug artist. Her art is all about crocheting and painting pugs!
Pat Sloan is a very talented designer and quilting expert!

Thursday, January 13, 2011

Flip-Pal™ Mobile Scanner Blog Hop Week # 2---How to Make Retro-Love-Bubble-Cookie Tins


Grandma B made the best chocolate chip cookies I can remember. She loved the same man her entire life. He loved her back.


I'm pretty sure I could have been born in 1935 and been a happy girl. I love "vintage stuff". I'm a sentimental chick(emphasis on the mental). So, my husband proposing marriage in an antique store 15 years ago, doesn't seem so odd weird now huh? Humor me. I know I'm off my nut a bit. Today's kitchen craft project will not, by any far stretch, seem like anything from 2011. It will in fact be a vintage love bubble. "Lucy...I'm home!"
Love bubbles. Yes. "Love bubble" is a reference to an incandescently happy place somewhere in the early days of my life and forever encapsulated in a sea of glass...right? The term "Love bubble" does not...most definitely, ardently... not...refer to a local house of ill repute. Just so we're clear. This is a family friendly blog. This is my family. In a love bubble...on a cookie tin...in my kitchen.
There may also be a love bubble lunch pail. Grandma's Cookies are a full meal. Ask Bill Cosby. Wait...his was chocolate cake.
How did I do it?
Glass with a family picture in it? Grandma's recipe in it?
First, let me tell you how this Scan Your Heart out blog hop works. I, along with 6 other creative designers across the country will create 6 clever projects for 6 weeks using the Flip-Pal™ mobile scanner! It's an honor to be part of this adventure I can tell you right now. I've been giddy for a month! The best part is the makers of the Flip-Pal™ Mobile Scanner will be giving away a scanner a week to a reader! Please register for a chance to win your own Flip-Pal™ mobile scanner by leaving a comment Here. I want everyone to have one of these.

Special thanks to the The Flip-Pal™ mobile scanner team leader Kathy Peterson.
Kathy Peterson is a Design Expert, Best Selling Author, TV corespondent on LIFETIME TV, Product Developer/Licensor and Master Gardener.

I'm honored to be part of this group for dang sure!


This is how it works on stuff. Things that are normally hard to scan or something you just don't have near a computer scanner...can be scanned into the mobile unit.

This includes the ability to do the amazing scan of the "cherished token of a woman's affection". Everyone...meet my grandma's chocolate chip cookie recipe card. She was old school. It was not weird to her to type the recipe on a card using a typewriter and ink paper-stuff...put it in a plastic sleeve...and use it. Use it until it was loved to death. That's how it was and nobody ever thought it was odd. I never thought the day would come that instead of seeing her smiling tender face and grasping her old wooden spoons with my tiny little fingers, that I would only have this tattered card left to remind me of those moments. I kept it tucked away in my cedar chest (yes I have a cedar chest for my keepsakes). I'm old school in spirit...see. I kept the card...along with her purple gingham apron hidden in a safe place. Until now...

Hello. Two sided.

Now...it will be able to be framed and put in the kitchen for my children to enjoy. The tradition of love will continue. I also have a very limited number of pictures with grandma and grandpa. My grandpa was named Elmo. He really didn't like the whole "tickle me Elmo" doll thing. I thought those were creepy...like clowns. I digress. So, Grandpa Elmo loved one woman and his family with a tender heart...his entire life. Fondest memory of him...when he would take me to the University drama classes as a little girl. I was eight or nine years old. It was rare to have time alone with him. there it was...Just me and him in a root-beer brown 1975 Chevy Nova...with two nickles, masking-taped to my class folder if I needed to call him. He'd walk me to the door, make sure I was safe...and then wait for me in the hall. What an angel of a man. Now you all know where my father the master gardener (aka The Pansy Man) got his sweet disposition. So...I scanned this picture of my grandparents from one of the few I had.


Then I wanted of course to make something super-di-dooooper cuti-pie-tastic to have in the kitchen to remind me of the love I so much cherish. I started with the picture frame that matches my kitchen polk-i-dots. Prited the recipe card on photo paper and framed it. Simple stuff...but I wanted just a glimple of it. Not the full picture. I'm again, a little off. So, there it is. Proof that I like a lot of things "a little off".


Bubbles.
I took the pictures I scanned and cut them to size of these glass floral decorative disk things. Is that the technical name for them?

It's a friendship stone. Let's blow on it and make a wish...zoooOOooohhh...Dude. Wipe the slobber off your screen.
To apply the pictured I used a dot of this Weldbond glue. It worked great. I took this picture before I realized I needed about 1/10th that amount. Just a small film of glue on the flat side of the stone.
Then turn the picture onto the glue. Like gum in a cheap theater...but nice to see. It smells better too (not that I'm telling you to sniff glue).

I almost can't breath when I think of this being in my kitchen...I'm so full of joy my eyes are getting misted. Or maybe it's my jeans getting tighter at the thought of the cookies...on my thighs.
Attach the love bubbles to a vintage cookie tin of your choice. Super glue is good. I chose this one because I took it on Fox 10 the first time I was on the show with my kids a year and a half ago...and it is in a way a great tribute to my loving grandpa who took me to the drama classes...and a grandma who cooked with me. It just seemed right. It also seemed right to go ahead and make the cookies.
Like a blessing from above... (pling...pling...harp music...pling...pling...)
They might even make it into the cookie tin...if you hide them there before the kids get home from school. Oh dang. Better yet...have them on the table with a glass of ice cold milk...and a real cloth napkin.
There you go. Vintage love bubble cookie tins!

Now hop over to the other gals in the design team and see what else crafty-cool is being made today on the The Flip-Pal™ mobile scanner. Don't forget to enter the drawing for a free scanner of your own Here.

Kathy Peterson is a Design Expert, Best Selling Author, TV corespondent on LIFETIME TV, Product Developer/Licensor and Master Gardener.

Linda Peterson is a wonderful multi-talented designer of jewelry and mixed media projects!
Chef Stephanie Petersen baker, food display artist, and cooking instructor.
Christy Tomlinsonis a fabulous paper and mixed media artist and more!
Amy Andersonis a delightfully talented decoupage queen, knitter and loves to sew!
Melissa Langer is a fun and energetic pug artist. Her art is all about crocheting and painting pugs!
Pat Sloan is a very talented designer and quilting expert!

Thursday, January 6, 2011

Flip-Pal™ Mobile Scanner Blog Hop Week # 1-- How to Make Crystal Ice Centerpieces


It starts here. This is the first week of a series of blog entries that will be featured nationally on the Scan Your Heart Out Blog Hop with Kathy Peterson flip-pal.com . It will begin on January 6th, 2011 and continue every Thursday until February 3rd, 2011.

How it works: I, along with 6 other creative designers will create 6 clever projects for 6 weeks using the Flip-Pal™ mobile scanner! The best part is the makers of the Flip-Pal™ Mobile Scanner will be giving away a scanner a week to a reader! Please register for a chance to win your own Flip-Pal™ mobile scanner by leaving a comment Here. I want everyone to have one of these.

Meet the The Flip-Pal™ mobile scanner Scan Your Heart Out design Team:

Kathy Peterson is a Design Expert, Best Selling Author, TV corespondent on LIFETIME TV,
Product Developer/Licensor and Master Gardener.
Linda Peterson is a wonderful multi-talented designer of jewelry and mixed media projects!
Chef Stephanie Petersen baker, food display artist, and cooking instructor.
Christy Tomlinsonis a fabulous paper and mixed media artist and more!
Amy Andersonis a delightfully talented decoupage queen, knitter and loves to sew!
Melissa Langer is a fun and energetic pug artist. Her art is all about crocheting and painting pugs!
Pat Sloan is a very talented designer and quilting expert!


Shall we get started then?
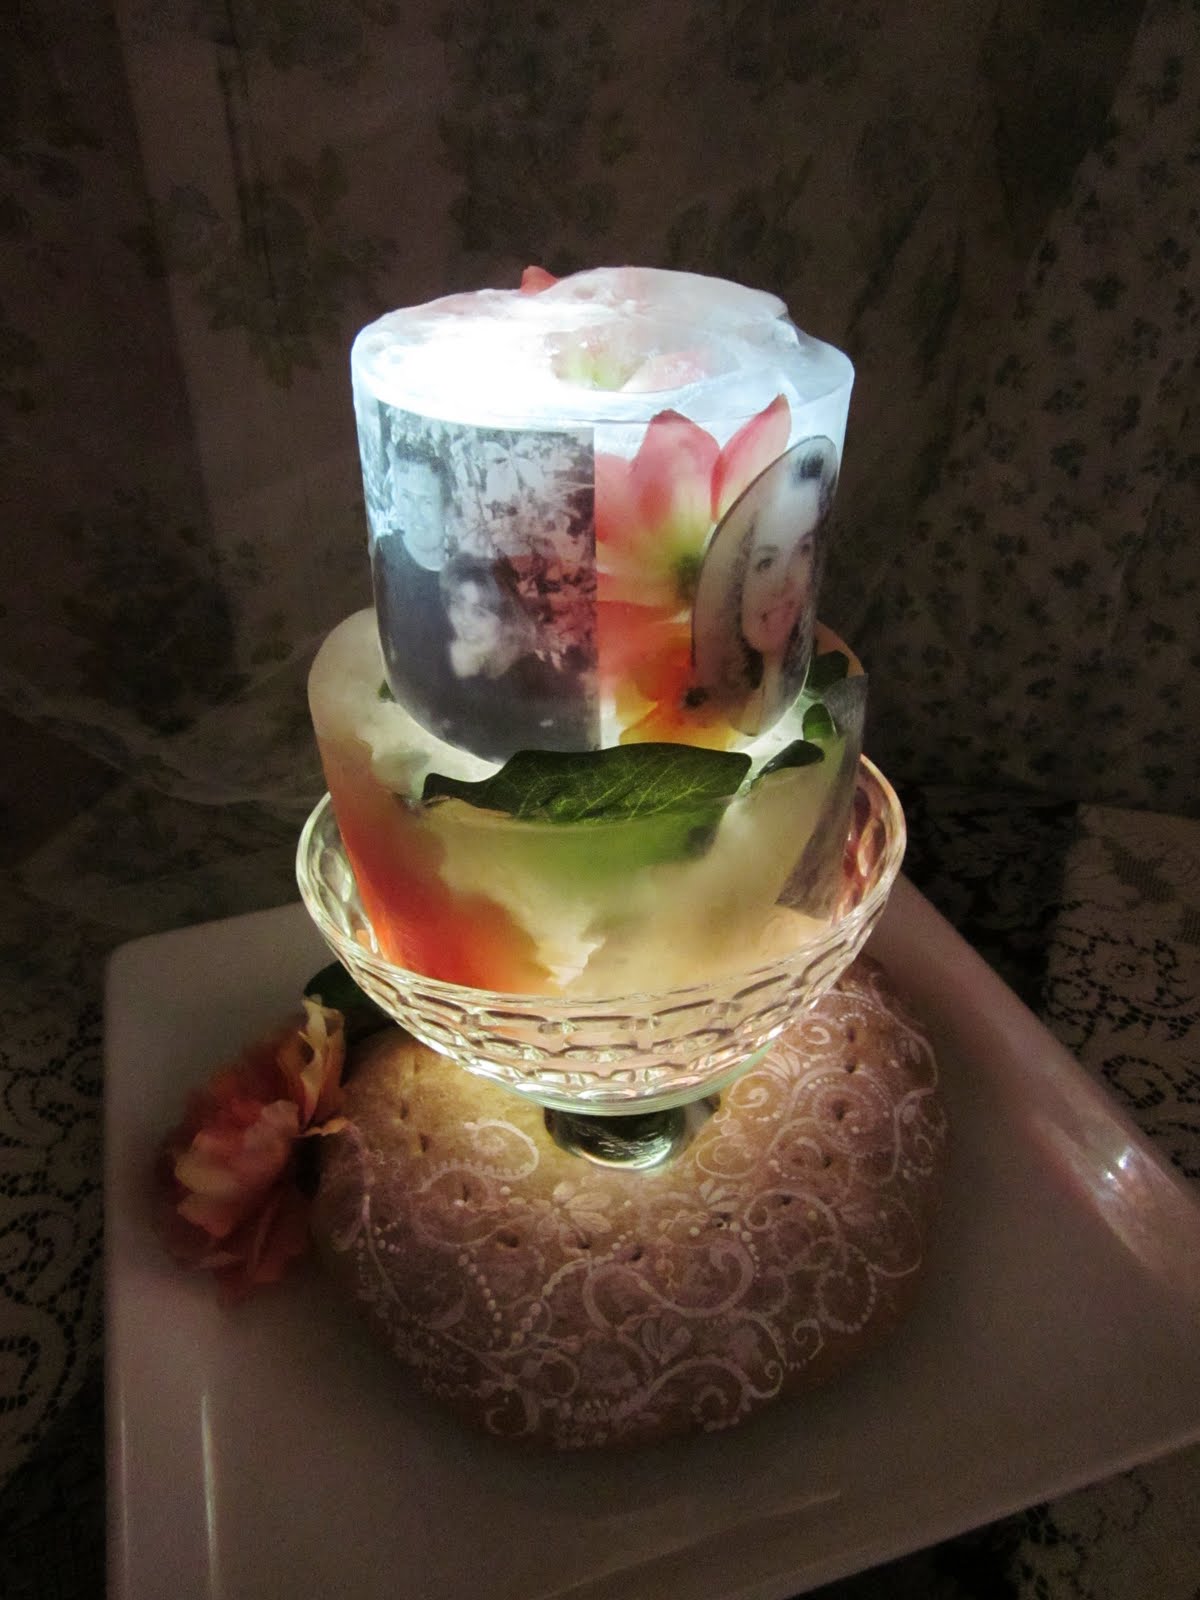
Yesterday was our Fifteenth wedding anniversary. Yikes. That's a big one for me. I guess because I remember being frumpy teenager and thinking, "I'll never get married..."as if that was a bad thing. Now I realize that at age fifteen I had no concept of what life and marriage really involved. I've been told that the traditional celebration gift for the big "one-five"...is crystal. I'm not super traditional in a lot of areas. I don't think I'd even have a clue what to do with real crystal...and two very insane boys living in my house. Modern replacement being...glass. (That doesn't help.) Either way, I was inspired by the whole sentimental affair. It seemed perfectly fitting to make a illuminated crystal ice centerpiece for our anniversary dinner. Fancy as that sounds...it's actually something my 7 year old could do. Don't worry. I'll take you on a little tutorial.


With the base of ornate ediblepainted bread, it stands about 3 feet tall in the center of the table.
It's a nice dramatic piece to add to a buffet or to use on several tables at a reception. It works with almost anything in the ice. There are a few exceptions to this of course. Hand grenades...live animals...

Before we get started, it's always good to read the story behind the scenes of Our Crazy Anniversary . It's a perfectly sappy love story.

Now. The Centerpiece of glory, laud and honor. (Pause for effect). Now...
Have you ever done something and then a week later realize how totally lame it was? I won't lie...I've been wrong. This is one of those dork-fest things I wish I could take back. Who in the freakishness actually glues the last copy of their wedding invitation to a scrap book? At the time it seemed nice... Until I realized I might have children and grand children who would like to see it...or at least the picture inside. One copy?! Really?! My kids fight over the last Life-saver in the roll...I'm not seeing this end well. Ironically I mounted the invitation right next to the rings. You know what that means? Not able to scan it on my regular computer scanner. Lame.
Oh the humanity of crazy glue. Fifteen years later I'm still rolling my eyes in total disturbance.


The Flip-Pal™ mobile scanner was awesome for this. Unlike my regular computer scanner that takes a long time to load one picture at a time...I was able to scan 100plus pictures in a few minutes. It was amazing! In the middle of the night without perfect lighting like I have to do with my camera...it was perfect for the spy-like ninja operation I was taking in hand.
There it is folks. Right from our invitation. Sigh. No more fighting over Life-Savers...or pictures of mom and dad.


I also used Flip-Pal™ mobile scanner to scan some of the finer details of my wedding dress. The dress that my husband used to proposed marriage to me when buying it at an antique store. He got a tear in his eye when he handed me that glorious gown from the 1920's. It's an epic dress. I'm not cutting it up into tiny nuggets of lace to put in a centerpiece. I'm wearing it when they bury me at the end of my life. I love it. However...in the meantime, details must be preserved. I'm talking about the hand stitched satin roses with pearl centers.
I loved playing with this photo until it looked like a post card...or wedding wrapping paper.


The delicate ivory lace that cascaded from the waist... original color and every timeless detail.


The ka-zillion buttons that I had to sew on. When Ace bought the dress, it was, 4 sizes too small...so I had to tailor it a bit...and completely re-do the bodice. Did women in the 1920's not ever have booozaaams? Smugglin' lug nuts? It's shameful to even mention...ya know what...I'm going to stop right there. I digress. So. On track again. My grand babies need to see the buttons right?

Once all the details were scanned, it was time to print and press the images onto white fabric for the picture not to bleed. I tried it several different ways and so far, this was the only one that didn't end with my wedding dress images smeared purple after freezing in a block of ice. Regular photo paper would work I suppose, but I also wanted to put a light in the middle of the ice so that it would shine through or image. Picky, picky. Amen for fabric though. It was just the ticket. Did I just say "it was just the ticket"? Who says that anymore? I like this stuff. Be sure it's the print and press or that it says "washable" on the package. I read quite a few labels before I found what I wanted.


All the instructions for this part of the project are in the package. Usually runs about 8$.

It took me about half an hour to iron everything. That may be the most ironing I've done in the last fifteen years. Sorry Ace. One of my other many flaws is that I'm not so big on the ironing of the shirts. We do own an iron though. How odd.
Cut out the pictures. If you need help understanding this picture...you may be reading the wrong blog. Just saying...simple is good.
It was very cool to have a pile of treasured pictures to pick from.


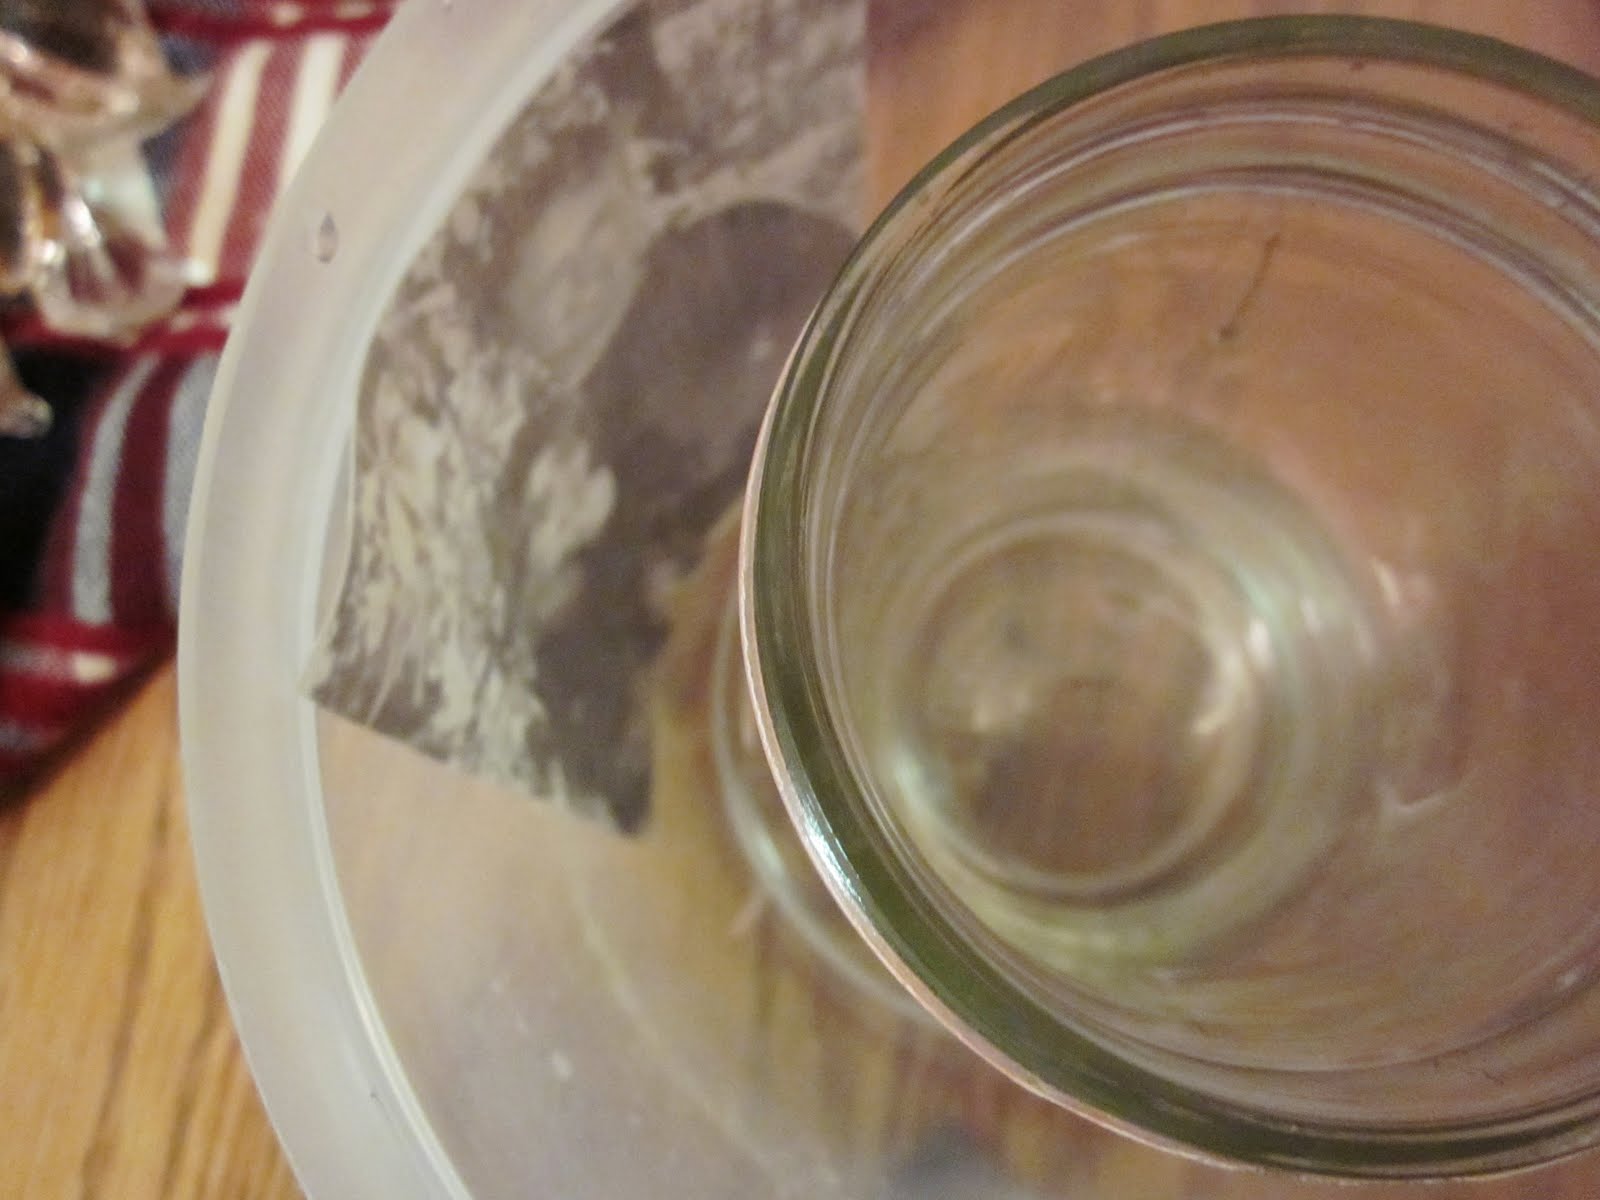
I used a half gallon flat sided plastic container. In the past, I've used clean empty paper milk cartons, plastic ice cream jugs (emptied of all the contents of course). I've also used flat loaf pans...2 liter pop bottles (cut off the spout part first)...any container that has straight sides that will allow a giant ice cube to fall out of it later are perfect. I find a clear glass jar that comes within 2 inches or less of the outside bowl. This not only allows the water to freeze faster, but also gives a great location for a battery powered votive candle or light inside the ice to illuminate the final project. Slide the photo as close to the edge of the outside as possible. The closer it is, the better the final image is to see through the ice.

I lined 4 pictures along the outside of the jar and then filled in the remainder with crystals, and floral that were the same colors that we used at my reception a zillion years ago. Give or take a few years.
Fill with water about an inch below the rim. It won't cover all the details complete, but it should get pretty close. Once the ice is frozen you can add more water to cover the remaining details and freeze again...or leave a few little sweet nothings sticking out of the top. Your choice. I find that silk flowers are 100% more forgiving on this subject. Fresh will work wonderfully if you can keep them at the bottom of the water until it's frozen.
Oh. Here's another secret. To keep the glass jar from floating out of the water until it freezes, I stuff a few tangerines or oranges in the jar. Just something heavy to hold the jar down until the ice is set. The crazy oranges come right out when it's frozen. They did do that final scene from Titanic to their friends who dropped to the depths of the freezing water though. Tragic really.


There were a couple of years early in my teens when my love life felt exactly like this picture...but about me. So...put the boy in the freezer for a while. I mean...freeze solid. It takes about 12 hours for a half gallon size one. Plan for a good chunk of time here. You don't want a half frozen ice block. Unless you're making a slushy punch for the reception. In that case, please take all the pretty pictures out. I just don't see that going over very well. Again...Titanic. Just saying. Goodbye Jack. Here's an odd thing (don't look at me like that...I'm perfectly normal). Once the ice is frozen, the glass usually slips right out. Strange but true. I didn't even have to use my giant girlie-baker muscles to dislodge this bad-boy jar. Be impressed. Please. Please?

Now you have this ice cave...like the one Luke Skywalker was dragged into and hung upside down in by the horrible snow beast. That was scary. This one is pretty. (I cock my head to the side and say "pretty" like a 5 year old girl. Yes...I am weird that way.)

Return the ice to the freezer. Do it. If you forget and you start working on other junk...you'll cry later. I'm serious. It's like a housewarming gift for an ice castle huh?


The good thing with this centerpiece is that I can make it a really long time ahead. It won't get freezer burn...um...not that I've ever actually sucked on a giant ice cube full of floral. I prefer the fruity ones. So, when the event shows up, I put a base of my crown loaf using the edible paint I use for my painted bread or it would be easy to use another one of myDecorative loaves. I think this is a much nicer touch than a basket of rolls in the middle of the table. Don't you? It's edible bread art. Ooooh. Ahhhh.


This loaf had an open center.


I made a slit in the back side of the loaf to allow the base of the tiered bowl to slip into it.


We can do this right? Replace the bread like a puzzle. Stuff a few flowers in there. Er...delicately arrange some fluffy nice accent there...

Now, I wanted this sculpture to light up from th inside.
These run about 3$ and last 7 hours. Perfect...the ice will melt long before the lights go out.
Make sure it is not a "keychain" light that has to be pressed down in order to stay on. I'd hate for you to have one finger in the sculpture while trying to eat dinner. These are very liberating little guys.
At the bottom of the scuplture, they also light up the bowl and shine on the bread. Head cock..."pretty".
Like when Luke Skywalker got his light saber...but without cutting off arms and heads and junk.
Now isn't that a vision of happiness?


With second tier on top... and a second light inside the ice cave on that one as well.

Repeat after me (in heavy French accent) "It's time to commence wiz zaaa wooooing." (that's "the wooing" for you who don't speak goofball.


In all seriousness however, we've worked really hard on our marriage to get this far. It's not ever going to be perfect...but it's perfect for me. I'm so grateful my sweet husband asked me to be his wife all those years ago.

Smooches Ace. I love you forever and ever...which is longer than this ice will last.

There you go. Make an ice-tastic centerpiece.

Now...if you liked this blog post, hop on over to the other designers who are using the Flip-Pal™ Mobile Scanner on Kathy Petersen's design team for the next 5 weeks! I've been so blessed to be part of this group.
Thanks again Kathy!
www.KathyPeterson.com/Wordpress/