Showing posts with label gluten free. Show all posts

Friday, April 25, 2025

Simple Delicious Gluten Free Buckwheat Blender Carrot Cake (No Flour)

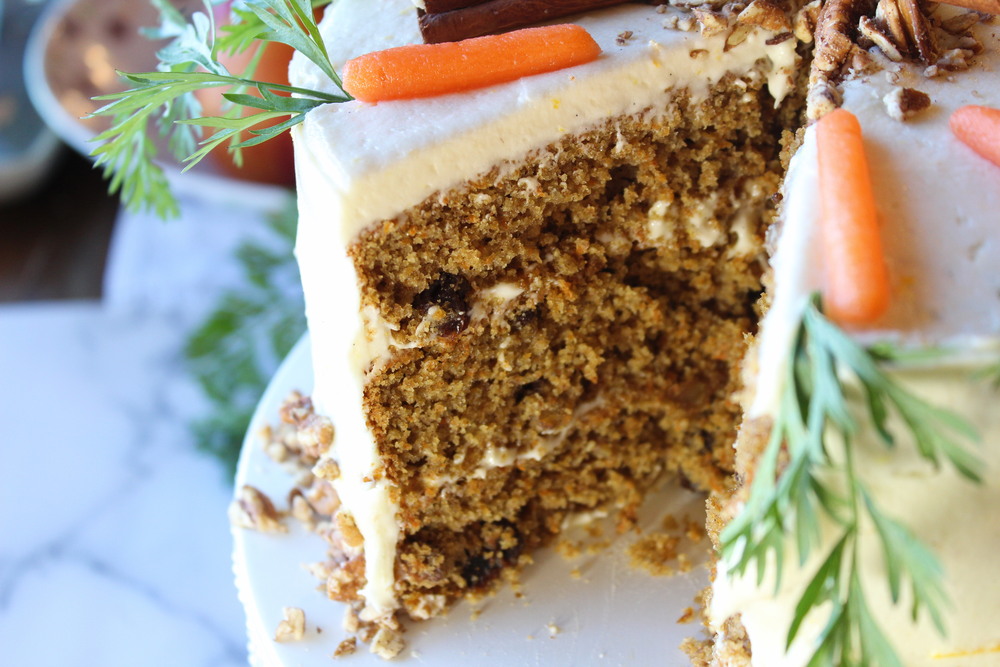
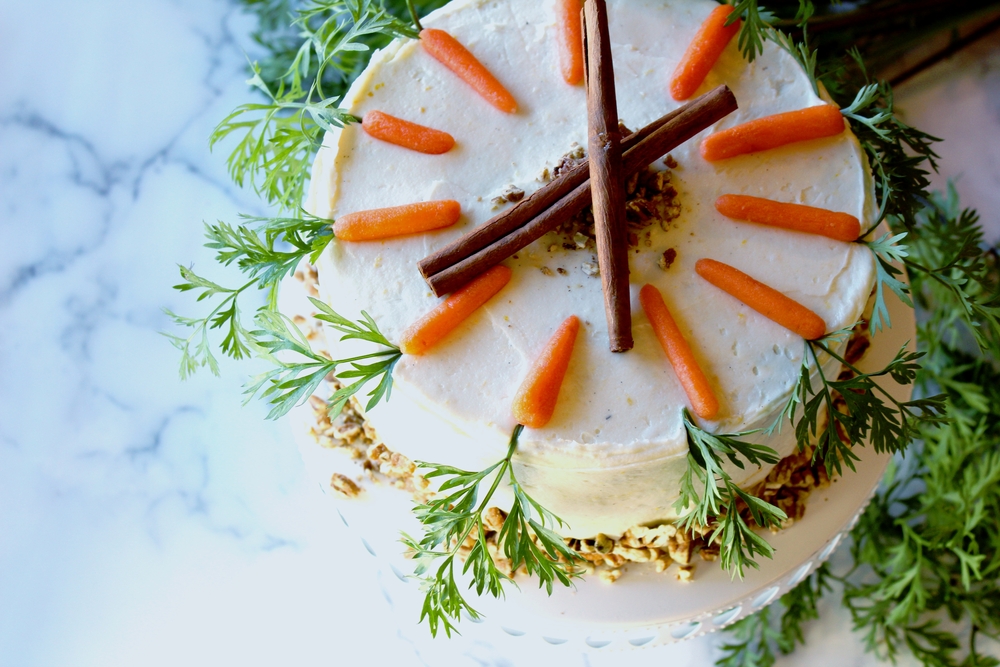
 This Gluten-Free carrot cake features whole grains of buckwheat milled in the blender! The result is a rich nutty flavor profile and a tender crumb.
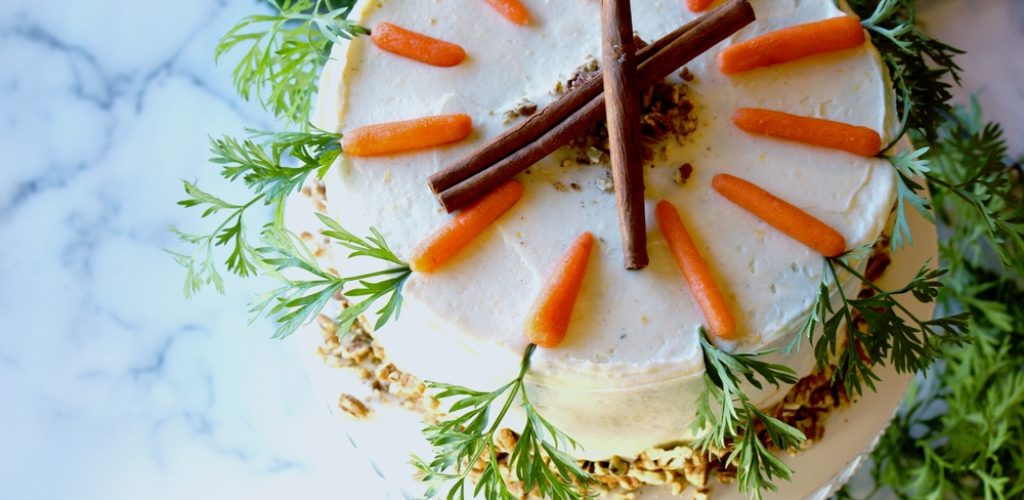
finished carrot cake OG branding2

Carrot cake is one of my favorite desserts, and I developed this recipe for all my gluten-free friends who are looking for a hearty whole-grain version of the classic. A common misunderstanding when baking gluten-free is that buckwheat contains wheat. Buckwheat is not related to wheat; it is naturally gluten-free and a fantastic choice for those with celiac disease or who are trying to eat gluten-free.
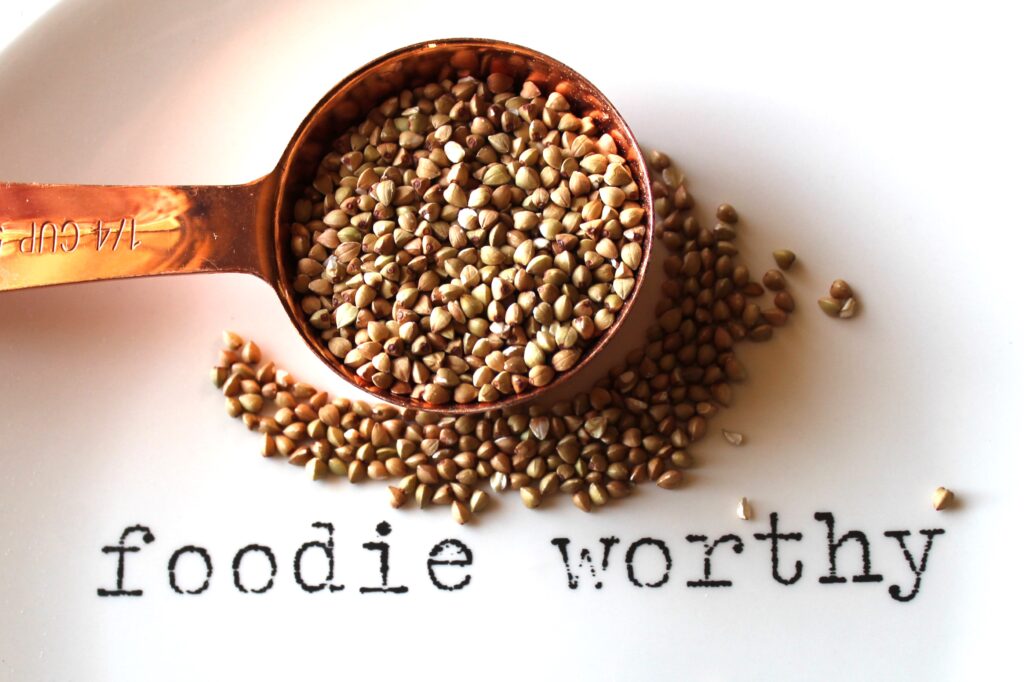
What is the benefit of the whole grain buckwheat?

  • Buckwheat is an excellent source of fiber, protein, magnesium, potassium, and antioxidants.
  • Buckwheat’s high fiber content and antioxidants can help lower cholesterol levels and reduce the risk of heart disease. 
  • Buckwheat is ideal for blood sugar control for people with diabetes. Its low glycemic index means it slowly releases sugar into the bloodstream, which can help regulate blood sugar levels and prevent spikes.
  • Buckwheat can improve digestive health when included in the diet. Its high fiber content promotes regular bowel movements and supports a healthy gut microbiome.
  • Buckwheat can assist with weight loss. Because it fills and slows digestion, it can help curb hunger and promote weight loss.
  • Buckwheat is rich in antioxidants, such as rutin, which may help protect cells from damage and reduce inflammation. 
  • Buckwheat may also benefit bone health and immune function and reduce the risk of certain types of cancer.
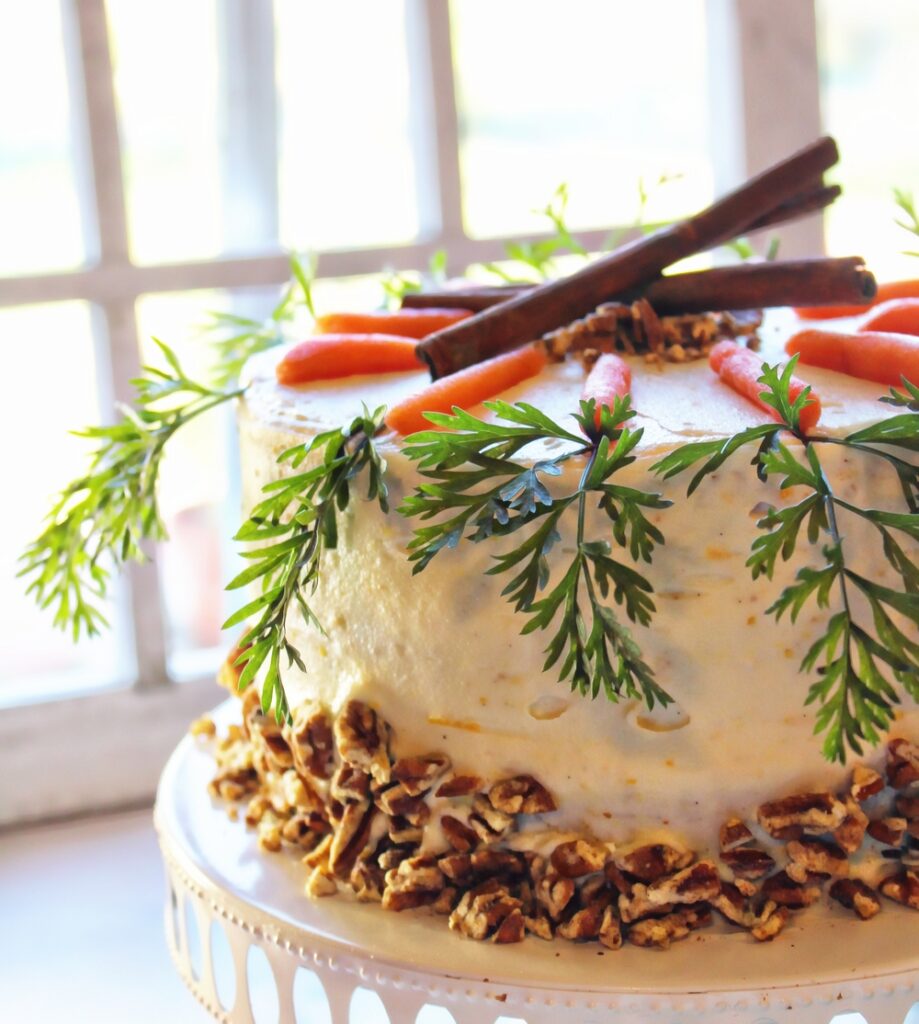
Gluten-Free Whole Grain Buckwheat Blender Carrot Cake

2 cups Hulled Organic Buckwheat Groats

5 large eggs

1 1/4 cup vegetable oil

1 tsp. orange zest

1 Tbsp. vanilla

2 cups brown sugar

1 Tbsp. baking powder

1 Tbsp. ground cinnamon

¾ tsp. salt

3 cups finely grated carrots

1 cup coarsely chopped walnuts or pecans

1 cup raisins or dried cranberries


Ingredients for Lemon Cream Cheese Frosting

16 ounces of cream cheese, at room temperature

1 cup unsalted butter, at room temperature

2 lbs.. powdered sugar, sifted to remove lumps

1 tsp. lemon zest, micro-grated

2 tsp. vanilla extract

Toasted finely chopped nuts and/or toasted

coconut, for garnish

Directions for Cake:

  • Preheat the oven to 350° and prepare 3 8-inch round cake pans. Line with parchment circles and grease the sides with butter and flour.
  • In a blender, blend the groats until they are a fine flour.
  • Add the eggs and oil and blend until very smooth, about 3 minutes.
  • Add the sugar, vanilla, and orange zest and blend for 15 seconds. Pour into a large bowl and add the remaining ingredients.
  • Transfer the batter evenly between the 3 pans to the oven.
  • Bake for 40-50 minutes. Test the baked cakes with a knife inserted into the centers; it should come out clean. Transfer the pans to cooling racks, cool for 15 minutes, then turn out onto racks to cool to room temperature.

Directions for frosting:

  • In a mixer fitted with the paddle attachment, beat the cream cheese and butter until smooth and creamy. Gradually add the sugar and extracts.
  • Continue to beat until velvety smooth.
  • Frost the cooled cake. Garnish with coconut or toasted nuts.
Always My Very Best,

Your Friend Chef Tess


Monday, July 17, 2017

Low-Carb Italian Sausage Riced Cauliflower


I had my weigh-in and measurement session at my gym today.  I've literally fallen in love with  Tribrid Personal Training. It's been six weeks since I started with my trainer Chris Schenck, and I have to admit that I was pretty nervous about today. Not because of anything he said or did to make me nervous, but because I'm so much of a freakin' perfectionist! I kept thinking, "What if I didn't lose anything?"...Funny, because my scale said I did. "What if Chris makes me feel crappy about not doing better?"...Stupid, because he's never been anything less than encouraging. I've been flippin' religious about tracking everything I eat, making it to the gym, and reporting my progress. Guess what?   It's definitely paid off!

I don't want to gross anyone out, but this is a  plastic replica of a pound of pure fat. Mmm. Fat.

 Chris keeps this replica at his desk.
 Only a personal trainer would keep this at his desk. 
I'm just saying. 

So...Drum roll please...I'm down 16.25 lbs in body fat and 16.5 inches! In 6 weeks. 

Six. Weeks. 

 I am feeling pretty awesome!

Simple healthy supper is here to stay! That's pretty much how I roll these days. So, here's a great recipe that is just super quick and really delicious. 


Tess' Low-Carb Italian Sausage Riced Cauliflower 

  • 1 28 oz can organic diced tomatoes
  • 1 lb lean Turkey Italian Sausage
  • 1 med onion, chopped
  • 2 Tbsp. garlic, minced
  • 1 12 oz bag cauliflower, riced ( I use Green Giant brand)
  • 1 Tbsp Chef Tess Romantic Italian Seasoning


 Directions:
In a 12 inch deep skillet, brown the turkey sausage with the onion until the onion is translucent. Add the garlic and seasoning and simmer a few minutes more.  Add all the remaining ingredients and cover. Reduce heat to low ans simmer about 10 minutes until the cauliflower is warm.  Yield: 5 servings


My Fitness Pal Nutritional information: 198 cal, 10 g fat, 19 g protein, 8 g carb, 2 g fiber,  6 net carbs per serving

There you go my darlings! 

Always My Very Best,
Your Friend Chef Tess


Wednesday, June 28, 2017

Gluten-free, Low Carb Almond Flour Double Fudge Macadamia Nut Brownies


Chocolate. I dream about this stuff. What is it about that "dark-lord of all things evil" that just calls to me? Maybe the name says it all, eh?  It's my kryptonite. For reals.  I love chocolate. LOVE.  Sometimes a girl just needs some brownies, but being converted to a healthy lifestyle, I have to actually make my own treats. Granted, the old me would have just gone to the grocery store and had a carb and sugar loaded brownie and not really thought too much about it, but I'm not the old me.  Chocolate crisis averted with these bad-boys! They're rich and thick and fudgy. Mmmmm. Mama neeeeeeeeds....

 I used low impact carbohydrates that won't make your blood sugar trip out, and the sweeteners are from natural sources.  I also use almond flour in this recipe, making it a great source of fiber, good fats, and protein. 

 In this recipe I be using the healthiest oil on the planet! Literally. It's the healthiest.  Thanks to our friends at Ahuacatlan Pure Avocado Oil for sending me all the beautiful samples! We've had so much fun exploring this awesome stuff! I think you'll see why. The flavor is super buttery and perfect for awesome brownies!


So, without further introduction, here's today's recipe...

Gluten-Free Almond Flour Double Fudge Macadamia Brownies

Ingredients:

1/2 cup Ahuacatlan Avocado Oil
½ cup  Pyure Sweet Stevia Erythritol Baking Blend

½ cup coconut sugar
2 Eggs
1 Tbsp Vanilla
1 cup almond flour
1/2 cup organic baker’s cocoa
2 Tbsp Arrowroot
1/2 tsp fine Sea Salt
1 cup chopped macadamia nuts

Directions: Cream together the oil, sugar, vanilla and eggs. Combine the dry ingredients and fold into the oil mixture. Spread into a greased 8 x8 baking pan.  It is going to be pretty thick. Sprinkle the chopped hazelnut over the brownies. Bake at 325° 20-25 minutes until outside edges are almost dry.  The middle will look a little moist.   Remove from oven.  The secret is to allow them to cool 1 hour before cutting.  Cut into 20 brownies.

My Fitness Pal Nutritional Information: Serving 1 brownie. 168 calories, 14 g fat, 8 carb, 2 fiber, 3 protein
  

Always My Very Best,
Your Friend Chef Tess


Thursday, June 22, 2017

Low Carb Thai Hot and Sour Red Cabbage Miracle Noodle Stir Fry with Sweet Soy Glazed Chicken


So, it's week three since I started seeing my awesome Tribrid Personal Training genius.  I want to say that it's easy and that I'm just breezing through the workouts, but I would be lying. It's heck. The first two workouts I actually puked. The workout today I actually cried a little (because it was hard... and I'm a sissy). Planking makes me feel like an old lady. That being said, Chris, my trainer is brutal (good). He's killing me...and I almost like it. Stockholm syndrome much? Bwhaha! Seriously though, it's been really good for me to have some accountability with someone who has a vested interest in my success. 

 One of the hardest parts of any fitness journey is finding good recipes that taste amazing and keep me full. So I wanted to start sharing a few of these here on my blog when I make them. It seems like whenever I post one of them on Instagram, I get a lot of requests for the recipe.  

When I made dinner tonight, my 14 year old son actually told me that I didn't work in a restaurant anymore and that we could just have pizza.  It made me giggle. Mainly because he then proceeded to gulp down a huge plate of this and loved it. 

Win. Double win.

Why? Because we're talking about less than 300 calories per serving, including the chicken! Less than 7 grams of fat, 42 grams of protein...are you seeing this?

One of the secrets to this dish, is  Angel Hair Miracle Noodles.  I don't work for them. I bought these myself because I am a foodie nerd and I love new adventures!  If you've never heard of them, they are really weird...but cool.  They are 97% water, non-gmo, gluten-free, carb-free, calorie free. It sounds impossible. The first time I tried them I thought they were nasty, but that's because I didn't cook them correctly.  The secret for me was to actually pay attention to the part of the package where it says to dry them out after you cook them. They only take a couple minutes to make, but really pay attention to the preparation directions.


The other secret to keeping full and hydrated for my workouts is the awesome use of Chia Seed...The Buzz word in Super Grain. It holds 10 times its weight in water and is loaded with omega 3's...that's the good stuff.  It keeps me full and gives a good boost to your fiber too!

 I get mine  at my favorite online grain store: 
Here

Are you ready to make this? 

 Chef  Tess Lo-Carb Thai Hot and Sour Red Cabbage 
Miracle Noodle Stir Fry
1 1/2 cups red cabbage, shredded
1 cup celery, chopped
1/2 cup onion, chopped
1 Tbsp sesame oil
1 Tbsp. minced garlic
3 Tbsp low sodium soy sauce
3 Tbsp. rice vinegar
1 Tbsp hot sauce
1 package  Angel Hair Miracle Noodles

Directions: In a large skillet or wok, heat the sesame oil. When very hot, add the onions, celery and cabbage. Stir fry until onions are tender, about 4 minutes.  Add all remaining ingredients, except the noodles. 
Just before serving, add the noodles and stir well. 

My Fitness Pal Nutritional for this recipe Yield 3 servings, 117 calories, net 13 low impact carbs, 5 g fat, 3 g protein.

Add 4 oz chicken breasts and 1 tsp chia seed per serving: add 180 calories, 39 g protein, 1.5 g fat. 

Total meal: 297 calories, 13 net low impact carbs, 6.5 g fat, 42 g protein. 

There you go. Some good stuff for my favorite peeps.

Always My Very Best,
Your Friend Chef Tess


Sunday, January 10, 2016

Perfect French Macarons


For me, the pinnacle of baking confectionery genius can be defined in two words...French Macarons.  Macarons take cookies to an unimaginable extreme of culinary perfection.  Macarons are not to be confused with the coconut cookies called "macaroons"...these almond flour cookies are made with a meringue base.  When baked correctly, they have a light crisp sugary coating surrounding a tender chewy cookie interior. Two of these perfect bites of heaven are then joined in holy-happiness  in a sandwich-style confection by creamy rich buttercream, truffle chocolate ganache, or tart jam.  The flavor is remarkable.  Resistance is futile. I save them for special occasions when  I can lock myself in a closet and be alone. I also share them with people who I really love. If Elvis was alive (or ever to come out of hiding)...he'd be the first to get one of these. Seriously. 
 

Macarons can be tricky to make, and the secret to success is of course, having a great recipe! This is the one I've used for the last few years in the bakery and for the farmer's market. The other secret:  Very fine milled almond flour.  The other trick I have found to making consistently awesome macarons is to carefully weigh and measure the ingredients. In fact, whenever possible, I prefer the weight of the ingredients to the volume measurements. It seems that even the slightest variation in ingredients' weight will not produce a perfect cookie. 


Tess' French Almond Macarons
yield 3 dozen small or 2 dozen medium

Ingredients:
120 grams (¾ cup) Blanched Almond Flour
230 grams (1 1/2 cups) powdered sugar
140 grams egg whites (about 4 large) 1/3 cup egg whites
¼ teaspoon Salt
70 grams (1/3 cup) granulated sugar
½ teaspoon pure vanilla extract OR 1/4 teaspoon flavored oils
¼ teaspoon pure Almond Extract

Directions:

  • Put oven racks in upper and lower thirds of oven and preheat oven to 300°F.
  • Line 2 large baking sheets with parchment paper.
  • In a separate bowl, Mix confectioners’ sugar with almond flour and SIFT well. This is a pivotal step if you want a smooth batter that will bake well and not be "bumpy".
  • Beat whites with salt in mixer at medium-high speed in a metal bowl mixer until they just hold soft peaks, about 4 minutes.
  • Reduce speed to medium, then add granulated sugar, a little at a time, beating, and continue to beat until whites just hold stiff, glossy peaks (about 3 minutes).
  • Add flavorings.
  • Fold almond flour mixture in 2 batches into whites until just combined. Transfer meringue to pastry bag and pipe 16 (1 1/2-inch-wide) mounds 1 inch apart on each lined baking sheet (32 total).
Piping the perfect macaron takes a little practice. Treat it as you would a rosette, bringing the pastry tip to the side of the circle, rather than forming a peak, to finish. I allow my macarons to sit out at room temperate on the baking paper for about 20-30 minutes before transferring to the oven. This seems to help with the smooth finish and the "foot" on the bottom of the cookie that gives it the traditional trademarked look of a true macaron. 

 Bake, switching position of sheets halfway through baking, until macarons are puffed and tops appear dry, 10 to 12 minutes. Macarons should be crisp on the outside and chewy on the inside. You may need to sample ten or fifteen to be sure they're just right...Okay...I made that part up.
  

Slide parchment with macarons onto racks and cool 10 minutes, then peel macarons from parchment, transferring to a rack to cool completely, about 15 minutes. 

Variation:
 Chocolate: Substitute 3 tablespoons unsweetened Dutch-process Cocoa Powder

 for 1/4 cup of the almond flour.

Tess' Favorite Buttercream Frosting Recipe

Ingredients:
2 lb powdered sugar
1 cups Butter
1 1/2 tsp Vanilla or Rum extract
3/4 cup very hot, almost boiling Water

Directions:
Combine all the ingredients in a mixer with the paddle attachment. Put on speed 1, with a spill guard installed or you will get powdered sugar all over the floor. Whip 3-5 minutes until very smooth. Pipe a dot of buttercream between two of the cookies. Resist the impulse to just pipe it right into your pie-hole...in public...

There you go darlings! The secrets to success in baking something really classic.  Enjoy!

Always My Very Best,
Your Friend Chef Tess

Friday, August 1, 2014

Sweet and Hot Slow Cooked Spanish Pork


We've made it to another Freezer Friday! Hooray! It's not just any Friday, mind you, but Labor Day weekend Friday! It's going to be a really nice four days to get together with family and friends. I may just relax and snooze. Tonight is "girl's night out"...and I'm going to leave dinner with the kids and a sitter. So, I thought I'd share one of my favorite freezer meals that also doubles as an amazing meal to serve to guests, neighbors, friends...or the babysitter. Good news, it's also gluten free and dairy free (if you don't top it with sour cream).

Sweet and hot is a weird combination. It's like a gorgeous drop-dead-to-look-at mom who can also bake brownies. Hmm. I'm not going to point fingers at anyone in particular. My mom says I totally fit that description. To the rest of you, you know who you are. I'm just saying, it's a hard balance to keep. Apply the sweet and hot combination to a dinner that can also double as a freezer meal for just about any Mexican filled entree...and you will be ready to cry tears of joy. Then and only then will you understand what it feels like to truly achieve dinner zen. Ohhhmmm. You love me already...Ohhmmmm. You can't wait to try this.
I've been goofing around with this recipe for quite a while. I hope when you have it, you will experience all the combined wisdom several different recipes. Call me crazy. What I wanted was a recipe that had fairly few ingredients, without using a jar or packaged item of to "count" as an ingredient. I also wanted the meal to be satisfying. I wanted them to love it! So much love...that I would hear a lot of general moans of adoration for my skills as a chef. I'm selfish that way. I like praise. Doesn't everyone?


Tess' Sweet and Hot Slow Cooked Spanish Pork


3 lb boneless pork carnitias (or a boneless pork loin, cut into cubes)
2 tsp dry ancho chile,
2 tsp dry Mexican oregano
1 tsp whole cumin,
1/2 cup honey
1/2 cup lime juice plus zest of one lime
1/2 cup Homemade sundried tomatoes or store purchased sun dried tomato julienne
1/2 bunch cilantro, chopped
3 green onions, chopped
salsa and sour cream (optional)


Directions: In a spice mill, combine the ancho chile,
oregano,
and cumin seed.


Grind until a fine powder is achieved.


Spread the spice mixture over the carnitas (pork). Drizzle with honey.
Add the lime and sun dried tomato.

I cooked mine in my solar oven (350 degrees) for 4 hours, but you can put it in the crock pot on low 5-8 hours or high 3-4 hours.

Meat will be very tender. Thanks to the tomato and lime juice for the acid that breaks down the meat to make it so divine. You can leave it in chunks or shred it, depending on your preference. It's so tender it easily shreds with a fork.


Serve as a taco filling. I like to add fresh chopped cilantro and green onion and top it with some avocado yogurt cream and some of my Home canned Salsa.


Yields 6 3/4 cup servings. Recipe is okay to double or triple as needed for freezer meal purposes. To freeze, place 3 cups of the meat and juice mixture in a quart size bag along with fresh chopped cilantro and green onion. Label clearly with date and reheat instructions:


"To serve, defrost overnight in the fridge or remove bag and defrost in the freezer. Shred the pork. Heat 5-7 minutes in the microwave or 8-10 minutes on the stove top. Be sure to keep the juice with the meat. Salt and pepper as needed. Serve hot as a taco filling, taco salad base, enchilada or burrito filling."


Lay bag flat in fridge. When cool, transfer to the freezer. Freeze solid and place in your freezer file.

Last note.
My sweet friend Andee Andee Farnsworth Bergeron sent me this wonderful recipe that would also work wonderfully!
Costa Vida Sweet PorkPork Roast (4-5 lbs), thawed if frozen
3 c. Dr. Pepper
1 can tomato sauce
1/2 c. sugar
1/2 c. (packed) brown sugar
1 Tbsp. cayenne pepper
1/2 tsp. powdered garlic
2 cloves garlic, minced
3 large carrots, peeled and grated
1 (smallish) Serrano pepper, seeded and diced
1 medium yellow onion, chopped
Cut away any obvious fat portions from the roast. Place all ingredients in a crock pot and cook on high for 6-7 hours.
Remove pork to cutting board.
Add an additional 1/2 c. granulated sugar and 1 cup Coke to the liquid in the crock pot. Stir.
Shred the pork, removing excess fat and bones, and add back to the crock pot. Stir.
Reduce to low and cook an additional 3 hours.
There you go!

Always My Very Best,
Your Friend Chef Tess

Thursday, July 3, 2014

Gluten-free Grain-Free Almond Flour Blueberry Muffin Crisps


I tried a blueberry muffin crisp...and then I ate them by the case for a few months. Now when I see them I want them, but I know that they are higher in sugar than what I want and that I really need to be better. So, when given the chance to make them healthier, I went for it. Here is a great alternative to the multi-grain breakfast muffin-crackers that taste amazing and will give you all the protein and fiber you need to keep you going throughout the day. I love them!  The secret is making them grain-free using almond flour. The fine grind variety is what I prefer, and I'm pretty partial to the almond flour from Honeyville. Even now that I am not their corporate chef, it is my pet favorite for perfect texture. I've tried others and I'll always come back to theirs. 

Have you ever tried Coconut Sugar to the recipe have solved that! Plus, there is naturally occurring caramel flavor that comes with coconut sugar that I adore!
 Palm Coconut Sugar  is supposed to be great for helping regulate blood sugar.  It is low on the glycemic index and this really affects how quickly you extract the energy from the food. It is measured and used the same as sugar in baking, but I seriously use about half. Honestly, in most baking, you can almost count on the fact that you can reduce the sugar by almost half and it will still bake pretty similarly. 

Palm Coconut Sugar was explained by Dr. Oz. He showed the benefits of using it in This Video. There are still a few people who say it isn't as healthy a choice but I'm in the group that says hey, " It still has more vitamins and minerals than regular sugar and yes, it contains natural fructose. It isn't calorie free, but it is all natural." That being said, it is also very easy to harvest and is sustainable. 


Gluten-Free Grain Free 


Almond Flour Blueberry Muffin Crisps

1 3/4 cup Almond flour
2 eggs
1/4 cup coconut sugar
1 tsp vanilla
1 tsp LorAnn Princess Emulsion
1/4 tsp salt
1/4 tsp baking powder
1/4 cup freeze-dried blueberries, crushed to 2T
12-15 drops stevia
2T olive oil


Directions:  Pre-heat oven to 350 degrees. Combine all ingredients until a thick dough is made. Place dough on a baking sheet lined with parchment paper or a baker's mat. 
Cover the dough with non-stick parchment paper.
Roll thin between the sheets using a small rolling pin or pressing with your hands. I have a rolling pin that I love and it works great for crackers. 
Remove the parchment. Lightly cut crackers into 1 inch squares. If you use a baker's mat you can use a simple pastry roller that won't cut the mat.  Roll to 1/16th of an inch thin. 
Bake 350 degrees 12-15 minutes (depending on the thickness of the crackers).
Store in an airtight container...if they survive that long. I'm not using them as ninja-stars. They're making snack-fest status for sure!


Always My Very Best,
Your Friend Chef Tess