Showing posts with label Home canning recipes. Show all posts

Friday, May 29, 2015

Chef Tess Video Segment on Good Morning AZ! Turning ANY fruit into freezer jam (3 ingredients)


Thank you again Good Good Morning Arizona! It was a blast being on the show again!

azfamily.com 3TV | Phoenix Breaking News, Weather, Sport

Basic Recipe for Turning ANY fruit into freezer jam
Ingredients
4 cups of crushed fruit
1 ½ cups sugar (or  sugar free use 3/4 cup granulated organic Pyure-Organic-Stevia natural erythritol stevia all purpose sweetener)
1 Pouch of Ball Fruit Jell® freezer jam pectin OR 3Tbsp of Instant Pectin 

Instructions
In a large glass 2 quart bowl, combine the pectin and sugar. Mix until well combined, about 1 minutes. 
Add the fruit, mashing well and combine 3 minutes. until well mixed. Add your choice of spices and flavorings. 
Put into 1 cup containers leaving 1/2 inch head space if you plan on freezing it. This recipe yields 5, 8 oz. freezer jars. Allow to sit at room temperature 30 minutes until jam sets. 
Freeze up to one year in freezer containers or just put in the fridge and use within 3 weeks.

There you go darlings! Keep it simple!

Always My Very Best,
Your Friend Chef Tess


Saturday, November 10, 2012

Home Canning Meat and Vegetables Tutorial


 This is a special food storage basics day and I'm sharing something really awesome! Well, when am I not sharing something awesome?! Today I taught a class on home preserving meat and the safety needed to make sure that the processing is done correctly. In my post Home Canning Safety 101, I covered some basics on safety. Many people process their own meat for longer-term shelf life. It is recommended that home-canned meat be used withing a year of being processed. As I'm liable, I'm not going to ever suggest that it could be safe for very much longer than that. Sorry folks. The only meats I suggest for really long shelf life (10-15 years) are Freeze Dried Meats. The moister content is the key. If food is stored in liquid, there's always going to be a possibility for bacteria growth. The most deadly canning concerns happen with low acid foods, and those botulism spores can only be killed at the higher temperatures that a pressure canners produces. Boiling water canners top out at 212 degrees (botulism needs to be heated to 240 degrees to be killed).   I am often asked how to do this and how to do it in such a way that it doesn't cause food-borne illness.  Today I'm sharing the basics on pressure canning! This is  method of canning used for "low acid" foods like meat, vegetables and some fruit (depending on it's acid levels). In my class I also covered the safety of home meat jerky production. That will be a later post. 

Some reasons for processing your own meat and vegetables:
  • Save money and buy when meat or vegetables are  on sale
  • Convenient cooked meals on hand for easy use
  • Processing game and wild animal meat (or home raised animals)
  • Preserving vegetables for use from the garden or local farmer's markets
  • Preparing for any emergency
Pressure canning is done in a large pressure cooker that is specifically designed for home canning. It is not okay to use a regular pressure cooker for home canning! It is however, okay to use a pressure canner for large batching of pressure cooked foods. Please make sure if you are home canning meat that you have a home canner that has been approved for home canning safely. Also, I'm a food safety freak. I will always give you the best possible safety information for your family that I have! I've seen some pretty interesting posts on home canning that include things like canning butter and storing meats for years and years in home canned jars. If you are doing this, please read the post on why I don't ever home can butter!  


General Meat Canning Information
Courtesy of the University of Minnesota Extension office
Meat, poultry and fish are low acid foods. They must be processed in a pressure canner to assure safety. Use the processing time and pressure (PSI) that is specified for each type of game.
Following are some general guidelines for canning meat or poultry:
1 Can only good quality meat, poultry ,or game.
2. Chill home produced meat at 40°F or below soon after slaughter to prevent spoilage.
3. Keep all meat clean and sanitary. Rinse poultry thoroughly in cold water, then drain.
4. If meat must be held for longer than a few days, freeze it for maximum quality retention, store frozen meat at 0oF or lower until canning time.
5 Thaw frozen meat in a refrigerator at 40°F or lower until most of the ice crystals have
disappeared. This may take several days for large cuts of meat.
6. Trim gristle, bruised spots, and fat off meat before canning. Excessive fat left on the meat will melt and rise to the top during processing. If the fat comes in contact with the sealing edge of the lid, the jar may not seal.

Note: Individuals using a weighted-gauge canner at altitudes less than 1000 feet may use 10 PSI instead of 15 PSI for the canner pressure. This will improve nutrient and quality retention. Check with your local county extension office or Soil Conservation District for altitude information. For more information about food safety, call USDA's Meat and Poultry Hotline at 1-800-535-4555

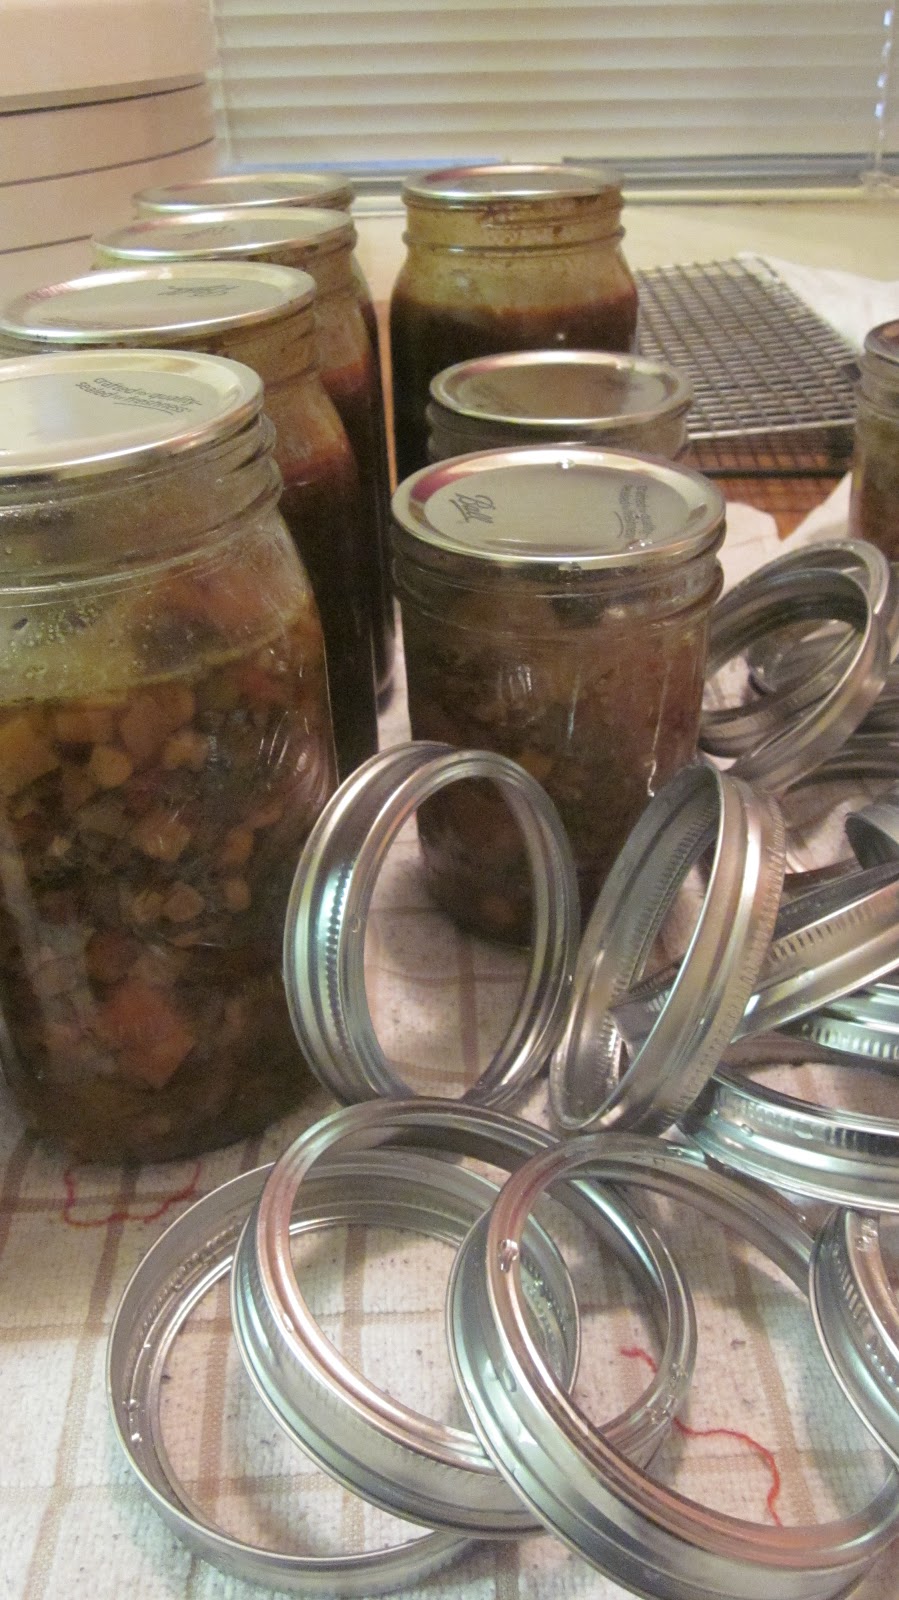
This is my personal post on how to pressure can beef stew. We don't pressure can meat often here, since Ace is a vegetarian. However, beans and vegetables are low acid as well, so we still have to do some now and then.  Plus...I like meat. 

I have two different pressure canners. One is a Presto Pressure Canner and one is the All American Pressure Canner (Thank you mom and dad for the early birthday present!). 

Ball's Beef Stew Recipe is approved for home canning. The cooking time and pressure have been tested! Always use an approved recipe. For pressure canning, I do add my own spice blends and herbs within reason. By the way, if you need canning supplies, Ball has a great website! Visit the Store 

Prepare the stew according to Ball's Beef Stew Recipe directions:
1.) PREPARE pressure canner (check seals, air vents and gaskets). Heat jars and lids in simmering water until ready for use. Do not boil. Set bands aside. 
2.) BROWN meat in oil in a large saucepot. Add vegetables and seasonings to browned meat. Cover with boiling water. Bring stew to a boil. Remove from heat. 

3.) LADLE hot stew into hot jars leaving 1 inch headspace. Remove air bubbles. Wipe rim. Center hot lid on jar. Apply band and adjust until fit is fingertip tight. 
4.) PROCESS filled jars in a pressure canner at 10 pounds pressure 1 hour and 15 minutes for pints and 1 hour and 30 minutes for quarts, adjusting for altitude. Don't forget to let the pressure canner vent a stream of steam for a full 10 minutes before topping with your canning weight! That is a very important step to making sure that the cooker has expelled enough excess air to get the pressure right. 
The Presto canner has a weight like this.

 The All American model I have has a weight as well as a pressure gauge.
 The weight must be set according to your altitude! Low altitude requires 10 lbs of pressure for most items. Check the recipe! 
I love having the pressure gauge, as I can actually see what the psi is within my cooker!
 Cook the full amount of time that the recipe specifies for your specific meat or vegetable. Only start the timer when the pressure canner is up to temperature and pressure.  When time is over, turn off the heat and allow the pressure cooker to decompress naturally. Do not run under water or remove the weight until the gauge reads "0" and the weight doesn't hiss when touched. This is a sure sign that it needs more time to cool. 

Remove jars and cool in a draft-free area.  Do not disturb them! Check lids for seal after 24 hours. Lid should not flex up and down when center is pressed.  At this point, remove the rings.
 Wash and sanitize the outsides of the jars with warm soapy water.
Home pressure canned food is good up to a year after processing if kept in a cool dry place. Label each jar clearly with the date of production so there aren't any questions as to how long the food has been around the house. If the bottles ever start to ooze, mold, or bubble on the shelf...they're evil and need to be destroyed! Be safe. If obvious signs of spoilage are clear, don't open the jars. Dispose of them. Don't feed them to your pets. Now that you know the safety, remember that by following a few rules, you can make meals that are actually delicious and safe at home! 

Always My Very Best,
Your Friend Chef Tess


Tuesday, June 14, 2011

Pickled Okra-Ooo-la-la


 I mentioned that we've been having some new organic farming adventures! I'm always the one who says, "Try something new"...but I have to confess...okra was not high on my list.  I never ate it growing up in my family. We never raised it in any of our many giant and fruitful gardens.  Dad didn't seem to think we needed it and mom didn't like it.  So...there it is.  So, when we were handed some in a beautiful shining paper bag...I decided I needed to say, " I dare say I need to post what we did with the okra that we gathered from Love Grows Farms!" Because...I've been eating it like crazy! Krista, the greenhouse manager and farming sweetheart gathered these for me.  This is what she showed me.   First, when harvesting okra, you want to gather it when it is still very young and tender.  The seeds should not get big like this one (below). In fact, she said this one will be fed to the goats.


Then she gave us some okra to play with. My boys ate it raw right from the bag! They thought it was awesome! Of course,  my husband Ace said, "they have also been out in the sun for a long time."  Ace, who is normally a veggie guy... not impressed by okra. He may never be impressed. Just like me and parsnips who may never find a common ground. Or  Tara and raisins (she calls them "the Devil")...ya know. Everyone has an opinion. I'm okay with that.  


 However...I think I have found my new favorite okra-song!

PicKleD OkRa! 
Krista at the farm said, "okay, it's pretty good pickled if you want to try it. "
 Who am I to *not* be at least  willing  to try it! Just once. So...I did.


I followed the recipe below, but instead of processing them in the heat (which seems to draw out the slime texture), I simply made the brine, added the okra, tightened the lids and then put in the fridge.  7-10 days later, we had the most delightful little garlic "niblets" of okra I've ever had! However, should you need to actually keep them on the shelf at room temperature, you'll need to follow the directions for processing the jars. 


Gourmet  | November 2003; originally published November 1982
ingredients

  • 1 pound okra (3 1/2 to 4 inches long)

  • 6 garlic cloves, peeled


  • 3 cups cider vinegar (24 fluid ounces)

  • 1 cup water

  • 1/2 teaspoon dried hot red pepper flakes

  • 1 1/2 tablespoons dill seeds

  • 1 tablespoon mustard seeds

  • 1 1/2 tablespoons kosher salt

  • 1 tablespoon sugar


  • Special equipment: 6 (1/2-pt) canning jars with screw bands and lids; an instant-read or candy thermometer.


    preparation

    Sterilize jars and lids:
    Wash jars, screw bands, and lids in hot, soapy water, then rinse well. Dry screw bands.
    Put jars on a rack in a boiling-water canner or a deep 8- to 10-quart pot and add enough hot water to cover by 2 inches. Bring to a boil, covered with lid, and boil 10 minutes. Heat lids in water to cover in a small saucepan until thermometer registers 180°F (do not let boil). Keep jars and lids submerged in hot water, covered, until ready to use.
    Make pickled okra:
    Drain jars upside down on a clean kitchen towel 1 minute. Tightly pack jars with okra, stem ends up, then put 1 garlic clove in each jar.
    Bring remaining ingredients to a boil in a 2-quart nonreactive saucepan, stirring until sugar and salt are dissolved. Divide pickling liquid evenly among jars, leaving 1/4-inch space at top, then run a thin knife between okra and jar.
    Seal and process jars:
    Wipe off rims of filled jars with a clean damp kitchen towel, then firmly screw on lids with screw bands.
    Put sealed jars on rack in canner or pot and add enough hot water to cover by 2 inches. Bring to a boil, covered. Boil pickles, covered, 10 minutes, then transfer jars with tongs to a towel-lined surface to cool. Jars will seal (if you hear a ping, that signals that the vacuum formed at the top has made the lid concave).
    After jars have cooled 12 to 24 hours, press center of each lid to check that it's concave, then remove screw band and try to lift lid with your fingertips. If you can't, the lid has a good seal.
    Let pickled okra stand in jars at least 1 day for flavors to develop.

    There you go! Pickled Okra!

    Monday, May 23, 2011

    Roasted Tomato Fajita Salsa de Chef Tess


    Happy brilliant-bright-shining Monday! I try to do a food storage recipe on Mondays and since I'll be on Valley Dish tomorrow using some of my homemade roasted tomato salsa, I thought it would be perfect to share the recipe here today! What do you think? Salsa season? Um yes! Especially since the salsa I love and use has been completely depleted  by my salsa freak  adoring husband. Normally that is okay, but when I'm thinking I have a certain ingredient only to find it snorted down and gone...well let's just say I was a little flustered.  I needed to make some anyway, right?! Okay. Perk for you! I'm sharing the recipe. See...something good has come from Ace loving salsa...besides a tortilla chip famine. 
     Remember when I was hard core working on Organic Tomato Farming with Jim and I had a bazillion of these?

    I came up with a recipe back then that made Ace literally drink bottles of salsa. He's a salsa boy. Honestly I couldn't decide if I wanted to share the recipe here on the blog or save it for bottling and selling across the country or at farmer's markets. Um...yes, we like it that much. However, I think it's safe to say that I can share a version here that's so close it's almost it...but not give away all my tricks, right?  It's a medium heat salsa I custom designed for Ace who doesn't like a lot of cilantro in his salsa. I'm a cilantro girl. I like a lot of chunks in my salsa too, but if you prefer a smoother salsa, you'll need to puree it. Ace also doesn't like, ironically, a lot of peppers in his salsa, so this one have very few. I roasted my tomatoes in the solar oven and then finished cooking the salsa on the stove. 

     Home Canning Safety 101 is a good place to start if you've never done any home canning. You'll need some equipment for this if you want it to be safe to feed to your family after sitting on the shelf.  


    Chef Stephanie Petersen's 
    Roasted Tomato Fajita Salsa

    6 lb  blanched tomatoes , peeled half pureed, half rough chopped
    1 medium onions, diced 
    (1T olive oil)
    1/4 cup minced garlic
    1/2 cup roasted mild Hatch green chiles, peeled and seeded
    1 cup apple cider vinegar
    1T fresh cracked black pepper
    2tsp fresh ground coriander seeds
    1T salt
    2T dry cilantro

    Directions:
    In a heavy 2 gallon stock pot over high heat. Add olive oil. Put onions in pan. Do not stir for 5 minutes until one side of the onions are very dark brown (as you would for fajitas). Add the garlic and cook 2-3 minutes.  Add all remaining ingredients. Simmer 20 minutes uncovered until thickened. Place salsa in sterile canning jars with 1/2 inch head space. Process 15 minutes for pints jars.


    Hide them from Ace.  Share them with the ones you love. 

     There you go. Oh...and join me tomorrow on Valley Dish on NBC 12 at 3:30 making my Enchilada Tortilla Casserole in the skillet and also showing how to make homemade Taco seasoning! Recipes are here. The enchilada skillet meal is amazing for the fact that it's fast, easy and daggumit...a freakin' awesome family favorite!  Anyone can make it!  If you like what you see, let them know down at NBC. I'm sure it will keep me coming back. Smooches all and happy cooking! 

    Saturday, March 26, 2011

    Homemade Tomatillo Salsa...Yes we Can!


    One of the all time favorites at my house is Salsa Verde. AKA Tomatillo salsa. Oddly enough, I realized today that I had never added it to my blog. This is a great human tragedy soon to be remedied by my stealthy fingers typing frantically.  I know everyone needs to know how to make it.  Okay, maybe not everyone per say, but everyone who has ever longed for a truely luscious green salsa recipe.  My husband Ace will literally crack open the bottles and drink them. Falling off the wagon...
     Note:  If you roast the peppers first, you'll have a slightly smoky depth to your sauce that will make your friends and family cry with joy and happiness...In Arizona we have markets that literally flame roast pounds and pounds of green chiles right in front of us. It's quite a nice perk to living in on the surface of the sun...I mean the valley of the sun.  


    Tess' Green Tomatillo Salsa
      
    5 1/2 cups chopped, cored husked tomatillos, pureed in food processor
    1 cup onion, pureed in food processor
    1 cup minced sorano green chili peppers (or for less hot, use mild roasted Hatch green chiles)
    6 cloves garlic, minced
    1 bunch minced cilantro
    1 teaspoons cumin
    2 teaspoon salt
    2 teaspoon oregano, dried
    1 cup vinegar (5% acidity or higher)
    1/4 cup fresh lime juice
    1/2 cup sugar

    Combine all ingredients in a large sauce pot. Bring mixture to a boil. Reduce heat and simmer 10 minutes. Ladle hot salsa into hot jars, leaving 1/2 inch head-space. Adjust two-piece caps. Process 15 minutes in a boiling water canner.  Remove from canner and place on dry kitchen towel.  Allow to cool 12 hours.  Check the seals.  If properly sealed, store for up to a year.  If it didn't seal, it may be refrigerated up to 2 months. 
    Yield: 5 1/2 pint jars (5 cups)

    If you've never home canned before, see my handy post: 


    There you go! 
    Always My Very Best,
    Your Friend Chef Tess


    Tuesday, September 28, 2010

    Using Freeze Dried Fruit to Make Cooked Jam and Freezer Jam


    Now seeing that my teaching next week be basics on homemade jam and canning safety, I had to do some experimentation. You may ask, "Can luscious homemade jam really be as simple as adding water and a few basic ingredients...and yet be so far above most people's grasp?" I wonder that exact question. Sometimes I wonder if I'm just too "simple silly". I hope I am. I hope that when folks read my words of wisdom and sound understanding that they will feel empowered to make wonderful things. Now...that being said I don't know how to say this...but this raspberry jam was made out of a little honey, some freeze dried raspberries and some pectin. Why freeze dried? Well...just for the danggum-fun-of-it-all. Honey...because I found this yumm-a-licious honey made from my native Sonoran Desert Blossoms...and I was a happy girl.

    For argument's sake, let's just say that perhaps raspberries are out of season and I have a can of freeze dried fruit just laying around my house. If I don't have to spend money...even on a bag of frozen berries...I won't. I'm a tight wad. There. I said it. I like freeze dried fruit for making muffin mixes and cake mixes.
    They look really crazy freeze dried...but the only ingredient in the can is raspberries!

    Chef Tess Raspberry honey jam
    4 cups freeze dried raspberries (or frozen work)
    1 1/2 cup honey ( I love the dessert blossom honey)
    2 cup water (only add water if using freeze dried berries)
    1/2 cup UltraGel or 1 box (1.59 oz) low sugar pectin
    Combine all ingredients in a pot for cooked jam except the UltraGel. This hydrates the berries and they look remarkably like what they are...real berries.

    Bring to a boil and cook 5 minutes. Whisk in the ultra gel or pectin. Return to a boil and cook a minute more.

    Process in sterile half pint jars in a boiling water bath canner for 10 minutes at sea level.


    Freezer jam is even easier. Simply add the honey, water and fruit together. You can also use agave nectar in place of the honey if you need lower glycemic or vegan sources. Use freezer pectin instead of low sugar pectin. Ultra gel works in both applications (cooked or freezer jam).

    Once the berries have absorbed the water, add the pectin or ultra gel. Stir a minute or two. Freezer pectin will take about 10-20 minutes to gel. Ultra gel will set almost instantly. Transfer to freezer safe containers. Keeps good up to a year in freezer safe containers.
    There you go. Fast easy jam even with crazy dried fruit. Who knew?!

    Always My Very Best,
    Your Friend Chef Tess

    Wednesday, September 15, 2010

    How to Make Fig Jam (for Gabi in South Africa)


    Gabi Fischer in Namibia, South Africa wrote me last December asking if I had any experience cooking fig jam in my solar oven. After I fell out of my chair at the shock of having a fan in South Africa, I set out to find figs. Arizona should have figs I thought. Wow did I have a doosey of a time. I should have planted a fig tree. I know there are people here with them...I just don't have one. As for Gabi, from her letter, I knew she was cooking in on a wood stove or using a solar oven as her main sources of heat. I find that amazing in and of itself.

    Gabi wrote,
    "I use fresh figs. We always have a small harvest at the beginning of December and now the big harvest will start. As I don’t have much time to cook it this time of the year I always used to freeze the figs, already taken the skin off and later in February I cooked it on a stove which works with wood. But it is more “ lecker” ( can’t find a word in English)when the jam is made out of fresh figs. I have cooked already 2 recipes. I always use a bit less sugar than the mass of figs, it gets very sweet but holds longer. I have cooked already two big pot full of fig jam, and it works very good. it is interesting that it does not cook over neither burn (in the solar oven). At the moment I don’t have a black pot, should cook quicker then. I also thought to ask my husband to put the oven on wheels s that I always can turn it, and when it looks like rain, which is not very often in Namibia, I can drive it into a room. We have the small one, is not too heavy but If I have to protect it from the rain I will have to carry it far.
    Gabi Fisher,
    Nazimbo Camping Safaris"

    Well. I finally found figs. Nine months later the fruit was finally in my hand. I searched for two reasons. One, I was actually very sympathetic to Gabi's plight. Second, I was bugged that I had not had any experience with fig jam in my solar oven. Isn't that funny? I get so anxious to try new things. This was something new to me and I wanted to make it work. Now we have it!

    Thank you California Black Fig farmers who distribute through Trader Joe's in Arizona. I love you.

    Those who have never seen a fresh fig before, here it is.
    Trader Joe's, I apologize I squealed in your store. I know it didn't make any sense to anyone looking at me...but I was giddy. I'm sure your produce stocker almost wet his pants. It must have been a scary sight.
    Figs are amazing. They all have a skin. The black variety look like this when the stem is cut off.

    The fruit is actually quite different to look at as well. The flavor is much like a bland kiwi.
    For the jam you will need:
    2 lb black figs (4 cups) washed and chopped (blanch and remove skin if desired)
    1/2 cup lemon or lime juice
    7 cups sugar
    1/4 cup Ultra Gel starch or 1/2 cup flour (Americans can use 1 box pectin)
    optional: 1 1/2 tsp vanilla
    1 tsp ground cinnamon
    dash of ground nutmeg and cardamon

    Directions:
    Heat the figs and lemon juice in your solar oven (or stove) until soft, about 10 minutes stove top or 15 minutes solar.

    Mash or run through a blender. I used a blender or a food mill.


    If you peeled the figs the blending step isn't necessary. You can just mash the fruit. Make sure you mash it very well, as I've noticed it helps the jam hold thick better when the fruit is very well mashed. I like keeping the skin. It makes the jam very red colored and I like the flavor.

    Return the fruit puree to the pot. Add the sugar and jell. I also add 1 1/2 tsp vanilla and 1 1/2 tsp ground cinnamon and a dash of nutmeg and ground cardamon. Simmer for 20 minutes until thick. The starch will help the jam to hold better.
    Those using pectin, bring mixture to a boil. When sugar is dissolved, add the pectin and cook one more minute.
    Transfer hot jam to very clean and sterilized canning jars with new lids. Put canning jars in a hot water bath canner on the stove making sure the water is well over the lids. Bring water to a boil. Cook 10 minutes. Remove from the water bath and put on a clean towel. Do not disturb jars for 12 hours. This will ensure a good seal. Label and use within a year.
    There you go Gabi. I know you probably have it all figured out by now, but I just want to say thank you for inspiring a chef half way around the world. If I ever make it to South Africa, I promise to look for you. Maybe we can cook jam together.
    The rest of you...there you go. Make some jam.