Showing posts with label Pizza. Show all posts

Tuesday, August 22, 2017

2 Shelf-Stable Complete Pizza Kits for Camping and Beyond


    I spent an evening a while back teaching how to make these awesome shelf-stable pizza kits with some of my friends in Utah.  These are "just add water" simple and they use the technology of freeze-dried cheese. Yes. It is real cheese. Yes, it hydrates beautifully and gets gooey and awesome for pizza. Yes, it is shelf-stable for a very long time. These kits are perfect for any day of the week! They're easy to make and delicious!  They can travel anywhere without needing a fridge for the ingredients. People often ask, where to get the freeze-dried products.  My family is greatly blessed by the extra money brought in by sales tracked back to my freeze-dried food website 

The crust is a quick rise with the addition of some baking soda and buttermilk powder so it will raise light and fluffy without yeast! The other secret is the addition of a tablespoon of lemonade powder. It is just enough to give the lemon-herb crust a fantastic depth. I use my spice blends because I know what they taste like. If you have a favorite, go with it, right? 
Pizza Kits for Camping and Beyond
Each kit:
  •      1 quart-sized bag crust mix
  •      1 snack-sized bag sauce mix
  •      1 sandwich-sized bag 2 cups freeze-dried cheese

 I use freeze-dried mozzarella cheese for the Italian and Freeze Dried Cheddar Cheese for the Enchilada Pizza.

Storage: Place all bags in a mylar bag or PETE container with a metal lid and an oxygen absorber.* Seal. Store meals in a cool dry place.  Meals will be shelf-stable up to 2 years with an oxygen absorber*If making vegetarian pizza, no oxygen absorber is needed, but they will only be shelf-stable about 6 months.
Crust quart bag:
No-Raise Lemon and Herb Pizza Crust Mix
3 cups bread flour
1T lemonade powder
¼ cup buttermilk powder
1 tsp salt
1 1/2 tsp baking soda
1T Chef Tess Romantic Italian Seasoning (or Fajita seasoning for Southwest pizza)
¼ cup powdered shortening
1T SAF yeast or Instant active-dry yeast

Directions: Combine with 1 ¼ cup cool water and knead until a soft dough is formed about 5 minutes. Allow dough to rest 5-10 minutes. Roll or stretch-out into a 10-12 inch circle. Top with hydrated sauce and cheese and place in a heated Dutch oven or baking pan. Bake 425 degrees 25-30 minutes until cooked through.

Sauce Bags :
Chef TessBakeresse Instant Marinara Sauce
1/4 cup tomato powder
2T  freeze-dried onion
2T freeze-dried bell peppers
2T  freeze-dried mushrooms
1T granulated honey
1tsp Chef Tess Romantic Italian Seasoning 
1/4 cup ultra-gel
Directions: Add 2 cups warm water (depending on how thick you want your sauce) and stir well.
For meaty sauce, add 1/2 cup freeze-dried sausage and increase water to 2 1/2 cups. Always use an oxygen absorber if you use the real meat. 

Chef TessBakeresse Instant Fiesta Enchilada Sauce Mix
1/4 cup ultra-gel
1 ½ T
 freeze-dried onion
2T  
tomato powder 
2T -4T ground ancho chile powder
1/4 tsp Chef Tess Wise Woman of The East Spice Blend 

1T Chef Tess Fajita Seasoning 

1 tsp baking cocoa (not hot chocolate)
2 tsp chicken bouillon (I like the no msg versions)
2 tsp
lemonade powder


Directions:  Combine the enchilada sauce mixture with 2 cups of  cool water. Whisk well. 

For Chicken enchilada pizza: add 1/2 cup freeze-dried chicken to the sauce bag and increase the water to 2 1/2 cups when hydrating. Always use an oxygen absorber if you use the real meat. 

I apply a label to the baking directions onto the container so I can remember what the heck I'm supposed to do. 

They look like this:

Chef Tess Bakeresse Shelf-Stable
Gourmet Pizza Kit
Crust Directions: Combine with 1 ¼ cup cool water and knead until a soft dough is formed, about 5 minutes. Allow dough to rest 5-10 minutes.  Hydrate sauce and cheese. Roll or stretch-out into a 10 inch circle. Top with hydrated sauce and cheese and place in a heated Dutch oven or baking pan. Bake 425 degrees 25-30 minutes until cooked through.
Sauce Directions: Add 2 cups warm water (depending on how thick you want your sauce) and stir well.
Cheese: Lightly mist with cool water and allow to hydrate about 10 minutes. Top Pizza.
Chef Tess Bakeresse Homemade Shelf-Stable
Gourmet Pizza Kit
Crust Directions: Combine with 1 ¼ cup cool water and knead until a soft dough is formed, about 5 minutes. Allow dough to rest 5-10 minutes.  Hydrate sauce and cheese. Roll or stretch-out into a 10 inch circle. Top with hydrated sauce and cheese and place in a heated Dutch oven or baking pan. Bake 425 degrees 25-30 minutes until cooked through.
Sauce Directions: Add 2 cups warm water (depending on how thick you want your sauce) and stir well.
Cheese: Lightly mist with cool water and allow to hydrate about 10 minutes. Top Pizza.
.

There you go my darlings! Shelf-stable pizza kits! Have fun with these! Onward and upward my darlings!

My family is greatly blessed by the extra money brought in by sales tracked back to my freeze-dried food website You also have the option of joining as a consultant/member and getting the commission on anyone who buys from you! I'd love to have you on my team! Thank you so very much for your support. Xoxo!

Always My Very Best,
Your Friend Chef Tess


Thursday, July 5, 2012

Skillet Pizza for Camping and an Easy Summer Meal

 Tomorrow I'm visiting our local Good Morning Arizona channel 3 TV station for a cooking segment on easy camping and summer meals for kids! I'm so excited to meet everyone there and cook with some new folks! The segment airs at 8:45 so if you're local, it should be a fun piece. I wanted to share one of the ideas I've used for camping that is just way too fun for kids and adults! I make pizza while camping using a skillet with a lid on a butane or Coleman stove or in my solar oven. It can also be done over the camp-fire with a skillet or folded in half like a sandwich in a foil pouch and cooked right in the coals.
At home it is fast, easy, and certainly can be done on the stove or BBQ grill! In the summer this will give you that crispy crust and gooey melted cheese without the oven heating your house. I can make them a lot healthier and cheaper than purchasing the pre-made frozen meals and they take about 20 minutes to make 10-12 ready-to-eat pizzas!  For the most part, camping meals need to be simple. If I'm not using one of my shelf-stable convenient 52 jar method meals, I'll usually bring along some of these! You will need store purchased pita bread or you can use the  homemade pita bread tutorial. Today I'm using some grilled panini flat bread. It really doesn't matter what you use for the crust, as long as it is thick enough for a pizza. When the boys were younger I'd use homemade English Muffins, split in half they made two mini pizzas. Now we need the bigger size. They're getting into teen years and it is a whole new grand adventure!  The best part of the skillet-pizza is that it doesn't heat the oven and it gives us a gooey cheese with a crispy crust. That's hard to do in the microwave. It's just freakishly cool!

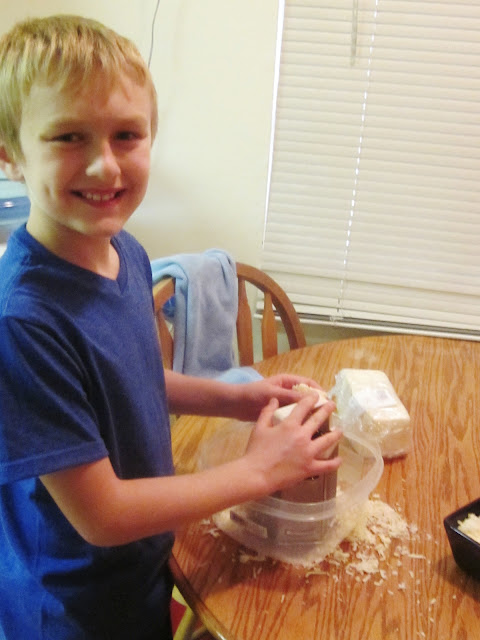
 I still try to suck the life out of the time I have with them and that included having them help make the meals they'll be eating while I'm at work. They like having some time with me. I have to admit, I adore having some time with them as well. So, this is my son aka Face. He's shredding the cheese and helping spread the sauce.
 I lay out enough pieces of foil to accommodate all the pizzas. In this way, we can make a whole bunch at once and have 10-12 pizzas on-hand for quick meals. This is great for camping too because the work is already done. I like not having to prepare food in the rough.
 Put a pita on each 10 inch piece of foil. Add sauce of your choice, just about 2 Tablespoons.
Put the children to work. They love this part!

 Top with cheese and your favorite toppings.
 Sprinkle with an outstanding Italian Seasoning. Um...I tend to lean toward my own blends whenever possible. Yup. I'm a fan.
 Now if you use a tomato based sauce, be sure not to use a foil to cover the pizza. The acid in the tomato sauce will react to the foil and make a terrible mess. It will taste horrid. I'm using a parchment lined foil. You can use wax paper here as well. Just cover the top of the pizza. Wrap the foil from the bottom around the pizza.
 Place in a gallon size freezer bag. We can usually get 5 pizzas in a bag. Freeze. I keep 3 or 4 in the fridge (up to 4 days) so the boys don't have to even defrost the pizzas. For camping, I always freeze them. This keeps them at a safe temperature and helps prevent food born illness. Remember the picnic food safety segment? It keeps them together and adds to the cold of my ice chest. For more information on picnic safety go here.
 To prepare, simply slip the pizza out of the wrap and place in a thick covered skillet. Mine is 14 inches and the bottom is thick enough to not burn the crust.
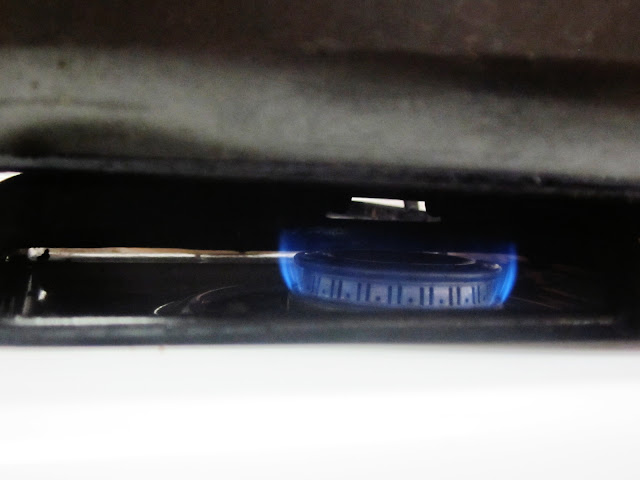
 The main secret is making sure the flame is low and letting them cook with the lid on the pan about 7-10 minutes.
 The cheese will melt and the pizza will have a crispy crust. It's just what we love in a pizza without all the trouble of baking it.
Ironically we find ourselves using this stove-top method a lot more at home than we do camping. After all, how often do we really go camping? On the other hand, when we have taken them camping we have been very excited to have pizza! This is great for a Dutch oven or even on "no burn days" here in Arizona when we have to use our Solar Oven.

Tomorrow I'll be sharing a few new tips for camping as well as the fun Hobo Foil Dinner that my kids adore! I'm looking forward to an amazing segment tomorrow!

There you go! Make skillet Pizza and don't forget to watch tomorrow morning!

Always My Very Best,
Your Friend Chef Tess

I am no longer the corporate chef for Honeyville but we still love them dearly. My family is greatly blessed and relies heavily on the extra money brought in by sales tracked back to this site. This is also the company that packages and sells my spice line as well as my food storage cookbooks. Thank you so very much for your support. Xoxo!

Tuesday, July 21, 2009

Greek-ish Pizza

Dinner tonight was a snap. I don't always have days like today, but I had one of those days where I thought to myself "self... that was utterly brilliant..."
It started with having homemade oven rise pizza dough (Friday's Freeze Frame...) in the freezer and ended with a delightful Greek-ish, Greek-like, flavorful pizza that my family literally devoured in about 3 gasping gulps. I'm still shaking. It was scary.

2tsp olive oil
1 tsp Italian seasoning
1 tsp dill
1 tsp balsamic vinegar
1 garlic clove, pressed
1 prepared frozen pizza crust (Friday's Freeze Frame...)
2 plum tomatoes, sliced
1 cup mozzarella cheese (low fat )
1/2 cup feta cheese crumbles
2 T fresh chopped basil and parsley

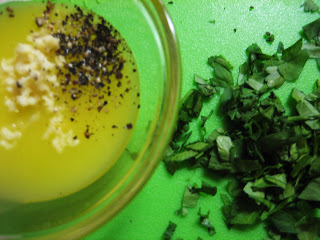
Combine oil, Italian seasoning,dill, vinegar and garlic. Brush the pizza crust with the oil mixture using a pastry brush. Place on a pizza stone. Preheat oven to 425 degrees. Top with tomato slices, cheeses, parsley and basil.

If you wanted to make this a freezer meal, you would simply place on a cardboard cake circle, wrap with heavy freezer plastic wrap and then put in a gallon size freezer bag. I chose to Bake at 425 degrees 25-30 minutes.

Either way it's all good.
Quick and easy dinner that was a huge success. Now that's something to blog about.
There you go.

Monday, June 1, 2009

Cool Ranch Veggie Pizza


I finally made another pizza. It has been a while with all the funky-fabulous stuff going on around here and I needed to do something fast and fun for the ding-a-dang family so they didn't think I wasn't paying attention to them...as if they would let me forget they existed. Sometimes I can't get them to stop talking...ever. Any other moms with me on that?! From the time they wake up until the time they actually physically fall asleep...they can't keep their mouth from talking. I know they get that from someone in the family...and it's not me. I'm not claiming that genetic issue. Unless of course, they are saying something excessively witty and charming while smiling and showing a dimple. Then they are mine. Cheek pinch. Hair tousle. Wink.

The pizza of choice was of course vegetarian. Ace was eating it. He's totally against any meat whatsoever on pizza...except pepperoni. I remind him that it is meat (of questionable meat content I might add) and he reminds me that I don't need to tell him everything. We have a good understanding. Pppfffhhh! He may fall into that magical whimsical creature category..."Flexatarian". I think they eat meat selectively. Kinda like my boys' selective hearing. But without the eye jabbing. NO I don't jab my kids in the eyes.
I jab Ace.
At any rate, I started with some of the 5 day bread dough. It was already in the fridge ready to be made into anything I wanted this week, so pizza was a logical choice. Use 1/4 of the dough.
For the sauce I used ranch salad dressing mixed with a clove of fresh pressed garlic and a tsp of dill.
Topped with
1 lb fresh mozzarella (sliced)
1 orange bell pepper(chopped),
8 oz sliced mushrooms,
2 medium vine ripe tomatoes--only the best.(Organic Tomato Farming)
1/2 cup chopped green onions, and a healthy dose of chopped fresh parsley. Salt and pepper. Baked 425 degrees 25-30 minutes.
Ace ate so much that he had to put on his stretchy pants. Believe me, that shouldn't be legal in any country. Nobody should have to see that. Of course, after the eye jabbing...he can't see anything either. Wink, smile and a dimple.
There you go.

Monday, March 2, 2009

Arizona BBQ Chicken and Sausage Pizza

I do declare, this may be one of my favorite pizzas of all time. I was just goofing around, which isn't unusual for me, but this time it all came together and I loved it so much it has come to the blog. I call it Arizona BBQ chicken and sausage pizza. Now, if Ace wasn't so against meat in general we would probably never have had this pizza. I personally am not against having it now and then, as long as it isn't my staple. Given the many heated opinions on the meat matter, we have come to peace here in the Petersen house. I'm good with it. I made some breadsticks to go with it that where very vegetarian, and Ace was happy, as long as there was some snazzy salad.

Chicken from the freezer made a quick meal, because it was already cooked, seasoned and deliciously tender. I am a little known for my obsessive use of the freezer for homemade dinners. One of which is the section on: Freezer Meal Ideas Pizza If you haven't looked at that one, it may be worth reviewing. I have my oven rise pizza dough recipe there (like the Djourno, but homemade). For the chicken, see :Freezer Meal Ideas meat I used the mustard glazed chicken for this BBQ pizza today.

With one half the dough for freezer pizza, top with 3/4 cup BBQ sauce of your choice, I use a combination of homemade chile sauce and regular BBQ sauce. Plop it in the middle of the rolled out dough and this is the shot..."ya' got me par'dner."

I seasoned the sauce with a bunch of black pepper, all purpose seasoning, and then topped with 1 lb chopped cooked chicken (mustard glazed chicken) and 1 lb cooked vegetarian sausage crumbles so it wouldn't be too fatty. Yikes. I can't stand a greasy pizza. Topped that with 8 oz of shredded low fat Mozzarella, though I am pretty-high-fa-loootin' sure that pepper-jack would have been intensely perfect.


I loved cheese. Oh heaven.

Bake 425 degrees 20-25 minutes from frozen (if you used the frozen dough) or if you make the dough and bake it right away, it takes 18-22 minutes. Bake until golden bubbly...(I'm golden bubbly on many occasions).

There you go! Serve it hot! Oh, and you must wear cowboy boot when eating this. Pretty sure.

Tuesday, February 10, 2009

Shrimp Pesto Pizza

Well, now we are down to some serious business. Shrimp pesto pizza. It has a cream cheese base, then pesto, then stuff piled on top. Need I say more?

Friday night is pizza night. Thanks to an outstanding recipe my mother developed, I usually have the dough on hand.(5 day bread dough ). I've talked about it before, but I really do enjoy knowing that I have dough for rolls, bread sticks, pretzels, cinnamon rolls, pizza...you get the idea. It's in the fridge. I know I am covered.

5 day bread dough ...become familiar with it. Make it Monday, still have dough on Friday. It's cool. I used the last 1/5th and rolled it out on a lightly floured counter top until it was round and about a half inch thick. Lightly coat the pizza stone with cornmeal. Then transfer the dough to the stone. That stoneware pizza pan started out light tan in color...so you know it's well seasoned and we use it all the time.


Oh yea, this is out of sequence, and totally random (you will start to notice a trend in my randomness). I'm not ditzy. Wait. Maybe I am a little. That is what makes me so insanely charming, right? Ask my husband Ace . When I was moving out to get married...wait. We are talking about pizza.
Here we go:

Cheese. Focus. I found a cheese that worked perfect for this pizza. Not only was it on sale, I also liked it. So that's a winning combination right?

It melted really cool and tasted so perfect. I don't work for Kraft either. Just liked the cheese.
So, in addition to the dough and cheese, you will need:

4 oz. softened cream cheese
1/2 cup prepared pesto sauce (of your choice...be creative!)
8 oz shrimp
1 lemon
2 large shallots, or 4 small, minced (you can use red onion instead)
1/4 cup chopped fresh parsley
1 garlic clove, minced
1/4 cup melted butter
black pepper
kosher salt

I softened 4 oz. of cream cheese.  Then spread it really artistically across the dough. Every time I use cream cheese I think of that movie line "the whole family looks like they're carved out of cream cheese!" (Quick, name that movie).


Next, plop...yes. Plop the pesto. Take a moment to just feel the calming influence of the pesto. Ohm...slip off your shoes if you have to. Mossy. Really it helps. I put on my hip skirt and belly dancing garb. Not really.

Spread it out over the cream cheese. Frame this picture. It matches your living room rug. In the 1970's we had rug like this. All textured and cool pea green. We called it Dinosaur turd green. Do not associate that with this pizza though. Sorry again for being so random.

Jurassic park...Sorry. (giggle).


Okay then roll over the sides and pinch them down really good so they puff up like bread sticks...or is that one giant round bread stick? I'm confusing myself. I really need to stop that.

Grab your shrimp and put it in a bowl. Mine was already cooked. Ace has a hard enough time with shrimp without me putting grey matter on the crust (I did not mean brain...oh dear that would be gross). No raw shrimp. That would have been a deal breaker, as if my reference to dinosaurs (and brains) hasn't already ruined forever your chances of happiness.


Shallots. Look like little purple garlic. In the produce section. I know some of you have never cooked with them in your life. I buy them in bulk. Peel and mince.


Shred the cheese. Pile it up really fluffy.


Add the lemon juice, zest, shallot, garlic, salt and pepper to the shrimp. I go heavy on the pepper, easy on the salt. Especially since the cheese is already salty.

Now here's where I get wild and weird. (I am denying fully any earlier wild and weird things I have done.) Now. I mix the cheese with the shrimp mixture. I think it tastes better. I may be weird. Just maybe.


Then I spread it out on the pizza. Topped it with the chopped bell peppers. I don't know why I didn't add those to the mixture. Seems I like adding steps. Random.

Preheated oven to 425 degrees. Baked 35-40 minutes. While it was baking I got my bread stick stuff together.

To the melted butter I added the minced garlic and a healthy dose of fresh cracked black pepper.


When the pizza was done I glazed the crust with the butter garlic combination and garnished the top of the pizza with the chopped parsley.
If you want to make this a freezer meal, see the post .Freezer Meal Ideas Pizza .

There you go.

Tuesday, November 25, 2008

Friday's Freeze Frame...


Every Friday it comes to this...


I make pizza. Pizza by the ton. I imagine that explains a lot. Especially if it causes brain damage. Or excitability in children. Or the complete inability to get me to stop talking about bread. Whatever it is about homemade pizza, we have it. Yes. All the symptoms that come with it as well. I can't explain what draws me or the majority of the country to the pizza parlor but I for one have pizza in my parlor. If I had a fancy parlor I would definitely make space for a pizza table. As it is, we have a tiny enough space for a 4 seat er table in my kitchen. Just right for my boys to go completely berserk at the thought of Friday night pizza. So I thought it only fair to post the recipe I use for homemade oven rise pizza dough. Apparently it has been quite a hit with all who have tried it. Cheaper than the frozen oven rise pizza by about 5$ a piece too. Not bad for the 10 minutes it takes to wind up the ol' Kitchen-aid and get it done!


Oven rise pizza dough (for your freezer)
6 cups bread flour
2 1/4 cups water
1T baking powder
1T yeast
1T salt
1/4 cup oil.
Directions: Combine all ingredients in a mixer and knead 5 minutes. Let dough rest 5 minutes. Form into 3 9 inch crusts placed on cardboard cake rounds or lined sheet pans. Top with cold sauce and toppings (be sure vegetables are blanched). Freeze then transfer to gallon size freezer bags that are labeled clearly. Bake at 425 degrees for 25-30 minutes, preferably on a pizza stone. Serve hot. Refrigerate leftovers immediately.
Note: pre-cook meat and veggies for best results. put cheese right on sauce, and then toppings, this will ensure cheese stays on pizza.


What will I do when my boys are teenagers? EEEk!