Showing posts with label solar baking. Show all posts

Saturday, March 16, 2013

The All American Sun Oven Review


I purchased a NEW All American Sun Oven for our family yesterday. Yup. I had been saving my pennies since I first heard about the changes in the new oven from Paul Munsen when he came and visited us at Honeyville in Chandler.  Honestly, they haven't changed the design in 28 years and the new changes are ones that have really inspired me! 

For the next two weeks the only place in the world that they are available is through Honeyville! Though I work for Honeyville as their company chef, they didn't ask me to post this review. I'm just so stinkin' excited!! I don't think I've ever been more excited about an appliance in my life...and y'all know I cried when I got my first solar oven right?!
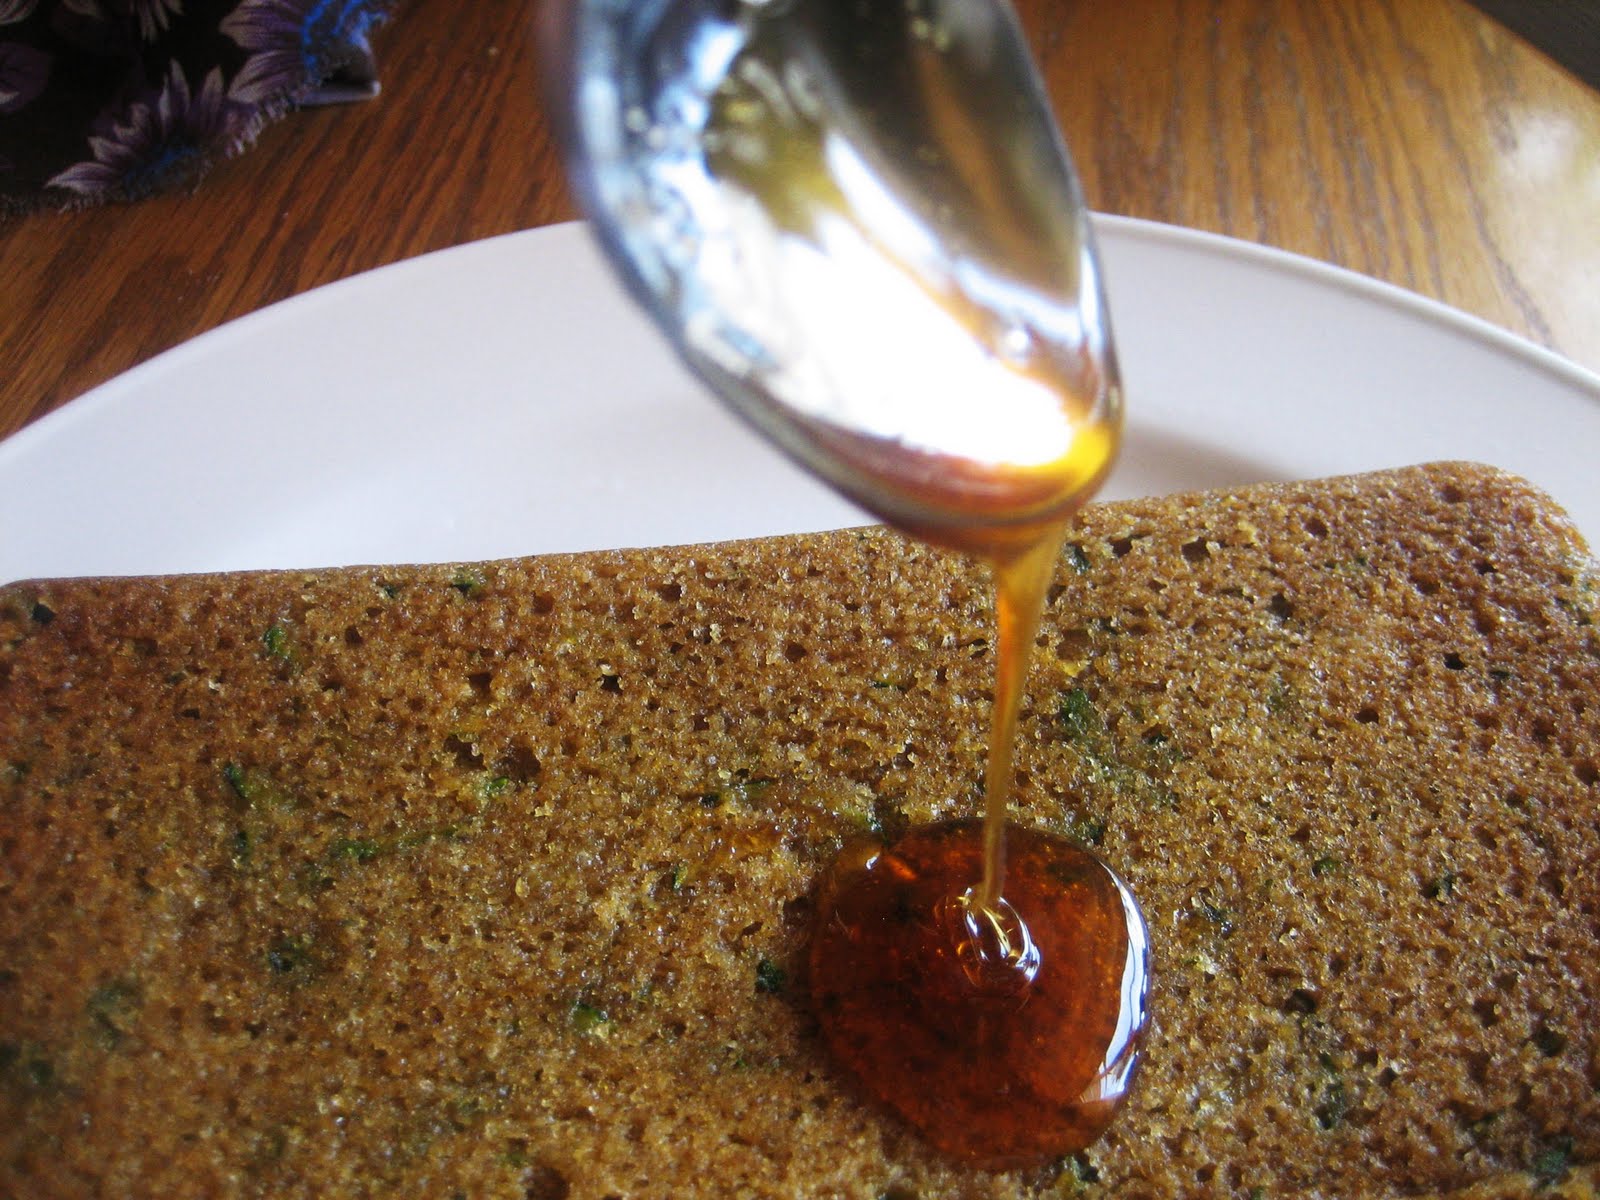
All American Sun Oven® is the easiest way to harness the power of the sun to cook, bake, dehydrate, or boil foods. Make delicious sun-baked foods while saving on fuel and money. With a solar oven, you don't need any fuel, just place in direct sunlight and you're ready to cook. When used correctly it can reach temperatures of 360° to 400° F in as little as 20 minutes.
Solar cooking with the sun oven can be achieved in everyday cooking while in your backyard, at picnics, during a camping trip, or in the event of a power failure. Since it doesn't use a flame to cook, their is no risk in burning your food. Using the sun oven on a daily basis can save you money on gas and electricity bills. At Honeyville, we stand by the importance of emergency preparedness and recommend the sun oven for every household.
Watch this video to learn more about the Sun Oven:

All American Sun Oven features:

  • Reaches Temperatures of 360° to 400° Fahrenheit!
  • Easy sun-track indicators
  • Extra thick Ultra White™ Transparent Glass
  • Built in Thermometer
  • Inside made of Food Grade Fiberglass
  • Bake, Boil, or Steam Foods - Boil or Pasteurize Water!
  • American made
  • Dehydrate Fruits, Vegetables, or Jerky!
  • Slow cook or cook similar to conventional stove tops or ovens!
  • As Portable as a Small Suitcase - Only 22 lbs!
  • Ruggedly Built for Years of Trouble Free Use!
  • Totally Safe - No Danger of Fire!
  • 20% larger than prior model SUN OVENS®

Sample Cook Times

  • Beef Roast, 2.5 lbs = 1 hour, 20 minutes
  • Baked Chicken, 3 lbs = 1 hour, 30 minutes
  • Bread = 45 minutes
  • Rice = 40 minutes
  • Chocolate Cake = 35 minutes
Packaging: The Sun Oven folds up for easy carrying and weights only 22 pounds. Ships in one large box, which weighs approximately 30 pounds.
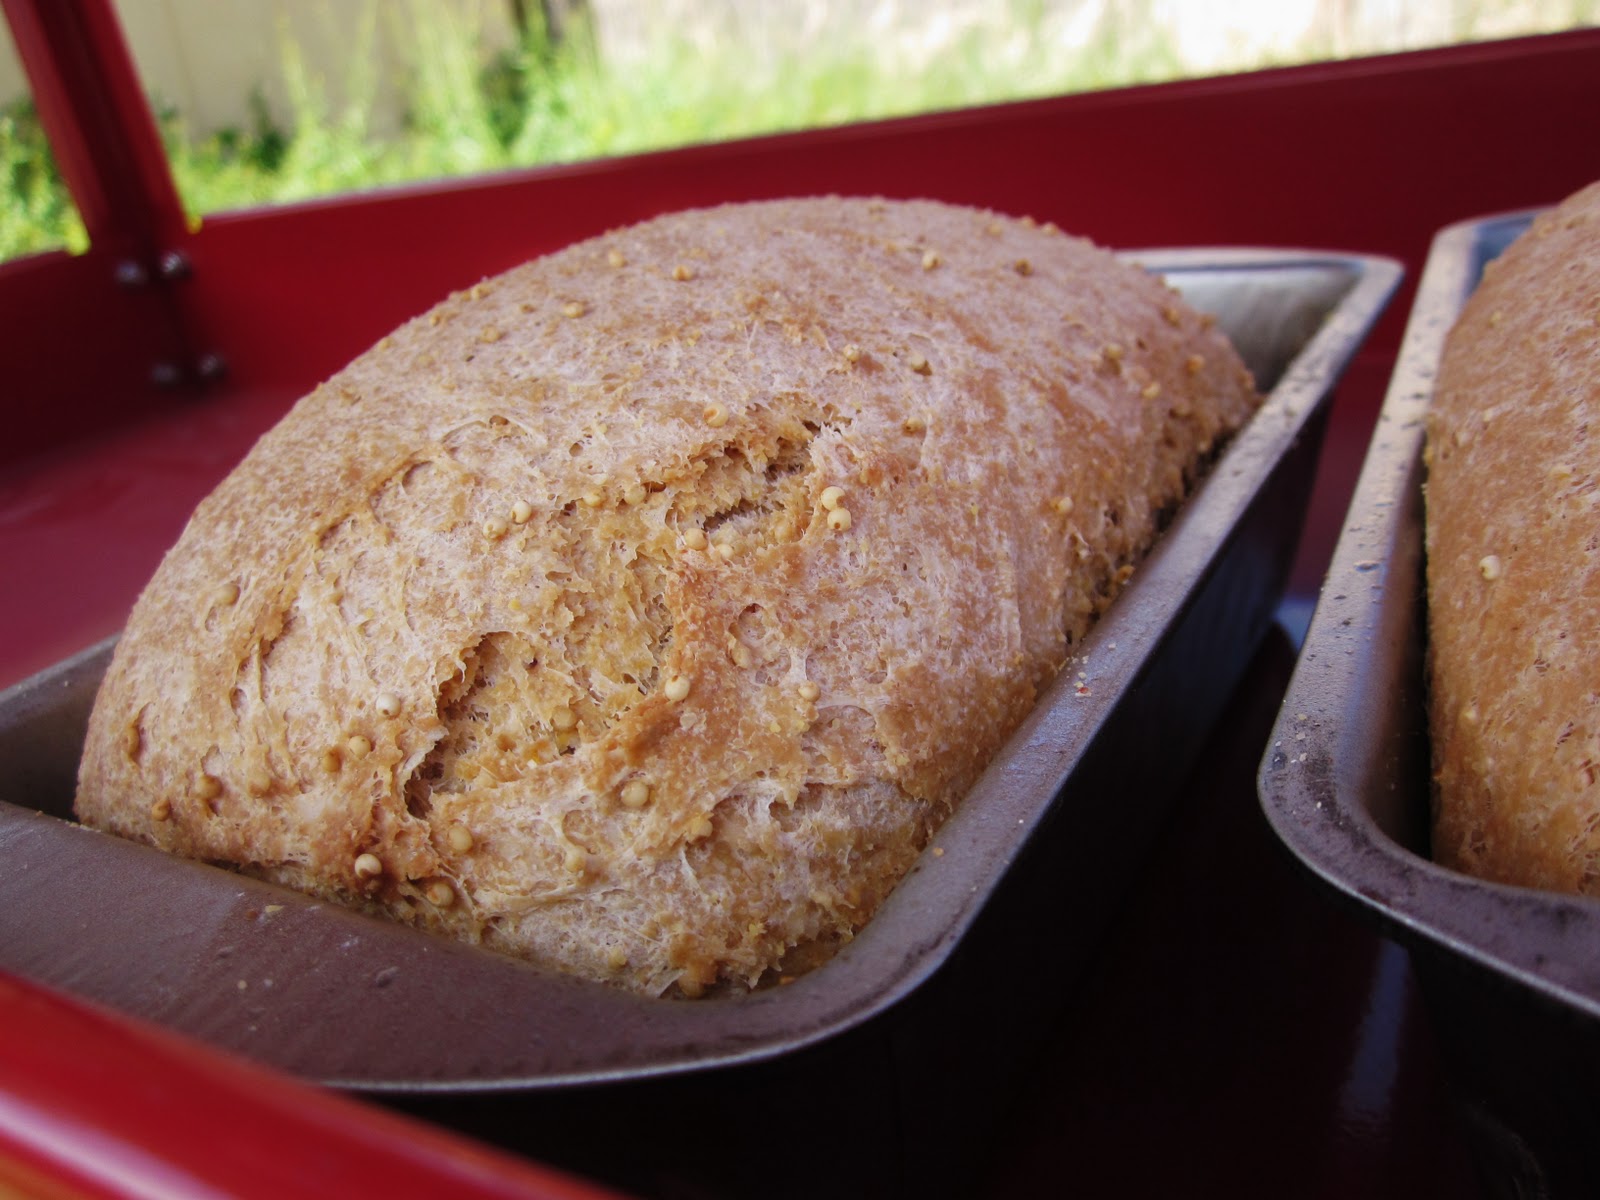
Personally, I have used the original Global Sun oven many many years. After seeing and using the  All American Sun Oven all weekend, I can honestly say, without hesitation that it is remarkable! It makes focusing so much simpler. It gets hotter faster and maintains the heat exceptionally well. So far I've baked bread, a skillet fritatta and brownies...and I'm not stopping. Yes. I thought I knew a lot about solar cooking and I thought I had mastered the details, but this new oven has made it even simpler than ever before. 


There you go!

Always My Very Best,
Your Friend Chef Tess

Tuesday, October 18, 2011

Giant Cherry White Chocolate Sweet Rolls the Size of A Dinner Plate (Tutorial)

 I've had a lot of requests...um...a SEA of requests for a tutorial on how to make the giant rolls the size of a dinner plate. I'm assuming that y'all are going to share these rolls with me right? I mean...if I share the secrets to perfect buns-o-glory I ought to at least get to sniff the frosting. Isn't that fair? Well. I'm sharing. I think it's an awesome skill. Let's face it...skills are good. Boys like girls with skills...and ligers. What's a liger? (Quick...name that movie...and then bust out your moon boots and dance for me. )
 Let's assume for just a minute that these are also some level and degree of almost healthy. Wouldn't that just blow your mind? Well...they're 100% whole grain and low fat. If that's a deal breaker...walk away now. I'm giving you some serious happy food. Glad all over food...even your bum will be glad you came to see me. Dang...did I just type that out loud? Well. I used half the dough from the 6 whole grain bread recipe. When it finished it's raising, I rolled it out like this...The full legnth of my kitchen table. Yup. That long.Flour the table pretty well there too. I'm not making them sticky buns. Um...sticky to the table buns...roll about 1/2 inch thick 18 inches wide and 4 feet long.
 Smear with a drizzle of honey caramel sauce, top with some Peaches and Cream Smoothie Mix (about 1/2 a cup) white chocolate chips and sun-dried cherries. I also sprinkled a light dusting of micro-fine lime zest and fresh ground nutmeg...just a kiss. Not a make out session. Just saying.

 Now...The secret to huge rolls...is to roll it the short way the full length of the table...instead of the short way the full length of the table.

 Keep your rolling pretty tight and pinch the livin' daylights out of the side seam so it doesn't fly open and spit it's gorgeous delicious innards out. How's that for a visual?
This makes 3 large rolls. 5-6 inches high and 10 inches wide when baked. You'll need to generously grease 3 10 inch baking pans and place the rolls in them. This helps the rolls keep a nice shape too.

 This pan is the pan that came with my Solar Oven . When the roll raises, it will peak it's beautiful glorious body over the top of the pan...as if to say, " I'm ready to meet my maker...or baker...or whatever a giant roll meets at the end of it's short life." Yes. It appears my rolls actually talk just like I do. Did I ever tell you my son's favorite muffin joke? "What did one muffin say to another muffin as they sat in the oven? 'Oh my crap! A talking muffin!" Yeah...I never claimed that it was a good joke. Golly. Look at that bun!
 I placed her...er...um...it. I can't call it a her. She would never forgive me for making her so fat. He on the other hand would stand in front of the mirror and say he was ripped. So...there it is. HE will be baking soon. Close the preheated solar oven. (Regular oven bake at 350 degrees 30-35 minutes.) Solar...45-50 minutes.

 Mmmmercy. HE is pretty hot. I must admit. I'm a little...flustered. 
There you go. Make some freaks of nature! Have fun...and don't forget to share! I love seeing your creations on my Chef Tess Bakeresse Facebook Page! I think every single freak need to be seen...at least a few seconds before it's destroyed by the family forks. Xoxo.
Always My Very Best,
Your Friend Chef Tess

Monday, April 4, 2011

Whole Grain Millet Bread

The first time I ever saw millet I was in love with it. I loved it's golden color. I loved it nutty charm. It's rapier whit.  Okay...maybe not it's rapier whit.  It didn't talk to me...at first. However, when I got to know it and use it in many applications, it not only began to talk to me, it began to sing! Oh land. I love a good millet! Now I have to say it.
Millet. Gosh. It's used as bird seed most often in America and it's such a sad use of such an amazing grain. I'm super duper fond of it. I mean really...look how pretty it is...


I have a secret to adding it to my millet bread that will make it moist and delightful. I'm certain you want to know what it is. 

Here's my recipe for millet bread first. I'm sure you'll want that to get started.

6 cups whole wheat Praire Gold flour ( Did you see how to make whole wheat flour? look here )
1/2 cup honey Honey  
1/4 cup  extra virgin Coconut Oil  
2 tsp active dry yeast
1 1/2 tsp Real Sea Salt  
2 1/2 cup Soy Milk (or regular milk)--luke warm and no hotter than 110 degrees.


Directions:
24 hours before you want to make your bread, place 1 cup millet in 2 cups of boiling water. Cover and allow to sit for 24 hours. This will ensure that the grain is well moisturized. Drain off water completely.

In a large 2 gallon bowl combine the soy milk, oil, honey, yeast and soaked millet.  Make sure the yeast is active.  Add 5 cups of flour and the salt. Knead about 500 turns by hand or 5 minutes in a mixer at medium setting, adding as little flour as possible.  Allow dough to sit 10 minutes and assimilate moisture before adding any more flour (as it most likely will not need more flour at all).  Roll into a ball and place in a covered straight sided crock and allow to raise until doubled, about 2 hours at 85 degrees.  Tenderly punch down dough and release excess air.  Allow to raise again until doubled in size, about 1 hour.  

Now if you've never made a loaf of bread before, there is a method. This is Lauren's first loaf...

Shape the dough into a rectangle, as you would for loaf molding.  Please see directions. Because once you do, your loaves will always look amazing.  Now, lightly oil and dust with cornmeal two standard sized loaf pans.Place loaf in a lightly oiled standard loaf pan. The pan size is important. 8 inch by 4 inch. Any larger, and the loaf will end up squatted without a well shaped slice. You can still use the larger pans, but just note, I don't recommend them for that reason.
To keep the top crust from separating from the loaf, spread with butter or oil. This keeps it from getting dry, which is one of the leading causes of crust separation.


I bake in a preheated solar oven after letting the dough raise for 45 minutes. If you bake in a regular oven, bake after raising 1 hour and bake in an oven preheated to 400 degrees.  Bake 45 minutes (or until internal temperature registers 165-175 degrees with a meat thermometer).


Remove from pan right after baking is done and place on a wire rack.  I wrap mine in a clean kitchen towel and then place them in a clean plastic bag until cool. This helps steam the crust and makes them easy to slice as well as preventing any rock hard whole grains of millet from being on the surface of the bread.

There you go.

Friday, March 4, 2011

Free Sun Oven Cooking Essentials Seminar


I have to share this event because there are so many solar cooking enthusiasts who read my little ol' blog here. Many of you know that I started using the Global Sun Oven several years ago after getting absolutely addicted to cooking with a solar oven I made from a few cardboard boxes. Ace decided it wasn't a phase I was going through, but a passion for using sustainable resources for cooking. He bought me the Global oven as a suprise. After I stopped crying tears of joy...I took it to my patio and cooked with it. Now, years later I can report it is my favorite cooking appliance ever...bar none.


  Here's the kicker...


  I'm not teaching this upcoming seminar. I've never been more excited to attend something as a student! Why?!  Well, because it's actually being taught by the President of Sun Ovens International! These are the guys who make the Global Sun Oven. 
I'm going to be taking the class in spite of my experience, because I think there's never a time to stop learning...especially when it's something one is passionate about!

Free Sun Oven Cooking Essentials Seminar - Saturday, March 5th at 10:00 AM. 
(At Fitch Park - 1 East 8th Street, Mesa, AZ)

Paul Munsen, the President of Sun Ovens International, will be teaching an instructive course on how to use the Global Sun Oven.  This class is great for Beginners and Advanced sun oven users alike.  Paul has a great teaching style and always provides wonderful pointers and techniques for getting the best out of your Sun Oven.  Come and get inspired to use your sun oven more on an everyday basis.


SUN OVENS International has been innovative in developing methods of placement, training, and marketing to assist in the positioning of over 34,000 family sized GLOBAL SUN OVENS in  the U.S. and more than 100 developing countries, and 250 large VILLAGER SUN OVENin deforested developing countries. --http://www.sunoven.com/


I'm happy to say that you can get Global Sun Oven at Preparing Wisely for 250.$ 

I'll see you at the seminar my friends! I'm so excited!!


Monday, September 27, 2010

Solar Cooking Education and Media Coverage

I believe the greatest untapped source of natural energy, is human potential. That is why I teach.


Today I am not going to feature my usual Mix Monday (full of scratch convenience mixes of one sort or another)...due to a very full schedule with an upcoming segment. I will be at a local school teaching the science of solar cooking to a group of anxious second graders later today. It is amazing to me how something that has become second nature to us, can be something so exciting to someone who has never seen solar cooking up close. That's what I like to do, get kids and adults thinking outside their frame of reference. If I can spark some genius in a child, it may just bring about another innovative design for solar cookers that will bless literally thousands of underprivileged poverty stricken people around the world. In fact, those who once had to walk several miles for fire wood and cook over an open flame are now being introduced to a safe clean method of cooking. I've been told that there are over 100 thousand solar cookers in use throughout China and India and reportedly they are used in almost every county in the world. Why not solar? It's really getting to be quite a revolution worldwide. They are using them to not only cook food, but sterilize water and surgical tools. Really remarkable isn't it?

September has been National Preparedness Month. Why not make a little cardboard box solar cooker and keep it around for any random emergency. You never know what is ahead...and it's always nice to be prepare! Want to learn? You can find ideas here: Plans for Solar Cookers
Why not give it a shot?!

That being said, this Friday at 3:30 on NBC 12 Phoenix, I'll be a featured chef on Valley Dish! Hopefully you'll join me for a delicious and easy Fall dish.

Thursday, June 10, 2010

Orange Brandy Zucchini Bread

You know, when I stared my little garden I had visions of big veggies and luscious herbs just bounding out of the ground. When the two zucchini plants started I was so giddy. They where so strong.

Then, they started taking over. I lovingly refer to them as the "Rebel Alliance". I was out of the loop for a few minutes and suddenly everyone has delusions of grandeur. I have two plants the size of a small rhino filling the upper half of the garden. They are producing elite lovely squash.

Every now and then some of them get cocky. I'm happy to report that the rebel base has been discovered and the mutants dealt with.

The head squadron leader who flew the Millennium Falcon has been to the carbon freezing chamber and is now beautifully displayed in my kitchen hutch.
Drizzled with orange brandy honey glaze.

What pray tell, am I talking about? It's zucchini bread my friends. It's the perfect way to store extra zucchini. Make a few loaves and put them in your freezer. They hold really well for 4-6 months if you wrap them in foil and then place them in gallon size freezer bags. This recipe uses about half the sugar of most zucchini bread recipes. You can use Splenda or Xylitol in place of the sugar or granulated fructose if you are wanting a sugar free bread. I prefer the flavor of whole wheat cake flour (I mill my own :Flour making day...flour power.) , but you can use regular all purpose flour. I'm not checking your cupboards. I'm just sharing how I do it.

Tess Orange Brandy Zucchini bread
yeild 1 large 9 by 5 inch loaf or 3 small loaves
3/4 cup melted butter (or  Lucero Crushed Mandarin Orange Certified Extra Virgin Olive Oil)
3/4 cup granulated fructose or sugar
1 tsp double strength vanilla Or 1/2 tsp vanilla bean paste
1/4 tsp  Brandy oil
1tsp orange zest
3 eggs (or 3/4 cup water with 1 packet unflavored gelatine dissolved...about 5 minutes)
2 cups shredded fresh zucchini
2 cups whole wheat cake flour (all purpose works)
1 tsp baking soda
1 tsp baking powder
1 tsp cinnamon (I use Wise Woman of The East Spice Blend)
1/4 tsp salt
1 cup chopped toasted pecans or walnuts (optional)
1/4 cup dark honey
1/2 tsp brandy flavor or 2T real brandy (if you prefer)

Directions:
Combine the melted butter, sugar, and eggs, vanilla, zest and flavored oil whisking well until the sugar seems dissolved. I use the flavored oil. It lends a nice complex flavor to the loaf.
Once the butter and egg mixture is smooth, add the zucchini and cinnamon.
I was out of eggs today. Did you know you can use unflavored gelatine in place of eggs in baking recipes? One packet equals 3 eggs if dissolved in 3/4 cup luke warm water for 5 minutes stirring well.
Less calories than eggs, and no cholesterol.
In a separate bowl, combine the dry ingredients well. Pour them into the wet ingredients.

Mix the wet and the dry until combined, about 1 minute.
If you use cake flour it is easy to keep the right texture for the batter. All purpose flour, be careful not to over mix.

I use a stoneware loaf pan, but regular loaf pans work just fine. Remember on stoneware to add about 5 minutes to the baking time. Make sure to grease the pan well with nonstick cooking spray. The ones with flour added are especially nice for baking. Or you can line you pan with parchment paper.
The sun was rather accommodating today, so I used the solar oven.

Bake at 350 degrees 9 by 5 loaf pan 67-75 minutes.

It will look dry on the top of the loaf. Check to see if it is done by inserting a toothpick into the bread. If you pull it out and it isn't covered in slime, but clean, it's done.
Cool in the pan at least 5 minutes.

Invert pan onto a serving tray or cooling rack if you don't plan to honey glaze it.

Combine honey with brandy or brandy extract.


Drizzle over the warm loaf. Try not to drool.
I sprinkle the glazed loaf with more cinnamon (okay it's really my Wise Woman of The East Spice Blend ) and serve it warm.
The honey seeps into the bread in a most pleasing fashion.

"Where are your rebel friends now?" Evil grin.


There you go.