Showing posts with label dinner rolls. Show all posts

Friday, July 14, 2017

Freezer Friday! Video 3 Ways to use Sprouted Wheat dough: Cinnamon rolls, Dinner Rolls and Sticky Buns


Episode 3 Season 2 Cooking with Chef Tess as seen on the Heartland TV Network in Las Vegas! Here's last week's episode and recipes. 

Freezer to Oven Sprouted Grain Cinnamon Rolls, Dinner Rolls and Sticky Buns

Make the Dough
·       3 cups water (no hotter than 110 degrees)
·       2 Tbsp. active dry yeast
·       ½ cups Organic coconut sugar
·       4 ½ cups Organic Grains bread flour
·       4 ½ cup  Organic Grains sprouted white wheat flour 
·       1 Tbsp. salt
·       ¾ cup coconut oil or Ahuacatlan Avocado Oil 
·       2 egg
Combine everything in one large bowl or mixer. I like that. Knead 5 minutes by hand or 3 minutes in a mixer on medium setting. This is a less developed dough as far as gluten is concerned. Form into a ball and place in a bowl covered with plastic or a lid for 1 hour, or until doubled in size. Punch down dough and divide into 3 equal pieces.

Cinnamon Rolls
Roll out in rectangle on a lightly floured surface. 

Smear:
½ cup sugar
½ cup butter
2 Tbsp cinnamon or Chef Tess  Wise Woman of the East Spice blend


Cut into 8 rolls. Place 4 roll per 8 inch pan. Raise 45 minutes. Freeze.

Oven-Ready Stuffed Sticky Buns

Caramel Topping:
1 c brown sugar
1/2 chopped real bacon bits
 1/3 c maple syrup
¼ c butter, melted

Cream Filling:
1/2 package (4 oz) cream cheese, softened
¼  c shredded coconut (okay...how evil is that?!)
 2 Tbsp.  powdered sugar
 1 Tbsp.  butter, softened
 1 tsp vanilla

 Spread topping in the bottom of each pan.
Combine all cream filling ingredients and beat until well mixed; set aside.
Punch dough down and divide into 6 equal pieces. Flatten each piece of dough into a small circle, about 4 to 5 inches in diameter. Place a scant T of cream filling in the center. Pinch edges of dough together and form into a ball; It looks like a little cheese tortellini. Place in prepared pans, pinched side down. Cover and let rise until doubled, about 30 to 45 minutes. Yes, let them raise before freezing! That is the secret! (if freezing, put in freezer at this point. To prepare pull from freezer straight to the oven and add 20 min to bake time for room temp dough) Bake at 350°F for 25 to 30 minutes or until deep golden brown (45-50 minutes from frozen). Cool on rack for only 1 minute; invert onto serving platters. Remember, allow to cool only one minute before inverting onto a platter. Be careful, it's hot and that goo is delicious...but not in a molten mass attached to your arm. Oh my stars!


 Making Dinner Rolls

 I kind of put them in a log form. this helps to keep things pretty even. You can get science-like and weigh the dough and then divide it into 12 equal portions, but on most given days, I just eyeball it. I may go to baker's heck for saying that.
Now, lightly (I do mean lightly) dust the counter top with a little flour...just a little. We don't want the rolls sticking too much. On the other hand, we don't want so much flour that they just roll all over the place. The point is, we want a little tacky stuff so they form correctly. Take the dough piece and pinch the sides together...
Then turn it over so the pinched side is down.
You don't want it to look loose like this...
You want the dough balls to look like they have a skin holding them together. Like this picture below. Place the rolls on a pan lined with parchment paper (or a freezer friendly pan for easy make and bake). If you use metal pans, you don't have to worry about the glass shattering going from the freezer to the oven. I may mention that again.
Allow to raise at room temperature, uncovered for 35-40 minutes, until the rolls are touching if originally placed 1/2 an inch apart. Cover with foil and place in the freezer. Keep frozen up to one month. Removing them from a pan once frozen and placing directly in a freezer bag will save space in your freezer...big time!

 Bake, Serve. Wrap Up
When you want fresh rolls, preheat oven to 375 degrees. Remove pan from the freezer. Important note...don't place glass pans directly from the freezer to the oven, they will shatter. If you keep rolls frozen in freezer bags, place frozen rolls on pan and then place in the oven.
Bake 375 degrees 20-25 minutes until golden brown.
Try not to eat them all in one sitting...alone. 

Special thanks to Organic Grains for sponsoring this episode!

 There you go! Make some awesome buns!


Always My Very Best,
Your Friend Chef Tess


Tuesday, April 2, 2013

3 New Rolls for Spring (from one base dough) Tutorials of Love


It is Tutorial Tuesday! Spring is in the air. Baking with darling friends is in the air. Carbs are in the air. Guess what?! I got to bake some delightful rolls with my sweet friend Sassy Cassie! She's heading off to start her culinary training soon and I certainly needed some Cass' face-time before that happened...and all the way through school. I told her she needs to tag me on facebook everyday so I feel like I'm not missing her adventures! You know how it is right? You meet someone who is such a kindred spirit that it is almost scary. She's one of those.  

So, here's a peek at what we did. I know you can do them too because they are just some cool shapes to do and make with dough. For each of the variations you can use any of the Basic Bread Recipes. I personally prefer my mom's 5 Day Bread Dough. The dough is good in the fridge up to 7 days and I was raised with this bread. It is my mother's recipe.  It can be used for a variety of recipes...basically any recipe that needs some kind of delightful dough base. 


First variation today, 
  Herb fans. 
I'm the biggest herb fan. Ever...so this is basically a hot-bun version of me.
 How's that for scary?
A fan roll is a fabulous way to have an herb or spiced pull-apart layer-by-layer love bomb. 
Roll out a pound of dough as you would a cinnamon roll, on a lightly floured work surface about 1/2 inch thick. Then cover with a light layer of butter and sprinkle with your favorite herb combination.  Today I used my Chef Tess Big Dill Seasoning. It is a delightful combination of garlic, onion, bell pepper, citrus and dill. Perfect for a Spring salad or in this case, a spring dinner roll.  There really is a little bit of me inside...but in a very non-cannibal way.  At any rate, cut the dough into 1 1/2 inch strips the entire length of the dough and stack the dough strips. 
Cut the stack into 2 inch stacks and place sideways into a greased muffin pan. 
Raise until doubled in size. Preheat oven to 350 degrees. Bake 25-30 minutes until golden brown. Yields about a dozen rolls. 

Next up...
Savory French Herb and Smoked Paprika Pinwheel:
I know you know what a cinnamon roll is...if you've lived on this planet for more than a week in America. Well...here's my favorite variation (today). 
Roll out 1 lb of dough in a 12 inch by 8 inch rectangle.  Spread with a thin layer of butter to the edges and sprinkle with French Provencal Essential blend. It is a bold, rustic blend of herbs, citrus, and garlic, and sea salt. I love it with chicken, but I especially love it in buns. Roll up the dough and cut into 2 inch pin-wheels. 

Place in a greased muffin tin and sprinkle lightly with a really good smoked paprika.  This gives the buns a beautiful spring color and a bold spring flavor...plus they just look like flowers in your dinner roll basket!

Last but certainly not least...
Bear Claws-o-Glory
This is a classic breakfast bun and it can be filled with a wide variety of flavorful blends. Today I chose a sweet variation  using hazelnut paste, a kiss of ginger and touch of lemon. You can do any number of flavors but I've done them with raspberry jam and a little jalapeno. They're excellent as a blue cheese and black pepper roll. Amazing as an orange-cardamom roll...with a hint of lavender or nutmeg. You name it. You're only limited by your giant brain!


Roll out your pound of dough into a rectangle, twelve inches by 8 inches. Spread with the filling of your choice. I used 1/2 cup of hazelnut butter and a sprinkle of sugar...along with the zest of half a lemon and 1 tsp of ginger. It works best to cream the spice and zest into the hazelnut butter. 
Roll tightly and pinch at the seams. Cut into 4 3 inch rolls and flatten the rolls with the heal of your hand.
Cut with 3 notches along the length of the bun, being careful not to cut through the roll. 
Place on a greased  baking sheet. 
Lightly mist with water and allow to raise until doubled. Bake in a pre-heated oven at 350 degrees 30-35 minutes. 
They're the perfect grab-n-go!

Speaking of that. Grab your favorite baker and GO! Start creating today my darlings! I'm excited to see what you're up to! Seriously. It always makes me smile to read about your success!


Always My Very Best,
Your Friend Chef Tess

Friday, March 22, 2013

Spring Time Mother's Day Bread Class with Lin Sue Cooney


Remember all the fun we've had with the amazing, remarkable, talented and fun Lin Sue Cooney and her bakery Sweet-Stops?!! Well I've got something awesome to share with you!
 It is a month away, but I can't stop myself from telling you what I've been baking today! Mother's Day braids and Forget-Me-Knots (glorious dinner rolls)! What do you think? Aren't they just fantastic?!!
 The pearls and lace one turned out really pretty! 
 All that being said, I get to visit my friend Lin Sue Cooney from NBC 12 here in Phoenix for a wonderful joint class in May out at Honeyville! We're teaching Mother's Day Breads like this on May 3rd!  If you're interested in joining us, contact the number below:


There you go!

Always My Very Best,
Your Friend Chef Tess

Friday, November 18, 2011

5 More Roll Ideas!


 5 day Sweet Roll Dough like I did this week, I dang well better also show at least 5 new ways to make rolls, right?! Well, I did in my dinner roll class on Tuesday, but I know there are people all over the country and globe who read the blog and well...it's not your fault you couldn't make it to the class.  So here we go. In a roll marathon! Hopefully it gives you a lot of new ideas! Let your brain just soak it up. We're going to play.

I just figured that if I introduce a First a Windmill. Take 1/5th of the dough and roll it in a rectangle on a lightly floured counter top or board. It should measure approximately  15 inches by 9 inches. It will make 15 small pin-wheels if you cut it into 3 inch squares.  Cut a notch into the squares like this.  It will look like 4 triangles stuck together if you do it right. 

 Alternate windmill by going around the dough and pinching 4 corners in the middle of the square.
 Transfer to a baking sheet lined with parchment paper or oiled well. Allow to raise 45 minutes to an hour. With your thumb, poke a hole in the middle of the roll and then dot with 1T pie filling or pastry filling of your choice.Lucky Leaf premium cherry is perfect for these, by the way. It's what I used today. Top with a light sprinkle of...

Chef Tess' Streusel Topping
1 cup all purpose flour
3/4 cup butter
1 cup sugar
1/2 tsp almond flavor
Combine all ingredients and  mix with a fork until crumble topping is formed. Use as Streusel topping for pies, muffins and baked goods.


Bake 350 degrees 20-25 minutes. Remove from oven. I top with a light fruit glaze to get a nice shine. To do so, melt 1/2 cup apricot jelly with 2T water over a stove until liquid. With a pastry brush, apply warm glaze over rolls.

This next roll is actually a pretty classic design called a Flemish fruit square. You basically make that same square you used for the windmill, but tuck the corners in to the center instead of cutting a notch.
 Easy stuff.
 Transfer to a baking sheet, giving 1-2 inches space between rolls. Allow to raise on hour. Add a Tablespoon of Lucky Leaf  Premium cherry or Apple pie filling in the center of the roll just before baking. I also added a few nuts. Top with a little struesel and bake 350 degrees 20-25 minutes. I paint the hot rolls with a light fruit glaze to get a nice shine. To do so, melt 1/2 cup apricot jelly with 2T water over a stove until liquid. With a pastry brush, apply warm glaze over rolls.  You may frost them if desired.
 For twisted Danish. Take 1/5 dough and roll into a rectangle 12 inches by 8 inches. Lightly spread a thin layer of butter and spiced sugar on the dough. Cut into 1 inch strips for small danish or 2 inch strips for larger Danish.
 Twist the strip with your hand and roll into a snail design on the pan. Like so...
 Allow to raise 1 hour. Top with a Tablespoon of filling or just a cherry. Bake 230 degrees 20-25 minutes. Remove from oven and glaze or frost as  desired.


Fan Rolls:
5 Day Bread Dough or the  5 day Sweet Roll Dough can also be used with herbs to make fan rolls. Now if you haven't seen a fan roll, It's basically a pull apart roll. Here's what they look like before baking. It appears I forgot to take a picture of the finished rolls. How odd.
Roll out 1/5 the dough into a 12 inch by 8 inch rectangle. Spread with 1/4 cup of soft butter and sprinkle with an herb blend of your choice. I love these with dill and onion. Very much. Too much.
 Cut the dough into 2 inch (4 across the 8 inch length).
 Stack the strips.
 Cut into 12 one inch rolls and place in a well greased muffin pan.
 Allow to raise until double and bake 350 degrees 20-25 minutes. Serve warm.

Last but not least...Salted Sweet Rolls.
These are by and far my favorite way to have the sweet roll dough. Divide 1/5 of the dough into 12 rolls and roll into balls. Place in a well oiled muffin tin and allow to raise about an hour. Whisk one egg with a pinch of salt and lightly "paint" the tops of the rolls with the egg wash. Sprinkle with a pinch of sea salt.
 Bake 20-25 minutes until golden brown.
Serve warm.
There you go! Five new ways to do rolls! Enjoy and have a wonderful Thanksgiving!

Always My Very Best,
Your Friend Chef Tess

Thursday, November 17, 2011

Swirly Twisted Roll Tutorial

Sweet rolls are so freaky fun! I adore making shapes with them that people don't see all the time and this is one of them. It's basically an S-curve cinnamon roll (if you use cinnamon) but it can also be a thousand other flavors! Imagine using micro-orange or lemon zest and having citrus rolls. A thin layer of jam to make it a strawberry, raspberry or blueberry roll. What about lemon pie filling or some marzipan, poppy seed filling or nuts? Do you see where I'm going? Good! Be creative with these!  Try something new. This is why I developed the 5 day Sweet Roll Dough.   Use it for any slightly sweet dinner or dessert roll.
To make the Swirly Twist Rolls, take 1/5 of the  5 day Sweet Roll Dough out of the fridge. Roll it out in a rectangle on a lightly floured table or counter top. Smear with a thin layer of jam, flavored honey, or butter. I would be amiss if I didn't say that my secret to really good sweet rolls is using my Wise Woman of The East Spice Blend for a totally unique and magnificent flavor. My biggest advice is to not over-fill. Use a light layer of the sweet stuff so that your rolls will hold together. If you go too heavy, it will be a gooey mess. Too much goo is also the first reason rolls stick to the pan or burn. The sugars just overpower the rest of the kingdom. Dang sugar.
Instead of rolling it all the way through the length, roll it like a scroll. My dough is pretty tender. I like it that way. It makes really soft rolls. Be gentle with it. Remember it has a good heart and good intentions.
When you slice it, like so, it will look like this.
Cut it into 1 inch slices. Pick up the slice and twist it once and transfer to a lightly oiled pan or one lined with parchment paper. Give them an inch and a half or more between rolls.
Allow it to raise, uncovered, for about an hour.  It should be very fluffy. Bake in a 350 degree oven 20-25 minutes. You can drizzle them with icing or white chocolate. Feel free. I left them naked today.
There you go! A twisted roll. Imagine the possibilities! Go crazy. I want to see what you come up with!

Always My Very Best,
Your Friend Chef Tess

Saturday, February 5, 2011

Auntie Em's Onion Sandwich Rolls

For the first time in forever, our Phoenix valley got below freezing temperatures. So I made stew. Guess what went perfectly with it?

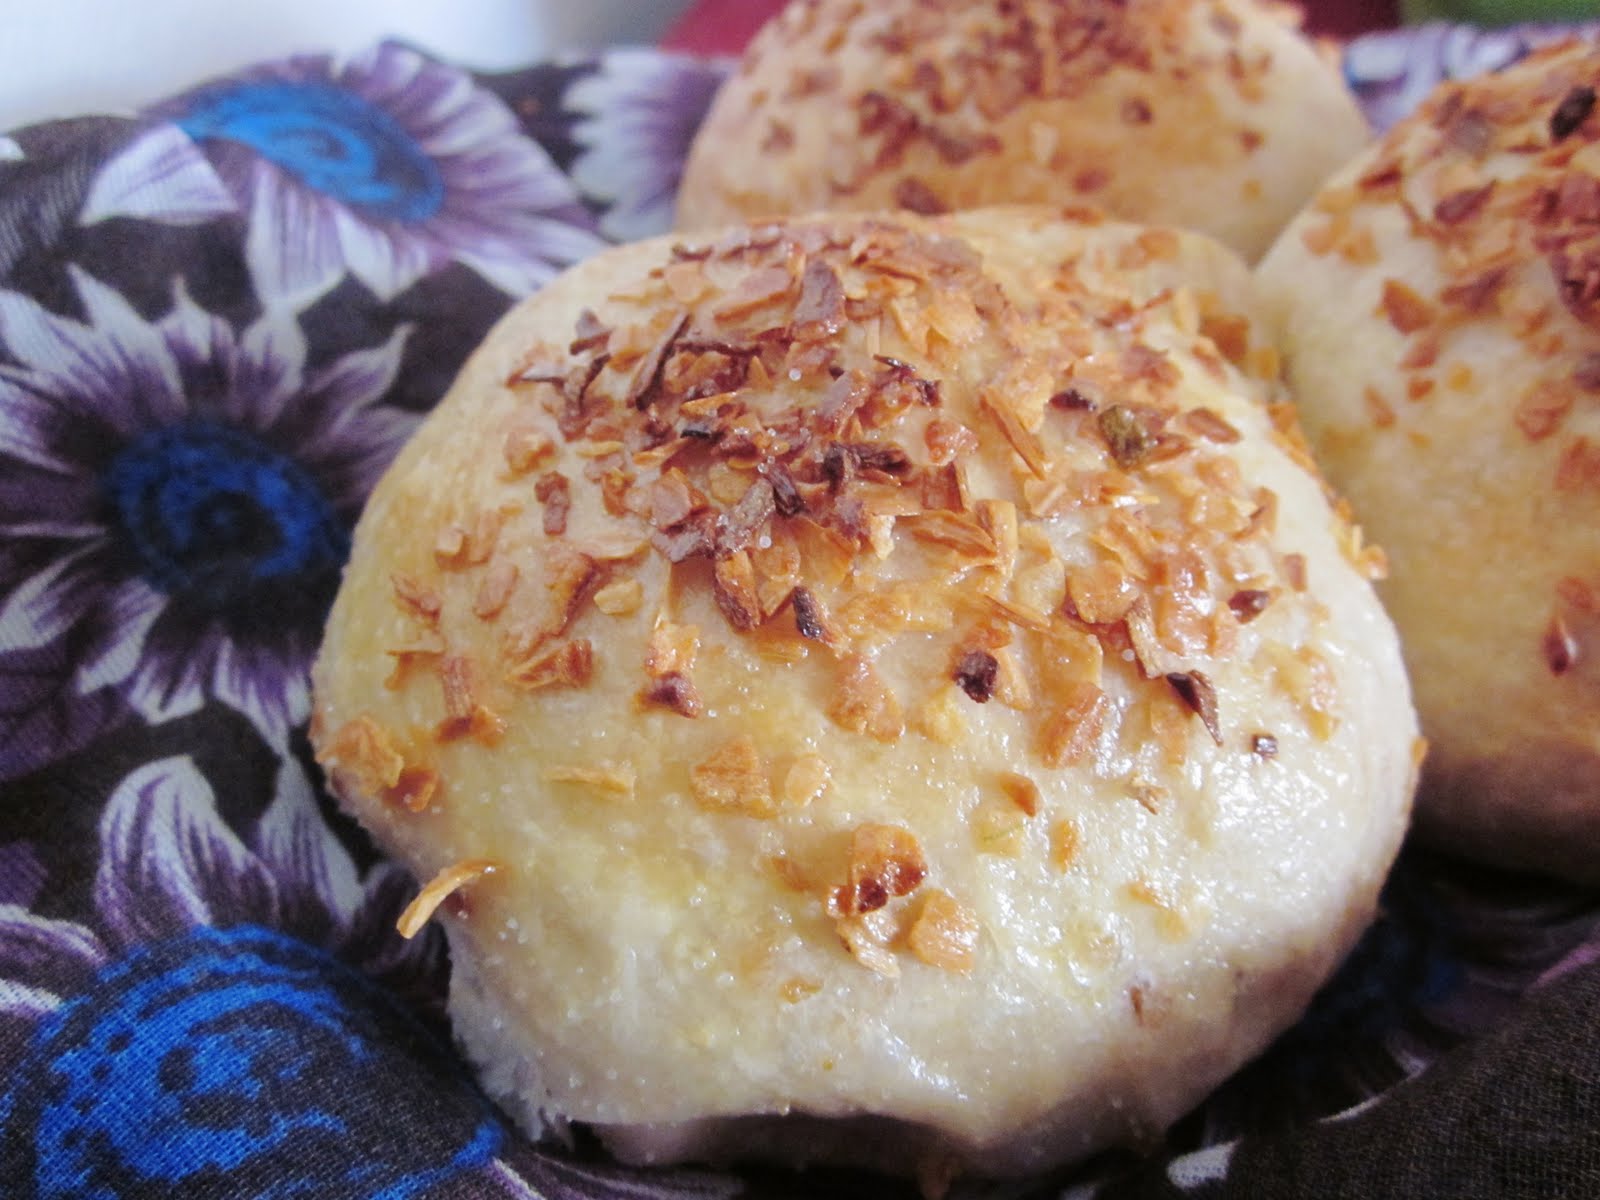
I do adore a good sandwich roll...especially one loaded with onion. So, when my sister Em offered up this recipe, I decided I'd give it a try. Oh I love how they turned out! Soft, fluffy, and just right for sandwiches. So...I doubled the recipe and made 16. That will last us all of a day (with two growing boys and a husband in on the feasting). However...what a day it will be! I'm also going to serve them with Refried Bean Soup or Kim's Spaghetti Pie or maybe Homemade Frozen Lasagna.
No matter what I serve them with, they will be eaten with love. Em uses the convenience of her bread machine's dough setting to make these rolls. I mixed them by hand and got great results as well.

Auntie Em's ONION SANDWICH ROLLS
3/4 c lukewarm milk
5 T lukewarm water
3 T butter, softened
1 1/2 t salt
3 T white sugar
1 tsp onion powder
3 T dried minced onion
1/4 c potato flakes
3 c all-purpose flour
1 T active dry yeast
1 egg white
1 T water
1/4 c dried minced onions


Place milk, water, butter, salt, sugar, onion powder, dried onion, potato flakes, flour and yeast into the pan of a bread machine in the order recommended by manufacturer. Select the Dough cycle, and press Start. When the cycle has completed, remove the dough from the machine, and knead on a lightly floured surface. Cut into 8 equal pieces, and form into balls. Gently flatten the balls until they are 4 inches in diameter. Place in a draft free place to rise until double in size, about 40 minutes. Preheat the oven to 350 degrees. Whisk the egg white and water in a cup. Brush over the tops of the risen rolls, and sprinkle with remaining minced onion. Bake for 15 to 20 minutes in the preheated oven, until golden brown.
I especially love how light and fluffy they were! Well done! Thanks Auntie Em for a great recipe!
There you go. Make some rolls.