Tuesday, May 31, 2011

Danish Aebleskivers and "Scandinavian Classic Baking" by Pat Sinclair

Just over a month ago as I was walking into the NBC 12 studio here in Phoenix, a charming woman named Pat Sinclair was finishing up her Arizona Mid-Day Segment.  I met her outside the studio and we started talking briefly, only to find a common passion as sisters in baking (oh laaaawd-koom-bye-yaaa...). We did not bust out our blocks of butter and nutmeg mills and set up base camp right there in the lobby (tempting as that might have been)...Oh be still my heart when she told me she had been on the show introducing her new book entitled "Scandinavian Classic Baking", and asked if I would be willing to read it. Could someone please pinch me now?! It was a pure stroke of Divine Intervention! Pat,  who is a food consultant with almost 25 years experience in test kitchens and recipe development, was offering the Bakeresse more ammo to bake with?! What's not to love about that? 

When the book arrived in the mail, I could hardly wait to pour over the many breathtaking photos and descriptions of this magnificent region. It felt like I was going home as I saw and read the many baking styles from country to country. Why did it feel like home?

I'll tell you why. When my mother, born and raised  of almost pure Danish descent brought home a Swedish-English fiancée...it could have ended badly. However, Dane's are know for their stubborn streaks, and mom was not an exception to that rule. She knew a good thing when she had it. I was born a few years later to both parents of Scandinavian decent. There it is folks. I am a Scandinavian Classic Baker! Pat Sinclair meeting me at the channel 12 studio was not just an accident. Her book of heirloom quality recipes falling into my hands has been like a breath of heaven. In fact, each new page and recipe made my heart almost sing. I wanted to jump a flying leap out of my chair, grab a wedge of Land-o-Lakes...I digress.  The final kicker was  near the end of the book. Aebleskivers. Moment of silence for the fat little Danish fingers of my childhood...daggumit. I love those little puff balls of love. What are they? Well, they're pure fluffy golden heaven in a swirly-whirly butter fried mass of joy. Lightly crisp on the outside with almost a popover note.  I used to eat them until I could see them in my sleep. *Used to* being the operative. Dang diets. Now we eat them on Christmas and birthdays.

  Danish grandmother Dorothy, mother of eleven children gave my mother a family heirloom aebleskeiver pan. 


Grandmother's Aebleskiver pan passed from mom's hands to mine at the time of my wedding. She shared her secrets to perfect Danish aebleskivers at the time as well. So, imagine my joy when I saw Pat's cookbook include a recipe of authentic Danish Aebleskivers! They are not just pancakes. They're almost a cross between a popover and a pancake. The flavor is mild and the texture should be exceptionally light and slightly sweet. The secret is the method. 

The  spelling is usually aebleskiver or ebleskiver. I saw some version of my beloved æbleskiver being sold with a commercially changed pan, It was branded as "Pancake Puffs" and stuffed with all kinds of filling...but truth be known, it wasn't grandma's recipe. Not even close. It was just a pancake.  I'm a pure freak. Pure freak. If you're calling it a classic, it better dang-tootin' be a classic. This one is. Pat Sinclair...you're my hero!
Danish Aebleskiver from
 Classic Scandinavian Baking by Pat Sinclair
yield 35 pancake balls

4 large eggs, separated
2T sugar
2 cups All purpose flour
1 tsp baking powder
1/2 tsp salt
2 cups 2% milk
1/4 cup butter, softened


confectioners sugar
applesauce if desired

Whisk the egg yolks and sugar until foamy. Combine the flour, baking powder and salt in a medium bowl. Add the flour and milk to the egg yolks and whisk until smooth.


Beat the egg whited in a large bowl with the electric mixer on high speed until soft peaks form. When you lift the beater, the whites will make peaks that fold back slightly.


Gently fold the egg whited into the batter until smooth. (Pat's book has a great tutorial on how to fold).


Get out great-great grandma's pan. Try not to cry. Remember you're loved...
Heat aebleskiver pan over medium heat until drops of water sizzle.  (You can use any ol' aebleskiver pan.)
 Place about 1/4 tsp butter in each cup. Add about 1/4 cup batter in each cup. Each cup will be about 3/4 full.


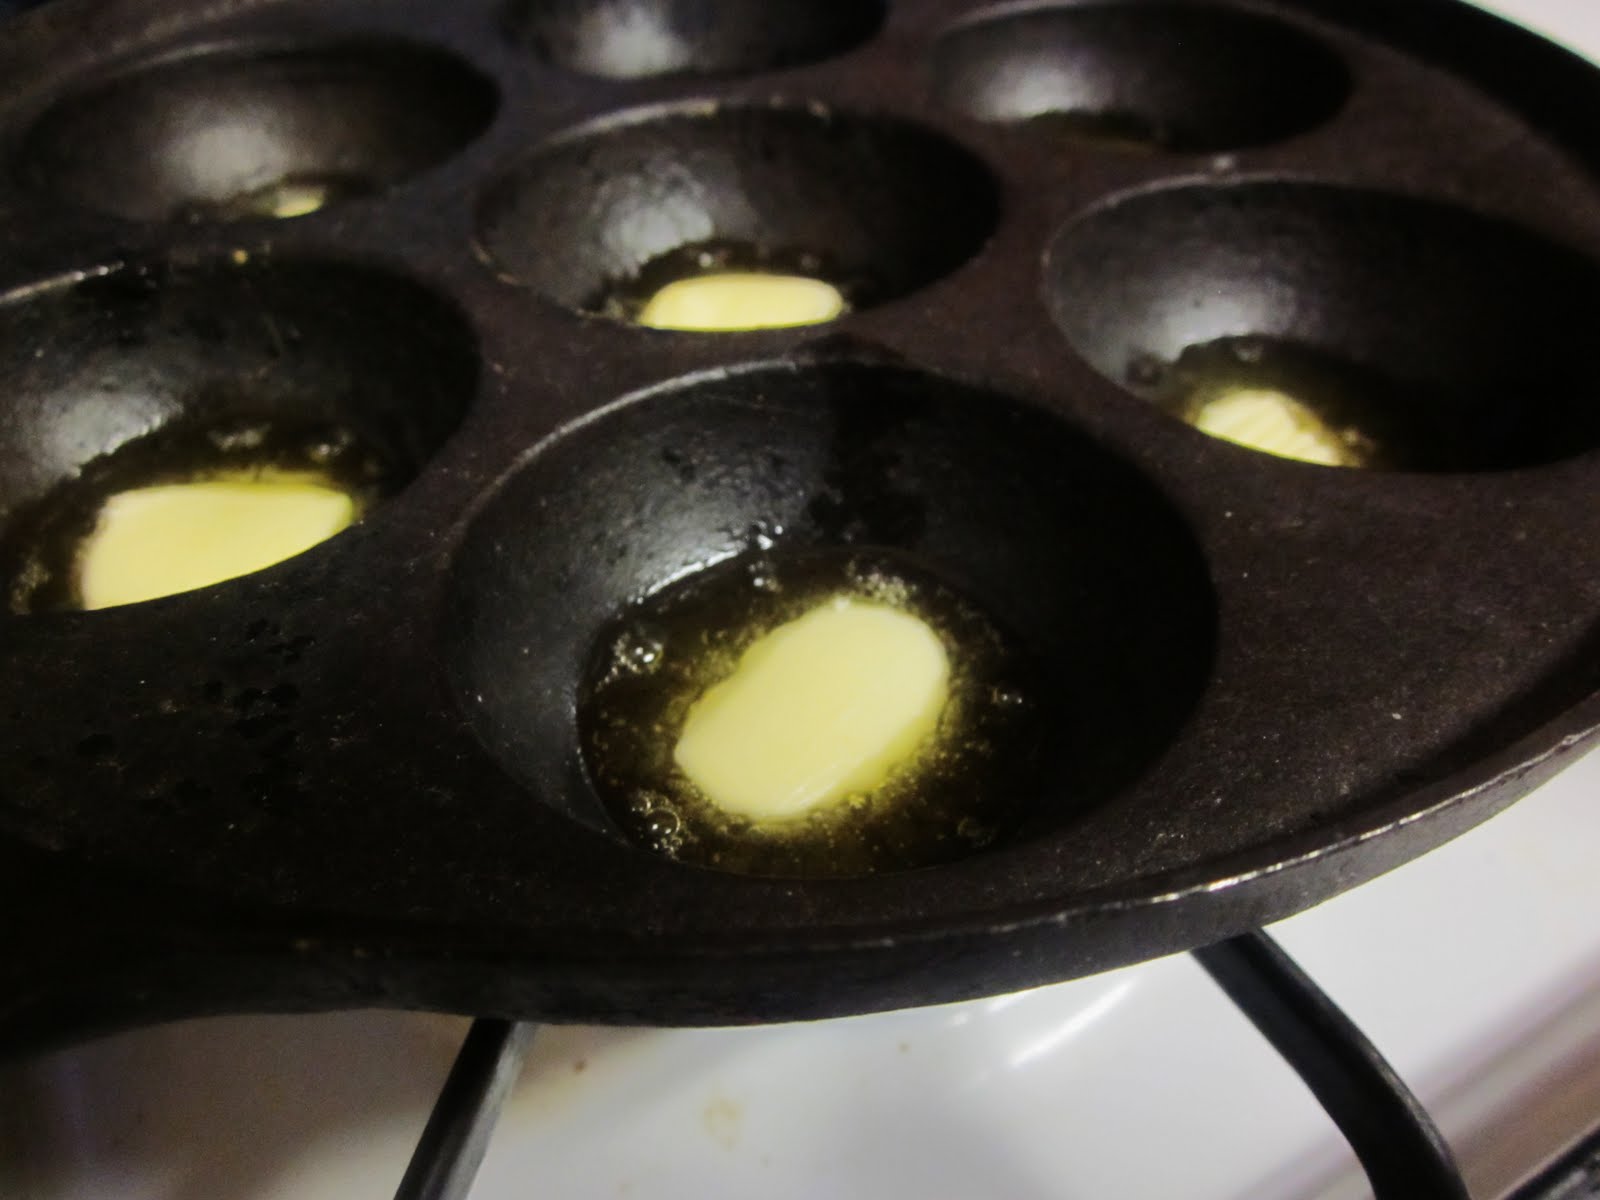
Pat uses a knitting needle to turn over her aebleskivers...I use one of these chop stick thingies...


Cook 1-2 minutes until bottom half is brown. Use the knitting needle (or chop stick) to slowly turn the balls to cook the other sides.  Balls are done when a wooden pick inserted in the center comes out clean.


Turn out pancake balls onto plate and keep warm in a low oven. 

Dust with powdered sugar and serve warm


Be it braided breads or tarts, muffins or rolls...Pat Sinclair has won perhaps forever, my loyalty and love for her attention to detail and her wonderful book. Thank you Pat. From one baker to another...you have truly inspired! Anyone would be blessed to have this classic baking book in their home. Especially, however, anyone with an appreciation for the baking of the Scandinavian region. It really is an outstanding book. Chef Tess Bakeresse  Pulla Braid approved!


 Once again, special thanks to Pat Sinclair  who is a food consultant with almost 25 years experience in test kitchens and recipe development. Her newest cookbook, Scandinavian Classic Baking was published by Pelican Publishing in Spring 2011. Her first cookbook "Baking Basics and Beyond", published by Surrey Books, has been presented the Baking Cookbook Award for 2007 by the Cordon d’Or- Gold Ribbon Award International Annual Cookbooks and Culinary Arts Program. She has worked for corporate clients Land O'Lakes, Pillsbury and General Mills. She is currently working on her second cookbook, "The Ultimate Empty Nesters Cookbook". She also teaches cooking classes in the Twin Cities.


Buy Scandinavian Classic Baking here

Friday, May 27, 2011

Taking a Trip to India in Gingham...


Recently I have been made aware of an outstanding humanitarian organization called  Gingham Project and their amazing Mission for school children and their families in rural impoverished India. 
Their goal is to keep the child living with their family and provide support for the child to attend school. They feel that the most effective tool they have is mentoring the children and families through locals who understand what it takes to educate a child and rise out of poverty.
Ironically, Face (my youngest son) and his  class at school have been studying India in geography this month and his teacher Nicole asked if I would be willing to come down and teach a little about the food that they have in India. I felt like someone had asked me to tell every food in America in under 30 minutes...and knew it wouldn't be possible. Instead, I decided to make it a little more personal. I wanted the kids in Face's class to see real life children their age.  Thursday I went to his school and shared some Tandoori Chicken, jasmine rice and mango. Specifically we talked about the fact that kids their age are eating  Dal and rice generally and mango with a little spice.  We learned about what kids his age are doing in school across the world in  India...and it was an amazing experience. Thanks to Melanie  Smith, the photographer who has been working on this amazing photography of  Gingham Project and the beautiful children for these breathtaking  pictures...


As part of a joint effort to help these children, I'll be providing Melanie with my tandoori spice rub recipe and she will be purchasing spices while there in India. We'll be combining efforts to do what I call, "lift where I stand and reach where I can." I lift local...and I reach far even in small ways if I think it will benefit some of God's children on the other side of the world.  When someone makes a donation ($ amount to be announced) they will get my rub from the Gingham Project Store and the knowledge that their donation went 100% to the children. . So, here's what the tandoori looks like:
Its a remarkable flavor combination or heat, ginger,  cumin, coriander, paprika, sea salt...and a few others.

 My Grilled Tandoori-Style Chicken 

and Mangoes with Mango Jasmine Rice


  • 1/2 cup chopped fresh cilantro
  • 4 garlic cloves
  • 3T Chef Tess Tandoori Spice Rub 
  • 1/2 cup olive oil
  • 1 cup plain whole-milk yogurt
  • 1/4 cup fresh lemon juice

  • 2 (2 1/2-pound) chickens, quartered


    For the Rice:
  • 2 large ripe mangoes, peeled; 1 cut into 1/2-inch-thick slices, 1 cut into 1/2-inch cubes
  • 2 cups jasmine rice 
  • 3 cups water


Arrange chicken on large platter; garnish with grilled mango slices and cilantro sprigs. Serve mango jasmine rice alongside.


Put cilantro, garlic,  and spice rub in blender or food processor.
 . With machine running, gradually add oil through feed tube and process until blended.


  With machine running, gradually add oil through feed tube and process until blended. Transfer 1/4 cup herb mixture to small bowl; reserve. Add yogurt and lemon juice to remaining mixture in processor and blend.
 Place chicken in 13x9x2-inch glass baking dish. Pour yogurt mixture over chicken; turn to coat. Cover and refrigerate 1 hour.
Prepare barbecue (medium heat). Place chicken, skin side down, on grill. Cover and grill until chicken is cooked through, turning every 5 minutes, about 30 minutes total.


Grill mango slices 2 minutes per side; set aside. Meanwhile, combine rice, 3 cups water, and reserved 1/4 cup herb mixture. Bring to boil. Reduce heat to low; cover and simmer until tender, about 15 minutes. Remove from heat; let stand, covered, 5 minutes. Fold in mango cubes. Arrange chicken on large platter; garnish with grilled mango slices and cilantro sprigs. Serve mango jasmine rice alongside.
Did they like it? Yes! Thank you Nicole for letting me be part of this amazing class!
 Hopefully, this brought these kids a better understanding, if only for a few minutes, of what kids in India are up against...and perhaps they'll want to cook something from the spices and staples of the land so very far, far away. I know that I, for one, wish I could just bring them all home!


There you go!


Oh...on an end note.. look at this beautiful Necklace from the gift shop of the school. I just got mine in the mail today! It's so cool and a great way to give a little to help a lot!  Check out the Gingham Project Store  and help if you can as well. It's really an remarkable cause.

Monday, May 23, 2011

Roasted Tomato Fajita Salsa de Chef Tess

Happy brilliant-bright-shining Monday! I try to do a food storage recipe on Mondays and since I'll be on Valley Dish tomorrow using some of my homemade roasted tomato salsa, I thought it would be perfect to share the recipe here today! What do you think? Salsa season? Um yes! Especially since the salsa I love and use has been completely depleted  by my salsa freak  adoring husband. Normally that is okay, but when I'm thinking I have a certain ingredient only to find it snorted down and gone...well let's just say I was a little flustered.  I needed to make some anyway, right?! Okay. Perk for you! I'm sharing the recipe. See...something good has come from Ace loving salsa...besides a tortilla chip famine. 
 Remember when I was hard core working on Organic Tomato Farming with Jim and I had a bazillion of these?

I came up with a recipe back then that made Ace literally drink bottles of salsa. He's a salsa boy. Honestly I couldn't decide if I wanted to share the recipe here on the blog or save it for bottling and selling across the country or at farmer's markets. Um...yes, we like it that much. However, I think it's safe to say that I can share a version here that's so close it's almost it...but not give away all my tricks, right?  It's a medium heat salsa I custom designed for Ace who doesn't like a lot of cilantro in his salsa. I'm a cilantro girl. I like a lot of chunks in my salsa too, but if you prefer a smoother salsa, you'll need to puree it. Ace also doesn't like, ironically, a lot of peppers in his salsa, so this one have very few. I roasted my tomatoes in the solar oven and then finished cooking the salsa on the stove. 

 Home Canning Safety 101 is a good place to start if you've never done any home canning. You'll need some equipment for this if you want it to be safe to feed to your family after sitting on the shelf.  


Chef Stephanie Petersen's 
Roasted Tomato Fajita Salsa

6 lb  blanched tomatoes , peeled half pureed, half rough chopped
2 medium onions, diced (1T olive oil)
1/4 cup minced garlic
1/2 cup roasted mild Hatch green chiles, peeled and seeded
3/4 cup apple cider vinegar
1T fresh cracked black pepper
2tsp fresh ground coriander seeds
1T salt
2T dry cilantro

Directions:
In a heavy 2 gallon stock pot over high heat. Add olive oil. Put onions in pan. Do not stir for 5 minutes until one side of the onions are very dark brown (as you would for fajitas). Add the garlic and cook 2-3 minutes.  Add all remaining ingredients. Simmer 20 minutes uncovered until thickened. Place salsa in sterile canning jars with 1/2 inch head space. Process 15 minutes for pints and 20 minutes for quart jars.


Hide them from Ace.  Share them with the ones you love. 

 There you go. Oh...and join me tomorrow on Valley Dish on NBC 12 at 3:30 making my Enchilada Tortilla Casserole in the skillet and also showing how to make homemade Taco seasoning! Recipes are here. The enchilada skillet meal is amazing for the fact that it's fast, easy and daggumit...a freakin' awesome family favorite!  Anyone can make it!  If you like what you see, let them know down at NBC. I'm sure it will keep me coming back. Smooches all and happy cooking! 

Sunday, May 22, 2011

Are you Irrigated Yet? (Bread of Life Section)

Sunday is the day I share a little of my soul. Enjoy.

I'm not only a baker, but I'm deeply in love with gardening and plants.  Thanks to my upbringing as the Pansy Man's daughter.  In my lifetime I've seen various watering systems for plants. This is one of the front flower beds at the greenhouses my dad operates in Utah for our church. It's been amazing growing up seeing from this unique perspective the efforts that go into making the church grounds look amazing.  It's also been humbling to see the extraordinary effort and unseen hours that my dad has put in behind the scenes to make sure things run smoothly. He loses sleep...and even on Sunday, if there's an emergency with the temperatures of the greenhouses, he has to be there. It's been a labor of love.
In addition he also grows some produce...like pumpkins the size of small children to donate to local food banks and church organizations.  

I guess I never thought too deeply about the watering of the plants until recently when I was looking at local irrigation methods for my garden. 
 Auntie Em had been kind enough to show me her corn and an irrigation method our dad taught her. Notice the wires holding the hose in place.


Then Dad had showed me how he had turned his entire back yard into a garden...and the irrigation system he used.


With the hose held in place by a simple wire a small and simple thing, great things come to pass. If it wasn't there, the hose would not be secure and the plant would not get the much needed moisture in this method of irrigation.


Infused throughout dad's landscapes heave always been culinary herbs and edible plants...and I think I'm finally starting to understand.


Today I was reading David A. Bednar's sermon on spiritual patterns.  He compared the spiritual pattern he had been describing to drip or trickle irrigation, in which water is applied in a more focused and frequent way than with other methods, providing “a high moisture level in the soil wherein plants can flourish.  In like manner, if you and I are focused and frequent in receiving consistent drops of spiritual nourishment, then gospel roots can sink deep into our soul, can become firmly established and grounded, and can produce extraordinary and delicious fruit,” he said.     
 “I believe many, if not all, of the most satisfying and memorable accomplishments in our homes, in the Church, in our jobs and professions, and in our communities will be the product of this important spiritual pattern—of simple and small things,... we should find great comfort in the fact that ordinary people who faithfully, diligently, and consistently do simple things that are right before God will bring forth extraordinary results.”
The spiritual pattern of small and simple things like scripture study, prayer and meditation...these things bring strong roots. Never underestimate what it can do for your spirit and for those around you. Never underestimate the impact you can have on the world. God has great things in store for those who love Him and desire to serve His children with their whole heart. I know this to be true.
There it is. 

Wednesday, May 18, 2011

Perfect Weakness...featured today in Identity Magazine


 I have to share something pretty exciting. I was informed today that a short article I wrote on perfectionism will be featured in Identity Magazine here. So, I had to share with all of my sweet friends on my blog. Thanks for all your love and amazing support. I promise I'll be back with some baking soon...it's been a little crazy the last few days with Mr. Putt Putt's 85th birthday party and family "details" to attend to...as you all know we have. Smooches and hugs always.

Friday, May 13, 2011

Fast and Easy Bacon Wrapped Shrimp Lemon-Herb Linguine

I made a dinner last night for the family that was a new recipe total win! Ace loved it. The kids almost licked the serving tray...I'm calling it a complete and total dinner success. The best part...it was freakin' fast. Not just regular fast...but freakin' fast. It would be nice enough to serve at a dinner party. Pretty enough to show to someone you actually *like*. When asking my kids what I should call this new recipe of mine, Little Man took one look at the bacon and said, "Bacon wrapped shrimp blah-what-ever-is good-with-bacon wrapped-stuff" (That's 12 year old boy code...for "DUDE mom there's bacon in here...whatever you call it I'll eat it!). Thank you Gena for all the "Bacon Wrapped Friday Night" parties. He's now got that fact in his grey-matter for life. Question.  Do I tell him I used the pre-cooked lean bacon coupled with extra-virgin olive oil like a responsible heart loving person? Yeah, I actually did. I totally want him to learn some healthier habits. Don't underestimate the power of the mighty leeks either. They pack this dish with .Magnificent. Flavor. If I can be so bold as to say so. You would be amiss to leave them out. Be sure to wash them well and dry well too. 
Bacon Wrapped  Shrimp Lemon-Herb Linguine
1/3-1/2 cup Extra Virgin Olive Oil (I love Lucero Olive oil...Meyer Lemon infused)
1 small red bell pepper, julienne
3 leeks, trimmed, halved, cut lengthwise, sliced thin, washed, rinsed, dried
2 cloves Garlic, pressed
2 lemons, zested and juiced
1 cup diced cooked bacon (2.5 oz cooked weight--pre cooked packaged diced bacon okay)
1 lb uncooked shrimp (60-80) peeled, vein removed (or 14 oz frozen uncooked)
1 lb fresh spinach linguine, cooked according to package directions (about 4 minutes) and drained. 
6 oz  extra large black olives, drained 
smoked paprika, salt and pepper to taste
Fresh parsley to taste (about 1/4 cup chopped)


First grab one of the leeks.  Okay. Trim off the dark green parts and use the light green stuff. Seems like a lot of wasted stuff, but the top is too fibery and stalky...those are not really words but they make sense. Not really  what we're looking for in this dish today.
Chop in half lengthwise and then slice thin like this. Are those pretty little leek-let-ribbon-lets? If I was crafting with those I'd hot glue them to some kind of wreath or something. Cooking today...focus. Focus. 
 In a large 14 inch skillet, heat the oil. Add the bell pepper, leek, garlic, lemon zest and bacon. Cook until vegetables are just tender. See how we just didn't need to cook more fat with that bacon? Really? Plus, we just knocked like 5 minuted off this dish...


Push the vegetable to the side of the pan. Add the shrimp and cook until pink, about 3 minutes. Don't overcook the shrimp. I'm a nerd here, but honestly, I'm not a fan of rubber shrimp. If food bounces back when you chew it...you should spit it out. That's just my humble (yet highly accurate) opinion.
Add the cooked pasta, and olives and lemon juice. Toss with the vegetables. 
Season with pepper. Taste. Season as needed. Transfer to a serving platter or bowl. Garnish with chopped parsley and sprinkle with smoked paprika. Serve hot.  Oh be still my fluttering magnificent heart!
After I passed out...and came to...I realized I better take some pictures.

You want to know something...I hid some. Confession. I did. I put some in a bowl at the back of the fridge so I could have some for later. Pasta salad the next day was even more magnificent...if that was humanly possible! 
There you go.