Tuesday, December 12, 2017

Southern Christmas Chicken and Rice Gumbo Meal in a Jar


Several years ago I visited my son's 4th grade classroom to share some regional foods of America. It was a lot of giggles seeing kids try okra for the first time and explore some of the southern foods they don't get to have often here. One of the class all time favorites (with bells, whistles, several helpings and begging for more) was this chicken gumbo! Who knew?  Well, the irony of this one is that it was all made from freeze-dried food. It was all dried including the okra.  I still can't find it freeze dried anywhere besides my friends at North Bay Trading Company!  However, I'm having a hard time actually not eating it!  It's like popcorn, but good for me! 

I love fresh tender okra too. I swear, I should have been born in Georgia. Wait...did someone from Macon  lose a daughter in Logan, Utah in the mid 70's? If so, she's been living quite comfortably with the Mormons and needs more okra! Okay. Admittedly, I seriously belong in my family. We have some southern relatives back in the family tree so that probably explains my okra-fetish. Admittedly, I'm also out of okra. That's embarrassing.  5 years later, this is still a favorite around my house. I'm making these again this year for Christmas! 

This  is a classic chicken Andouille gumbo. Using freeze-dried sausage along with the smoke and spices in this recipe mimic the andouille sausage traditionally used in good Southern Gumbo. I get all my freeze-dried ingredients from my own website: Thrive Life Chef Tess and the powdered sauce mixes from a place called Firehouse Pantry Store. 

Chef Tess Chicken and Rice Gumbo

2 T ultra gel or cornstarch
2T worcestershire powder
2T dehydrated parsley flakes
1T dehydrated minced garlic
½ tsp buffalo wind sauce powder
1 ½ tsp chicken bouillon powder
½ tsp hickory smoke powder

In a Quart Sized Jar layer the ingredients, shaking the powdered ingredients into the solid ones. Top with an oxygen absorber and close tightly. 


To Prepare meal: Combine contents with 4 ½ cups boiling water. Simmer 5-7 minutes. Yields 6 cups

If you omit the rice, it is lower carbohydrate for diabetics.

There you go.

Always My Very Best,
Your Friend Chef Tess


Saturday, November 25, 2017

7 Genius Holiday Cookie Jars Mixes from One Base


Is it just me, or does the Holiday season come too quickly?! It seems like there's always one thing or another that needs to be done, or baked, or delivered. The joy of giving can easily be lost in the hustle...but it doesn't need to be that way. I get a jump-start on all the gifts by making a few of these handy cookie-mixes ahead of time. That way, I don't ever feel too stressed.  For some great inexpensive very Martha-Stewart-like beautiful cookie mix wrapping ideas, see my post on Holiday Gifts of Impeccable Taste. These are also fabulous made in pint or quart-sized jars  (depending on the size of the recipe) and will be shelf-stable 2-3 years with an oxygen absorber! Wow! Right?!


What if one gourmet-quality homemade moist and chewy buttermilk cookie mix could save you a ton of money on holiday neighbor gifts and be made into 7 or more different cookie mixes, just by adding a few different ingredients?! Would that be the best cookie mix in history?! What if it was also shelf-stable and "just add water" so you didn't even need to find an egg or a cube of butter? That is evil-genius.


Here's my simple basic recipe base:

Chef Tess Bakeresse ™ 
Extra Moist Buttermilk Cookie Mix
9 cups All Purpose Flour 
1 ¼ cup Powdered Whole Eggs
1 cup Buttermilk Powder
1 cup Vanilla Pudding Mix (2 small boxes)
2 Tbsp. baking soda
1 Tbsp. salt
4 cup Powdered Butter
3 1/2 cups sugar 

To make Cookie Mix: Combine all ingredients well. This mix will make approximately 20 cups of cookie mix. Use 2 cups of mix per gourmet cookie mix (or the amount specified for the flavor variations). This recipe will make 10 bags of plain sugar cookie mix. 10 quart-sized jars.
To Bake: Combine cookie mix with 1/3 cup water and stir well. Place one inch balls on a cookie sheet and bake 8-10 minutes.  Yield 1 dozen cookies.

This Mix will Make 7 different cookie mixes depending on what flavors you add to it. It is simple to change and very versatile. 


Raspberry Cocoa Coated Crinkles

For the mix  (pint size jar):
2 cups buttermilk cookie mix
1 tsp LorAnn Raspberry flavored oil, combine well.
Coating:
1/4 cup hot cocoa mix 
To Bake: Combine cookie mix with 1/3 cup water and stir well. Form into 12 balls and roll each cookie in the cocoa mix. Place one inch balls on a cookie sheet and bake 8-10 minutes.


 Elvis' Blue Christmas
 Peanut-butter Banana whoopie pies

For the Mix (quart size jar):
2 cups buttermilk cookie mix
1 cup Powdered Peanut Butter
1/2 cup sugar
1 tsp. LorAnn Banana Flavoring oil

Frosting (plastic sandwich bag): 
1 cup powdered sugar
1/4 cup cocoa

To Bake: Combine cookie mix with 1/3 cup water and stir well. Form into 1 dozen balls. Flatten lightly. Place one inch balls on a cookie sheet and bake 8-10 minutes. For frosting, combine frosting mix with 1 1/2 Tablespoons very hot water (more or less depending on how thick you want the frosting). Spread the frosting in-between two peanut butter cookies.


Mint Cocoa brownie bites

For the Mix (quart sized jar):
2 cups buttermilk cookie mix
1/4 cup Baker's Cocoa
3 Tbsp. Mint Hot Cocoa Mix (Stephen's)
1/2 cup sugar
1 cup chocolate chips

To Bake: Combine cookie mix with 1/3 cup water and stir well. Form into 1 dozen balls. Flatten lightly.  Place one inch balls on a cookie sheet and bake 8-10 minutes.


7 Grain  Caramel Apple Walnut Cookies

For the Mix (quart sized jar):
1 cup 7 Grain rolled Cereal 
1 cup Buttermilk Cookie Mix
1/2 cup sugar
1/2 cup Freeze Dried Apples (chopped)
1/2 cup chopped walnuts
1 Tbsp.  vanilla caramel non-fat non-dairy creamer powder

To Bake: Combine cookie mix with 1/3 cup water and stir well. Form into 1 dozen balls. Flatten lightly. Place one inch balls on a cookie sheet and bake 8-10 minutes.


Coconut-Chewy Hawaiian Christmas Cookies

For the Mix (pint-sized jar):
1 cup Buttermilk Cookie Mix
1 cup Macaroon Coconut
1/4 cup sugar
1 Tbsp. coconut flavored non-fat non-dairy creamer powder

To Bake: Pre-heat oven 350 degrees. Combine cookie mix with 1/4 cup water and stir well. Scoop by the rounded tablespoon onto a lightly greased baking sheet.Bake 8-10 minutes. Allow to cool 5 minutes before removing from baking pan.


Dark Chocolate Chip Orange-Brandy Cookies 

For the Mix (quart sized jar): 
2 cup Buttermilk Cookie Mix
1/2 cup sugar
1 tsp LorAnn Orange Brandy flavored oil
2 tsp vanilla caramel non-fat non-dairy creamer
1 cup 72% cocoa dark chocolate chips

To Bake: Pre-heat oven 350 degrees. Combine cookie mix with 1/3 cup water and stir well. Scoop by the rounded tablespoon onto a lightly greased baking sheet.Bake 8-10 minutes. Allow to cool 5 minutes before removing from baking pan.
                                    

Creamy  White Chocolate Eggnog cookies

For the Mix (quart sized jar):
2 cups Buttermilk Cookie Mix
1/2 cup sugar
1/4 cup Sour Cream Powder
1/2 tsp Wise Woman of the East Spice Blend OR 1/4 tsp nutmeg
1 cup white chocolate chips

To Bake: Pre-heat oven 350 degrees. Combine cookie mix with 1/3 cup water and stir well. Scoop by the rounded tablespoon onto a lightly greased baking sheet. Bake 8-10 minutes. Allow to cool 5 minutes before removing from baking pan.


There you go! Make some amazing cookie mixes this season! Enjoy my darlings!


Monday, November 20, 2017

Good Morning Arizona! 3 Brilliant Ways to Use Thanksgiving Leftovers for Breakfast, Lunch and Dinner


Tomorrow morning I will be on Good Morning Arizona sharing 3 Brilliant ways to use Thanksgiving Leftovers for breakfast, lunch, and dinner! I'll be incorporating a lot of whole grain goodness from Organicgrains.com in this one because I not only have the honor of using their grains often in my baking as part of my regular job but also because I love them!
Breakfast: 

Puff Pastry (or Biscuit) Turkey Quiche Cups

1 package froze puff pastry*
8-10 oz cooked turkey, well seasoned
8 slices of bacon, sliced in 3 pieces (total 24 small pieces)
3 eggs, beat well
1/4 bell pepper, chopped fine
12 1 inch squares of Havarti or Swiss Cheese
Pepper to taste

Allow the puff pastry to come to room temperature and cut into 12 squares. Line the bottom of a muffin cup with the pastry up the edges.  Put pieces of bacon and bell pepper in each cup and top with a few chunks of turkey.  Fill cup with 1 Tablespoon scrambled egg. Put a nice little cheese top on the whole deal-eee-oh (no I really don't have a real technical jargon for the muffin thing-a-ma-gig...sorry.) Bake 425 degrees 13-15 minutes. Serve warm. Any leftovers need to go in the fridge. 
*Variations:
Low carb: Omit the puff pastry and spray the muffin tins well with a non-stick coating (or line with a cupcake liner).  Proceed with the recipe filling the cups as described. 
Biscuit: Use biscuit dough in place of the puff pastry dough.
Flavors: Change the seasoning using your favorite variety of fajita seasoning for a Southwest quiche, French herbs de Provance for a more classic flavor, Spinach to replace the bell pepper if desired. Play with these! 

Lunch:


Start with the Sweet Potato Bread...

The Sweet Potato Bread is my original recipe made in full in the Fall Sweet Potato Bread Tutorial with the embellishments and leaves.  Here, I'm just giving you the recipe for the plain loaves. 

Chef Tess' Sweet Potato 5 Day Bread Dough
yield: 4 loaves 
2T active dry yeast (over 3000 feet use 1 T only)
4 cups milk, cold is best 
3/4 cup honey Or Organic Maple SYRUP
1T salt
4 eggs (or 1 cup egg replacement)
3/4 cup oil
1 1/2 cup mashed sweet potatoes. cooled to body temp again. The consistency of thick oatmeal.
1T baking powder

 2T cinnamon, 
2tsp ground ginger and 
1T vanilla
2 cups Organic Grains Freshly Milled hard white wheat flour
12-14 cups  organic grains bread flour  (I have used fine ground white wheat and been fine doing all whole grain, use only 12-14 cups total if whole wheat is used )

Directions: Dissolve yeast in milk. Stir in honey. Allow yeast to get all foamy and look like it is having a hay day. Add egg, oil, mashed sweet potato, baking powder, 2 cups whole wheat flour, 2 cups all-purpose flour spices, vanilla, and salt, in that order. Do not let yeast come in contact with salt on its own or it will kill the yeast. Beat until smooth. Allow dough to rest 10-15 minutes
Add enough of the flour remaining to make a soft dough that is easy to handle but not dry. Turn dough onto a lightly floured surface and knead 10 full minutes. about 600 turns. Yea. 600 by hand. 5-6 minutes by machine on medium speed. Form into a ball and place in an ungreased 2 gallon bowl, covered tightly. If you don't have a large enough bowl...use two smaller bowls. Or...just half the recipe if you are worried. Put in the fridge. Punch down after 2 hours (this may be faster if you use warm ingredients or flour. If the dough is over 85 degrees when you put it in the fridge, be sure to punch down sooner. Also...if you have kids who open the fridge a lot, be sure to lower the temperature a bit so that your fridge is really as cold as it should be) Form into a ball again. Cover tightly and chill at least 8 hours.
Be sure to punch down daily (this not only expels gas, but also ensures even temperature in the dough). This dough can be made up to 5 days before Thanksgiving! So, it's nice to have around. It's also amazing to make into rolls instead of bread, should you choose to do something else. This makes four loaves. Four. I will only make one here, but you'll get the idea. Take one-quarter of the dough and roll it into a tight ball. I like to expel as much air as possible so it raises rather uniformly. Gather the dough at the bottom and make a tight ball out of the dough.
Place on a parchment lined baking stone or baking sheet, at least 12 inches by 10 inches. Allow to rise until doubled, uncovered, lightly misted with water. When almost raised, turn on the oven to 425 degrees.  Bake 425 degrees 15 minutes and lower the temperature to 350 for the final 15-20 minutes of baking.  Allow cooling. Slice and wrap tightly. 

To make into the Turkey Grilled Cheese simply place a slice of the well-seasoned turkey and 2-3 slices of sharp cheddar on a thick slice of the sweet potato bread. Grill on the stove in a medium skillet over medium heat with melted butter until golden and toasted.  Add a Tablespoon or two of cranberry relish and a drizzle of good balsamic. Garnish with minced fresh rosemary if desired.


Dinner: 
Marinara Turkey Sliders with Roasted Garlic 


Get your rolls.
In this recipe, I used the 4 Ingredient Make-Ahead-Rolls from Organicgrains.com. Or the Make-Ahead No Knead Cracked Wheat Dinner Rolls (pictured below).  If you're still looking for great roll recipes, these will save your brain power. 


You will need:
1 dozen baked rolls 
1 lb cooked turkey
1 cup roasted garlic
1 1/2 cups marinara sauce
12 slices mozzarella
1/2 cup Garlic infused Ahuacatlan Avocado Oil
1 cup parmesan cheese
Parsley, chopped (for garnish if desired)

Direction:
Cut a 1 1/2 inch circle out of the top crust of each roll and set aside. With each roll, remove a little of the soft interior or push it down with your thumb. 


In each roll, add 1 1/2 oz turkey, 2-3 pieces of roasted garlic, 2 Tbsp Marinara, and1 slice of mozzarella. Top with the circle of crust that was removed previously. Brush with garlic infused olive oil and sprinkle with parmesan cheese. Bake at 350° for 15-20 minutes. Serve hot. Garnish with chopped parsley if desired.


There you go! Make some awesome meals with all those Turkey leftovers!

Always My Very Best,
Your Friend Chef Tess


Thursday, November 16, 2017

A New Chef Tess Business and 2 NEW Chef Tess Meals in a Jar: Instant Chicken Stuffers and Toppers


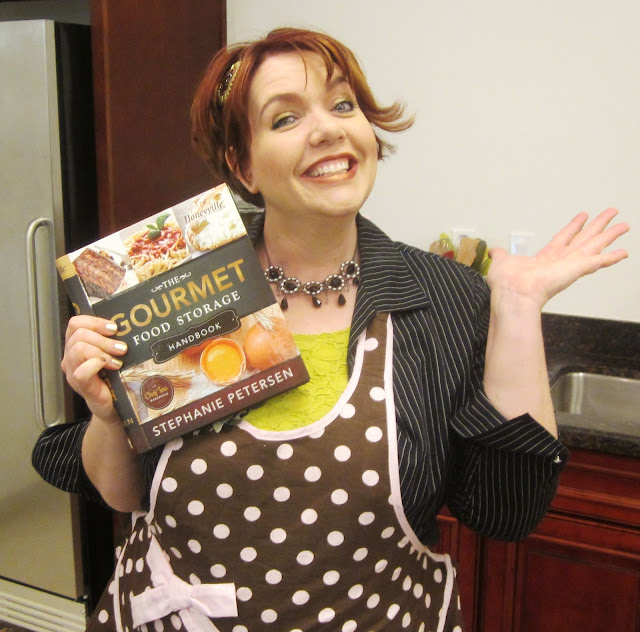
Almost 10 years ago, I started sharing my recipes for meals in a jar using freeze-dried and dehydrated items that were "just add water" and super simple...  I started sharing the 52 method.  The method of basing long-term food storage on a 7 day menu and getting 52 of each jar.  It took off like crazy!  It was long before anyone else had even put the concept together.  Several years into it, I wrote The Gourmet Food Storage Handbook, and then a year after that The Meal in a Jar Handbook


At the time I pioneered this concept, I had no idea how popular it would become, or how many people would be blessed by the simplicity of the concept. I worked diligently to promote the idea on TV, Radio and at endless preparedness trade shows. I spoke with literally thousands of people about it. Thousands.  

 I didn't make much money for sharing my recipes and wisdom. It wasn't about the money for me. It felt more like a calling than a job and I was (and am) super passionate about helping people...

However, I did see the company that I worked for at the time making thousands of dollars from how my concept could make food storage so customizable and so simply accessible for daily use. I was on salary, and as the sole breadwinner for my family didn't complain about them making money. I considered it part of my job.


Fast forward now to 2017. I haven't worked for my previous employer for almost 4 years. They continue to make money from links off my website here based on direct referrals. It doesn't seem fair to my family. At. All. Now they no longer sell my books or spices on their website. They've moved away from me, it's fair to say that I'm no longer part of their family. So...I'm moving on. I still love them and am forever grateful for the opportunity that they gave me. Period. 

Just to clarify, I have a current employer that treats me like gold. Serious gold. They have built my confidence and lifted my spirits.   It's still salary and I am still the sole breadwinner for my family. Things are better, but it's still a pretty serious job. I'm still recovering from four years of less than ideal finances.  I thank God for my job now every single day. It is a huge blessing!  My current employer doesn't sell freeze-dried foods. This side venture will not be considered a conflict of interest. I'll only be mentioning those new freeze-dried products here every now and then as an effort to bless my family and hopefully your family. So that's what we're doing.  

I've become an independent sales consultant for a company in Utah called Thrive Life. That happened...yesterday. Literally. Mainly because my family does and did rely on the royalty money we did receive from said previous employer to pay some of the family expenses. That loss has been sorely felt.  The other reason, however, is that I've secretly been purchasing Thrive products for the last several years and have actually found their quality to be incredible. Their meat cans are always full. Their textures are perfect. They have more variety. They cater to more of the family's needs and a busy lifestyle than any other freeze-dried company out there, including meal kits similar to the famous "Blue Apron" meals. The simple plates, however, are totally shelf-stable! 


As for this new venture...Anyone is welcome to join my team and get the benefit of having me as your food storage mentor on this journey. I'm excited about that. Mostly, I'm excited to share some outstanding tips and ideas for shelf-stable food It also goes without saying, that I will still only suggest foods that I think have the highest possible quality. 

So...Now for today's Recipe Post.


Instant Chicken Salad was such a popular post for fast and easy sandwich filling that I thought I would take it a step further and introduce all of you to this great way to make instant BBQ chicken bun stuffer and instant oriental chicken wrap or salad greens topper. These are great convenience meals for family picnics, camping trips, travel and whenever you're on the go. They are perfect for scout camp and are really delicious.  


 If you are new to this 52-method Meals in a Jar  you'll probably need to read the posts on how to pack the jars with a food saver (if you don't want to use an oxygen absorber) as well as how to make the meals in mylar bags if you decide not to make them in the jars.  Those posts are here: 
For camping and backpacking, I generally will use the method of packing in the mylar bags. Keep in mind that mylar is shelf-stable for a very long time but is not rodent-proof and can puncture, so take precautions when packing them in your bags. This is one I packed for my son for scout camp. {Best. Bartering meal. Ever. }


Now. On to the recipes! 

This isn't just BBQ chicken. It is Kansas City BBQ Chicken. If you know anything about BBQ then you know that the Kansas City version of BBQ is usually tomato based on the addition of molasses or brown sugar. Using tomato powder give you the ability to control the thickness of the sauce without having to simmer it for hours.  If you like your bbq chicken saucy, then this recipe is for you! 


 I used just a few simple ingredients for this stuffer. Once you've used freeze-dried chicken, you'll wonder why you have waited so long to try it! I have been so impressed with the lean, clean, awesomeness of this stuff for a long time. Mainly because it doesn't have any added junk to it. No soy, or msg or extra flavor. It is just chicken. Ahhh. It is a great way to make a shelf-stable meal without added chemicals. 


One thing I am pretty particular about is the seasoning. If you haven't tried my Chef Tess Spices Chef Tess All purpose seasoning,  is one that I developed as a chef for restaurant and banquet use. It goes with everything and hands-down is one of the best seasoning blends on the planet. You won't be disappointed.  I say that and I realize that it is no longer available online, but that will change in the near future! I promise!  

Kansas City  BBQ  Chicken Stuffer 
1/2 cup Tomato Powder
1/2 cup Brown Sugar
2T Freeze Dried Onion
2 tsp Chef Tess All Purpose Seasoning 

1/2 tsp hickory smoke flavor powder or 2tsp smoked paprika
2 cups Freeze Dried White Chicken chunks

Directions: Combine all ingredients in pint-sized jar and top with an oxygen absorber. You may also use a mylar bag instead of the jar.  You can cut the recipe in half for smaller portions or double for larger families. Simple stuff. 


Safety Note: For the love of Pete, please use an oxygen absorber. They are the magic ingredient that makes these meals safe for long-term storage. Bacteria and junk can't grow without oxygen and moisture so this is a biggie! By the way, oxygen absorbers are a one time use. They are a must! After you have filled all your jars or mylar bags with the recipe ingredients, place a 300cc oxygen absorber in each jar (or bag). Seal within 20-60 minutes for the oxygen absorber to be viable. 


To prepare: Combine chicken stuffer mix with 2 cups boiling water.  Allow hydrate, about 10 minutes. Add more water to-taste of sauce thickness.


Fill your favorite buns with the mixture.I make hamburger buns using the No Knead 4 Ingredient Overnight Bread Anyone Can Make and they're  ready to go for a low-cost meal!

Lettuce wrap filling  or salad green topper:


This recipe is versatile for either a salad wrap, topper or even a tortilla wrap. You'll love the heat! If of course, you're not a spicy person, you can omit the pepper flakes all together. I serve my salad with a squeeze of hot chile sauce and some fresh shredded carrots on salad greens. It is a simple grab when I'm traveling or just want a light lunch. 


Oriental Spicy Chicken Salad 

2 cup  Freeze Dried Chicken chunks (3 oz) 
1/3 cup Soy Sauce Powder (1.5 oz)
2T  Lemonade Powder
1T dehydrated garlic slices (store purchased or make your own)
2 tsp red pepper flakes (more or less depending on how hot you like your meals)
1/3 cup Dehydrated Onion
1 tsp Chinese 5 spice 
1T Ultra Gel 

Directions: Combine all ingredients in pint-sized jar and top with an oxygen absorber. You may also use a mylar bag instead of the jar.  You can cut the recipe in half for smaller portions or double for larger families. 


To prepare: Combine chicken stuffer mix with 2 cups boiling water.  Allow to hydrate, about 10 minutes. Add more water to-taste of sauce thickness. Serve on top of greens. Or wrap in lettuce leaves for salad wraps.

There you go! Enjoy some wonderful new summer meals in a jar! 

Always My Very Best,
Your Friend Chef Tess

Wednesday, November 15, 2017

Meal in a Jar: Breakfast Ham and Zucchini Quiche Casserole (Low Carb & Gluten Free)


One of the classes I adored teaching was how to make shelf-stable meals in a jar that are good 5-7 years. This is, in fact, something I have done for my family for years. It's just a super practical way to have a "grab-n-go" meal for any occasion. Unlike other jar meals I've seen, the ones I plan are "just add water" and include the meat, veggies, sauce and all...ONE jar. One place. Grab-n-go!   These quart size jars make a meal for our family of 6 (4 adults, 2 children) and average about 9 cups of prepared food coming from the small amount of space in a quart jar. They can be made in mylar bags, but I personally prefer the jars. They're airtight, rodent proof and clear, so I can tell if the food is still gorgeous. Yes, I do slip into my Hollywood fashion designer alter-ego and say, "Fabulous Darling! Fabulous!"  Yes. I realize I'm odd. Shhh. I'm happy in my delusion. It keeps me young. What was I talking about? Oh yeah...

 I'm sharing an adaptation of an old family recipe that I think is a keeper! I made it for my kids and the 12-year-old had 3 plates of it. Next time I'm making half gallon jars. I'm getting into teen years with these little whipper-snappers. Yikes. Needless to say, the meals will feed a normal family of 5...or one teenage boy. I also plan a loaf of bread a day per person (for rolls, breadsticks, or sides like that) in my food storage. I have a whole series of jars based on those too...but that will be a later post.   This is an adaptation of my mom's Zucchini Casserole. I grew up with this fresh from the garden and I wanted to capture the flavors in a jar meal for storage.  Thankfully I have found the most beautiful freeze-dried zucchini slices!  I have to stop myself from eating them like potato chips right from the can. You know what else I love? I love the there's no junk added to my favorite brand of freeze-dried veggies.  It's just the veggie. Just the fruit. Nothing added but happiness. 

When the Breakfast Ham and Zucchini Quiche Casserole is in a jar, it looks like this...

Cooked, it looks like a quiche and tastes like a quiche...without the crust. 

My Mom's Ham and Zucchini Quiche Casserole
Ingredients:
1 cup Freeze Dried Ham
1/2 cup Freeze Dried Bell Peppers
1/2 cup Freeze Dried Zucchini
1 T Powdered Butter
1/4 cup Ova Easy Egg Crystals or Scrambled Egg Mix
1/2 cup Powdered Sour Cream
 2T  Ultra Gel
1/2 tsp  Italian Seasoning
1  1/2 cup Freeze Dried Cheddar Cheese

Directions: 
 *Real freeze dried meat must be in a glass jar or mylar bag with an oxygen absorber. Open all your cans of happiness. Line up your jars. Get all your measuring tools and stuff together. Make sure you have all your ingredients. 
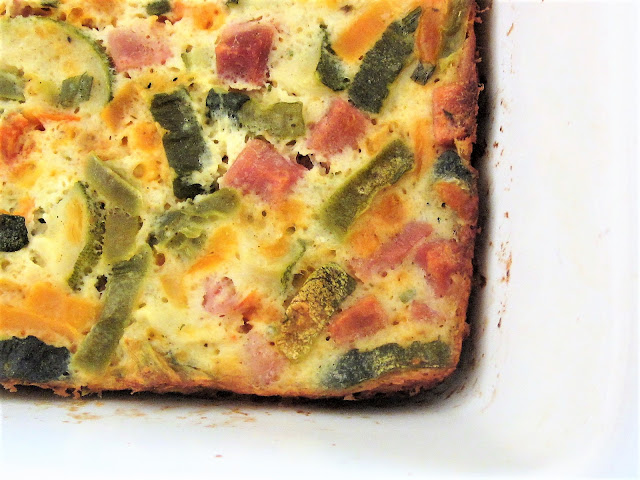
Put the green onion, freeze-dried ham, zucchini, and bell pepper in the jar. Add the powdered ingredients and shake them down into the veggie mixture. This is how I get a lot of product into a small space. I shake things a lot in my jars. 


 Add the cheese and top with a fresh 300 cc oxygen absorber. You can also use the jar attachment on a food saver, but you'll need to either cut a coffee filter to fit the top of the jar or use a cupcake/muffin liner at the top of the jar just inside the rim to keep the dry particles from clogging the hose. I prefer the speed of the oxygen absorbers. Frankly, that's how I can do so many in a short amount of time. If you want to use the slower method with the lid attachment, you totally can.  
In about 25-30 minutes, the jar lid will "pop", indicating you have a vacuum seal. 

I made eight of these meals in about 15 minutes (one was prepared and in the oven when I took this picture). Eat your heart out, Rachael Ray. One dinner in 20 minutes is so last week.

To prepare:  Preheat oven to 325 degrees.  Pour the jar ingredients into a 2-quart bowl and add 2 1/2 cups cool water. Allow to hydrate 10 minutes.


 Lightly grease a 9 inch by 9-inch casserole (or solar oven 9 inch round pan works too).


Cover with foil.  Bake until set, 325 degrees 35-40 minutes. Do not over bake. May be stored in the refrigerator after baking and heated for service. 

I had enough ham to make about 10 of these meals, so initially, the cost is about $8 a meal. Some meals or less if you use the TVP. The sausage TVP is amazing. I'm a big fan.

There you go! Welcome to my meals in a jar!  

Estimated Nutritional Information:
Yield 5 Servings, 336 calories, 25 g fat, 5 g carbohydrates, 1 g fiber, 21 g protein.

Again, the sales of freeze-dried products from my website is a huge blessing to my family and will be to yours.  I give out the recipes here as a service. If you do share them, please give full credit to this site.  Thank you so much!  Onward an upward!


Always My Very Best,
Your Friend Chef Tess