Tuesday, May 23, 2017

The Power of Indoor Micro-Green Farming

Photo Courtesy of IOGP website

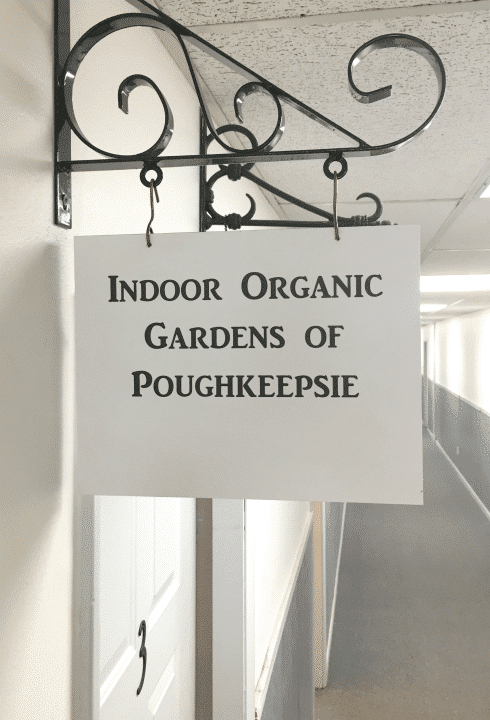
One of the perks of doing what I do, is that sometimes I get to interview some remarkable individuals. This week I had one of those experiences.  I had a very unique opportunity to spend about an hour interviewing one of the pioneers in the indoor organic micro-greens farming industry  from Indoor Organic Gardens of Poughkeepsie named Brud Hodgkins. After over 20 years as a chef who is passionate about childhood education, empowerment and nutrition, it is still awesome to connect with someone who shares that same vision.  As the daughter of a greenhouse manager and Master Gardener, I relish the opportunity to bend the ear of an urban farmer. 

 In full disclosure, Brud's company reached out to me to see if I would be interested in sampling their products for this blog. As a chef who has used micro-greens extensively as an Executive chef in a French bistro as well as catering venue, I already was a huge fan of what they could do for any dish. Add to that, the desire to continue to incorporate micro-greens in my at-home cooking, this seemed like an ideal marriage of product use. They are not paying me to endorse their products. They're just giving me some greens.  So, I will be sharing their stuff here on my blog. Don't let that freak you out. I'm always trying to share good nutrition with y'all. I think this is pretty daggum interesting to hear about.

This is what I found out about this amazing food source and this indoor farm.


Photo Courtesy of IOGP website

Bringing Farming to the Inner City
First of all...Brud explained  that his crop is farmed exclusively indoors using a commercial property that was sitting vacant after the downfall of one of the neighborhood retail marketplaces. In a seventeen thousand square foot facility that originally started out as a K-Mart-type store, they're using this space to produce a powerful nutrition source in the middle of the city. At the first mention of this, my mind actually starting racing, thinking of all the vacant buildings in my own town that could easily be converted to such a use. It was a brilliant use of space, not to mention providing clean food and employment opportunities to the "at risk" segment of society usually found in the parts of the city he is focusing on in Poughkeepsie. In fact, just before our meeting, Brud had been meeting with some local high-functioning autistic teenagers who would be coming to work at his farm. This of course, got us talking about the need for education of children in the school system.

Photo courtesy of IOGP website

Kids Love Them!
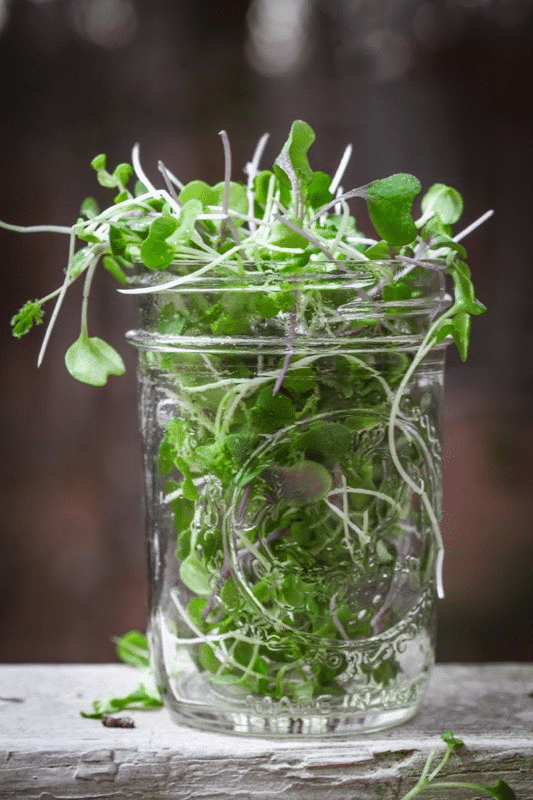
Micro-greens are sweet and nutrient dense. They are easy-to-absorb nutrition...and one of the simplest things to get kids to eat. For example, cabbage Micro-greens have 260% more vitamin A than fully grown cabbage, and they don't taste like cabbage. They taste sweet.  That's just one of many examples of the powerful punch of nutrition in micro-greens.  They grow to mature micro-status in just a few days! Why wouldn't we teach kids how to grow these? They want to eat them because there's ownership.  Well...Brud is doing that. They're launching local school STEM programs teaching kids first hand how to grow this crop...and they're giving them the power to be able to grow a crop that is financially sustainable. 

So here's the skinny on Micro-greens. 

*What are microgreens?
 Microgreens are older than sprouts, but younger than baby vegetables. Almost any edible vegetable or herb can be enjoyed as a microgreen, such as lettuce, radish, basil, beets, celery, cabbage and kale. Many microgreens are four-to-six times higher in vitamins and antioxidants than their adult forms and can provide a nutrient boost in just a few calories.


Eating them
Many people enjoy the tiny leaves of microgreens for their fresh taste, crisp crunch and bright colors, including:
  • Raw, as an addition to a salad. Drizzle with a little lemon juice or low-fat dressing or eat them on their own.
  •  As a garnish to meals. Add them to your breakfast plate. Top fish, chicken or baked potatoes with microgreens.
  • Added to a sandwich or wrap.
  •  Sprinkled into soups, stir fries and pasta dishes.
  • Blended into a fruit drink or cocktail.
Growing them
  •  If you grow your own microgreens or purchase them in soil, snip the healthy stems and leaves above the soil when they are seven-to-14 days old. 
  • Eat them fresh, or store them in the refrigerator.
Finding them
  • Microgreens are available at local health food stores or whole foods markets. Look near the lettuce for packages of greens that are a few inches in length and have tiny stems and leaves. Check the local farmers market as well. Microgreen growing kits can be ordered online or found in some kitchen stores. (May I suggest just getting them from here. )
  • Selections may change from time to time so keep an eye out for your favorites.
  • Once cut, they can last in the refrigerator for five-to-seven days, sometimes longer depending on the type.
*Source: here


As for me and Brud Hodgkins, we are clearly on the same page regarding organic plant based nutrition, clean food, providing opportunities for the "at risk" segment of society, environmental Awareness, etc, etc.  They at IOGP are working toward the Financial Sustainability end by spreading the word so folk's know there is a Source of Nutrition Dense Vegetables within 24 hours of Harvest to fill their Personal and/or Commercial needs.  
 The website for info and ordering:  indoororganicgardensofpoughkeepsie.com


Photo courtesy of IOGP facebook page


There you go. Awesome Micro-greens. Great Brand. I'm a fan. 

Always My Very Best,
Your Friend Chef Tess

Wednesday, May 17, 2017

Cherry Orange Biscuits


This is just a quick post to keep everyone updated on what I've been doing around here.  As many of you know, as soon as the boys hit their teen years, they really didn't want me posting much here on the blog about them.  However, it's been way too long since I updated my friends on the prides and joys of my life!  So...here's the scoop. The boys are almost finished with the school year. That's always a bitter-sweet time. Little Man graduated at age 16 after spending the last two years of school as a home-school genius. He definitely didn't get his giant brains from me, but I've been cheering him onward.  He got a full scholarship to our local community college last year and has just a few months left before he has his associates degree. He'll be 18 years old next week. That freaks me out. I'm not old enough to have a kid that old. Period. He's preparing to serve as a missionary for our church at the end of the year. That's freaking me out too.


As for Face, he starts high school in the fall. He just won first place in the science fair for building 16 steam engines from coke cans in various shapes, sizes and functions. I'm pretty sure he's going to solve the world energy crisis. I'm really, really, really looking forward to having him home for the summer!


Okay. Now you're updated on the home-front.  Now...for the biscuits. With Spring is upon us I always love a good sweet biscuit for breakfast during this time of year. It's grab-n-go for the drives to school, and I want it easy.  These are some of my favorite biscuits. They're full of sundried cherries coupled with orange zest with a hint of cardamom in a fluffy buttery biscuit. I serve them often with chicken peach salad as a quick lunch as well. I think they're pretty delicious...and simple. Enjoy. 

Chef Tess Cherry Orange Biscuits
yield 8 large or 16 small

Dry ingredients:
1 1/2 cups all purpose flour
1/2 cup whole wheat flour
1/2 cup butter or organic vegetable shortening
1/2 tsp salt
5 Tbsp sugar 
5 teaspoons baking powder
1/2 tsp ground cardamom
1 Tbsp orange zest
1/2 cup dried cherries, chopped

Wet ingredients:
1 cup milk or buttermilk

Directions:

  • Preheat your oven to 425 degrees. 
  • In a half-gallon sized bowl, combine the shortening or butter with the dry ingredients. Mix until the shortening has been cut into tiny pieces, the size of a pea.
  • Add milk or buttermilk them to the flour/shortening mixture.  Mix very gingerly until a light dough is formed. 
  • Knead the dough 4-5 times, then roll out on an floured counter top 1 inch thick.
  • Cut into biscuits.
  • Place on ungreased baking sheet and bake 15-20 minutes.
There you go darlings. Finish up the school year with glory!

Always My Very Best,
Your Friend Chef Tess


Saturday, May 6, 2017

Summer Apple Beet Salad with Peach Balsamic Dressing

 This week I've had an influx of red and golden beets from local farmer friends of mine Eric and Christina Amadio at Amadio Ranch in Laveen, Arizona. These beauties are flipping perfect, and organically grown. Plus, they come from some good hard-working people that I just love! If you've never tried golden beets, they are a bit milder in flavor than red beets and they are gorgeous! I love them.  

This is a light and refreshing salad that really is brilliant in color and is extremely simple to make. The addition of apples gives the salad a sweet-tart crunch balanced with the peach balsamic dressing. I'm picky. I'm specific about the brand on of balsamic that I use because the flavor is deep and complex with natural sweetness. 


Summer Apple Beet Salad with Peach Balsamic Dressing

Ingredients:
4 large beets, about 1 lb. Peel and dice.  
1 crisp tart Fuji or Pink Lady Apple, diced
1 white sweet onion, sliced thin

Dressing:
1/4 cup agave nectar
1/2 cup high quality Extra Virgin Olive Oil
1 tsp dry dill
salt and pepper to taste

Directions: 
Cook the beets by placing them in a 1 quart pot on the stove. Cover and steam 15-20 minutes over medium heat until tender. Cool.

In a large bowl combine the beets and chopped fresh apple with the dressing ingredients.  The apples won't get brown because they take on the color of the beets. 
I love how colorful it is!

* If you do not have peach infused white balsamic vinegar, you can use 1/4 cup white balsamic+1/4 cup peach puree.

There you go. It's vegan, clean, and divine!
A very simple salad for all the Spring and Summer adventures ahead.

Also...if you're in Phoenix, check out these awesome local farmers Christina and Eric Amadio and their mobile farmer's market peach truck...

Amadio Ranch Peach Truck and  Amadio Ranch Farm Store. You will not be disappointed. 


Oh...and their pie...is to die for. To. Die. For! We've purchased them twice on separate occasions. The strawberry rhubarb and the blueberry. I'm in love. Clean flavors, with just a hint of spice so that the natural organic fruit flavor comes through. They're killing it over there in Laveen. Killing it!


Always My Very Best,
Your Friend Chef Tess

Thursday, May 4, 2017

2 Ingredient Dinner?! Easy Ravioli Eggs


When I was growing up, Ravioli Eggs were a staple. I now call them Rav-i-oh-leeee-oh-lee eggs. Not sure why that nickname has stuck but I like it. I think the words "quick and easy" had a lot to do with their popularity around my house as a child. Not only did they taste pretty freaky awesome, but they where also a comfort food. We used plain tomato sauce (don't ask me why...). Now as an adult, I use marinara or spaghetti sauce depending on what I want. The good thing is they are low fat, low carbohydrate, loaded with flavor, and easy. Did I mention easy?! They sport a whopping 2 ingredient. I now need to go get more eggs. My kids want more of these bad boys and I only made 6. Little Man says these are now and forever his favorite breakfast food. FOREVER. He totally gulped it down. Three gulp to be exact. Grin. I couldn't be more pleased if I tried.

Ravioli Eggs
2 cups spaghetti sauce
6-8 eggs
Italian seasoning (optional)
1/4 cup Parmesan cheese (optional)

In a heavy 10 inch skillet with a lid, pour tomato sauce.
Turn on heat to medium and slowly crack the eggs into the sauce as you would for poached eggs.
Sprinkle the top with Italian seasoning and Parmesan cheese. Cover and reduce heat to low for 10-12 minutes until cooked through... yolks cooked silly.
Serve warm with crusty Italian bread for breakfast, lunch or dinner.

There you go!

Always My Very Best,
Your Friend Chef Tess


Wednesday, May 3, 2017

2 Chicken Dinners and Easy Homemade Stuffing (Full Video)


Cooking like a Chef-Boss has never been so easy! This is 2 chicken dinners, homemade stove-cook stuffing and the secrets to freezer-friendly potatoes all in one episode. That’s right! Today I'm back with incredibly delicious homemade convenience meals that will save you time, money and energy. Strap on your oven mitts and let’s get rockin’!


I am frequently asked how I make so many freezer meals so quickly. Here is the big secret. Sit down, it may be too much AWESOMENESS at once... It's called Dove tailing. You see it a lot in restaurants. One kind of meat 12 different sauces. This is basically how a lot of them do it. I think it's quite remarkable. I'm only using 2 sauces here today, but you will get the main idea. Don't worry, I will add a lot of sauce recipes along the way. This is the start.

First...I season and bake 5 lb of Chicken. Salt, Pepper, Garlic...you can use any "all purpose seasoning" out there. 5 lbs of legs and thighs is about $4 at my local Wal-mart. Gotta love that. It will make us 4 dinners. My kids eat a leg each, I eat a thigh, and my husband has all the side dishes because he thinks any cooked meat is just nasty. Ace is out of town this week. I am cooking FISH and CHICKEN and all kinds of animal stuff. Hint: side dishes .

Chicken Legs and Thighs
4-5 lbs leg and thigh meat (about 12 thighs)
2 T all purpose seasoning blend
Place legs and thighs on a large cookie sheet and season generously with seasoning blend. Bake at 350 degrees for 30-40 minutes (until juices run clear when pricked with a fork or temperature reads 170 degrees when inserted with a meat thermometer). Divide meat between three plates, 4 thighs each and season with three different sauces...today I did two.

Mustard Glaze: 
2T whole grain mustard
2T molasses. Mix and wipe all over the chicken....

Put in a freezer bag clearly labeled. Put in the fridge immediately. Once cooled transfer to the freezer. (I do this cool, then freeze thing so that I don't have a lot of medium temperature meat sitting in my freezer making germs grow...the quicker the meat gets cold, the less chance my family has of getting a food born illness...which is good.)


Pesto sauce: 
3T prepared Pesto sauce. I also added 2T chopped Italian flat leaf parsley
and 1T fresh rosemary leaves....


Put Pesto Chicken in a freezer bag and label clearly. Transfer to the fridge immediately and then once cool, to the freezer.

Now I have 2 of each of these dinners in my freezer. I will be doing a lot more of these so don't feel like you are being left out of any secrets.
Oh. To reheat the chicken, DEFROST and then heat in the microwave 5-7 minutes on a microwave safe dish, or heat in the oven (covered casserole) 350 degrees 20-25 minutes until internal temperature is over 150. Simple stuff.

There you go darlings!


Always My Very Best,
Your Friend Chef Tess