Wednesday, September 29, 2010

Red Corn, Sweet Potato and Roasted Green Chile Skillet

Arizona stinks for beautiful fall leaves...at least here in the valley of the sun. My sweet little sister, aka Auntie Em, asked if I could come visit her in Utah and we could go on a long walk together like we used to do. The "crazy lady" walks are some of my fondest memories. I miss them. I miss her. She has long-time been called my "sunshine twin". You know what I miss most about Fall? I miss the leaves crunching in futile resistance under my size 10 loafers and the smell of musty piles of bright crimson and amber shaded water stained masterpieces of God. I miss the chill in the air and seeing my breath come out in fog. I can almost smell the sweet cornbread and pinto beans with garden grown corn. I can smell the heavy spice of mom's pumpkin muffins...and I'm longing for that unlike anything I have in ages. Why does life take us from people we love? I ask this often. I wonder why I live so far away from my family. Then I look at my sweet little whipper-snapper kiddos and I remind myself that my whole world is here.

Whoa. It almost got heavy here. What the heck?! We're all about happy memories and creating good things right in front of us. Today, we're making Fall...right here in the heat of Arizona. Starting with this gorgeous red corn I found at a local farmer's market. Why yes, I do support local farmers. Thank you very much. If you don't have red corn, use yellow. This however, was too good to pass up. Look at it! It's a water painted masterpiece of luscious red and white. I think God has been really busy.


I love fast easy dinners. Who doesn't? Middle of the week I try to share something fast to throw together for the family that will still satisfy. We used the red corn and some sweet potatoes we grew in our garden! Yes! We finally had a bit of a harvest on the sweet potato planting. That was really cool.
Red Corn, Sweet Potato and Chicken with Roasted Green Chile Skillet Meal
3 ears fresh sweet corn, cut off the cob
1 yellow onion, chopped
1/2 cup chopped roasted mild green chiles
1 cup fresh organic sweet potatoes, chopped ( I know! It's freaking cool we grew ours!)
2 chicken breasts, boneless, skinless chopped
1 clove garlic
1 bunch green onions
Fajita seasoning (to taste)
1 can (15 oz) stewed Mexican Style tomatoes or 1 home canned pint of stewed tomatoes

Saute the onions and corn in 1T hot oil for 5-6 minutes until well cooked and slightly caramelized. Add green chiles chicken and garlic. Saute one or two minutes more. Look at how much this looks like Fall!

Sweet potatoes are so cool aren't they? Here's my itty bitty sweet potato of glory laud and honor. I seriously did the happy-happy-joy-joy dance when I pulled this little sweetie out of the ground. It was *that* awesome to me. My very first sweet potatoes are now chopped into lovely little cubes and looking so hot. Oooo baby!
Add the sweet potatoes, tomatoes, green onions and seasoning. Simmer 10-12 minutes more until chicken is cooked through and potatoes are tender.


Bask in the glow of Fall.


Smother it in cheese if you must.

There you go.

Tuesday, September 28, 2010

Using Freeze Dried Fruit to Make Cooked Jam and Freezer Jam


Now seeing that my teaching next week be basics on homemade jam and canning safety, I had to do some experimentation. You may ask, "Can luscious homemade jam really be as simple as adding water and a few basic ingredients...and yet be so far above most people's grasp?" I wonder that exact question. Sometimes I wonder if I'm just too "simple silly". I hope I am. I hope that when folks read my words of wisdom and sound understanding that they will feel empowered to make wonderful things. Now...that being said I don't know how to say this...but this raspberry jam was made out of a little honey, some freeze dried raspberries and some pectin. Why freeze dried? Well...just for the danggum-fun-of-it-all. Honey...because I found this yumm-a-licious honey made from my native Sonoran Desert Blossoms...and I was a happy girl.

For argument's sake, let's just say that perhaps raspberries are out of season and I have a can of freeze dried fruit just laying around my house. If I don't have to spend money...even on a bag of frozen berries...I won't. I'm a tight wad. There. I said it. I like freeze dried fruit for making muffin mixes and cake mixes.
They look really crazy freeze dried...but the only ingredient in the can is raspberries!

Chef Tess Raspberry honey jam
4 cups freeze dried raspberries (or frozen work)
1 1/2 cup honey ( I love the dessert blossom honey)
2 cup water (only add water if using freeze dried berries)
1/2 cup UltraGel or 1 box (1.59 oz) low sugar pectin
Combine all ingredients in a pot for cooked jam except the UltraGel. This hydrates the berries and they look remarkably like what they are...real berries.

Bring to a boil and cook 5 minutes. Whisk in the ultra gel or pectin. Return to a boil and cook a minute more.

Process in sterile half pint jars in a boiling water bath canner for 10 minutes at sea level.


Freezer jam is even easier. Simply add the honey, water and fruit together. You can also use agave nectar in place of the honey if you need lower glycemic or vegan sources. Use freezer pectin instead of low sugar pectin. Ultra gel works in both applications (cooked or freezer jam).

Once the berries have absorbed the water, add the pectin or ultra gel. Stir a minute or two. Freezer pectin will take about 10-20 minutes to gel. Ultra gel will set almost instantly. Transfer to freezer safe containers. Keeps good up to a year in freezer safe containers.
There you go. Fast easy jam even with crazy dried fruit. Who knew?!

Always My Very Best,
Your Friend Chef Tess

Monday, September 27, 2010

Solar Cooking With Face's Class On Valley Dish

Solar Cooking Education and Media Coverage

I believe the greatest untapped source of natural energy, is human potential. That is why I teach.


Today I am not going to feature my usual Mix Monday (full of scratch convenience mixes of one sort or another)...due to a very full schedule with an upcoming segment. I will be at a local school teaching the science of solar cooking to a group of anxious second graders later today. It is amazing to me how something that has become second nature to us, can be something so exciting to someone who has never seen solar cooking up close. That's what I like to do, get kids and adults thinking outside their frame of reference. If I can spark some genius in a child, it may just bring about another innovative design for solar cookers that will bless literally thousands of underprivileged poverty stricken people around the world. In fact, those who once had to walk several miles for fire wood and cook over an open flame are now being introduced to a safe clean method of cooking. I've been told that there are over 100 thousand solar cookers in use throughout China and India and reportedly they are used in almost every county in the world. Why not solar? It's really getting to be quite a revolution worldwide. They are using them to not only cook food, but sterilize water and surgical tools. Really remarkable isn't it?

September has been National Preparedness Month. Why not make a little cardboard box solar cooker and keep it around for any random emergency. You never know what is ahead...and it's always nice to be prepare! Want to learn? You can find ideas here: Plans for Solar Cookers
Why not give it a shot?!

That being said, this Friday at 3:30 on NBC 12 Phoenix, I'll be a featured chef on Valley Dish! Hopefully you'll join me for a delicious and easy Fall dish.

Sunday, September 26, 2010

Perfect Blackberries (Bread of Life Section)


Sunday is the day I share a little of my soul, enjoy.


I love blackberries. I do. It's a sick obsession that just this year ended with me planting a blackberry bush. I made a friend named Lisa a couple of years ago who happens to share this joy for blackberries. We made tarts together with a few of them and I found some that were...a little different to look at. They almost looked like they couldn't decide if they wanted to be a raspberry or a blackberry. Ironically, they were still sweet. They were still amazing. They just looked different. Today I was reminded of them when I heard these words:

"Charity is having patience with someone who has let us down; it is resisting the impulse to become offended easily. It is accepting weaknesses and shortcomings. It is accepting people as they truly are. It is looking beyond physical appearances to attributes that will not dim through time.... It is resisting the impulse to categorize others."—President Thomas S. Monson

How we look at others is a large reflection of what we are inside. If we are judging...we are not loving as much as we could. That being said, I'm so glad that people, like blackberries are usually trying to be good. I can usually find good in them somewhere. As that sweet gal Pollyanna said, "When you look for the good in man, expecting to find it, you surely will". I'm pretty sure she was quoting Abe Lincoln. You get the message just the same.

Let's spend less time picking the perfect berries...and more time making pie. There you go.

Friday, September 24, 2010

Slow Cooked BBQ Beef sandwiches with Creamy Corn Relish

Welcome to Freezer Friday! For those just joining my grand adventures in the kitchen, let me tell you that we have a freezer meal most every Friday around here. It keeps me thinking out side the box...and saves us all a lot of money. We control the ingredients. Today isn't any different. Is there anything more classic American than a good ol' Western style BBQ beef sandwich? I dare say that I even type "cow-poke" style while speaking of one of these beauties. Did anyone see that crazy movie called "West World'? Ace is a stinker for liking old random 1970's sci-fi movies...and dragging me along for the strange adventures. These stiff legged robot gun-slingers are chasing some innocent tourists all over town and shootin' up the joint. It's very gripping...Needless to say, half way through that movie I decided I needed to do other stuff...like bake. I think of that movie every time I cook this dish, though it really has nothing at all to do with that cyber-freak-fest. Ironic that I'm typing this on my cyber-blog isn't it? No comments from the peanut gallery about a cyber-freak-fest right here on my blog. I'm not having random robot eye balls pop out of my skull or anything horrid. I'm making dinner. That shouldn't be horrid. It should be magical. Like swans on a crystal lake. Why oh why would I think of cyber freaks? Rant is now complete.

At any rate, I have found this to be one of those amazing dinners that goes really far around here. We use the shredded meat for not only sandwiches, but also for pot pies and fulling for homemade hot pockets-style sandwiches.

You will need:
3 lbs chuck roast beef, cut into 1 inch cubes
1 cup ketchup (I use Homemade Ketchup)
1/2 cup prepared mustard
1 tsp liquid smoke
2T Chef Tess All Purpose Seasoning
1 onion, chopped
1 cup homemade Sweet and Hot Corn Relish (or store purchased I like Aunt Nellie's corn relish)

At service you will need :
8 fresh hamburger or Kaiser buns

1 cup homemade Sweet and Hot Corn Relish
1/4 cup mayonnaise
2T fresh chopped parsley

Directions:
In a 2 quart crock pot or solar oven pan, combine the beef, ketchup, mustard, liquid smoke, Chef Tess seasoning, onion and 1 cup corn relish. Cook on low 8-10 hours or high 4-5 hours. Solar bake 4-5 hours full sun.

Shred the meat with a fork.
For a freezer meal, remove meat from crock or solar oven, and divide between two 4 cup containers. Chill in the fridge uncovered for at least 2 hours. Seal containers and transfer to the freezer with reheating instructions.
Defrost overnight in the fridge or in a microwave safe container on half power for 10-14 minutes. Heat for 5-7 minutes on the stove or in the microwave until very hot.
To serve: Combine the corn relish with the mayonnaise and the parsley. Spoon 1/2 cup of beef mixture onto a fresh burger bun and top with two heaping tablespoons of the relish.

I serve it with the homemade Peach Bread and Butter Pickles and carrot nibbles.

There you go. Slow cooked BBQ beef. One more cyber-recipe to add to your collection from Chef Tess' "West World". Enjoy.

Thursday, September 23, 2010

Chocolate Buttermilk cupcakes with Lightly Salted Caramel Peanut Butter Nougat frosting


I shouldn't ever blog about junk. It makes me feel...evil. However, this chocolate buttermilk cupcake-fest I had needs to be documented. Like a torture session with a terrorist psycho foodie, it needs to be shared with the world at large. Be impressed I didn't even eat one. I gave them away to a bunch of ladies who came to my house for a church women's Relief Society committee meeting. "I've had a lot of churchie-opportunities lately". (Name that movie) Church ladies...isn't that speeeecial?
I've previously shared the recipe for the Chocolate Toffee Buttermilk Cake Mix. I used one mix and divided the prepared batter into 20 cupcakes. Bake 18-21 minutes at 350 degrees.
Now, while the cupcakes were baking, I decided they needed something over the top. Some kind of peanut-butter confection prepared in the classic technique...but faster, since I was looking at making dinner for the family as well as scrumptious little nibblets for the ladies. I decided on using equal portions (by weight) of 8 oz peanut butter and 8 oz Peter's caramel.
Put the peanut butter in a double boiler, or stainless steel bowl over a pan of boiling water.

Melt it until smooth. Add the caramel and stir until the caramel is incorporated. I also added 1 tsp vanilla and 1 tsp salt. I really wanted to accentuate that salty-sweet combination.
Remove from the heat. Stir in 1-2T of warm water.
Remove cupcakes from the oven and allow to cool. Once peanut butter nougat has cooled a little, spread it on the cupcakes.


I had some Guitard French Vanilla Semi Sweet chocolate, so I cut off several shards off the Devil's handy-work (2010 Space Odyssey monolith size brick)...and arranged it on top.

Little Man heated his slightly when the ladies left. If it it didn't look like this...would you be surprised?

There you go. Some delightfully evil nibbles to add to your hips. I mean your lips. I mean your patootie. I mean your party. Oh dang. You know what I mean.


Always My Very Best,
Your friend Chef Tess


Monday, September 20, 2010

Homemade Instant Pudding Mix


Welcome to yet another mix making Monday. Today I wanted to share a little information about using modified food starch for mix making. Thanks once again to Troy and Tracey at Preparing Wisely for sharing this cool stuff with me. This is called Ultra Gel. It gets thick in hot or cold liquid so it works amazingly well in instant pudding mix. I love that I don't have to cook the pudding, even though I could if I wanted to do so. Sometimes I love getting that cooked pudding skin...but most of the time when I'm making pudding I want it fast. My Father in law Mr. Putt-Putt is eighty something...and he loves his pudding cups. This saves us money. Fair enough right?

It can be used to replace the starch in any of the mixes I have on my blog including:
Cream Soup Mix at a fraction of the cost
Homemade cream of condensed soup replacement
Gravy Mix made easy

Nutritionally it's pretty low calorie and carbohydrate.
It's gluten free but not corn free. It can also be used in sugar free jam. Really!

It holds well and, unlike regular corn starch, it keeps it's thickening power after freezing.

For instant pudding I wanted something with about four ingredients, instead of the list found on a box of store purchased stuff. I try to stay as natural as possible. You know how I roll right? Well this is what we have come up with.
Instant pudding mix:
1/2 cup sugar or sugar free "spoon-able" alternative
1/3 cup ultra gel
1/8 tsp salt
1/8 tsp LorAnn flavored oil of your choice (*butterscotch, vanilla, butter cream...you name it.)

I happen to use vanilla infused sugar on a regular basis for this. I keep vanilla beans in quart jars full of sugar. After about 3 weeks, the sugar has a very nice vanilla flavor. Yes...that is a vanilla bean sticking out of the top of the sugar...not a worm. Zoinks. That would be nasty.
To make into pudding:
2 cups cold milk or soy milk

Whisk the pudding mix into the milk and chill 10 minutes. Serve cold.

It will be about this thick at first. The longer it sits the better the set.


Other flavors:
*Pistachio pudding, add 1/4 cup fine chopped pistachio and 1/8 tsp pistachio flavor
* chocolate pudding, add 1/4 cup cocoa to the mix
*caramel pudding, use brown sugar instead of white sugar
*coconut cream pudding, use coconut milk instead of milk
*lemon pudding, use 1/2 tsp lemon zest and juice of 1/2 a lemon in finished product.
There you go.

Sunday, September 19, 2010

The Sweetest Things Yet (Bread of Life Section)

Sunday is the day I share a little bit of my soul. Enjoy. (This post is going up on the blog a little late this week...but for good reason.)

I remember when I started writing this blog about a zillion days ago. Okay, two years ago there about. My dear friend Tara had pulled me aside one day and told me she sincerely thought I should write a blog. I struggled with what to share and not share. I struggled with being too real or too open. I struggled with sharing my testimony of Christ, for I know it can be a touchy subject to some people. I struggle no longer. If I only ever shared my love for Him, it would be enough. It isn't though. It isn't enough to just profess I care for him, though I do. It isn't enough to try to be like him and do what he did, though I do. It isn't enough to try to give Him my heart...I must do it. I must give the Lord everything. I must be willing to give away all my worldly possessions to know him. What does it profit a man if he gain the whole world and loses his soul?

I was reminded of that recently by a dear reader who shared with me her amazing story of conversion to the Gospel of Jesus Christ and her new Faith in the Redeemer. DB...you know who you are. You left your home and belongings. You have begun a journey...that started by driving 2300 miles, 8 months pregnant on a wing and a prayer...frantically trying to learn more about the Church of Jesus Christ of Latter-Day-Saints. It is the church I have loved and adored since I joined it. Have I ever mentioned that before? I'm a Mormon. I love being one. It answered many questions and opened countless doors for me. The one that said that God still spoke to prophets and had apostles. The church in the latter-days spoken of by ancient prophets as the "stone cut without hands". I'm so happy you reached your new found family in Christ. You and your family have been baptized. You are now my sister. I will love you forever. Until we meet at Jesus feet...may he hold you in the hollow of His hands. Your son Henry will grow in a family blessed by a father who holds the Priesthood of God. I grew up in such a home, with a father who loved the Lord and tried to be a true disciple. A mother of faith can do so much. I know that the Lord truly lives and loves you. He knows who you are. Never doubt that great things come to those who believe. I know God hears and answers prayers...and I'm so glad he answered yours.

There you go.

Friday, September 17, 2010

The Great Divan Divide...6 amazing casseroles out of one recipe

Welcome to yet another Freezer Meal Friday. I'm Chef Stephanie Petersen for those just joining us. Every Friday I host a freezer meal idea. This week, we have six. Yes. Six. I couldn't figure out how to break it up without losing the amazing effect of what you can accomplish in a short time. A house divided against itself cannot stand. That cannot be said about casserole. If you served the same flavorless casserole every week to your family, week in and week out, would they eventually get so bored they would start punting hot chunks of molten sauce drenched casserole across the dining room table in protest? Not today. I joined my darling friend Lisa for an Evil Think Tank freezer meal session to see if a Chicken Divan recipe could be made into several different varieties of casserole. The recipe we divided was actually so bland that it may be one of the best classic examples of plain American food I've ever seen. Right up there with milk toast. Granny eats milk toast. Yeah, that's all I have to say about that. Lisa opened up her kitchen. She had the main ingredients for the original recipe and we raided the fridge and pantry to create the rest. That is what we do at an Evil Think Tank...we use what we have and we create.

Needless to say, this ensuing brilliance was a welcome change. Six casseroles...all very different and all very flavorful. Not bad for a couple hours in the kitchen. Am I right?

Southwestern chipotle and black bean
chicken primavera and pesto
French chicken bacon mushroom and Swiss
spicy peanut black-bean and chicken
Polynesian curry chicken
buffalo chicken bacon and Swiss


We used microwave safe containers since Lisa wanted to just be able to pop them in her micro to cook them. It is fine to use freezer safe casserole pans if you want to bake the casseroles in the oven as well. Might I also suggest if you are making the smaller size casseroles for a family of 2 adults with one or two small children to use loaf pans. Those work perfectly.
So...let the wild rumpus start.

This makes 6 casseroles for a family of 4 or 12 casseroles for a family of 2 (or families with 2 adult and one or two small children)

We started with the fresh ingredients called for in the recipe:

You will need:

10 lb skinless boneless chicken breast
Salt, pepper, granulated onion and granulated garlic
4 10 -oz packages frozen broccoli
8 oz mixed frozen Italian veggies
8 oz bell pepper, frozen
1/2 cup all purpose flour
1/2 cup butter or oil
4 cups chicken stock
4 cups milk


Lisa added these items from her fridge:
4 cups shredded Monterrey Jack (divided into 2 cup portions)
1 lb of cooked bacon (divided into 1/2 lb portions)
6 oz cooked sausage (southwest seasoned)
2 oz basil pesto
8 oz sliced mushrooms, sauteed and seasoned with salt and pepper (divided in 2 portions)


Pantry items on hand:
2T peanut butter
2T soy sauce
1/2 jar Frank's hot sauce
15 ounces diced tomatoes, drained (we used Fresh & Easy marinated tomatoes)
15 oz can of black beans
1/4 cup raisins
1 small can pineapple tidbits, drained
1 small can roasted chipotle chiles (green chiles will work)

Pantry Seasonings:
curry powder, ground ginger, ground mustard, ground white pepper, fajita seasoning, Italian seasoning, celery seed, dry lemon zest, black pepper, 2 bay leaves, Chef Tess All Purpose Seasoning, ground rosemary,
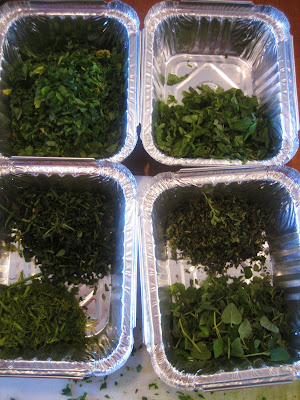

Fresh herbs...
I brought organic herbs from my garden. Thyme, basil, oregano, dill, parsley and tarragon.
If your family won't eat fresh green stuff like this, by all means use dry...but use something.


Chop the herbs separately. I placed them in separate containers to keep a little order.


Lisa boiled the chicken breast until they where cooked through and no longer pink. About 35 minutes on high, covered in water or chicken stock.

Chop the chicken into chunks and season well with salt, pepper, granulated garlic and onion or Chef Tess All Purpose Seasoning.


Line up your casserole dishes. Six or twelve depending on the size of your family. Lisa decided we needed to label each casseroles so we didn't get confused about what went where.
Southwestern chipotle and black bean,
Chicken Primavera and pesto,
French chicken bacon mushroom and Swiss,
Spicy peanut black-bean and chicken,
Polynesian curry chicken,
Buffalo chicken bacon and Swiss
Divide the frozen broccoli between the casserole dishes. In one of the dishes add the mixed Italian veggies and bell peppers (see top middle?). Divide the sauteed mushroom in half and add them to two of the plain broccoli pans as well.

Take seasoned chicken chunks...


Divide the chicken between the six casseroles. The frozen veggies help keep that chicken cool while you make the sauce and add your flavor ingredients. You want them cold. I promise.

We made two different base sauces. One based on chicken stock and one based on milk. I prefer to make my own so I can control the ingredients, but also so I can control the cost. It's much cheaper than buying prepared gravy jars. However, if you do buy the jars, make sure it is low sodium.


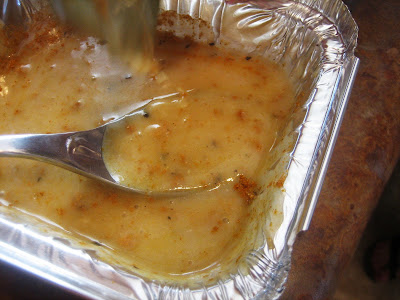
Let's make the sauce. You will need two half gallon sauce pans. In the bottom of each pan melt 1/4 cup butter over medium heat. When melted add 1/4 cup flour to each pan and whisk well. It will be the consistency of loose wet sand.

Cook this butter and flour mixture, called a roux, for 3-5 minutes stirring constantly. This cooks some of the start out of the flour and make you sauce have a smooth velvet texture. Pour 4 cups milk into one pan and 4 cups stock into the other. Stir constantly to avoid lump. Lisa is good at gravy mixing. Isn't she cute? Smoooches Lisa!
Each sauce pot gets one bay leaf, 1tsp granulated garlic, onion and 1/2 tsp pepper. I also add a hint...just a breath...of ground clove to the sauces. Not too much or it will taste like Christmas pudding sauce instead of a nice subtle hint of happiness.
Simmer on low heat stirring every few minutes so the sauce doesn't burn. It needs to cook 15-20 minutes. This gives you time to add all the flavor agents to the casserole pans.
When sauce is cooked, divide each sauce into 3 containers. This will give you 3 milk sauces and 3 chicken sauces 1 1/3 cup each.

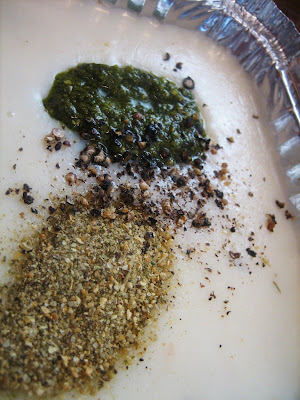
Curry Polynesian Chicken and Pineapple
Add 1 tsp curry powder and 1/2 tsp black pepper to one of the chicken sauces. Stir well.
Oh...and if you find that dang bay leaf, take it out. If you don't the sauce will be overpowered by bay.


To one of the plain broccoli chicken casseroles, add raisins and pineapple. Top with curry sauce and ease the sauce into the casserole.


Spicy Oriental chicken with black beans and peanut sauce
To one of the broccoli, chicken and mushroom casseroles, add half the can of black beans.
To one of the chicken sauces add 2T peanut butter, 2T soy sauce, 1 tsp granulated garlic, 1/2 tsp ground ginger, and 2-3 tsp hot sauce. Mix well.

Add to the chicken and black bean casserole.

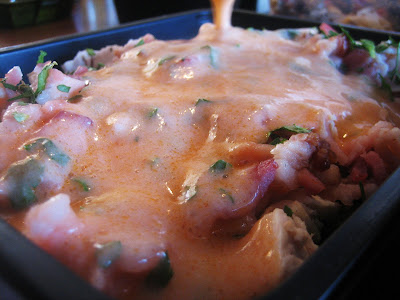
Southwestern Chipotle chicken, sausage and black bean:


To one of the plain chicken and broccoli casseroles, add cooked sausage and the other half of the black beans. Top with half the can of diced tomatoes (we used marinated tomatoes). Add a tablespoon of fresh oregano, sprinkled over the casserole.

To the last chicken sauce, add 2-3 Tablespoons chopped chipotles or green chiles and 1 tsp fajita or taco seasoning.
Pour over the casserole.
Savory Buffalo Chicken and Bacon Casserole.
Add 1/2 lb of cooked bacon to one of the plain chicken and broccoli casseroles. Sprinkle with 2T fresh chopped parsley if desired.
For the sauce, use one of the milk sauces.
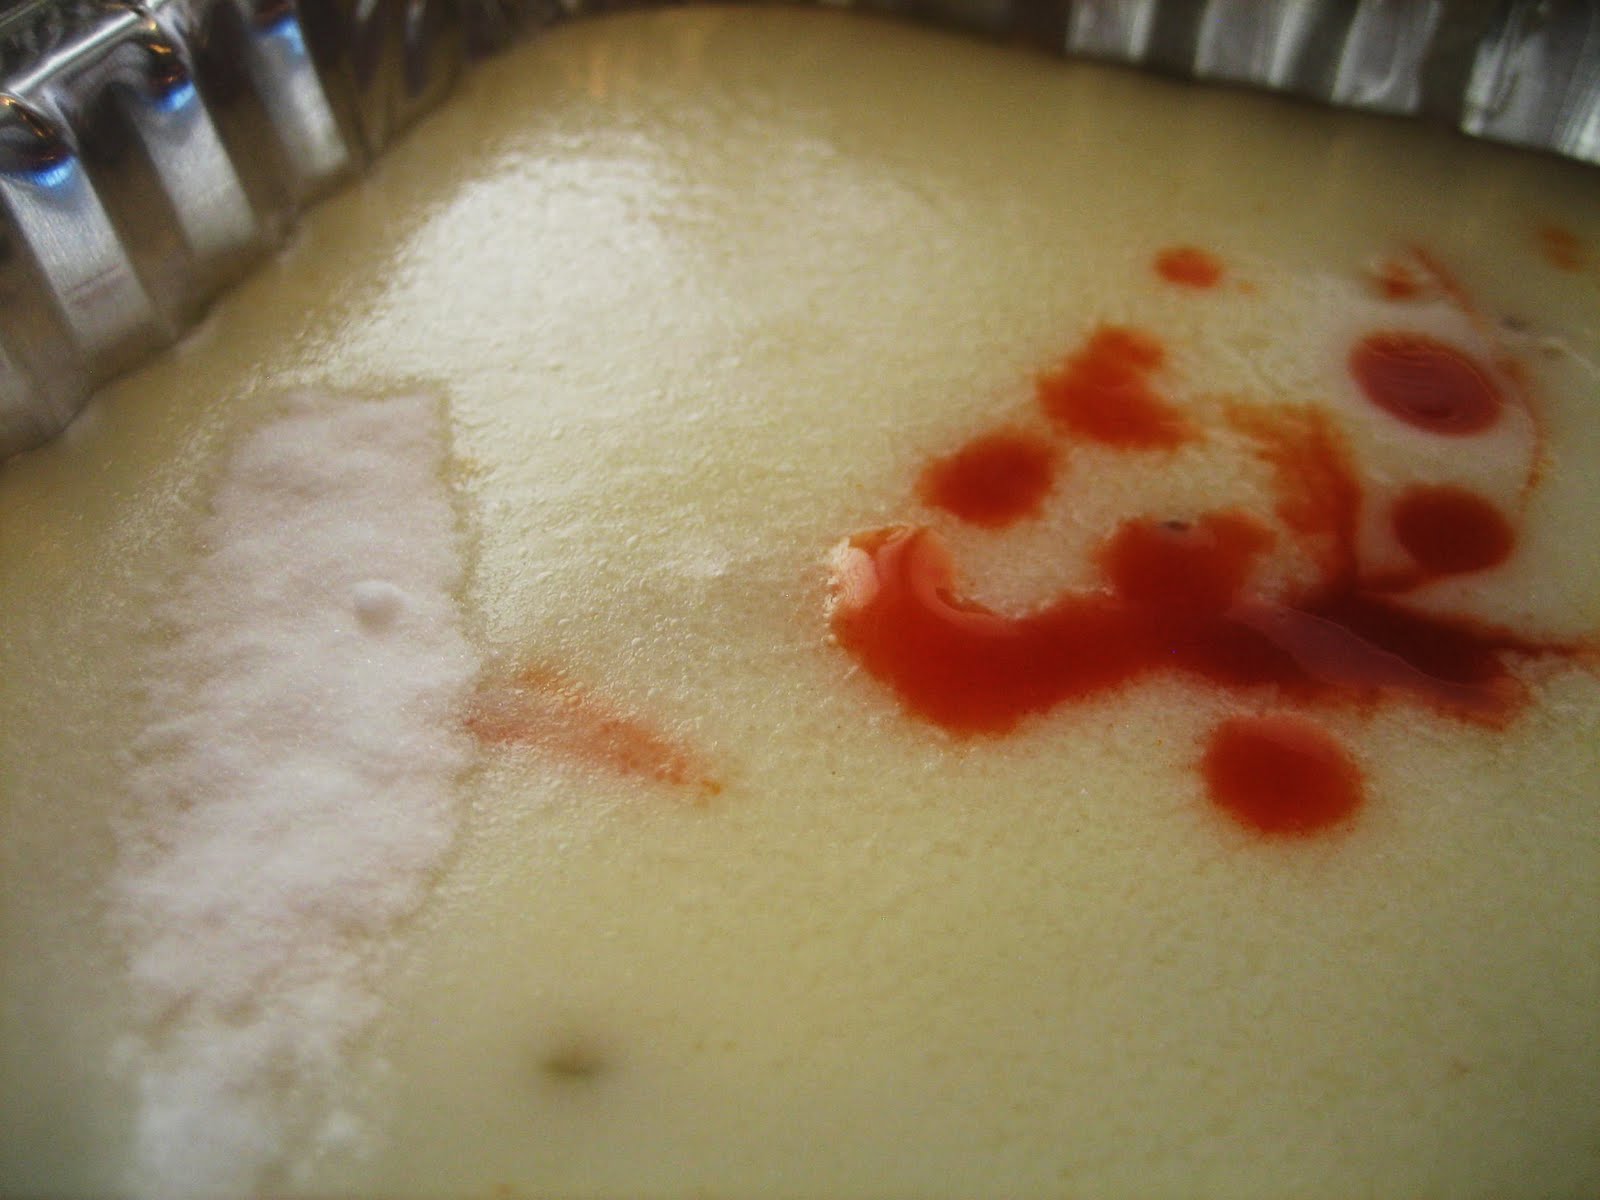
Because we used 3T of hot sauce that contains vinegar in it, we had to do something to keep the vinegar from curdling the milk sauce.

1/8 tsp baking soda will neutralize the acid without changing the flavor of the sauce.


We also wanted the sauce to taste like buffalo with ranch dressing and celery so we added 1/4 tsp celery seed, 1 tsp onion granules, 1 tsp garlic granules and 1T chopped parsley.


The acid will react to the soda a bit by bubbling. Don't worry, it won't overflow like that science project valcano you made in third grade.


Pour the sauce over the bacon and chicken casserole. Top with half the grated Monterey Jack cheese.


Chicken Primavera with Pesto
To the chicken casserole with the broccoli and Italian veggies add the remaining half of the diced tomatoes. Sprinkle with the following fresh herbs (if you use dry herbs cut measures in half) 1T basil, 1T oregano, 1T parsley
Add 2-3T fresh basil pesto and 1 tsp fresh cracked pepper and 1 tsp chef tess Romantic Italian seasoning to a milk sauce.

Combine well.
Pour over the casserole and work it into the ingredients a bit. You can top with mozzarella cheese if desired (we didn't have any on hand).

French Chicken Bacon Mushroom and Swiss
To the last casserole with mushrooms, broccoli and chicken add the second half of the cooked bacon. Sprinkle with 1T each fresh chopped French herbs: Tarragon, parsley, basil, thyme and dill (if you use the dry herbs use 1 1/2 tsp each).
For the sauce take the last portion of milk sauce and add 2tsp dry mustard and 1/2 tsp white pepper.
Combine well.


Pour over casserole and work into the ingredients a bit.

Once combined, top with the last half of the cheese.


You now have six casseroles.
All six are now ready to bag and freeze.
Some had lids that came with the containers.
The rest went in gallon size freezer bags like this:


To serve the casseroles:
Remove from the freezer and defrost in the fridge overnight (or defrost out of the bag using the defrost setting of the microwave). Microwave uncovered on high 13-15 minutes until hot.
Oven: Heat defrosted casserole in oven safe containers, covered, 375 degrees 35-40 minutes and uncover last 5 minutes.
There you go. Six to twelve freezer meals are now yours. Enjoy my friends.
END note: Auntie Em has made this blog entry into a lovely pdf. If you would like a copy, feel free to email me chef-tess@hotmail.com and I can get that to you for free! Thanks!