Friday, December 20, 2013

Nancy's Killer Divine Christmas Baked Oatmeal Delight!


Baby. It's cold outside. Even for Arizona. This morn' it was raining. You know how it is? I was laying all snuggle-bug in bed and the sound of the rain and wind on the window just made me  want to dig deep into the mattress and never leave. I started to get annoyed. I knew I had a big day of work ahead.  I almost started to nag.  Then I got a grateful heart and remembered I still had a home to live in, family nearby, and yes...the opportunity to work for one of the coolest grain  companies ever.

Confession: I still didn't burst out of bed, but I did think of Jimmy Stewart (sigh, swoon...remember he's now old enough to be my grandpa)...It's a Wonderful Life.  
"Merry Christmas Emporium!"  "Merry Christmas!"

That brings me to Nancy Beykirch.
She's been the "Zu-zu's petals" of my day.
Well...technically I've been eating the petals but still...
Okay. I shouldn't call baked oatmeal "flower petals". However, for the first time in history, I've really loved a baked oatmeal. I'd put it in my pocket and carry it around. I'd be weird...but I'd carry it around. It is literally the taste of Christmas morning love.
Everyone meet Nancy. She's one of my fellow cooking instructors, kindred spirit, and a jolly-happy soul. Nancy owned her own cooking store for 12 years and has mad-skills when it comes to baking. Total kindred spirit.  Cute. Cute. Cute! Seriously. The adorable apron should be our first clue that we're of the same water, right? 
This is where I confess my frailties. 
Confession: I have an awful weakness for pretty much anything Nancy makes.  Right when she walked into the teaching kitchen this morning, she unveiled her almond cake...warm...insane. It is made with almond flour and dense with perfect tender texture...topped with toasted crisp almonds. Dear delicate little wedge of perfection...I love you.
That recipe will be another post...
Lets talk baked oatmeal.  I've been long on a search for the best baked oatmeal recipe.  I've tried a few that were...doozies...in a bad way. I stopped looking.  
 Today, I tasted a perfection in baked oatmeal that we describe at my house as,
 "blog-worthy". 
This is it.

Nancy's Christmas Baked Oatmeal Delight

2 eggs
1/2 cup brown sugar
1/2 cup melted coconut oil
1 cup milk
2 tsp vanilla bean paste
3 cups rolled oats
2 tsp baking powder
1 tsp salt
1 1/2 tsp Chef Tess Wise Woman of the East Spice blend
1 cup fresh chopped cranberries
1/2 cup flaked coconut

Brown sugar for topping

Directions: 
In a large bowl,beat eggs and brown sugar until they are thoroughly mixed.  Add coconut oil, milk and vanilla. 


 Add the remaining ingredients (except the additional brown sugar for topping). 


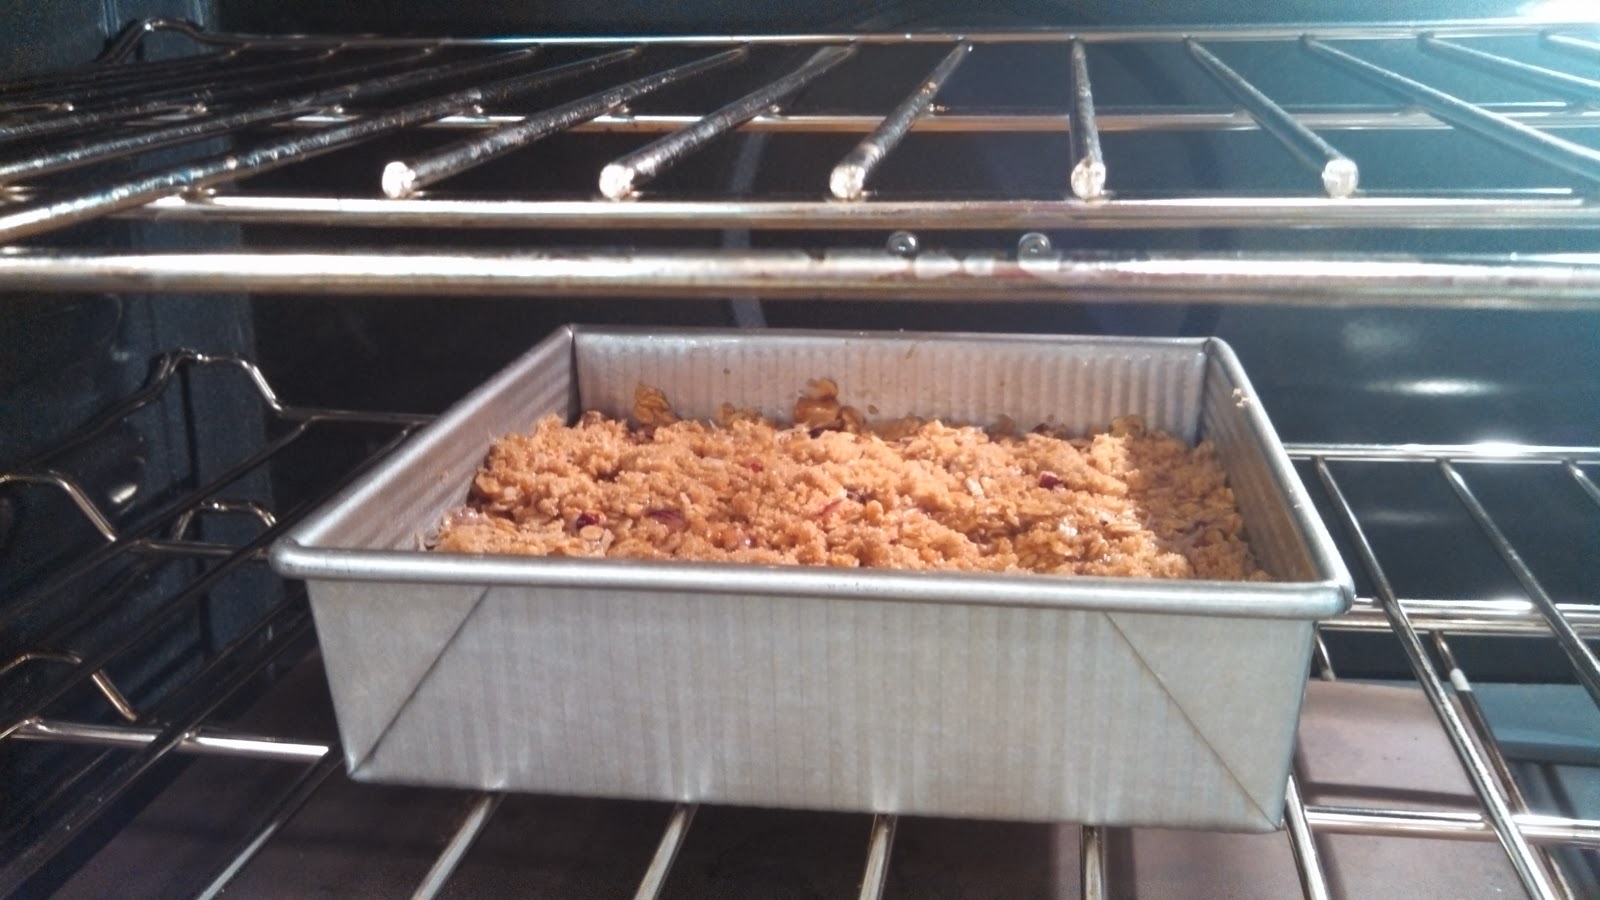
 Pour the oatmeal mixture into a greased 9 by 13 inch casserole pan.
 Sprinkle with brown sugar on top.
   Bake at 350 degrees for 20-25 minutes uncovered.
Do not over-bake.
Here's a picture of Nancy's hand scooping out some of this warm spiced delight for me...
Here's a picture of her tempting me with the perfect chewy tender texture of the oatmeal... and caramelized crunch of the brown sugar coating.
Here's a picture of me taking the whole pan and leaving her with a small dish...

The end.


I am super excited to work with Nancy and I think you'll be glad you made it down. She's adorable, knowledgeable, and just a down-right real person. I'll always hold a special place in my heart for her. 

There you go darlings. Have yourself a very Merry Christmas! I know what we're making for breakfast! Nancy...Thank you!


Always My Very Best,
Your Friend Chef Tess


Tuesday, December 17, 2013

The Week Before Christmas Goodie List...

So. Ya know how it goes right? I've been planning on doing a lot of things. In my mind.  Then today it really hit me that this is the week before Christmas and what do I have left to do. There's some serious details that need to be covered.
 
Well first of all...there's the edible ornaments.  We do these every year. It's tradition.
So. I made these today.
 
In my mind I looked like this...all peeeeerty and glamorous.
 I'm pretty sure it wasn't that elegant.
Confession...I never really did get to making the gingerbread houses this year.
 Though last year we did this one...and it is still in a glass cookie jar the size of a 5 gallon fish tank in my kitchen...so that counts as still having the goods, right? It isn't even dusty. Bonus. Year-old candy. Woop. Seriously. We're not eating it. Don't worry.
 
This week, we also usually make some kind of goodie for Christmas Eve.  I'm thinking chocolate cupcakes.
However, I think it will end up being pumpkin chocolate chip tamales from the Pumpkin Tamale Tutorial. I know a really good tamale guy if I run short on time.
 
This week, just like every week, I still will make several dozen of these for the Farmer's Market...Yes. I'm at the Central Farmer's Market in Phoenix every Saturday Morning now!


Plus some of these...for the Cinnamon Roll...with toffee and White Chocolate truffle egg-nog frosting...
 Free Class on Thursday, Dec. 19th 10am
Register NowThings are going to get a little crazy when Tess does her cinnamon rolls at this free class. Just in time for your holiday!!!


If my kids are lucky we'll make the chocolate mounds balls. I don't think I'm going to be that ambitious. We did get some killer amaaaaazing chocolate into the store and the Almond Joy Balls and Chocolate Dipping Tips are calling my name.  Evil. Evil. Evil.


Guess what? We did get to these today.
 From my class today on  Edible "Stained Glass" Gingerbread ornaments
We also did these using gingerbread circles...and a lot of candy.
 
Here's the deeeeeal. What if the list of "must do" was just shorter this year. What if the list became more of "optional as long as the kids know I love them".
 I know. That sounds pretty cliché, but this chef is working harder than ever.
  The kids are craving my time and attention...and I really am starting to realize that the "must do (to keep face)" is not as important as the "must do to kiss their faces". I never thought I'd admit that I can't do it all. However, I've been feeling my own mortality...and that's probably a good thing.
 
So there it is. What's on my list. Really?
 
1. Snuggle the kids.
2. Make cookies while snuggling the kids.
3. Make a few more ornaments and stuff for the tree with the kids and snuggle the kids.
4. Make sweet memories. Have something to look back-on when I'm old...er...
 
Somewhere in there this week there will be work and more work. However, what I do for work, is not what makes my life's work. It is those people closest to me and my Faith that will ultimately be what I become in the end. So there it is. The week before Christmas "must do".  Must...make time for Life. So sing loud my darlings. It is time.
Always My Very Best,
Your Friend Chef Tess


Monday, December 16, 2013

No-Knead Tomato and Herb Bread Mix

One of my favorite new mixes and one that has been one of my top sellers over the last few months is this tomato and herb bread mix.  The mix makes 2 loaves.  We currently sell it packaged at the Farmer's Market.  I will be updating my online store (work in progress) to sell it online as soon as possible.  I list the ingredients here, but I am not sharing the detailed recipe. I have outlined something similar to this mix Here on the blog if you want to make it yourself. 
 
 At any rate, I've had requests to post the directions on how to bake it here on the blog for those who have purchased the mix.
  Here are the details.


Chef Tess No-Knead Tomato Herb Artisan Bread Mix
Ingredients:
Alta Artisan Bread Flour, tomato powder*, yeast, Spices, Seasonings, sea salt.
 
Directions: Combine bread mix with 2 1/2 (add a little more water if it seems really dry) cups cool water until no dry mix is left and soft dough is formed. No need to knead extensively. Place dough in a  in a 2 gallon bucket with a lid or divide between two one gallon plastic bags. Place in the fridge and allow rising overnight (at least 8 hours and up to 7 days).
 
 Remove bucket from the fridge.  
 
This mix will yield 2 loaves of bread. 
  •  Form into 2  balls  and roll each lightly in cornmeal or oats.
  • Place  each ball in a well greased  gallon sized Dutch oven with a lid or a gallon sized covered oven-proof stock-pot/ pan.
  •   Allow to raise until triple in size, about 2 hours (or 1 ½ hours in a lightly warmed oven no hotter than 110°). Preheat convection oven to 425° (regular oven 450°).
  •  Lightly slash the tops of the loaves with a sharp serrated knife. Sprinkle with salt if desired. Bake at 425° for 25 30 minutes.

Yields 2 loaves artisan bread. 

There you go darlings! Always My  Very Best,
Your Friend Chef Tess


Monday, November 18, 2013

Easy 3 Ingredient Holiday Artisan No-Knead Bread Mix


Happy Mix-Monday my darlings!  

Today I just wanted to share a quick and amazing bread mix that we've been working on here in the test kitchen that has been a great "grab-n-bake" mix.  It is "no-brainer-bread" at its finest.  It is my basic 4 Ingredient No-Knead Bread made simple  fast.  Follow the baking instructions using a pot to bake it in, and you'll have great success in having a very crunchy, chewy, amazing crust! The secret is the use of a remarkable Artisan Bread Flour . The one I use has the added benefit of malted barley flour and ascorbic acid, which help with the yeast action and the dough development.  This year, I plan on giving this bread mix away with gallon sized pots and little cute bottles of pink kosher sea salt (to sprinkle on top of the loaf just before baking).  The yeast is included in the mix, which means it is only shelf-stable about a year, but what a great year it will be!

Have fun!

Chef Tess No-Knead Artisan Bread Mix


Ingredients:
3 ½ cups Honeyville Alta Artisan Bread Flour 
1 1/2 tsp. salt
¼ tsp. SAF Premium instant yeast (or ½ tsp. active dry yeast)


Directions: Combine the ingredients with 1 ¼ cup water  in a 1 gallon food-grade bucket or a large 1 gallon bowl with a lid, just until everything is mixed and smooth. It takes about 20-30 turns by hand to get it all combined. Cover with a lid and keep it covered 10-12 hours at room temperature until you're ready to your bake bread. Form into a tight ball of dough. Place  ball in a well greased  gallon sized Dutch oven with a lid or a gallon sized covered oven-proof stock-pot/ pan.  Allow to raise until triple in size, about 2 hours (or 1 ½ hours in a lightly warmed oven no hotter than 110°). Preheat convection oven to 425° (regular oven 450°).. Lightly slash the tops of the loaves with a sharp serrated knife. Sprinkle with salt if desired. Bake at 425° for 25 30 minutes.


No Knead Artisan Bread Mix Label:
Directions: Combine the ingredients with 1 ¼ cup water  in a 1 gallon food-grade bucket or a large 1 gallon bowl with a lid, just until everything is mixed and smooth. It takes about 20-30 turns by hand to get it all combined. Cover with a lid and keep it covered 10-12 hours at room temperature until you're ready to your bake bread. Form into a tight ball of dough. . Place  ball in a well greased  gallon sized Dutch oven with a lid or a gallon sized covered oven-proof stock-pot/ pan.  Allow to raise until triple in size, about 2 hours (or 1 ½ hours in a lightly warmed oven no hotter than 110°). Preheat convection oven to 425° (regular oven 450°).. Lightly slash the tops of the loaves with a sharp serrated knife. Sprinkle with salt if desired. Bake at 425° for 25-30 minutes. www.cheftessbakeresse.com


If you have any questions, 
visit the post on my   4 Ingredient No-Knead Bread! Xoxo!!

Another way to do a bread kit is to just give the recipe and smaller packages of the ingredients. No matter how folks get their bread supplies, they'll be excited!


Always My Very Best,
Your Friend Chef Tess


Tuesday, November 12, 2013

Bakeresse Dozen Meals in a Jar for November


My new cookbook The Meals in a Jar Handbook: Gourmet Food Storage Made Easy is now on Amazon!! In honor of its release, I thought I'd kick off my new program here on my website.  Every Month, I'll be adding something new to my blog. We're calling it the Bakeresse Dozen.

All of the freeze-dried products are available at my freeze-dried foods website...as of November 2017. 

I don't have a staff or a personal assistant.  So this is what I'm going to do with the time I do have. I get e-mails by the truck-load and messages on Facebook all the time to ask me to break my 52 method meals down into more usable portions with shopping lists for each. So each month I'll be adding these here. The cost will be right around 10$ for a full-sized family meal, not including the jars and oxygen absorbers.  If you have a smaller family, these can be made by cutting the recipe in half and using pint-sized jars.  The quart-sized meal will make 6 1 1/2 cup servings.

It is very important before doing these jars to read:
  52 Method Safety and Recipe Information


The Bakeresse’ Dozen
Country French Beef Stew

Gourmet Food Storage Made Easy
Meal in a Jar Recipe of the Month
Chef Stephanie Petersen

Shopping list for One Dozen Quart Mason Jars
1 can  freeze-dried diced beef
1 can quick cook red or black beans
1 can  freeze-dried vegetable mix
1 can  tomato powder
1 bottle  Chef Tess French Provencal Essential seasoning (Or your favorite Herb de' Provance plus seasoning salt)
12T beef bouillon  or sea salt
1 ½ cups  all-purpose flour  OR ¾ cup cornstarch
1 can  dehydrated diced potato
1 can  dehydrated onion
Recipe per quart  jar:
1 cup freeze dried beef
1 cup quick cook beans
1 cup freeze-dried vegetable mix
½ cup tomato powder
¼ cup flour (or 2T cornstarch)
1T French Provencal Essential
1T beef bouillon
1 cup dehydrated diced potatoes
1/4 cup dehydrated onion.
To prepare Stew: Remove oxygen absorber. Pour contents into a gallon sized pot and add 7 cups water. Simmer on medium heat 15-20 minutes until everything is tender. Serve hot.  Store any leftovers in a fridge.


 Jar Labels:
Country French Beef Stew:
 Remove oxygen absorber. Pour contents into a gallon sized pot and add 7 cups water. Simmer on medium heat 15-20 minutes until everything is tender. Serve hot
Country French Beef Stew:
 Remove oxygen absorber. Pour contents into a gallon sized pot and add 7 cups water. Simmer on medium heat 15-20 minutes until everything is tender. Serve hot
Country French Beef Stew: Remove oxygen absorber. Pour contents into a gallon sized pot and add 7 cups water. Simmer on medium heat 15-20 minutes until everything is tender. Serve hot
Country French Beef Stew:
 Remove oxygen absorber. Pour contents into a gallon sized pot and add 7 cups water. Simmer on medium heat 15-20 minutes until everything is tender. Serve hot
Country French Beef Stew:
 Remove oxygen absorber. Pour contents into a gallon sized pot and add 7 cups water. Simmer on medium heat 15-20 minutes until everything is tender. Serve hot
Country French Beef Stew:
 Remove oxygen absorber. Pour contents into a gallon sized pot and add 7 cups water. Simmer on medium heat 15-20 minutes until everything is tender. Serve hot
Country French Beef Stew:
 Remove oxygen absorber. Pour contents into a gallon sized pot and add 7 cups water. Simmer on medium heat 15-20 minutes until everything is tender. Serve hot
Country French Beef Stew:
 Remove oxygen absorber. Pour contents into a gallon sized pot and add 7 cups water. Simmer on medium heat 15-20 minutes until everything is tender. Serve hot
Country French Beef Stew:
 Remove oxygen absorber. Pour contents into a gallon sized pot and add 7 cups water. Simmer on medium heat 15-20 minutes until everything is tender. Serve hot
Country French Beef Stew:
 Remove oxygen absorber. Pour contents into a gallon sized pot and add 7 cups water. Simmer on medium heat 15-20 minutes until everything is tender. Serve hot
Country French Beef Stew:
 Remove oxygen absorber. Pour contents into a gallon sized pot and add 7 cups water. Simmer on medium heat 15-20 minutes until everything is tender. Serve hot
Country French Beef Stew:
 Remove oxygen absorber. Pour contents into a gallon sized pot and add 7 cups water. Simmer on medium heat 15-20 minutes until everything is tender. Serve hot

Additional Equipment:
1 dozen mason jars (or 2 dozen pint jars)
Oxygen absorbers (100 pack, put 1 in each jar and place leftovers immediately in a sealed jar)

To prepare Jars: Wash and sanitize jars.  Dry completely.  Fill with recipe ingredients (in the order listed). Place a fresh oxygen absorber in each jar. Tighten the lid onto the jar.  Label and date the jars.

Cost per Bakeresse Dozen*
Ingredients:  $ 128.24
Cost per jar:  (ingredients only)$ 10.68

*Cost will vary depending on store location. Actual cost as of Nov. 2013 Cost does not include the cost of mason jars, flour, and bouillon. ©2013 Chef Stephanie Petersen. All Rights Reserved. Copies permitted author information included. Source. www.cheftessbakresse.com 


Ingredients available at www.thrivelife.com/cheftess 

There you go darlings!

Always My Very Best,
Your Friend Chef Tess


My family is greatly blessed by the extra money brought in by sales tracked back to my freeze-dried food website.  You also have the option of joining as a consultant/member and getting commission on anyone who buys from you! I'd love to have you on my team! Thank you so very much for your support. Xoxo!