Thursday, January 29, 2009

Baked Lowfat French Fries...Homemade Perfect


I found the coolest way to make French fries that are actually low fat and healthy. They are so low fat that it's almost insane. What I like most, is that the turn out crispy on the outside, but not thick skinned and funny. The insides are fluffy, not gummy, like a lot of homemade potato fries. The secret to these delicious little nibbles, is to partially cook the potatoes before baking them. Here's the tricks to make them wonderful!

You will 4 medium russet potatoes, washed and peeled.
Cut them into beef-steak size fries and put in a microwave proof bowl, filled with water.
Microwave the fries in the water for 8 minutes, or until they are tender.
Drain the water. Rinse again with cold water.
Spread out on a dry, clean dishcloth and pat dry.

Then comes the fun part...Preheat oven to 450 degrees.

Lightly mist a stoneware baking pan with vegetable oil. Line up the potato wedges in rows.

Salt well. I use a little Kosher salt...not all of this silly. I used about a teaspoon.

Lightly mist the top of the potatoes with more of the vegetable oil. You can use any flavored oil if you want or just the non-stick spray. I use a natural oil in a mister. Bake at 450 degrees 25-30 minutes until very crispy.


Season generously with all-purpose seasoning and serve with your favorite ketchup. This is actually homemade ketchup. Mmm. Enjoy!


Wednesday, January 28, 2009

Overnight Started Bread

It took a bout with pneumonia for me to realize I am High Maintenance when it comes to very few things. I'm not one of those gals who has to get my nails done, or primp just right to leave the house. Usually. I do have my moments, but on most days it's jeans and a nice shirt. I wear make up. I don't need top of the line fashion or hand bags to match every outfit. I don't have 40 pairs of shoes. Last I counted. When it come to bread however, I have issues. It's part of my psychic makeup. Probably stems from years of growing up with a "make your own bread" mother. Yes, I know. A lot of people blame their moms for mental issues. This just happens to be a good mental issue. We make bread. We do. Not to say that growing up I didn't ever see this bag:
Or ingest this junk on a regular basis:

My mom worked and we had some weeks where it just didn't happen. But...when I was old enough to bake the bread, I did. Mom was great about teaching me the basics and I can say that I am very glad to have that legacy. We bake the bread. So...when I was sick with pneumonia and my dear sweet Ace brought home the bag of bread, I didn't complain (much). However, now that I can stand up, I am making bread. Then flopping back in bed because I still have the persistent cough, but I can't stand not having my bread any more!

It just so happens that one of my all time favorite bread recipes is made in 2 stages. It's called Overnight Started Bread

You start with some ingredients the night before and get them fermenting. This gives the bread a lot of advantages over regular bread recipes. It has a longer shelf life (this stays moist and delicious 5-8 days). It also has a very deep well rounded flavor. Not like any of the quick rise breads that taste a little flat and mono-dimensional. Not this bread. It is amazing for flavor. If only for those two reasons, this would be my favorite bread. I do however, love the versatility in the time frame needed to make the bread. Just perfect for a zany crazy mom/chef who sometimes gets her schedule interrupted by LIFE. Love it for the flexibility. Also great for a chef who happens to have pneumonia and can only be in the kitchen a little bit at a time before running completely out of steam. Yea. Love it for that too.

This is a bread that has all the benefits of a bread that has fermented for a long period of time... moist, mild flavored, great keeping quality and texture. It also has the benefits of a quick rise bread. A sponge bread is one that a portion of the dough is started prior to the main dough. I have several hundred recipes with this method of dough preparation, but this is by far my favorite. Why use a sponge? Well for one thing it has time to start some enzyme action that you would never get in a quick rise bread, amylase and phytase-- to name two. Amylase is the enzyme that releases sugars from its storage form (starch). Phytase enzymes are responsible for the break down of phytic acid and allow easier absorption of minerals, and vitamins not normally easy to break down and digest in bread. Plus, the fermentation process conditions the natural protein in the wheat called gluten. This sponge like mesh is responsible for the trapping of gas that leavens bread. Cutting corners in this fermentation process or not allowing this process to take it's full round on the gluten will not allow the mesh to become as strong and elastic as it could be. Meaning? This method is awesome! I will walk you through it as best I can.

I got this recipe initially from the Laurel's Kitchen Bread Book. I mentioned it before in the posting: Sprouted wheat bread day 3 in a food processor . Great book. I did adapt this recipe a little to be dairy free. The book called for milk. I used potato instead. Other than that it's the same recipe. You will need:

1/4 tsp yeast
1 cup cold water
2 cups whole wheat bread flour
1/3 cup instant potato flakes
1/2 tsp salt

Combine all ingredients in an 8 cup mixing bowl (non metal works best)...about 5 minutes. Cover and leave in a cool room until you are ready to bake the bread, 12-18 hours. If you will be leaving it for more than 18 hours, it may be stored in the fridge part of the time, or stir after 8 hours. This will keep the yeast happy, moving it to greener pastures and evaporate any alcohol produced by the fermentation process that would otherwise hurt the yeast's ability to raise the bread.

After 12-18 hours it will be really puffy and smell like a good yeasty bread dough. Remember to keep it rather cool during this overnight period.


Get out your liquid measuring cup...the one that is clear with writing on the side. You will also need a measuring spoon. The ones made with writing on them for baking, not just the flowers or whatever on your silver spoons...

Get out your mixer.
To your kitchen aid (or mixer bowl) add 1 1/2 cups Luke warm water, 2 T honey and 2 tsp yeast.


Put that sponge you started 12-18 hours ago in the bowl.

Wash your hands. Now don't be scared. You will have to touch the dough. Actually you will have to really get in there and mix it up with your fingers. Break it down.

This may be my favorite part.


Woosh it around (very technical term I know) until it is smooth and batter-like. Yea. Batter-like is a word.


Now get out your whole wheat bread flour. I grind my own (Flour making day...flour power.), but you can buy it. As long as it is fresh.

Here's a peek into my flour bin. We're gettin' a little low...

Don't mock me, but I am going to show how to measure flour. Someone asked me and I don't want to assume too much of anyone reading my blog. If you are seeing this for the first time, I'm glad to help. The rest of you can just sit tight and humor me. I love everyone wherever they are in the learning process here. So here's how it's done:

Lightly scoop up the flour...don't bang it or try to pack it in there.


Get a butter knife.

Set it up on it's spine so the blade is pointed up:

Hold it flush to the top of the measuring cup and push off the extra flour so it is flat:

Like this. See?

Add 4 cups whole wheat bread flour and 1/4 cup oil (preferably expelled pressed or extra virgin) and 2 tsp salt. Mix on 2nd speed in the kitchen aid. The dough should take only 10 minutes of efficient kneading to attain supple perfection--600 strokes by hand (which I didn't do today). Form into a ball. This makes a balloon like structure that helps hold in the fermenting gasses and helps the texture of the bread. I rinse out the kitchen-aid bowl and put it back in there. Place it smooth side up.

Then I lightly spray the top of the dough with water. This helps it to stay moist, which ensures no lumps of crusty dough in my bread, just a nice even dough.

Keep that spray bottle around too. I use it a few times during bread making.


Get it pretty wet. Look how shiny. Oooo. I'm easily entertained.


Cover with plastic wrap and allow to raise at room temperature (75-80 degrees) about 1 and 1/2 hours. Sometimes it takes 2 hours if the room is cold. It helps to measure the temperature of the dough if you want to be sure. This can be done with a meat thermometer. This one was right at 85 degrees internal temperature so it took almost exactly 1 and a half hours. If it is cooler it will take longer.

It has raised about 2 inches from the top of the bowl. See the tiny belly button dot where I poked it with a meat thermometer?

When you just can't resist it anymore, go ahead and giggle and poke it with your finger.

If you don't have to use much effort, it gets those creases right around your finger, and it leaves a hole when you remove your finger, then it is ready to punch in the head.

So, punch it down already. Expel as much air as possible. This moves the yeast to greener pastures, releases trapped alcohol, and evens out the dough temperature. It's not just for the fun of punching something (though it is elating to punch something sometimes).


Reform into a ball and place back into the bowl. Spray with water again and cover with plastic. Allow to raise again. This time it should take about 1 hours. Less if your house is warm.

I had to show how the gluten strands are showing here. It's really something wild to see...


Like an alien in my kitchen...that we eat. Toasted. Mmm. Alien...

Okay, so cover the ET blob with plastic. In the meantime, lightly oil 2 standard size loaf pans. I also lightly coat them with a little cornmeal. I use 8inch by 4 inch almost without exception. This size makes great shaped loaves (see Sandwich Loaf Molding and baking for more details on this phenomenon).


Once the dough has risen to within 2 inches of the top of the bowl again, or passes the finger poke test (yea, I know, not again a technical term). The actual technical term is the "ripe test". Just poke it. It works...
Take the dough out of the bowl and place on a clean counter top that has been lightly misted with WATER.

Why did this picture just make me giggle with joy? I'm either really nuts or really love bread. Not sure which... Please look at this and find joy...

Mmm. Dough. Okay. Now get giddy crazy and divide the dough in half. It should look like this if you get on your knees and peek up over the edge of your countertop...

Now go here: Sandwich Loaf Molding and baking . It will lead you in all things right and good with makig this bread into a sandwich loaf. Go ahead now. Don't be scared. I will still hold your hand and walk with you.

Sandwich Loaf Molding and Baking


I am often asked how to I make my bread have such a nice shape. "Vigorous exercise and a strict diet" is my common sarcastic answer. Honestly folks, there is a method. It's called molding. Not the nasty blue mold on old bread. Goof. It's like molding clay into a shape. That kind of molding is done with dough. Once you see it and try it, you will be surprised how much your bread really holds a nice shape. I think the main beauty of this loaf molding procedure is that it stacks the mesh-like structure of gluten, basic math and architecture meet my loaf pan. Here's how I do it:

First take half the dough from the basic bread recipe( Are You Afraid of Germs? Or the overnight started bread recipe soon to follow in an upcoming post.)

For whole grain bread, I don't flour the counter top, just lightly mist with water.

For three reasons, first, it doesn't put any undue dry yucky flour streaks in my bread. Second, if I used oil, it wouldn't allow the bread to seal correctly and there would be seams in the bread that don't connect. Third, it adds moisture, which is always good for whole grain bread!

Pat dough out into a 16 inch rectangle. It doesn't have to be exact, but close.


Fold one third over.


Fold the other third over the top.


It should look like this. Like most brochures...well ones made of dough anyway.


Now roll and pinch into a log.

Once it's rolled, pinch the seams and the end...and tuck under the roll like this:


Place loaf in a lightly oiled standard loaf pan. The pan size is important. 8 inch by 4 inch. Any larger, and the loaf will end up squatted without a well shaped slice. You can still use the larger pans, but just note, I don't recommend them for that reason.

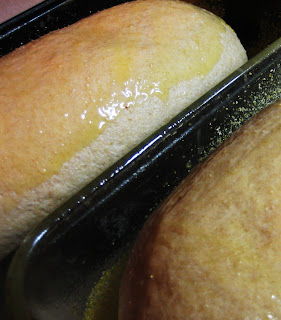
To keep the top crust from separating from the loaf, spread with butter or oil. This keeps it from getting dry, which is one of the leading causes of crust separation.

I use a little melted butter spreading with a silicone brush so there aren't any loose bristles left on my bread. One of the least exciting things to find on food is a piece of hair from a pastry brush (or worse, a head!)


I then lightly tent the loaves with plastic or plastic bags.
OR place in a moist place to raise...

You may not be like a bakery with a special moisture filled box called a "proofer" just for raising bread. Something else that works however is putting the bread in an unheated oven and misting generously with water from a spray bottle (I have one that I only use for bread and that has never had any chemicals in it). It generally takes between 1 hour , or 1 and 1/2 hours for the bread to raise like this. If it has been in the unheated oven, I remove them a little early to allow the oven to preheat.This gives them space to rise over the top edge of the loaf pan like this:

A preheated oven is also essential for great shaped bread. I recommend a hot oven (425) for sandwich loaves. This hot temperature allows the yeast to reach maximum activity, the loaf to get hot enough to have good oven spring (the loaf gets really tall and keeps nice shape), but then the yeast dies and doesn't keep the dough rising so it sets the outside structure. This keeps big bulges from oozing out the side of the loaf, or the loaf from getting so tall that the top of the bread kind of collapses and the inside of the bread looking almost hollow.

I keep the oven at 425 for the first half of baking, then lower it to 350 for the final 15-20 minutes. This ensures the top crust doesn't get to dark, allows the inside to cook through. At higher altitudes this gets even more important, since the air is lighter and it is easy to over-raise in the oven. In Utah for example, I would go as high as 450 degrees for the first 20 minutes!

Right before I put the loaf in the oven, I lightly slit the top with a very sharp knife. This vent also helps give the loaf a good shape and allows the loaf to raise correctly in the oven. It's not just for a pretty design, but it sure helps.
Baked at 425 degrees 20 minutes. Open oven to vent heat. Lower temperature to 350 and finish baking 15-20 minutes. (Hint: if you have a regular meat thermometer, bread is cooked when the internal temperature reaches between 170 and 175 degrees).

Remove from the pans immediately. This keeps the bottom crusts crisp as well as ensures an easy release. Cool completely before slicing and putting in bags.
Enjoy more beautiful bread.


Hopefully this helps!

Tuesday, January 27, 2009

Cheese Bread Pudding...

What? Cheese in pudding? Am I insane? Now that is a loaded question. Not usually safe to answer that one. Personal mental capacity aside, this is a great recipe. We sometimes have left over bread. Not often. Since I am the bread girl, I thought I'd share how we use some of the crust. Did I say crust? Crust is my favorite part! Usually the center slices have a better chance of survival around here.

Back to the pudding. This is a comfort food we have come to really enjoy. It is a savory casserole. Great as a main dinner or side dish. Great as a freezer meal. It is called Cheese Pudding thanks to my good friend Fannie Farmer. Ever read the Fannie Farmer Cookbook? I think it may be one of my all time favorite references. Great information. I wore out two soft covered copies before I had my brother in law order a hard cover into his store specially for me. It's nice having a family member in the book business.

Even nicer having recipes that work all nice and hard bound at my finger tips. Look at this...
I added green onions to the original recipe, but this is it:
Mmm. Cheese. So here's what's in it:
5 slices of good bread (I used some cottage cheese dill bread: The Sound of Music Meets Culinary School...Cottage...) cut into one inch squares.
1 1/2 cup milk (soy milk works)
1 cup grated sharp cheddar cheese (and 1/2 cup for topping later...)
3 eggs
2 tsp Worcestershire sauce
2 green onions, chopped
all purpose seasoning to taste (I use my seasoning blend but any all purpose seasoning would work)

Preheat oven to 300 degrees. Yea. That's a low temperature, but it gives a good texture to your pudding to do it that way.

Oh. A word on seasoning...

I do go a little heavy on the seasoning, but that's what makes a good savory stuffing, right?

Mix all that stuff together. Pretty simple right? Put it all in a lightly oiled casserole dish. I use a round 10 inch by 2 inch deep pan. Top with another 1/2 cup shredded cheese.

Bake covered with foil 40-50 minutes.

Pull out and serve hot.
This is an excellent main course for breakfast or brunch if you prepare it, ready to bake, the night before and put in the fridge overnight. Also good with chunks of cream cheese mixed into the bread cubes (but is there anything on earth that isn't improved with chunks of cream cheese?!). If you're not vegetarian, Bacon is also good. Blue cheese. Big hunks of roasted garlic. Roasted red bell peppers. Jalapeno. Sausage. Stop me. I could go on all day! Just know that it is a great way to use extra bread. And...spread out the "bread" you have. It's very inexpensive to make. Oh and here's a kicker...if you freeze it instead of baking it, it will make a wonderful freezer meal! Yeah!! Defrost it and bake as directed. Simple and fast for the freezer. There you go.