Wednesday, August 31, 2011

Beefy BBQ Beans with Garlic cheese drop biscuits and creamy sweet-n-hot coleslaw


Nestled somewhere in the middle of my day comes a weird thing called "dinner". It sometimes sneaks up on me and today was one of those days.  So I whipped together this little master genius dinner that was so basic, yet so simple that I knew I needed to post it! Why yes, it does taste like you cooked it for hours in a simmering pot of thick barbeque sauce. Yes. It does taste incredibly evil and unhealthy. However, if you make the baked beans (I pre-freeze them in 4 cup portions in the freezer) and use the leanest beef possible...it's actually nice! Oh...and the whole grain homemade bisquit mix helps too! I use sharp cheddar, so I use less fat, more flavor! 

Beefy BBQ beans with Garlic Cheese Drop Biscuits 
and Creamy Sweet-n-hot Coleslaw

1 lg can organic baked beans (20 oz) or 3 1/2-4 cups homemade baked beans 
8 oz hamburger (lean)
1 onion, chopped (about 1 cup)
1/2 cup chopped carrot
1/2 cup chopped celery
1 pressed fresh garlic clove 
1/2 cup Honeyville Honey Barbecue Sauce

Biscuit ingredients: 2 cups biscuit mix (my Homemade Bisquick use whole white wheat)
1/2 cup shredded sharp cheese
1 fresh pressed garlic clove
1/2 cup cold milk or water

Directions:
In a large 12 inch covered skillet, saute onions, celery and carrot in 1T oil until very dark brown. Add the hamburger and cook until browned. Add the garlic and Chef Tess All Purpose Seasoning and Honeyville honey barbeque sauce. Stir well. Lower to a simmer. Combine the ingredients for the biscuits just until combined. Drop by rounded Tablespoon on top of the BBQ beef mixture. Cover and simmer low 12-15 minutes until biscuits are cooked. Top with extra cheese and all purpose seasoning if desired. Serve with my favorite cole slaw. I used this recipe in the restaurant all the time and it was by far the most popular version I ever made. 

Chef Tess'  Recipe for Coleslaw 
1 head finely chopped cabbage
2 shredded carrot
 1 onion, minced
1 ½ tsp salt
1/4 cup Xylitol natural sweetener or sugar free substitute
1/2 cup vinegar
1 tsp mustard
1 tsp celery seed
1 cup low fat mayonnaise
1T  horseradish Plus 
1T hot sauce (optional)
Combine: onion, salt, sweetener, vinegar, mustard, celery seed, Mayonnaise, and horseradish. Coat cabbage with dressing. Refrigerate until service in a bowl, covered with plastic.

Serve the Beefy bbq beans hot. We drizzle ours with a little more sauce...but we're weird that way.

There you go. A quick middle of the week meal that everyone loves!

Tuesday, August 30, 2011

Bread Class Updates! I feel so Validated!


 You know that despite how many classes I teach, it never will cease to amaze me when someone comes back and says "Thank YOU" .  I'd teach bread classes until the end of time if I thought it would help even one person save money, eat well, and live better on whole grain. That being said...when I do stand in front of a room full of people it is always humbling to see that someone takes it home and uses it!

Today at Honeyville Farms in Chandler at the Class I taught there on Tortillas I was a few minutes before starting. To my joy, a brother and sister duo came in with the bread they had made for the VERY first time! {Ever} after attending my bread class on Saturday! I almost started to cry I was so excited!
 The blessed part...they are not stopping. She said she'd never buy bread again...and her brother made his own too! So...what better gift can you give your instructor than actually applying what you learned?!
 Here's their bread close up. The flavor was right on the mark. Texture pretty good and the moisture level was awesome! Not dry at all! 
 Saturday a few hours after the class, I got a lovely picture with my name tagged on it on my Facebook! Kim Carpenter-Lahn, a great cook that I had met on Valley Dish during one of my segments, had at the time, confessed her frustration with bread. I was overjoyed to see her at my class...and even more joyful to see this photo!
 Even more amazing was her great review of the class! Bread Glorious Bread! Thank you comes in many forms, but I believe the highest form of flattery...is imitation! Go forward my friends! So excited to hear how things are going! Oh...and yes this is my challenge to you this week!

Share bread with someone this week. Maybe sit down with your kids or spend a few hours with a friend...but let's make sure we don't let our talents go to waste. Let's make bread together!
Your Friend,
Chef Tess

Saturday, August 27, 2011

Whole grain Kamut Bread with Teff and Black quinoa (Herb and Spice loaves 101)


Kamut Point. Right here.  If you have no idea what that word means...I'm going to give you the simple words:  Kamut is the ancient Khorasan variety of wheat. Now you're smart.  Kamut is 1/3 longer than regular wheat and high protein. Kamut is the name that is registed by the man who started farming it here in America back in the early 50's when his son sent him 32 grains of the wheat from Egypt where it was found, reportedly, in a tomb. It must be grown organically, have a protein range of 12-18%, be 99% free of contamination varieties of modern wheat and 98% free of all signs of disease. Even though this wheat variety contains gluten, it has been found to be more easily digested by people with slight allergic tendencies to modern wheat. Excellent for making pasta and bread because of that protein! So I use it for bread on a regular basis. It's remarkably awesome!

Whole grain bread need not be dry, lifeless and flavorless. On the contrary! It should be boldly going where you mouth is and full of so many grains that they sing and dance on the surface of the loaf! So...I added Teff. Teff is a grain the comes to us from Ethiopia.  It takes 150 grains of teff to equal one grain of wheat in size. So they're small...yet they pack a nutritional punch! Lots of fiber as you can well imagine. 2 grams per ounce of grain (That's almost 10% of your daily  needs in one ounce baby!). Plus...there's a high amount of quality protein and a good source of iron, magnesium, phosphorus and copper. For more nutritional facts on Teff, look here .   
I also added some cooked black Quinoa. I used it yesterday in the cool salad Here
Today I'm going to show you how to take a magnificent dough like this and transform the flavor of almost any loaf INSTANTLY by rolling in herbs, spices, nuts, seeds...basically anything you want! It's remarkable! I think you'll fall out of your seat...if you are cool and baker-like.


 Whole Grain Kamut bread with Teff  and black Quinoa


2 tsp active dry yeast
1/2 cup cool water (not cold, but cool to the touch)

 5 Cups Kamut® flour
1/3 cup whole grain teff
2/3 cup cooked black quinoa 
2 tsp salt


2 1/4 cup lukewarm water
2 T honey
1/4 cup oil


Flavor agents:
2T lemon zest (Optional)
1T fennel seed (Optional)
Black pepper to taste (optional)

Directions:Dissolve the yeast in the 1/2 cup warm water. Mix the flour and salt in a large bowl make a well in the mixture. Dissolve the honey in the 2 1/4 cup water and add the oil of your choice. Pour the liquid and the yeast mixture into the well of flour. Stirring from the center, first combine the ingredients to make a smooth batter, then fold in the remaining flour from the sides of the bowl, mixing them together into a soft dough. Soft dough is the key!! Add the teff and quinoa. Since the whole grain flour takes a while to absorb water, wait 10 minutes--then evaluate the dough. Add water or flour if more is required, but do this slowly as it will probably take less flour than you think. If you want really good bread--best keeping quality, flavor, and rise--knead the dough about 600 strokes without adding any more flour. The dough should remain soft and should become elastic and smooth. Rest whenever you want, but aim for 600 strokes. This is about 6 minutes on medium speed in a Kitchen-Aid mixer. This may seem like an amazing and outrageous requirement, but after many hundreds of loaves, I'm convinced that thorough kneading makes the critical difference. As you continue to work the dough, toward the end of the kneading, it will become lustrous, utterly supple and elastic. It should actually be white if you look closely, with brown bran flecks clearly visible against pale gluten. Form the dough into a ball and put in an un-greased crock or food grade food storage bucket. Cover tightly with plastic wrap or a lid and allow to ferment. At about 80 degrees, this will take 1 1/2 hours to 2 hours. Wet your finger and poke it into the dough (called the ripe test). If your finger goes in without very much resistance and the hole remains when your finger is removed, the dough is ready to be punched down. For best results, do not wait until it sighs and collapses when poked. Gently press out the accumulated gas. Turn the dough out onto a lightly floured table and keeping the smooth surface, carefully unbroken, deflate the dough by pressing it with wet or floury hand from one side to another.
 Turn the dough out onto a lightly moistened table (yes I use water instead of flour at this point. It keeps the dough moist!) keeping the smooth surface, carefully unbroken, deflate the dough by pressing it with wet  hand from one side to another. Cut it in half and form each part gently int a round ball, still preserving the smooth surface on the outside. Roll dough into a rectangle and fold into thirds.  Now...this is where I get creative. Today I made the bread into a lemon fennel bread by adding a tablespoon of fresh lemon zest and 1 1/2 tsp of fennel seed at this stage. 
I gently press the flavor agents into the dough.
Then I form the loaf accordingly...in thirds.


Roll, pinch, and form into a loaf. Place in greased loaf pan (standard size only! 8inch by 4 inch--or loaves will be squat-ty). Loaves should take 35-45 minutes for their final rise (called proof)--I cover them with a loose gallon size bag. Make sure the surface doesn't get dry or the top crust will separate from the loaf when baking. I gently drizzled this loaf with lemon infused olive oil and sprinkled the top with more fennel and lemon zest.  
I made some plain bread, some with fresh Herbes de Provence and sea salt as well. You can make any kind of bread from a plain dough using this method! Again, be sure to cover and let raise until doubled before baking.
Preheat oven to 425 degrees. When oven is hot and only then, place loaves in the oven. If all has gone well, the loaves will arch over the top of the pan, touching the sides all the way up! The dough feels spongy but not soggy. Place in hot oven. After 15 minutes, reduce heat to 325 degrees for 30-35 minutes, until internal temperature is over 175 degrees (can be measured with a chef style meat thermometer). Allow to cool before placing in a bag. Keeps 3-4 days if you kept the dough soft.


There you go. One crazy cool idea from a crazy cool chef! 
Let me know how your bread is coming along folks! I'd love to help in any way I can! Look at some of my other bread basics here:


basic bread recipe 
5 day bread dough


freezer rolls {and doughs}


There you go.
Your friend, 
Chef Tess

Thursday, August 25, 2011

Universal Grain Summer Salad: Today with Quinoa Pistacho and Herb with Feta and Olive Oil

When I was visiting my family my sister kept saying Queen-Oh-Ahh. I had no idea what she was talking about until she said, "you know...that grain you use a lot on your blog." I had to smile. If you've never cooked with it or seen it this may be a new adventure for you. Let me start by saying that it's pronounced "Keeeen-Whaaah". Grain surgery continues today and I want to share this wonderful summer salad that I made for my cooking class this week. It's remarkably easy and I think perhaps my favorite summer salad. You can certainly use other cooked grains like wheat (Kamut, Spelt or regular red or white) barley, millet, or wild rice even. It's versatile for using with a mixed grain pilaf as the base. Mix up the herbs to reflect your mood  using my herb and spice alchemy.  There's also ideas on what flavors work together best in my post on Homemade Salad Dressings. So I hope to give you some more ammo here. As for today and the grain we're using for this Salad...Quinoa.
 Quinoa  has been cultivated in the Andes for more than 5000 years! Locally referred to as the "mother grain", it kept the Incan armies strong and robust. It's a protein powerhouse and considered one of the best sources of complete protein and amino acids by the United Nations. It's gluten free. Plus... look at it.  I fell in love the first grain that I ate. It is slightly nutty flavored and mild with amazing texture. If you've never cooked it, there's a full tutorial in the subject on my blog :here . There are a couple of tricks to cooking it and having it come out perfectly, but honestly it's one of the easiest grains to cook and I'm totally in love with it.


You will need to cook 1 1/2 cups quinoa. This will give you about 5 cups cooked and fluffed grain. 


Chef Tess' Quinoa Pistachio and herb salad with Feta and olive oil
Ingredients: 5 cups cooked quinoa
1T each chopped FRESH Parsley, Thyme and Rosemary
1 Clove fresh pressed garlic
1/3 cup Crushed Meyer Lemon Certified Extra Virgin Olive Oil or an olive oil of your choice
2T Red Apple Balsamic Vinegar or balsamic vinegar of your choice
1/2 cup coursly chopped pistachio
1/2 cup feta cheese
Zest of one lemon
sea salt and fresh cracked pepper to taste and 1 tsp of my Chef Tess
Romantic Italian Seasoning
 Pour olive oil and balsamic into the cooked grain.
Add the chopped fresh herbs.

 Chop the pistachio.
 Press the garlic.
 Mix it all up. Add salt Romantic Italian Seasoning and pepper to taste.
 Top with Feta.
 There it is. Low in fat. High in flavor. Excellent for the summer. It's a meal if you want something light an luscious.
Keep using your giant GRAIN! xo. Big hugs my friends. 
--Chef Tess

Monday, August 22, 2011

Teff, Chia Seed and Oatmeal No Bake Cookies


 No bake cookies shouldn't be healthy. Or should they? Should they be even close? I think so. I think they should be brimming with whole grains of goodie-two-shoes and happily-ha-ha! What am I saying really? I'm saying that today is Monday and I'm not baking with food storage today. I'm no-baking with food storage and whole grain to bring you these little love nuggets. Auntie Em used to call no bake cookies something gross. I won't even tell you what she called them. I won't. I'm going to save you from ever thinking that the girlie-girl sunshine twins would ever call a cookie anything that monkeys would use as...um...ammo. Well...here's some Ammo for mom! Teff and Chia are probably some of the healthiest grains you could add to your family's diets. I'm not kidding. Grain surgery wise...this is the rocket science of it all here honey! Plus...it's 116 degrees here all week. I'm not baking...even my sun oven may see a vacation...but then again...I have two bread classes this week so maybe not.  
 For more nutritional facts on Teff, look here .
What about cha-cha-cha- chia?
Are you familiar with Chia Seeds? They are the The Buzz word in Super Grain

Chia was cultivated by the ancient Aztecs, and was honored as a superfood. Chia is one of the best plant sources of beneficial Omega-3 oils, especially a-linolenic acid (ALA). Scientific Research on Omega-3 and other essential fatty acids (EFA) continues to prove that EFAs support cardiovascular health, comfortable joint mobility, immune system function and overall cellular energy. Chia is often stored for long periods of time as a Survival Food since it does not quickly turn rancid like other sources of Essential Fatty Acids. Chia is high in vitamins and minerals such as magnesium, potassium and phosphorous. It contains many antioxidants, including significant levels of caffeic acids, quercetin and flavonols. Chia is an excellent source of high molecular weight soluble fiber, which supports healthy bowel function.  Looking at the Nutrition Facts and Analysis for chia seeds revealed a glycemic index of 1. That's amazing for a grain!  When Chia is mixed into a liquid, it forms a thick mass due to its high content of beneficial mucilages. This slows the digestion of carbohydrates in the digestive system, leading to a feeling of fullness, and reduces the spike in blood sugar that often accompanies the ingestion of carbohydrates. Chia added to this cookie and others will  add to that full feeling. I love that I only want to eat a couple for a nice filling snack.
                I use sugar in these cookies. You can use 1 cup honey and 1/4 cup water instead, but you will need to increase the boiling time to 6-8 minutes. I also use a healthier oil. Some of these no-bake cookie recipes call for butter. I'm all for using an infused olive oil like  Wild Groves Blood Orange Olive Oil or Flax seed oil and some orange zest would also work.  I personally love the addition of the orange oil. It gives it a light fresh flavor. It's a perfect marriage to the chocolate.{ Big fan.} I use a  Wild Groves Pomegranate Balsamic Vinegar in this recipe to keep the texture nice and caramel like. If you don't use vinegar, the sugars will naturally get crystallized.  That's probably my #1 complaint when it comes to no-bake cookies...the texture is more like a sugar ball than a cookie. The vinegar has helped solve that. 
My Teff and Chia Seed Oatmeal No Bake Cookies
Syrup ingredients:
2 cups sugar
1/4 cup Wild Groves Blood Orange Olive Oil 
1T Lucero Wild Cherry Balsamic Vinegar
3T Honey
1/2 cup water
2tsp vanilla
Dry ingredients:
4 cups quick oats
1 Cup organic cocoa (baking cocoa)
3/4 cup Teff
1/4 cup Chia Seed (Flax seed also works here)


Directions: Lightly oil 2 cookie sheets or line them with wax paper.  In a large bowl, combine the dry ingredients.  In a one gallon pot over medium heat, combine syrup ingredients and boil for 4 minutes stirring constantly. Pour boiling mixture over the dry ingredients and stir until well combined. Allow cooling until you can touch them.  Roll into 1T size balls. Plop onto wax paper and allow to cool completely. Transfer to an airtight container.  (I keep mine in the fridge).  Will yield about 45 cookies. 

There you go. Oh...and be sure to eat them with a big glass of water. There's a lot of fibre in these and I'd hate to see them have a cork-effect on ya instead of what they should do...ya know...Make you healthy and happy. 
Your Friend,
Chef Tess

Sunday, August 21, 2011

Sunday Daisy's

Sunday is the day I share a little of my soul. Enjoy.

This is a little something different...but something that has been really on my mind the last few weeks and months. Many know that I have the two boys. I love them...they are my heart. I've always wanted a daughter but have not been blessed with such a soul as of yet.  Recently I started working with Gingham Project to help the kids there in India. It seems that every time I see the pictures and hear what is happening there for good...it makes me so joyous. It makes me thankful that I can contribute in any small way. Yet, part of me was just holding back a bit. Maybe that part of me that consciously wants more children but isn't sure how that will happen. Then I thought to myself, "Self...(Yes...that's what I call myself)...what's the problem?" What I essentially came down to was that I was afraid of loving too much.  I was afraid that I would be hurt. I'd love this new child...and lose it...As dumb as that sounds I sometimes think that I am way too open to love and that in so doing I'm also opening myself up for hurt and disappointment. On the other hand...there are five fingers. The other hand is a life full of being closed to love. I don't think I can live that life. So...I decided it was time to open up again.

Sister Daisy's Kids are special.  After reading about what Melanie's experience was with a young mother in the orphanage, I couldn't get my mind off that mother. I wondered what I would do should I be in such a situation...dying of HIV in a land where it would be basic social death for my child to be left without me and my support.  I thought of Les Misérables.  Jean ValjeanFantine, and the young   child Cosette...and  that literary hero I had seen in Valjean came back to my mind. I so wanted to take into my home that little girl of the mother in that orphanage in India...but...how? I'm certain that everything happens for a reason in this world and that some things we will never really have all the answers to...but thankfully we don't have to know it all.  I asked Melanie if I could go ahead and be a sponsor for one of these HIV Orphaned  kids.  Sister Daisy's Kids as they call them.   It only costs 30$ a month and I wanted to finally commit. Isn't it sad that it took me this long to do it? Well...I did. So I've finally got a sweet little girl assigned to our family. She is fairly new to the orphanage. Her mother is a single mom with HIV. She was so ill and weak that she had to give her daughter to the orphanage. Sathiya is a very small 11 year old girl in India...and now she's "my girl". I"m not sure is she's the same mother that Melanie met while there in India...frankly it doesn't matter. What does matter is that someone somewhere opens their heart and loves this little child.  I'm gonna love her like my own even though she's half a world away. So...prepare to hear some good things from here about her and what's going on in her world. We will get to email, Skype and keep in general contact with her.  I'm so excited! I'm secretly hoping that this will lead to more than a sponsorship...but only time can really tell what will happen. In the meantime...my heart is open to a new little friend. I don't even have a full size picture of her yet...just this one of her in the yellow dress with the burgandy jumper. Well...it's a start. She looks like a little Daisy doesn't she? I love her already. 


Thursday, August 18, 2011

Homemade Laundry Soap Segment from Fox 10

Check out the new ChefTessFan You Tube page! Thanks to Carl! Xo!
Here

I'm Making Homemade Laundry Soap today on Fox 10!


This is a side step from the normal food I have on my blog...but a fun step none the less.  Today at 9:45 on Fox 10 I'll be sharing a way to cut your laundry bill in half (or less) using homemade laundry soap! It takes literally minutes to make and is something that tons of my dear friends have been using for years! In fact when I mentioned it on Facebook a ton of them commented and offered their wonderful recipes for perfect homemade laundry soap that they've used for years.  True confession...this is a "so I put it to the test" kind of segment. I made it for the first time yesterday. I tried a couple different soaps as the base...but I have to confess...I'm freaking impressed! It cleaned, it removed odor...it was totally inexpensive! Will I be making it all the time...probably yes! Why has it taken me so long to try this...especially after years of my friends telling me that I needed to? I have no idea. I was perhaps a little skeptical. There...I said it. I didn't think it would really be that great. I stand horribly corrected...and gloriously relieved!  Thank you ladies for the amazing insights!  Sally, Bobbi, Christine, Beth, and Colby especially for the great insights yesterday! Your feedback has been most epic helpful!  Angela Paskett, writer of Food Storage and Survival.com first opened my eyes to this idea back in September of '09...Yup...and I was a chicken. So thank you Angela (even though it took me so long to jump on this)...I used Angela's recipe here today and I am very excited to share it! The base ingredients cost me right around 5$ and for the most part I will only need to get the bars like this...for the next 300 loads...

 What do you use?  These Basic natural ingredient and a cheese grater.

 You will need: 1 bar Fels Naptha or Zote soap 1/2 cup Borax natural laundry boost (about 3$ a box but it will last a long time) 1/2 cup WASHING  soda Natural essential oils for scent if desired (totally optional) A word on the washing soda from all of the ladies: Baking soda is sodium bicarbonate while washing soda is sodium carbonate

 Directions. With an old cheese grater, fine shred the bar of zote or Fels Naptha. I used both brands yesterday in two different batches. The Fels Naptha has a nice light lemon scent to it. The Zote is a little more perfume. I hear tell that there are organic soaps for this without scents. My friend Colby uses  just uses grated non scented dr bronners soap for the non scented version and has for a few years

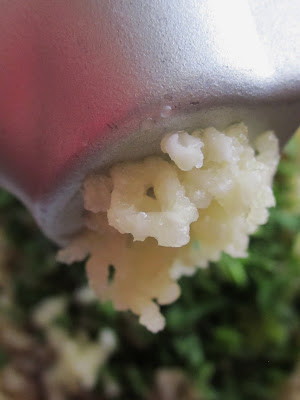
 You want a fine grate. Some even go so far as to use their food processor. I just did it by hand. It took about 3 minutes.

 Combine with the powders and essential oils...This is the Zote base.

 This is the Fels Naptha...

 I added 10-15 drops of lemon, orange, rosemary and oregano essential oils to the soap. Then to make it cute put the portions of the soap in baggies inside a  plastic Chinese take out box.

 The remainder I put in this 32 oz plastic container. It will do about 30 loads.

 The Zote took on the cinnamon, nutmeg and vanilla really well...so I used them for laundry soap too. Shoot me. I'm a chef. I wanted some of my towels to smell like a sugar cookie. I dolled up the labels...

The only complaint I did hear was that sometimes if you didn't use enough of the soap or use essential oils that there was some issues with odor (see my notes on Beth's recipe below for odor issues). On whites use a little oxy-clean and it will boost the whitening power of the detergent.  There you go. If you want details on how to make homemade liquid laundry soap go see my friend Sally's blog here . Bobbi Jo shared her recipe for the liquid with me and it's the same one. So thank you ladies! So awesome! Another helpful article on this liquid soap (using regular soap) with cost break downs I found here.  My friend Beth has a different recipe that she says works perfectly and has used it for a few years now...and to quote her exact words, " Odor? Not a chance! I've got 2 football players & 1 in marching band w/ 2+hr daily practices (& it's HUMID here in the South). My laundry's NEVER been so fresh"   Here's her recipe in her own words: "I've done liquid and powdered versions - MUCH perfer the powder since it's not messy. I use Fels Naptha, I think it's better at stain removal. The recipe I like is 6 c. Borax, 6 scoops oxy-stuff, 2 small boxes Baking Soda (or about 4 c.), 4 c. Washing Soda, 1 bar Fels-Naptha soap (grated). Mix together and it lasts for a REALLY long time. I use 1/8 c. per load. To prevent build up of the powdered ingredients, I also use vinegar (about a 1/2 c) in a fabric softener ball for the rinse cycle. The vinegar is a GREAT fabric softener in addition to keeping the machine clean. For whites, I use Mrs. Stewart's bluing. " 

Thank you again all my wonderful Urban homesteading women who make laundry soap! You're so inspiring and frugal...and awesome!!

On Fox I will also be sharing homemade natural toothpaste! I'll add the details for that recipe later today.

Your Friend,

Chef Tess