Thursday, August 23, 2012

Homemade Condensed Cheesy Soup Mix and a Meal in a Jar


As for today...this is a cheesy post. I'm just Oozin' with it. Actually...I should never really use the word "oozin'" when I'm talking about food right?  Is oozin' a word? If it is then it is a word that should only be reserved for medical journals. No. I think it applies to food. I think cheese can be (and should be) oozin'...but in a totally delectable non-weird Patch Adams kind-of-way. For instance, in a proper mess of Green Chile-Bacon Baked Macaroni and Cheese when it is in its golden perfection straight from the oven with a crisp crunching topping and the cheese is melty and gooey and divine with smoky nibbles of bacon and chunks of spicy green chilies...there is certainly some remarkable, life-changing oozing going on. Am I right?

Why do I bring up the cheese?


Well, I got a really fun e-mail from my friend Zak on the Cookin' Cousins that he had received from one of their readers. He said, "I have a blog reader that has been using your condensed cream soup mix recipe and was wondering if she could make condensed cream of cheddar soup by adding some freeze dried cheese. If so, she was wondering if you have a recipe for that."
Previously on their fabulous food storage blog, I showed how to make a really simple condensed soup mix that works outstandingly well for replacing a can of soup in casseroles and "what-not". Remember this recipe?


Tess' Condensed Soup replacement Mix

Ingredients:
1/4 c Corn Starch or 1/3 cup ultra-gel
2 tsp chicken bouillon/stock granules
1 T  freeze dried onion
1/4 instant non-fat dry milk
2T  sour cream powder
1/2 tsp Chef Tess All Purpose Seasoning

Directions: Combine mix with 1 1/4 cups water whisking over medium heat.


Heat until thick, about 5 minutes. It will thicken more as it cool so don't add a lot of extra thickener or you'll end up with glue.


Yes. It does weigh just about the same amount as the contents of one small can of cream-o-gunk soup. Give or take 1/2 an ounce. I'm not worried. By the way,if you use ultra gel, you can skip the cooking step and just combine the full mix with the 1 1/4 cups warm water using a wire whisk. It will thicken in about 5 minutes. Yes. You did just make instant condensed soup pudding. Mmm...
*Chef note: Cornstarch will lose it's ability to thicken once frozen, opt for Ultra gel for freezer sauces.
Cream of mushroom: Crush 1/4 cup Freeze Dried Mushroom Slices down to 2 T crushed freeze dried mushrooms. Add to your mix.
Cream of Celery: Add 2 T  Freeze Dried Celery to the mix.

Today I'm adding some Cheese. Brace yourselves for evil-genius. 

To make condensed cheese soup you have two options: 

Option 1:  Replace the cornstarch or ultra-gel with 1/3 cup powdered cheese sauce. It will hydrate the same as the above recipe, but be cheesy. I like this one because it is just so stinkin' simple. You do not even need to heat the mix, just add water, stir and let it sit about 5 minutes. It will thicken and be ready to use.


Option 2: Use 1/2 cup Freeze Dried Cheddar Cheese with the mix. Have you ever tried our amazing Freeze Dried Cheese ? It is totally wicked! Um...in the most righteous kind-of-way. Yes. It tastes like cheese, cooks like cheese and works like cheese. It IS cheese. The only ingredient in the can is cheese.


Add the freeze dried cheese to the dry mix. Hydrate the entire mixture with the normal 1 1/4 cup of water. Stir over low heat until the cheese dissolves and you have a beautiful non-lumpy cheese-oozin' divine sauce of happiness. 


To make it into a cheese soup: 


Use 1 3/4 cup water with the condensed cheese soup mix. Add 1 cup of hydrated freeze dried vegetables of your choice. 


OR for a dry vegetable cheese soup mix:


1 batch of the condensed cheese soup mix (above)

with  3/4 cup freeze-dried vegetables (of your choice). 

Directions: use 2 1/4 cup water to hydrate the entire cheese soup. You may use less or more water depending on how thick you like your cheese soup. Simmer over low heat about 15 minutes, stirring often. Does that make simple sense?


This condensed cheese soup can, of course, be used to make something as simple as a meal in a jar that we call Cheeseburger "Helper". 


Chef Tess Cheeseburger Hamburger Skillet meal in a Jar
Ingredients:

1 batch of Chef Tess' condensed soup mix (above)
1/2 cup  Freeze Dried Cheddar Cheese
2 cups elbow macaroni
½ cup  Freeze Dried Ground Beef
1/4 tsp turmeric (for color)

Directions: Put all ingredients in a quart jar with an oxygen absorber and seal tightly. 
To prepare Cheeseburger Skillet Meal: Put contents of mix in a 12 inch skillet (with a lid) Add 6 cup hot water. Bring to a boil and cover. Simmer 12-15 minutes until noodles are tender. Sauce will thicken a little more as it cools. Yield 6 cups prepared. 4 servings. 1 1/2 cup each. 365 calories. 6 grams fat.

There you go my darlings! Make some easy cheesy condensed soup. Enjoy!


I am no longer the corporate chef for Honeyville but we still love them dearly. My family is greatly blessed and relies heavily on the extra money brought in by sales tracked back to this site. This is also the company that packages and sells my spice line as well as my food storage cookbooks. Thank you so very much for your support. Xoxo!

Thursday, August 16, 2012

Almond Flour Banana Bread-Divine, Gluten-Free, Low-Carb, Grain-Free, & Sugar-free!


In the past I've covered real whole grain Gluten free Bread ,gluten free cookiesgluten free flour, and my all-time favorite gluten free pumpkin cookies. My Gluten Free Baking Class Notes and printable PDF are a great resource for those who are getting into gluten-free baking in general. As for those with lower-carbohydrate needs who are also gluten free...

Have you ever met my favorite Almond Flour? The first time I really highlighted this flour was when I shared an Evil Think Tank ( aka the ETT) with my diabetic-gluten-free sister Auntie Em, making these Almond Toffee Chocolate Chip Cookies. 
I get the perk, while being the chef for Honeyville Grain to work with some of their most beautiful products. Their almond flour is amazing! I've been playing with it a lot this week. Yes. I've heard the cries of my gluten-free low carb friends. Most of the recipes online and in cookbooks that I've run into for almond flour bread and cakes have had a lot more fat added to them than I personally like to see or use, since almond flour is already pretty high in fat, it is a great choice for a bread or cookie that will remain moist naturally. I personally don't see the point in adding butter, oil, whole eggs and so forth. I want my recipes to also be pretty good for the heart. I do pretty great with weight loss when I watch my carbohydrate intake. However, and this is a big however...when you go low carb you also still have to watch your calories. This bread still has a relatively low calorie count and is sweetened with natural zero-carb sources. I'm a big fan of that!
Now for the Almond flour.

2 months ago I asked Chris Ondatje (Director of E-Commerce, Honeyville Food Products, Inc.) where they got the almonds for their flour and what was involved with the growing of the almonds. Why specifically are they not organic? This is what Chris said when I asked about the almond fields,
"I’ve been there. All of our Almonds are California grown and processed. The almond orchards are about an hour and a half southeast of San Francisco. The plant that we work with only processes almonds. The actual growth and harvesting of Almonds is really quite amazing. Almonds grow on trees in a number of varieties (Nonpareil, Carmel, California Group, and Mission). Almonds mature on the tree until harvest time. At harvest, the branches of the trees droop low with the weight of all of those almonds. A specialized tractor goes down the rows with a special shaker attachment that grabs the trunk of each trees and shakes the nuts right out of the tree. Sweepers come behind and sweep the nuts to the center of the orchard rows where they dry for a period of several days. 

It is interesting to note that this step is required to allow the outer skin of the almond to dry. It also is why there is no {current}...Organic Almond Flour. If pesticides were not used during this drying process, the almonds would be riddled with work holes and bugs. After the drying process is complete, the almonds are collected and taken to a sheller where the shells are removed and the almonds are graded and separated. From there they go to the various mills and processers that slice, dice, blanch, roast, season, mill and otherwise process almonds. Over 80% of the world supply of Almonds is grown and harvested in California. It is a heavily regulated industry and quality is put on a world stage."


So that is why they currently do not carry an organic almond flour. They've been waiting on the growers to get organic certification. 
However, today I received word from Chris with some updated great news! Chris said,
"Things have changed recently. We can get organic almonds now. They are about 3 times as expensive, but the demand has been there and the industry has reacted. We're working on getting an organic product that has the same mill quality that our current product has." 
Waaaawhooo! I'm so excited to hear that it will soon be available in organic!  All I know is that the almond flour is really remarkable for baking. I like it far better than any of the other brands I've tried. I'm not just saying that because I work for Honeyville either. It has a fine texture that can't be beat. 

Chef Tess'  Gluten-Free Sugar-Free Banana Bread
3 cups Almond Flour
1/2 tsp salt
1 tsp baking powder
1/2 cup granular erythritol (sugar free natural sweetener) or 1 tsp stevia drops
1T Xanthan gum (all natural gluten replacement) 
1/4 cup powdered egg whites*
2 tsp vanilla

1/2 cup water
2 ripe bananas, mashed (about 3/4 cup) 

 Directions: Preheat oven to 350 degrees. Combine almond flour, salt, baking powder, erythritol, xanthan gum and egg white powder. In a separate bowl combine vanilla, water, and mashed banana. Pour the wet ingredients into the dry ingredients and mix completely. Divide between 2 6 inch by 3 inch loaf pans or 4 3 inch circular baking pans. Bake 350 degrees 35-40 minutes until the tops are golden brown and a a toothpick inserted into the center comes out clean. Let them cool in than 30 minutes, then serve. 

Nutritional Information:
Yields: 16 slices, each slice: 118 cal each; 7g carbs,  2.6g fiber (4.4 net carbs a slice)

*Someone mentioned that this product contains SLS as a foaming agent for the whites in very small amounts. From what I have read, it isn't something to worry about. If you are concerned, read the latest research here: The Truth about SLS via Snops.com. Decide for yourself. 

There you go! An awesome alternative to banana bread that is also lower carb and delicious! 
I'll be sharing a few other almond flour breads that I've developed lately here on the blog the next couple of days. I think you'll be in low-carb heaven!
Always My Very Best,
Your Friend Chef Tess 


Wednesday, August 15, 2012

Top 10 Delicious Things to Make with Zucchini that You'll Love!

 Sure. We read how great it is. Blah. Blah. Blah.
We plant it in our gardens and see it come in so small and innocent. Gently. Kind. Angelic. One can almost see magic fairies living underneath the leaves and bathing in the morning dew that gathers on the stems. 


Then the Zucchini-rebel-alliance takes hold of the yard and plans world domination. You're gone for a day and someone has filled its head with delusions of grandeur. 
Zucchini comes into girth and forms that are as big as the Death Star. 
Be honest. If you're dropping bags of zucchini off at your neighbor's house, lighting it on fire, and running away...maybe you need to figure out more constructive things to do with your bounty. I of course, come from the lovely state of Utah where 2 months out of the year, I would never leave my car windows unrolled overnight. No. Not because cats would sneak into my car. Good guess. I didn't want the mystery bags of zucchini that would arrive on my passenger seat. It is an odd phenomenon. If they had been bags of chocolate, I would have left the windows open and the keys in the car (maybe even a fat Visa gift-card and a thank-you note). 

 The zucchini ditching must end! It must end! Succumb to the squash. 

Ironically this year... I am suffering from a perfect shortage of squash since I had such a bad experience with the evil squash bugs a while back in my garden. Yes. That is a pathetic plea for anyone to zucchini-ditch at my house. Please don't light them on fire first though. I have a sick obsessive love-affair with zucchini most of the time.   For that reason, today I'm giving you some grand ideas of things to do with your squash. Once you've made them into something fabulous and delectable...feel free to ditch them. They will have a much finer chance of being adopted into a family if you dress them up in nice clothes first (and cover them in chocolate). 

Here are Ten Delicious Things to Make with Zucchini:

#1. My favorite zucchini bread. Orange-Brandy Zucchini Bread. Add chocolate chips. It won't hurt your cause.
#2. My Mother's Zucchini Casserole. This is perhaps my all time favorite thing to make with zucchini. It is my mother's recipe. She has had zucchini in her garden all my natural-born life and still makes this one, not because it is choked down and endured, but because it is really amazing! Don't add chocolate chips this time. It will make you a sick-o. 

#3. Meatloaf Stuffed Zucchini. Cut out the seeds and insides of a really large zucchini. Fill it with your favorite meatloaf recipe. Close it up. Bake it until the internal temperature is 170 degrees. Meatloaf will be moist, delicious, and come with a beautiful squash case. Plus...It looks really cool on your dinner plate!
#4. Pizza Stuffed Zucchini. This is just evil. Italian-American meets over-grown garden. It is actually a beautiful vortex of happiness. 
#5. Back to School Lunchbox Ideas include using grilled marinated zucchini in sandwiches in place of meat. It is delicious!
Using zucchini cut with a julienne shredder to replace part of the pasta in a salad gives fun texture, reduces the amount of carbohydrates in pasta salad...and is just cool to eat! This is a great one for kids!
#7. Zucchini-Bread Pancakes!  These are made taking whole grains, soaking the grain overnight and then putting the grain in your blender! You add the shredded zucchini at the end of the blend and you have whole grain zucchini-bread pancakes that taste really amazing. Yes. I do drizzle them with strawberry syrup and chocolate chunks. I know I'm an evil influence. 
#8. Dehydrated Zucchini chips. Slice your zucchini thin and place them in an air dehydrator. Dry until crisp and thin. They taste remarkably like a potato chip and have very few calories! Dip them in melted chocolate if you feel too badly about eating healthy.

9. Zucchini Cobbler! Mom says, "eat your veggies..."that tastes like apples!" Yes. You can disguise them to look like apples. Who will know (unless they read my blog)? I really like this Zucchini Cobbler recipe from allrecipes.com. It is delicious!

INGREDIENTS
8 cups peeled, chopped zucchini
2/3 cup lemon juice
1 cup white sugar (or 1/2 cup honey)
1 teaspoon ground cinnamon
1/2 teaspoon ground nutmeg
4 cups all-purpose flour
2 cups white sugar
1 1/2 cups butter, chilled
1 teaspoon ground cinnamon
DIRECTIONS: In a large saucepan over medium heat, cook and stir zucchini and lemon juice until zucchini is tender, 15 to 20 minutes. Stir in 1 cup sugar, 1 teaspoon cinnamon, and nutmeg and cook one minute more. Remove from heat and set aside. Preheat oven to 375 degrees F (190 degrees C). Grease a 10x15 inch baking dish. In a large bowl, combine flour and 2 cups sugar. Cut in butter with pastry blender or two knives until mixture resembles coarse crumbs. Stir 1/2 cup of butter mixture into zucchini mixture. Press half of the remaining butter mixture into bottom of prepared pan. Spread zucchini mixture over top of the crust, and sprinkle remaining butter mixture over zucchini. Sprinkle with 1 teaspoon cinnamon. Bake 35 to 40 minutes, or until top is golden. Serve warm or cold.


#10. Citrus-Mustard Grilled Zucchini and Purslane Salad. Amazing! Get the recipe: Here. You'll be surprised at the latest trend in garden greens!

There you go! Get rid of Share some zucchini! Xoxo! I wasn't kidding about bringing me some either. Really. I love the stuff (especially with chocolate). 
Always My Very Best,
Your Friend Chef Tess

Tuesday, August 14, 2012

Making whole-grain flour at home in 3 Easy steps! Turning Wheat into Bread!


 After 13 years of using an older hand-me-down grain mill, I finally have saved enough to get the electric grain mill I've had my eyes on for 2 years. Yup. We do practice delayed gratification at my house. I realize I could have bought it sooner...but I really wanted to be sure it was in the family budget after other debts were paid off. So. Enter the new grain mill. Eeeek! I'm so excited!  This is the NutriMill. I'm totally in love. Today we used 50lbs of whole KAMUT® ancient Egyptian wheat. It is organic, non-GMO and 70% of the people who have issues with modern wheat can tolerate this form of grain. With this mill, we made 50lbs of flour in about 20 minutes. That might be a record for making flour around here. In fact, my kids usually moan when I say, "It is flour making day!" However, this new mill was so easy to use that they ended up being asked repeatedly to stop making flour! I LOVE that! Love it!
 Here are the basic steps to making flour:
Step One: Assemble the grain mill.
 The first thing I noticed about this new NutriMill.  was how easy it was to assemble. I was worried that my giant-little brain wouldn't be able to get it to work.

 The instructions were pretty clear.

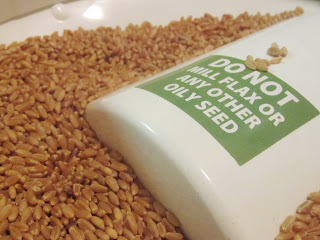
 Step 2: Follow what the NutriMill owner's manual says about the first time you use their mill. This means you need to mill 2 cups of wheat and then discard it. This will eliminate any contaminants the mill may obtain in the manufacturing process. Make sure the grain you use is clean! 
Mill that first 2 cups of wheat according to the mill instructions. This one says to unplug the mill, add the grain to the top. Then plug in the mill and turn it on. There is a knob on the front that is easy to adjust for how fine or large the grains are that are going into the stones to be ground.
 Throw away that first two cups of wheat (about 4 cups of flour). By the way, this step only needs to be done the very first time you ever ever use the mill. From here on out, I'm good to mill and use all the grain I want without throwing any away.
 Step 3: Let the kids take over and make the bread. You think I'm kidding right? Not really but okay. I was there in the kitchen when they started milling the grain. They know how to use our hand-crank grain mill as well, but today we did electric. I wanted there to be full ownership in this bread. I am the Little Red Hen Mother. If they want bread, they get to help make it. Plus, this also gives me the extreme emotional and spiritual satisfaction of knowing that in any given situation, my boys will know how to make food from grain. Bread, porridge, crackers or anything that can be made from flour, they can make. I'm sick-in-the-head that way, but I get a weird sense of peace in knowing that they will leave my home someday with a full knowledge of how to work, cook, and contribute to society as a whole. So...starting with wheat and basic food is a good place. They could end up in a country someday that doesn't have flour. You think I'm kidding right? No Way. I'm thinking about being prepared for anything in life...anything! Will they be soldiers or in a refugee camp in the future? I don't know. There are not any guarantees in life.  If they only had wheat or any other grain, they'd be good to go! Heck yes! Rock-star cool! Yes, they are boys. So?!? If I had girls they'd learn the same thing. Boys grow up into men who need to eat right?! What if there isn't a girl around who knows how to make flour?! See...sick mother isn't so sick right?  So let us repeat the steps again:
1. Unplug mill and add grain to the top (hopper).
 2.Turn mill on & adjust the grind to the your desired texture of flour. Random side note. My son asked, "Hey does the wheat scream when it gets down to the part where it is all ground up?!" I laughed out loud as I remembered watching my grandmother's grain mill and the last straggling grains hold on to the edge of the mill's hopper before being sucked into the black hole at the bottom to be ground into the sweet and delicious flour that would be made into bread. Yes my son. They scream. Just like kids scream when they go down a water slide. It's fun! Or it is grain-o-side. Either way...it is for the greater good. Right? Try not to encourage slipping on grain-native-ceremonial-garb and doing some weird dances and chants while the grain is being sacrificed to the grain-mill-demi-god. I'm crazy but I'm not insane. Wait. Now that I think of it...the dancing would be just strange enough to do wouldn't it? If I can fashion the turmeric and paprika into a thick paint-like paste to rub on our noses...{I digress}.
 Hold on little grain and your life may be spared! Bwhahaha! Not today looser. Evil grin (as I flick the grain with my finger into the pit of despair)!
One thing I do with my grain is add 4 cardamom seeds to each batch of flour.
 I grind them with the wheat. The mill is not designed to grind spices alone (so keep that in mind and if you do add anything to your grain, keep it as pure as possible).  The cardamom will help the flour to retard bugs and other pests. I don't keep the flour around very long but it is a wonderful habit to have. Doesn't that seed mixed in with the grain look so much like a...nevermind.
 Little Man took his turn with the grain grinding as well. He's getting so tall! I don't know how much longer I can call him my Little Man.
 Each 25 lb bag of Kamut made 5, 5lb bags of flour. Simple math right?
 In the end, we made dough for 25 loaves of bread. We retained 25 lbs of flour for the bread class I'd be teaching soon.
It is beautiful stuff.
Step #3. Let kids make the bread. Or make it yourself. Whatever.
My son Face was anxious to make the bread now that he had made the flour.
4 cups hard wheat flour

 2 cups water. 1/4 tsp instant yeast.
 1 1/2 tsp salt.
 Mix until just combined. I'm not going to lie. This is his favorite part.
 The dough is so smooshy at first.
Once all the dough is smooshy, cover over with a lid and let sit 10-14 hours (usually for us it is about 12 hours before we get back to it). Dough will be ready to make into bread. The printable tutorial is below for how to make it into bread.
If you want the printable go to:

There you go! Turn Wheat into Bread!
Save money and empower yourself! 

Legal blah blah blah: By the way...I paid for my mill out of my own pocket so this a totally unbiased review of the mill. The opinions expressed here on the blog are totally my own. Isn't that good to know? I don't make any money if you decide to buy a mill based on this review. 

Always My Very Best,
Your Friend Chef Tess