Friday, November 30, 2012

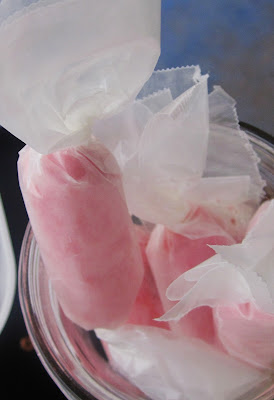
Love is a cupcake...the Gift you give from the heart.

 I remember my mother coming home from work one December day when I was in my teen years. Bless her heart for loving me through that emotionally weird time.  Teenage girl-hood is such a funny time isn't it? I love you mom. At the time I was screaming for my own identity...and you let me become the woman I am today. Part of that, was how freely mom shared her experiences.

Mom had been crying and I knew it wasn't because of the boss or something stress related. I know she had been under a lot of pressure, but I didn't know, even remotely, what she was dealing with at the time. I didn't learn that until I faced it myself. I did learn however, that her tears that day were tears of gratitude for a single cupcake. It was after the office had closed and most of the people in the office had left...except for mom and one other woman.  With tears in her eyes mom told me that the sweet lady would come in and clean the office and was financially in a very bad spot. That night, the woman had given my mom a single cupcake as her gift. Mom gently unwrapped the cupcake while the woman was there in the office and relished every bite while telling this friend, in all honesty, that it was the best cupcake she had ever eaten. It was full of love. It was the best gift ever. I'll never forget that cupcake.

Today I wanted to share something that has been on my mind. I think it is more important this time of year because there is so much emphasis on the gifts that come along.  I've been, for many years, giving homemade gifts. In all honesty, that was what I could afford financially. Honesty here...it was really hard. In my heart I thought I was somehow giving less of gift than what I could give. Now, I realize more than ever, that it isn't the package...it is the love inside the package. 
 Today...I'm thankful for the lesson of the cupcake. 
For me, it isn't how many you give, it is the love behind the cupcake.

Why do I do what I do? It is because I truly deeply believe that the love you give away is the only love worth having. That being said, I'm looking forward to a very full and busy weekend! I'll be sharing the love with all of my dear ones who I'm certain have no idea how much they really have changed me! Thank you for the love. Thank you for the powerful energy in your heart. You have made a difference to me and my family. You have walked with me through a very tough and yet, magical year! I don't imagine I can ever express it enough. But just in case...I'll be sure to bring you a cupcake. 

Remember tomorrow is the Ribbon Cutting Event. Xoxo!

Always My Very Best,
Your Friend Chef Tess


Wednesday, November 28, 2012

Amazing Happy Homemade Holiday Gifts That Won't Break the Bank

We have a Christmas tradition of going into the Fox 10 studio for a quick segment every December. Many years have been filled with great ideas to save money and time for those simple gifts from the heart that only you can give. Tomorrow I'll be on Fox 10 at 9:45 AM to share my favorite personal ideas for Hostess gifts...that aren't Twinkies and cupcakes (since we can't get those anymore anyway and they just make you fat). You know the hostess gift is the sweet little gesture you give to the gal or guy having the party to say, "Thanks for thinking I'm cool enough to invite to your little shin-dig. I think you're pretty swanky yourself." 

One of my favorite new Holiday Mix videos just got finished! Here it is!Tropical Mango Berry Cobbler Mix in a Jar...


Here are a few more post links and ideas!

Evil Genius 7 Holiday Cookie Mixes in One


Whole Grain for the Holidays! Cookies and Bars on Fox 10

Gifts of Impeccable Taste (Holiday Mix Class Notes and Printable)


Neighbor Gift Ideas for Christmas!

 Holiday Soup and Gravy Mix (The 101)

Infused Holiday Vinegar Tutorial

Homemade Strawberry Almond Milkshake Fudge Mix and Peanut


Chef Tess Magic Fudge Mix


Fruit Crisp Mix


There you go! Make some great and extremely cool personal gifts this year!  I'll be sure to post the video link from Fox 10 as soon as it is available! 

Always My Very Best,
Your Friend Chef Tess


Tuesday, November 27, 2012

Easy and Delicious Christmas Cobblers from Lucky Leaf


It isn't really Christmas until we break out the warm deliciousness of a good cobbler from our friends at Lucky Leaf! Am I right? Well, this year is no exception! 

Remember last December when I got to share this ridiculously delicious Wise Woman Apple Cake with Salted Caramel Sauce Recipe from my friends who make the remarkable fruit fillings-o-happiness at Lucky Leaf?

I got another amazing and exciting package from my darlings there. They've been really nice to send me some complimentary samples and allow me to review their recipes and products over the years.  If you've never heard of them, you can find their recipes and ads in these major magazines!
The recipe for the Amaretto Peach Cobbler was outstanding! We ended up making it in personal sized cobblers for easy service at our breakfast buffet.
As always, the filling was full of big chunks of fruit all the way to the top of the can! Sometimes I wonder if they sit at the factory trying to figure out how they can get more fruit in the cans each time. I've never been disappointed! It always tastes fresh and divine!


Ingredients
2 21-ounce cans LUCKY LEAF® Premium Peach Pie Filling
½ cup amaretto (or non-alcohoic alternative)
117.5-ounce package sugar cookie mix I used my Homemade buttermilk cookie mix
1cup almonds, sliced (we used toasted walnut chunks)
½cup butter, cubed

Instructions
Spread pie filling into an ungreased 13-inch x 9-inch baking dish; drizzle with amaretto. Sprinkle cookie mix and almonds over top; dot with butter.Bake at 350° for 30-35 minutes or until filling is bubbly and topping is golden brown.Serve warm.
Chef Tess note: For personal-sized, divide between 7 1 cup ramekins or baking dishes. 

I used my Homemade buttermilk cookie mix with 1/2 tsp LorAnn English Toffee flavored oil with my mix along with the amaretto. It gave just the right amount

Top with butter according to the recipe directions
Note to self: Has there ever in the history of history been t a time when topping with butter wasn't going to end in delicious? --Um...no. Even snails taste better with butter. Now imagine topping something that is actually good on it's own...with butter...just saying. 
 Bake. 
Aaamazing.  My husband ate 3 of the personal sized cobblers. Don't ask me why I bother making anything personal size around with him. He's such a dork-face. I love him. I really do...ugh. 


 I was impressed enough with that simple amaretto recipe that I didn't stop. I decided to also try their Cherry Kuchen  recipe too! I added some dark chocolate chips for a devilish dessert delight!
Ingredients
121-ounce can LUCKY LEAF® Regular or Premium Cherry Pie Filling
¼cup butter or margarine
½cup sugar
1egg
1 ½cups flour, sifted
2 ½teaspoons baking powder
½cup milk
1 teaspoon vanilla
1 cup dark chocolate chips optional
1 cup toasted walnuts (optional)

Instructions
Preheat oven to 350°F.Sift dry ingredients. Cut in butter. Combine egg, milk and vanilla. Add to flour mixture. Add Chocolate chips. 
 Note to self: Is there any recipe in the world that isn't made better by "adding chocolate chips"?


Pour pie filling into greased 7x11-inch glass baking dish (2 quart).  Gasp at how many cherries there are in the filling. That's just a Lucky Leaf tradition. I love them. Have I mentioned that before?

Cover with batter. Sprinkle with sugar and cinnamon. Bake for 25 minutes. 

We have a freakin' winner!! Daggumit I love this stuff! 
As always, I have really enjoyed these simple holiday recipes from my darlings at Lucky Leaf! 

There you go! Make some beautiful cobbler!


Always My Very Best,
Your Friend Chef Tess


Monday, November 26, 2012

Elegant Budget Friendly Holiday Buffet Table Ideas Segment


 Today at 5:45 AM I was on NBC 12 Phoenix with one of my all time favorite people, Syleste Rodrigez talking about some amazing and outstanding holiday buffet table ideas.  First we'll be talking about some amazing tamales!
 I have a full tutorial on how to make Homemade Tamales here on the blog.   I'll be making some cheddar bacon tamales enchilada style with green sauce and jalapeno cilantro sour cream. 
We'll also be making some hot dips.  Today it will be  Jalapeño Popper Dip. The only change being that I will top it with bacon! Also...the ridiculously beautiful centerpiece ideas that will blow your mind including gingerbread mansions...
How do I build them in glass cookie jars though?
I'll post the full tutorial for the gingerbread house centerpieces soon.
There you go!
Always My Very Best,
Your Friend Chef Tess

Tuesday, November 20, 2012

Hawaiian Christmas Meal in a Jar Tutorial Video

I've been busy the last couple of weeks and one of the major projects has been putting together some awesome videos! If you like what you see, be a dear and please be sure to tell your friends and share on facebook, twitter, and pinterest!  Click over to youtube and like the video. Comment. Honeyville will make a lot more of these, but that will depend on some great response from all of you! So...please share. Xoxo!


The original Hawaiian Style Beef Meal in a Jar Post has the recipe as well as the picture tutorial. 

There you go my darlings! Enjoy!

Always My Very Best,
Your Friend Chef Tess

Thai Chicken in a Spicy Peanut Sauce Meal in a Jar Tutorial Video!


The original Thai Chicken in Spicy Peanut Sauce Meal in a Jar Post was added to my blog in February. It has been one of my all-time favorite meals in a jar! Originally it was a family favorite freezer meal that I converted to a shelf-stable meal for convenience and longer shelf life. I adore it!

I know a lot of folks who have been waiting anxiously for more tutorial videos on how to make meals in a jar and this is one of the new videos! Yes! If you like what you see, be a dear and please be sure to tell your friends and share on facebook, twitter, and Pinterest!  Click over to youtube and like the video. Comment. Honeyville will make a lot more of these, but that will depend on some great response from all of you! So...please share. Xoxo!


Chef Tess 

Thai Chicken in Spicy Peanut Sauce with Rice

In a quart jar:
1 1/2 cup  Freeze Dried Chicken
1/2 cup Soy Sauce Powder
2 Tbsp. Lemonade Powder
1 Tbsp. Dehydrated minced or sliced   garlic 
1/3 cup Powdered Peanut Butter
1 tsp. Hot Red pepper flakes
1/3 cup Dehydrated Onion
2/3 cup  Dehydrated Carrots
1 Tbsp. Dry cilantro
1 Tbsp. Ultra Gel or cornstarch
1 1/2 cup Long Grain Rice

You will also need:
One oxygen absorber per jar.
One sandwich bag for rice if you use the bag and cook the rice separate from the sauce.

To prepare:
In a 2 quart pot with lid, combine the rice bag contents with 3 cups hot water. Cover tightly and simmer on very low heat for 20 minutes. While the rice is cooking, combine the topping contents with 3 cups water and simmer on low heat 15-20 minutes until vegetables and meat are hydrated and sauce thickens slightly.


There you go my darlings!

Always My Very Best,

Your Friend Chef Tess
I

Saturday, November 10, 2012

Home Canning Meat and Vegetables Tutorial


 This is a special food storage basics day and I'm sharing something really awesome! Well, when am I not sharing something awesome?! Today I taught a class on home preserving meat and the safety needed to make sure that the processing is done correctly. In my post Home Canning Safety 101, I covered some basics on safety. Many people process their own meat for longer-term shelf life. It is recommended that home-canned meat be used withing a year of being processed. As I'm liable, I'm not going to ever suggest that it could be safe for very much longer than that. Sorry folks. The only meats I suggest for really long shelf life (10-15 years) are Freeze Dried Meats. The moister content is the key. If food is stored in liquid, there's always going to be a possibility for bacteria growth. The most deadly canning concerns happen with low acid foods, and those botulism spores can only be killed at the higher temperatures that a pressure canners produces. Boiling water canners top out at 212 degrees (botulism needs to be heated to 240 degrees to be killed).   I am often asked how to do this and how to do it in such a way that it doesn't cause food-borne illness.  Today I'm sharing the basics on pressure canning! This is  method of canning used for "low acid" foods like meat, vegetables and some fruit (depending on it's acid levels). In my class I also covered the safety of home meat jerky production. That will be a later post. 

Some reasons for processing your own meat and vegetables:
  • Save money and buy when meat or vegetables are  on sale
  • Convenient cooked meals on hand for easy use
  • Processing game and wild animal meat (or home raised animals)
  • Preserving vegetables for use from the garden or local farmer's markets
  • Preparing for any emergency
Pressure canning is done in a large pressure cooker that is specifically designed for home canning. It is not okay to use a regular pressure cooker for home canning! It is however, okay to use a pressure canner for large batching of pressure cooked foods. Please make sure if you are home canning meat that you have a home canner that has been approved for home canning safely. Also, I'm a food safety freak. I will always give you the best possible safety information for your family that I have! I've seen some pretty interesting posts on home canning that include things like canning butter and storing meats for years and years in home canned jars. If you are doing this, please read the post on why I don't ever home can butter!  


General Meat Canning Information
Courtesy of the University of Minnesota Extension office
Meat, poultry and fish are low acid foods. They must be processed in a pressure canner to assure safety. Use the processing time and pressure (PSI) that is specified for each type of game.
Following are some general guidelines for canning meat or poultry:
1 Can only good quality meat, poultry ,or game.
2. Chill home produced meat at 40°F or below soon after slaughter to prevent spoilage.
3. Keep all meat clean and sanitary. Rinse poultry thoroughly in cold water, then drain.
4. If meat must be held for longer than a few days, freeze it for maximum quality retention, store frozen meat at 0oF or lower until canning time.
5 Thaw frozen meat in a refrigerator at 40°F or lower until most of the ice crystals have
disappeared. This may take several days for large cuts of meat.
6. Trim gristle, bruised spots, and fat off meat before canning. Excessive fat left on the meat will melt and rise to the top during processing. If the fat comes in contact with the sealing edge of the lid, the jar may not seal.

Note: Individuals using a weighted-gauge canner at altitudes less than 1000 feet may use 10 PSI instead of 15 PSI for the canner pressure. This will improve nutrient and quality retention. Check with your local county extension office or Soil Conservation District for altitude information. For more information about food safety, call USDA's Meat and Poultry Hotline at 1-800-535-4555

This is my personal post on how to pressure can beef stew. We don't pressure can meat often here, since Ace is a vegetarian. However, beans and vegetables are low acid as well, so we still have to do some now and then.  Plus...I like meat. 

I have two different pressure canners. One is a Presto Pressure Canner and one is the All American Pressure Canner (Thank you mom and dad for the early birthday present!). 

Ball's Beef Stew Recipe is approved for home canning. The cooking time and pressure have been tested! Always use an approved recipe. For pressure canning, I do add my own spice blends and herbs within reason. By the way, if you need canning supplies, Ball has a great website! Visit the Store 

Prepare the stew according to Ball's Beef Stew Recipe directions:
1.) PREPARE pressure canner (check seals, air vents and gaskets). Heat jars and lids in simmering water until ready for use. Do not boil. Set bands aside. 
2.) BROWN meat in oil in a large saucepot. Add vegetables and seasonings to browned meat. Cover with boiling water. Bring stew to a boil. Remove from heat. 

3.) LADLE hot stew into hot jars leaving 1 inch headspace. Remove air bubbles. Wipe rim. Center hot lid on jar. Apply band and adjust until fit is fingertip tight. 
4.) PROCESS filled jars in a pressure canner at 10 pounds pressure 1 hour and 15 minutes for pints and 1 hour and 30 minutes for quarts, adjusting for altitude. Don't forget to let the pressure canner vent a stream of steam for a full 10 minutes before topping with your canning weight! That is a very important step to making sure that the cooker has expelled enough excess air to get the pressure right. 
The Presto canner has a weight like this.

 The All American model I have has a weight as well as a pressure gauge.
 The weight must be set according to your altitude! Low altitude requires 10 lbs of pressure for most items. Check the recipe! 
I love having the pressure gauge, as I can actually see what the psi is within my cooker!
 Cook the full amount of time that the recipe specifies for your specific meat or vegetable. Only start the timer when the pressure canner is up to temperature and pressure.  When time is over, turn off the heat and allow the pressure cooker to decompress naturally. Do not run under water or remove the weight until the gauge reads "0" and the weight doesn't hiss when touched. This is a sure sign that it needs more time to cool. 

Remove jars and cool in a draft-free area.  Do not disturb them! Check lids for seal after 24 hours. Lid should not flex up and down when center is pressed.  At this point, remove the rings.
 Wash and sanitize the outsides of the jars with warm soapy water.
Home pressure canned food is good up to a year after processing if kept in a cool dry place. Label each jar clearly with the date of production so there aren't any questions as to how long the food has been around the house. If the bottles ever start to ooze, mold, or bubble on the shelf...they're evil and need to be destroyed! Be safe. If obvious signs of spoilage are clear, don't open the jars. Dispose of them. Don't feed them to your pets. Now that you know the safety, remember that by following a few rules, you can make meals that are actually delicious and safe at home! 

Always My Very Best,
Your Friend Chef Tess