Tuesday, August 14, 2012

Making whole-grain flour at home in 3 Easy steps! Turning Wheat into Bread!


 After 13 years of using an older hand-me-down grain mill, I finally have saved enough to get the electric grain mill I've had my eyes on for 2 years. Yup. We do practice delayed gratification at my house. I realize I could have bought it sooner...but I really wanted to be sure it was in the family budget after other debts were paid off. So. Enter the new grain mill. Eeeek! I'm so excited!  This is the NutriMill. I'm totally in love. Today we used 50lbs of whole KAMUT® ancient Egyptian wheat. It is organic, non-GMO and 70% of the people who have issues with modern wheat can tolerate this form of grain. With this mill, we made 50lbs of flour in about 20 minutes. That might be a record for making flour around here. In fact, my kids usually moan when I say, "It is flour making day!" However, this new mill was so easy to use that they ended up being asked repeatedly to stop making flour! I LOVE that! Love it!
 Here are the basic steps to making flour:
Step One: Assemble the grain mill.
 The first thing I noticed about this new NutriMill.  was how easy it was to assemble. I was worried that my giant-little brain wouldn't be able to get it to work.

 The instructions were pretty clear.

 Step 2: Follow what the NutriMill owner's manual says about the first time you use their mill. This means you need to mill 2 cups of wheat and then discard it. This will eliminate any contaminants the mill may obtain in the manufacturing process. Make sure the grain you use is clean! 
Mill that first 2 cups of wheat according to the mill instructions. This one says to unplug the mill, add the grain to the top. Then plug in the mill and turn it on. There is a knob on the front that is easy to adjust for how fine or large the grains are that are going into the stones to be ground.
 Throw away that first two cups of wheat (about 4 cups of flour). By the way, this step only needs to be done the very first time you ever ever use the mill. From here on out, I'm good to mill and use all the grain I want without throwing any away.
 Step 3: Let the kids take over and make the bread. You think I'm kidding right? Not really but okay. I was there in the kitchen when they started milling the grain. They know how to use our hand-crank grain mill as well, but today we did electric. I wanted there to be full ownership in this bread. I am the Little Red Hen Mother. If they want bread, they get to help make it. Plus, this also gives me the extreme emotional and spiritual satisfaction of knowing that in any given situation, my boys will know how to make food from grain. Bread, porridge, crackers or anything that can be made from flour, they can make. I'm sick-in-the-head that way, but I get a weird sense of peace in knowing that they will leave my home someday with a full knowledge of how to work, cook, and contribute to society as a whole. So...starting with wheat and basic food is a good place. They could end up in a country someday that doesn't have flour. You think I'm kidding right? No Way. I'm thinking about being prepared for anything in life...anything! Will they be soldiers or in a refugee camp in the future? I don't know. There are not any guarantees in life.  If they only had wheat or any other grain, they'd be good to go! Heck yes! Rock-star cool! Yes, they are boys. So?!? If I had girls they'd learn the same thing. Boys grow up into men who need to eat right?! What if there isn't a girl around who knows how to make flour?! See...sick mother isn't so sick right?  So let us repeat the steps again:
1. Unplug mill and add grain to the top (hopper).
 2.Turn mill on & adjust the grind to the your desired texture of flour. Random side note. My son asked, "Hey does the wheat scream when it gets down to the part where it is all ground up?!" I laughed out loud as I remembered watching my grandmother's grain mill and the last straggling grains hold on to the edge of the mill's hopper before being sucked into the black hole at the bottom to be ground into the sweet and delicious flour that would be made into bread. Yes my son. They scream. Just like kids scream when they go down a water slide. It's fun! Or it is grain-o-side. Either way...it is for the greater good. Right? Try not to encourage slipping on grain-native-ceremonial-garb and doing some weird dances and chants while the grain is being sacrificed to the grain-mill-demi-god. I'm crazy but I'm not insane. Wait. Now that I think of it...the dancing would be just strange enough to do wouldn't it? If I can fashion the turmeric and paprika into a thick paint-like paste to rub on our noses...{I digress}.
 Hold on little grain and your life may be spared! Bwhahaha! Not today looser. Evil grin (as I flick the grain with my finger into the pit of despair)!
One thing I do with my grain is add 4 cardamom seeds to each batch of flour.
 I grind them with the wheat. The mill is not designed to grind spices alone (so keep that in mind and if you do add anything to your grain, keep it as pure as possible).  The cardamom will help the flour to retard bugs and other pests. I don't keep the flour around very long but it is a wonderful habit to have. Doesn't that seed mixed in with the grain look so much like a...nevermind.
 Little Man took his turn with the grain grinding as well. He's getting so tall! I don't know how much longer I can call him my Little Man.
 Each 25 lb bag of Kamut made 5, 5lb bags of flour. Simple math right?
 In the end, we made dough for 25 loaves of bread. We retained 25 lbs of flour for the bread class I'd be teaching soon.
It is beautiful stuff.
Step #3. Let kids make the bread. Or make it yourself. Whatever.
My son Face was anxious to make the bread now that he had made the flour.
4 cups hard wheat flour

 2 cups water. 1/4 tsp instant yeast.
 1 1/2 tsp salt.
 Mix until just combined. I'm not going to lie. This is his favorite part.
 The dough is so smooshy at first.
Once all the dough is smooshy, cover over with a lid and let sit 10-14 hours (usually for us it is about 12 hours before we get back to it). Dough will be ready to make into bread. The printable tutorial is below for how to make it into bread.
If you want the printable go to:

There you go! Turn Wheat into Bread!
Save money and empower yourself! 

Legal blah blah blah: By the way...I paid for my mill out of my own pocket so this a totally unbiased review of the mill. The opinions expressed here on the blog are totally my own. Isn't that good to know? I don't make any money if you decide to buy a mill based on this review. 

Always My Very Best,
Your Friend Chef Tess

Thursday, August 9, 2012

Saving Money and Eating Clean?! Today's 3TV Segment! With Printable Recipes!

I joined the famous and fabulous crew down at 3TV Phoenix this morning with some great money saving and clean eating ideas that I use! Check it out. I had so much fun!


What Are The Top 5 Money Saving Recipes Every Cook Should Know?

 I usually share a little on cooking with food storage and also money saving ideas for anyone who is just trying to make ends meet and wants to be able to take control of their family budget. Sometimes the difference in being able to have the chance to be home with kids or work full time is just a few hundred dollars a month. If I can help you save some precious funds so you can you use them places that you want, cool. A lot of people read my blog for various reasons. If you want things more natural, I'm here to help if I can with that as well. You have to do what is best for your family in the long run. So take my advice for what it is. Use it or not. I'm not checking your cupboards. I just know what has worked for us in the past.  Today I want to share my top 5 Money saving areas in cooking and baking. They really do make those dollars and pennies stretch out! Note: If you use organic and non-GMO ingredients in the recipes I suggest, you will probably pay a little more for the raw ingredients, but over-all it will still cost a lot less than the individual organic mixes. I purchase organic grains and ingredients in bulk and it cuts the cost quite a bit. 

Here are My Top 5 Money Savers!

#1.  Sauce, Condensed Soup, and Gravy Mixes 
Usually you will go from dollars to mere pennies if you learn how to make your own white sauce and gravy mixes from scratch. They usually only take a few ingredients and the money you save can be substantial! Usually from almost 2$ a can for condensed soup to about 14cents to make it from scratch. 
 #2. Basic Bread Dough  How much do you pay for a single loaf of bread? Making it from scratch can save you up to 3$ a loaf for the whole grain breads. Think about that and maybe try to gain a new skill. I think the greatest gift you can give yourself is the ability to take any flour in any given situation and be able to make a loaf of bread that would not only satisfy, but delight your family. In taking back the art of making your family bread from someone else and placing it in your own able hands, you become very empowered! It is the staff of life. If you know the basic recipe "by heart" and can make it anywhere, anytime...you're prepared for anything! If you buy the whole grain flour in bulk, your savings will add up even more. If you don't think you'll use all the flour, consider "going in" on a bag with a friend and splitting the cost. (My favorite online source is here)

#3. Homemade "Bisquick" Baking biscuits, muffins and pancakes from one homemade mix can save a lot of cash...even over buying the pre-made store bought mix! Did you know that the average box of pre-made baking mix costs around 4$ for 2 lbs? Making it from scratch...about 1.50$ (cheaper if you buy the flour in bulk). Making it at home, you control all the ingredients. Initially it may seem to cost more to get all your supplies, but once you have all the ingredients, it's a snap! Every penny counts right? I also suggest going whole grain whenever you can. 9 grain all purpose baking mix is a great one for that!

#4 Basic Beans. On average, a 15 oz can of beans is around 1$...depending on where you shop. If they are organic they will be a lot more than that. Now, imagine you took a 1$ one pound bag of dry beans and cooked them yourself? Keep in mind, on average a pound of dry beans will make about 7 cups of cooked beans! We eat a lot of beans. Buy them in bulk and save even more than what it costs to get a single pound bag of beans. This also applies to knowing how to cook other basic grains from scratch. You'll save a lot of money if you use long grain rice instead of instant rice. Par-boiled rice and brown rice are great nutritionally and will keep your stomach filled longer. 
#5 Home Spun Breakfast Cereal. Isn't it crazy how much they charge for cereal in the grocery store?! One thing that saved us a lot of money and still does is the ability to make homemade breakfast cereal. My favorite is granola, but we also love homemade "grape-nugget". Generally I use the granola as a boost to cereal I buy. I'll get the rolled grain in bulk, make the granola and then mix it into the flake cereals like corn flakes, bran flakes, or crispy rice. This not only adds to the cereals nutritionally, but also it satisfied hunger longer. I for one, can keep going for hours on a bowl of cereal if it has granola added to the flakes...instead of just the flakes alone.  This also applies to saving money buying the whole grain and grinding it yourself if you can. When you make creamy-wheat from wheat you gain nutrition and save money!

Ultimately, there are a lot of areas you can start saving money cooking with food storage. You may also want to try baking with alternative cooking tools like Solar cooking with a Solar Oven . I know it saved our utility bill a lot in the Arizona sun cooking all summer outside instead of heating the house and having to cool it back down again . I don't know what you're saving your money for, I just want to help if I can.  Share your favorite money saving tips too! We are all in this together! I'd love to share them here on the blog! 

 You can get the printable PDF here. 

There you go!

Always My Very Best,
Your Friend Chef Tess

Wednesday, August 8, 2012

Spice Blends are In! Now We Have 8! Remember when we only had One?

Just over 8 years ago, I started blending and milling spices late at night to earn a little extra grocery money while my kids were asleep and I was a full time mom. This is one of the very first printed labels. Initially...I wrote them all by hand. 
 A few years later, I had a different look and sold the spices exclusively on Etsy. 
 I'd go to boutiques and hope that a few bottles would sell so I could get something special for my kids at Christmas. I remember one year a friend and her husband bought about 25 bottles. I bawled all the way home. It made such a difference to me at that time, not only to have that huge vote of confidence, but that boost of cash for some essentials. 

 A year and a half ago...this is how the Wise Woman of the East Blend label looked.  I thought I had come pretty far from the days of hand-written labels. This was also about the time I was staying up until well past 3 AM about 4 nights a week filling orders and making more blends. It was crazy!
 Last June, my spices were bottled. I went to Salt Lake City, Utah and blended and packed each bottle myself at the Honeyville kitchen. It was the first time I got to see them on an actual store shelf! I was so excited!
 A few months later, these new labels were made. The spices were not only popular, but getting more popular!  I was officially adopted as a Honeyville product! Waaawhooo! At that time I had four blends that I had developed and loved. They were (and are) blended by one of the finest spice companies I know!  
Wise Woman of the East was (and still is) my most popular blend. I use it anywhere a recipe calls for cinnamon. It is amazing. 

 During all of this... I had four more spice blends  that I had "off menu"...if you knew they existed, you asked for them by name and if I loved you enough...I'd make a bottle for you. 

 Now I have eight blends! 

Well...Nine.
 I have nine if you count my Gingham Masala Spice Blend
It totally counts.
Gingham Masala- An exotic blend based on an ancient recipe.  Formulated by me as a colorful accent that highlights any meal with tongue tingling flavor and beauty. Packaged in collectible glass bottles adorned with art by Erik Johnson, these spices complement any cook’s kitchen. Proceeds from the sale of this spice go 100% to help feed, educate and cloth impoverished HIV orphans in India through the efforts of the Gingham Project. It can be found Here.   One day...I'm going to bring one of those kids home.  I just know it. 


Today, I have to show you the new labels!
The new blends should be in stores very soon! I know that they have already shipped...so now it is just a matter of time. 

Introducing:

Cheftessbakresse™ French Provencal Essential™ 
A bold blend of rustic French herbs, citrus, and garlic with a hint of sea salt to add depth and Provencal charm to your salads, poultry, sauces, pasta dishes and potatoes.
Ingredients: Granulated garlic, granulated onion, Herbs, Spices, and Sea salt
No Sugar or MSG. 


Cheftessbakresse™ The Big Dill (Salt-Free)
Wake up your taste buds to a Salt-Free dill, bell pepper, citrus, garlic and onion blend that is designed to add brilliant bright flavor to your life! It is remarkable on seafood, in potato salad, egg dishes, sour cream dips and cream cheese spreads. 
Ingredients: granulated onion, dill weed, bell pepper, lemon peel, garlic, spices. No sugar, salt or MSG.

Chef Tess Bakeresse™ Greek Olympian 
Bold, powerful, and able to make anyone fall instantly in love! Call down the thunder. This is the Venus of spice blends! With a perfect balance of beautiful Greek herbs,  spices, lemon and garlic it is remarkable on roasted meat, vegetables, salads, and pizza. Salt Free!
Ingredients: Herbs, Spices, Garlic, Onion, Lemon peel, pepper. No Sugar, Salt or MSG.

Chef Tess Bakeresse™ Amazing Wok-Star  
Beautiful musical notes of the Orient will burst from your latest dish when you add this tangy, spiced-citrus blend to your stir-fry, marinades, rice dishes, sauces and grilled vegetables. It is sure to transform any ordinary dinner into a concert for your mouth!
Ingredients:  natural soy sauce powder (contains wheat), natural lime juice powder, garlic, onion, lemon zest, orange zest, ginger, cinnamon, spices, coconut powder, natural misquite smoke flavor.Contains Wheat. No sugar or MSG. 


There you go! I'll be certain to post when the bottles are in my sweet little hands! This is such a huge blessing!

Always My Very Best,
Your Friend Chef Tess

Tuesday, August 7, 2012

How To Make Homemade Mylar-Packed 52 Method Convenience Meals for Camping and Beyond!


I've had a lot of requests for the detailed tutorial on how to make homemade Mylar bagged meals for camping, convenience meals, and emergency preparedness. This is a perfect post to use with the 52 Method meals that I've done in the past and that I'm currently writing the book on as well!  The first Original Post on making the jar meals was here. That menu has 7 recipes and there have been a ton of recipe posts after that post! None of those have been done in mylar bags up to this point and I know there are some remarkable appications for the use of these bags.
These meals are great for :
  • meals-from-home for college students
  •  family and group camping/hiking/backpacking trips
  • cub-scout camps and girl scout camps
  • new-mom baby shower gifts
  • foreign  missionary care-packages
  • meals from home for military troops
  • anyone living in tornado or earthquake zones
  • travel and vacation meals to heat-and-eat in hotels
They are designed for those  that want to be able to control the ingredients in their food and be prepared for anything!  Hopefully I can offer some easy techniques that will help you make some fun memories! We've had a total blast making these with the kiddos and planning the upcoming camping expeditions. Menu choices included things like these (though you can see a ton more in my 52 method recipe section):
Carrot Cake Breakfast Pudding with coconut cream sauce...here.
Especially popular is the  
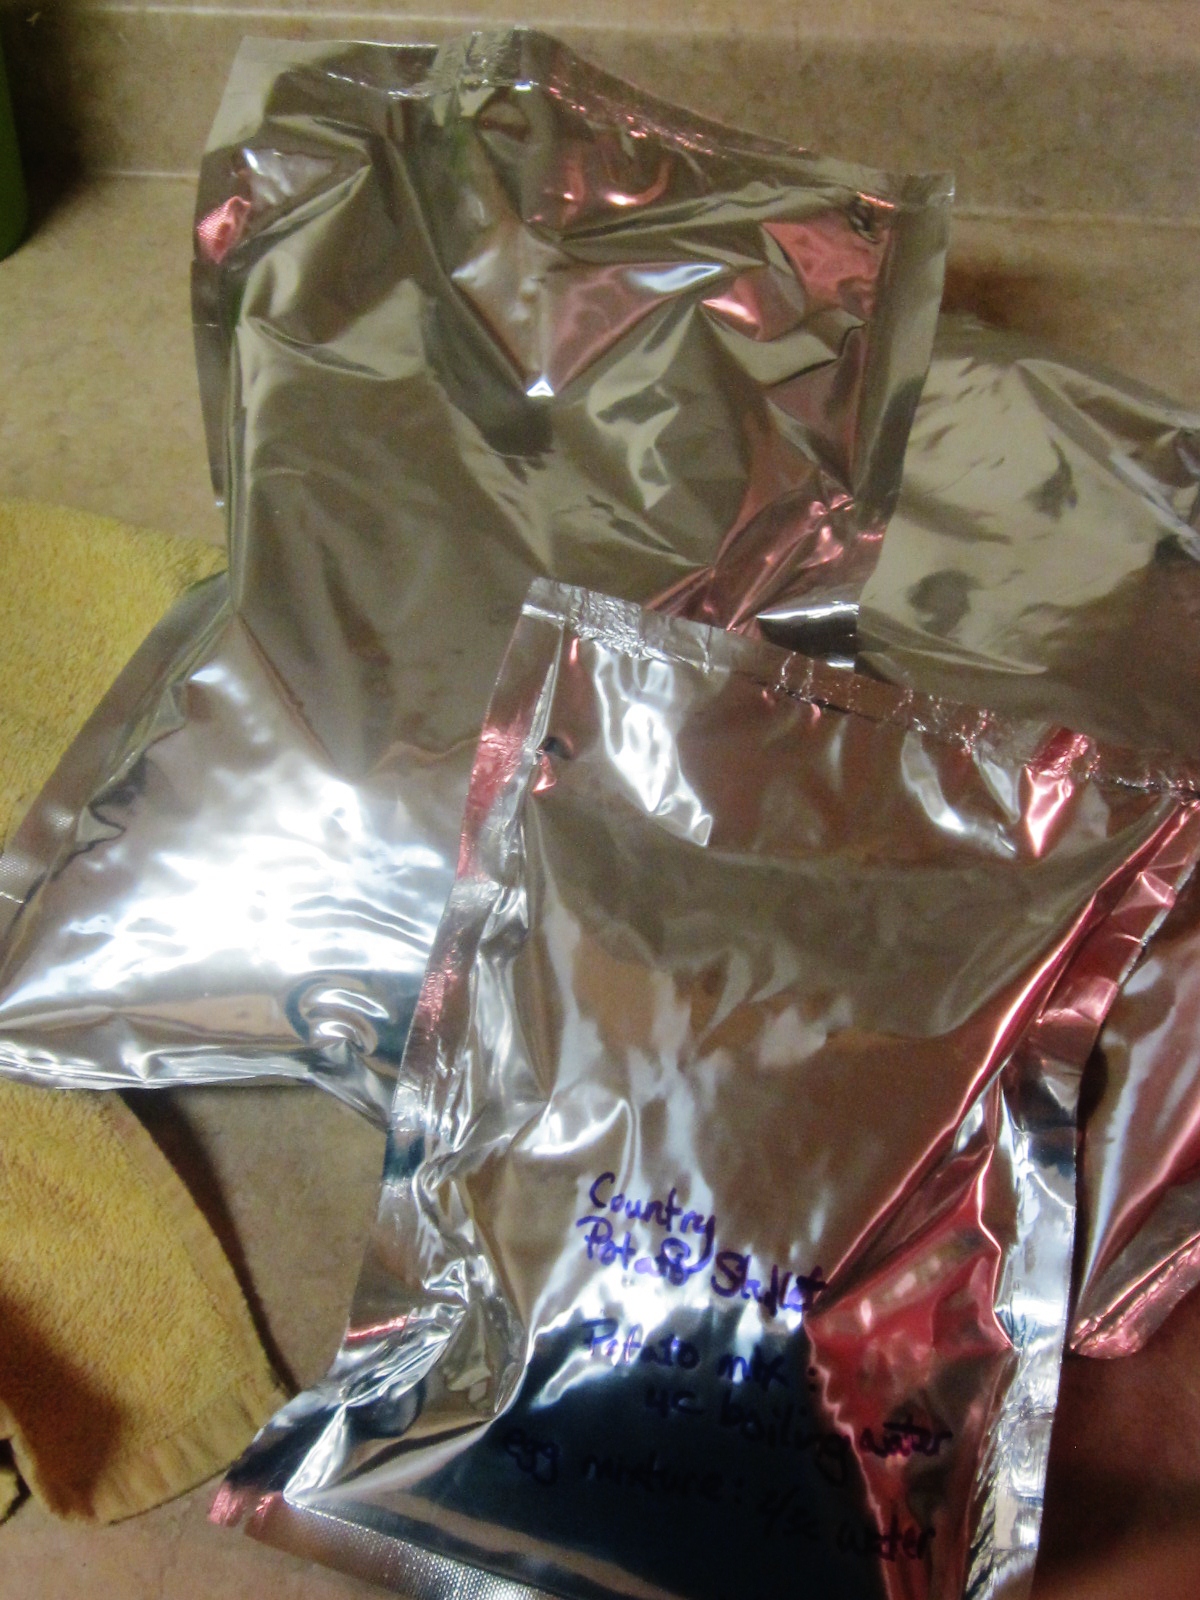
Country Breakfast skillet meal here with real scrambled eggs, sausage, bell peppers and real cheese. Yes. It is shelf stable 5-7 years. Try not to pass out.
Ginger-Apple Raspberry Snap Crisp...with chocolate sauce...Here.
Just pack it with the crisp mix separate from 4 cups of freeze dried fruit in the bags.
Thai Chicken in Spicy Peanut sauce over rice...here
.
Saucy Italian Baked Ziti with Mozzarella Cheese...video tutorial.
Polynesian Sweet-n-Sour Chicken baked beans...here
Chicken Chile Verde...here
Yankee Pot-Roast Gravy with Garlic Mashed Potatoes...here.
Yes, there are many more recipes. These are just a few suggestions!
Sure enough, I took pictures of how to pack the mylar meals.  You know,  so that you'd benefit from my adventure as well. I know you love me. Try not to cry.
1. First you will need some Mylar bags.  For more information on how they are made and designed, go here. The outside is aluminum and the inside is lined with a food-grade plastic. Ironically when it is ironed with heat on the outside of the bag, the plastic fuses together causing a magnificent seal!  I use and recommend the 5.0 mil FOOD GRADE bagsThey come in various sizes, but so far, my favorite has been the 5-gallon size. 
  I've been able to cut it down to any size I want and be able to really maximize the cost-effectiveness of the bags.
2. Second you will need oxygen absorber pouches.  I use them in the 52 method jars. There are many oxygen absorbers of different sizes, depending on how much food you will have in your Mylar bags. For that reason, I'm suggesting you look at the resource here for more details on that:  
I'm not the inventor of oxygen absorbers, but they sure are remarkable! 
3. A hot iron. I know there are machines for Mylar sealing available, but I had this old iron and didn't have to spend any extra money. Perk! I found my iron!  This is totally off-topic-random. Yes...I'm officially not Martha Stewart. There. I said it. I saw an episode once where Martha devoted a whole show to how to iron and what to do. I think she's delusional. Just saying. I'm not that girl. If I can pull it out of the dryer or hang it on a clothesline and not have to iron it...I'm pleased about that. 
Mylar Bag Sealing Procedure:
1. Set your iron on the cotton setting. No steam. Get a soft, clean cloth and place it on your work surface or ironing board.
 2. Iron edges. After cutting the bags to your desired size, iron the edges with the hot iron. Be sure that the bag's edges are exactly aligned so that the plastic doesn't melt on your iron.
 3. Stack cooled bags and prepare to fill with food.
4. Fill bags with food. There are a few methods for this. I like the one that includes putting the food in another bag inside the Mylar so it doesn't fall out of the bag when I'm sealing it. Obviously the more air that is removed, the better! I've had friends pack food inside food saver bags, suction out the air and then put them in mylar.
5. Once filled with food, add the oxygen absorbers and seal. Work quickly. It is recommended that you seal all the bags within 30-60 minutes from the time you open the oxygen absorbers! So...keep that in mind.
6. Label clearly! Make sure all bags are labeled clearly with contents, cooking instructions, and preparation dates. You will benefit greatly from knowing what is in the bags. Or...you can go without labels and make a game out of not knowing. I don't really like that game. I'm a party poop-er-drooper-deluxe, Agua-fiesta-supreme...with cheese.
 The bags will suction around the food as the oxygen absorbers do their job. Yes, even the smaller bags sealed in the zip-locs inside the mylar will be okay. Twist them closed lightly, don't zip them. They will have their air removed too. Yes...you still need the mylar bags for long-term. Yes, you can use the jars instead.
7.Pack food in your food-grade buckets, back-packs or travel bags as desired.
8. Remember to take your solar oven or Heat Retention Cooker for ease on your journey! I'm so excited to hit the open road this weekend!
There you go! Make some Mylar-packed meals for camping and beyond! Please feel free to share this information with those you love. 


Always My Very Best,
Your Friend Chef Tess